
Mother’s Day dessert ideas are a wonderful way to create something sweet and thoughtful for the amazing mums in your life especially when they are inspired by the 1960’s. From classic cakes to fun, easy treats, there are plenty of options to make the day feel extra special. Even if you’re short on time or ingredients, a few simple cooking tips and substitutions can help you whip up a delightful dessert that’s sure to bring a smile to her face.
Indulge In Decadent Chocolate Lava Cakes
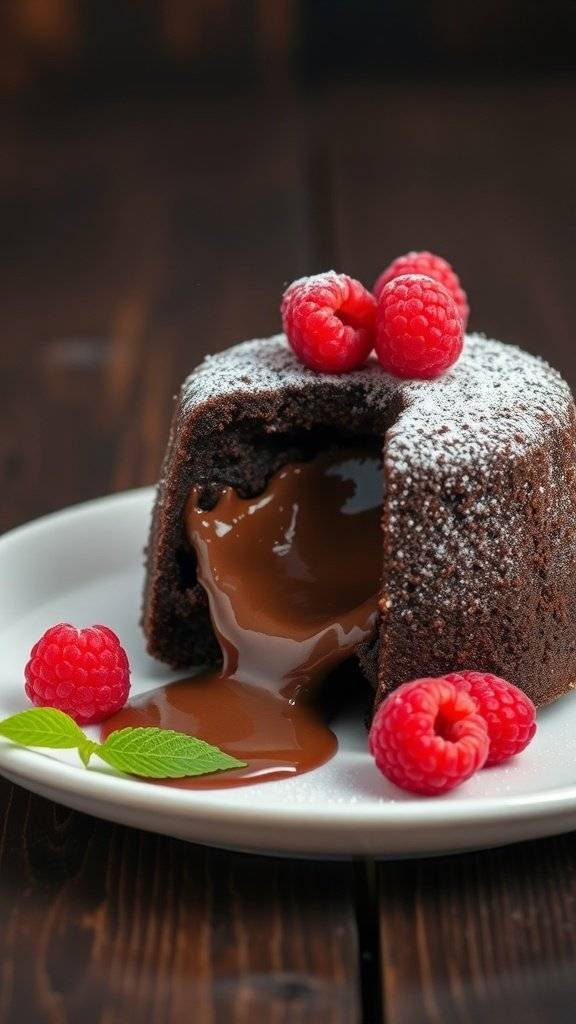
Chocolate lava cakes are a perfect treat for Mother’s Day. They are rich, warm, and filled with gooey chocolate that flows out when you cut into them. This dessert is not just a feast for the eyes; it’s a delightful experience for the taste buds.
Imagine serving these warm cakes with a dusting of powdered sugar and a few fresh raspberries on top. The contrast of the tart berries with the sweet chocolate creates a lovely balance. Plus, they are easy to make, so you can whip them up without spending all day in the kitchen.
For a little twist, you can add a scoop of vanilla ice cream on the side. The cold ice cream melting into the warm chocolate is simply divine. These cakes are sure to impress and make your Mother’s Day celebration extra special.
Ingredients
- 1/2 cup unsalted butter
- 1 cup semi-sweet chocolate chips
- 2 large eggs
- 2 large egg yolks
- 1/4 cup granulated sugar
- 2 tablespoons all-purpose flour
- 1/4 teaspoon salt
- Powdered sugar for dusting
- Fresh raspberries for garnish
Instructions
- Preheat your oven to 425°F (220°C). Grease four ramekins with butter and dust with flour to prevent sticking.
- In a microwave-safe bowl, melt the butter and chocolate chips together. Stir until smooth and let it cool slightly.
- In another bowl, whisk together the eggs, egg yolks, and granulated sugar until thick and pale.
- Gently fold the melted chocolate mixture into the egg mixture. Then, add the flour and salt, mixing until just combined.
- Pour the batter evenly into the prepared ramekins. Place them on a baking sheet for easy handling.
- Bake for 12-14 minutes, until the edges are firm but the center is soft. Let them cool for 1 minute before inverting onto plates.
- Dust with powdered sugar, add fresh raspberries, and serve immediately.
Cooking Tips: If you want to make these ahead of time, you can prepare the batter and refrigerate it in the ramekins. Just add a couple of extra minutes to the baking time if baking from cold.
Ingredient Substitutions: If you don’t have semi-sweet chocolate, dark chocolate works well too. For a gluten-free option, you can use almond flour instead of all-purpose flour.
Delightful Strawberry Shortcake For Sweet Moments

Strawberry shortcake is a classic dessert that brings joy to any occasion, especially on Mother’s Day. This delightful treat features layers of fluffy cake, fresh strawberries, and whipped cream, making it a perfect way to celebrate the special women in our lives.
The image showcases a beautifully stacked strawberry shortcake, topped with vibrant red strawberries and a dollop of whipped cream. The fresh mint leaves add a pop of color and a hint of freshness, making it visually appealing and inviting.
To make this dessert even more special, consider using organic strawberries for a burst of flavor. You can also switch out the whipped cream for a lighter yogurt option if you prefer. This dessert is not only delicious but also customizable to fit your taste.
Here’s how to create this delightful strawberry shortcake:
Ingredients
- 2 cups all-purpose flour
- 1/4 cup granulated sugar
- 1 tablespoon baking powder
- 1/2 teaspoon salt
- 1/2 cup unsalted butter, cold and cubed
- 1 cup milk
- 2 cups fresh strawberries, sliced
- 1 cup heavy whipping cream
- 2 tablespoons powdered sugar
Instructions
- Preheat the oven to 425°F (220°C). In a bowl, mix flour, sugar, baking powder, and salt.
- Add the cold butter and mix until crumbly. Stir in the milk until just combined.
- Turn the dough onto a floured surface and gently knead it a few times. Roll it out to about 1-inch thick and cut into rounds.
- Place the rounds on a baking sheet and bake for 15-20 minutes until golden brown.
- While the cakes cool, whip the cream with powdered sugar until soft peaks form.
- To assemble, slice the cakes in half, layer with strawberries and whipped cream, and top with the other half. Finish with more strawberries and a sprig of mint.
Cooking Tips: If you want to save time, you can use store-bought shortcake or sponge cake. For a dairy-free version, substitute almond milk and coconut cream for the whipped cream. Enjoy this sweet treat with your loved ones!
Classic Red Velvet Cupcakes With Cream Cheese Frosting

Red velvet cupcakes are a classic choice for any celebration, especially for Mother’s Day. Their vibrant red color and rich flavor make them a delightful treat. Topped with creamy frosting, these cupcakes are sure to impress. The combination of cocoa and buttermilk gives them a unique taste that pairs perfectly with the tangy cream cheese frosting.
These cupcakes are not just beautiful; they are also easy to make. You can whip them up quickly and enjoy the process. Whether you’re baking for your mom or just treating yourself, these cupcakes are a fantastic addition to your Mother’s Day dessert ideas.
Ingredients
- 1 1/2 cups all-purpose flour
- 1 cup granulated sugar
- 1 teaspoon baking soda
- 1 teaspoon salt
- 1 teaspoon cocoa powder
- 1 cup vegetable oil
- 1 cup buttermilk, room temperature
- 2 large eggs, room temperature
- 2 tablespoons red food coloring
- 1 teaspoon vanilla extract
- 1 teaspoon white vinegar
- 8 oz cream cheese, softened
- 1/2 cup unsalted butter, softened
- 4 cups powdered sugar
- 1 teaspoon vanilla extract (for frosting)
Instructions
- Preheat the oven to 350°F (175°C) and line a cupcake pan with liners.
- In a bowl, mix flour, sugar, baking soda, salt, and cocoa powder.
- In another bowl, whisk together oil, buttermilk, eggs, food coloring, vanilla, and vinegar.
- Combine the wet and dry ingredients, mixing until just combined.
- Fill each cupcake liner about 2/3 full with batter. Bake for 18-20 minutes or until a toothpick comes out clean.
- Let the cupcakes cool completely on a wire rack.
- For the frosting, beat cream cheese and butter until smooth. Gradually add powdered sugar and vanilla, mixing until fluffy.
- Frost the cooled cupcakes and enjoy!
Cooking tips: If you don’t have buttermilk, you can make a substitute by mixing milk with a tablespoon of vinegar or lemon juice. For a lighter frosting, you can use whipped cream instead of cream cheese.
Homemade Lemon Bars With A Zesty Twist
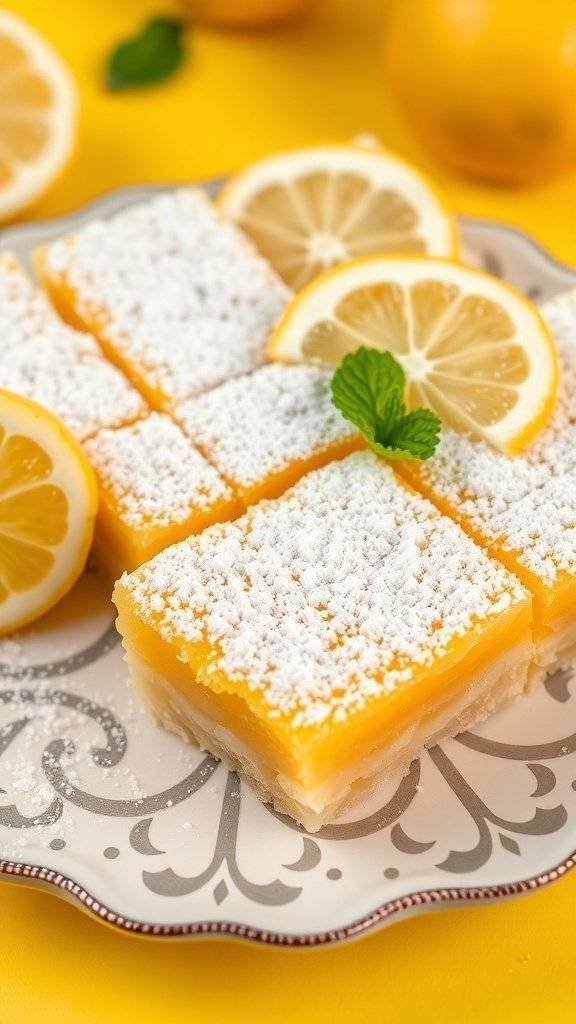
Nothing says spring like a bright and tangy lemon bar! These homemade lemon bars are perfect for Mother’s Day dessert ideas. They bring a refreshing twist to the table, making them a delightful treat for any celebration.
The image showcases beautifully cut lemon bars, dusted with powdered sugar and garnished with fresh mint and lemon slices. The vibrant yellow color pops against the elegant plate, inviting everyone to take a bite. These bars are not only visually appealing but also packed with flavor.
Making lemon bars is simple and fun. You can easily whip these up in your kitchen and impress your family. Plus, they can be made ahead of time, so you can enjoy the day without stress.
Ingredients
- 1 cup all-purpose flour
- 1/2 cup powdered sugar
- 1/4 teaspoon salt
- 1/2 cup unsalted butter, softened
- 1 cup granulated sugar
- 2 large eggs
- 1/2 cup fresh lemon juice
- 1 teaspoon lemon zest
- 1/4 teaspoon baking powder
- Powdered sugar for dusting
Instructions
- Preheat your oven to 350°F (175°C). Grease an 8×8-inch baking dish.
- In a bowl, mix flour, powdered sugar, and salt. Add the softened butter and mix until crumbly.
- Press the mixture into the bottom of the prepared baking dish to form the crust. Bake for 15 minutes.
- In another bowl, whisk together granulated sugar, eggs, lemon juice, lemon zest, and baking powder until smooth.
- Pour the lemon mixture over the baked crust and return to the oven. Bake for an additional 20 minutes or until set.
- Let the bars cool completely before slicing. Dust with powdered sugar before serving.
Cooking Tips:For a gluten-free option, substitute the all-purpose flour with a gluten-free blend. If you want a sweeter bar, add a bit more sugar to the lemon mixture. You can also experiment with other citrus fruits like lime or orange for a different flavor.
Decadent Chocolate Mousse With A Rich Flavor
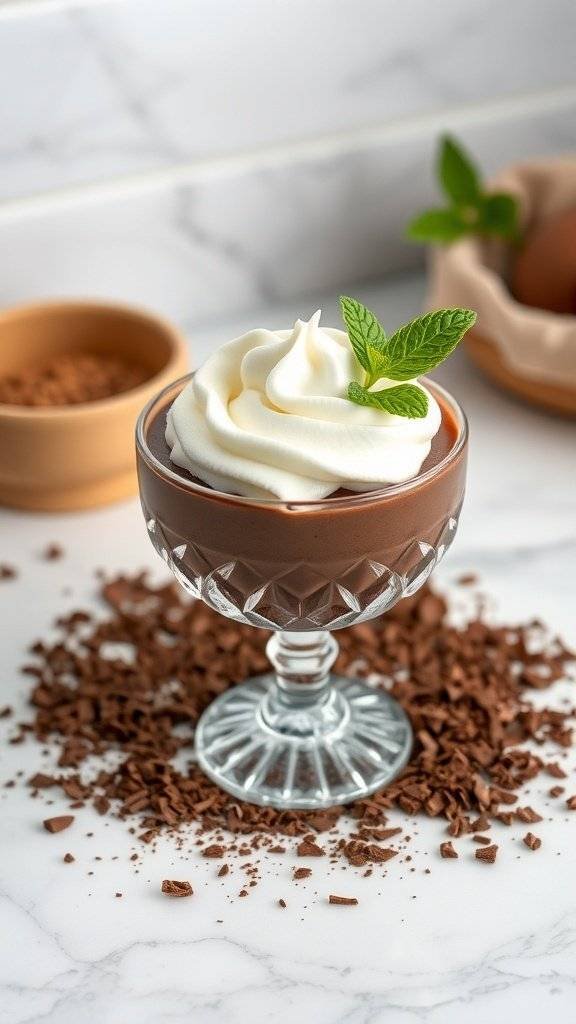
Chocolate mousse is a classic dessert that brings joy to any occasion, especially on Mother’s Day. This creamy delight is rich in flavor and has a smooth texture that melts in your mouth. Topped with a swirl of whipped cream and a sprig of mint, it looks as good as it tastes. Perfect for impressing your mom, this dessert is sure to be a hit!
Making chocolate mousse is easier than you might think. You only need a few simple ingredients, and the steps are straightforward. Plus, it can be made ahead of time, leaving you free to enjoy the day with your loved ones.
Ingredients
- 6 oz dark chocolate, chopped
- 3 tablespoons unsalted butter
- 3 large eggs, separated
- 1/4 cup granulated sugar
- 1 cup heavy cream
- 1 teaspoon vanilla extract
- Whipped cream and mint for garnish
Instructions
- Melt the Chocolate: In a heatproof bowl, combine the chopped chocolate and butter. Place over a pot of simmering water and stir until melted and smooth. Remove from heat and let it cool slightly.
- Whip the Egg Yolks: In a separate bowl, whisk the egg yolks and sugar until pale and thick. Stir in the melted chocolate and vanilla extract until well combined.
- Beat the Egg Whites: In another bowl, beat the egg whites until stiff peaks form. Gently fold the egg whites into the chocolate mixture in three additions.
- Whip the Cream: In a separate bowl, whip the heavy cream until soft peaks form. Fold the whipped cream into the chocolate mixture gently until no white streaks remain.
- Chill: Spoon the mousse into serving dishes and refrigerate for at least 2 hours or until set.
- Serve: Top with whipped cream and a mint sprig before serving.
Cooking Tips: If you want a lighter mousse, you can use egg whites from pasteurized eggs. For a dairy-free version, substitute coconut cream for heavy cream. Enjoy this delightful treat as part of your Mother’s Day dessert ideas!
Fluffy Vanilla Bean Panna Cotta For A Creamy Finish
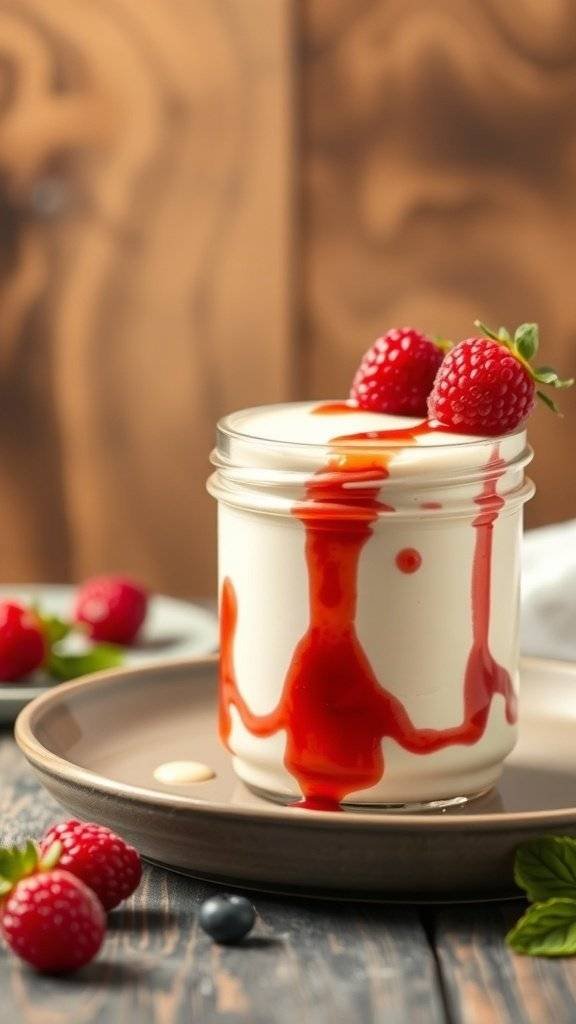
Mothers Day Dessert Ideas can be simple yet impressive. One delightful option is a fluffy vanilla bean panna cotta. This dessert is creamy and smooth, making it a perfect treat for celebrating moms. The panna cotta is beautifully topped with a vibrant raspberry sauce, adding a pop of color and flavor.
The panna cotta itself is made with just a few ingredients, making it easy to whip up. The combination of vanilla bean and cream creates a rich taste that feels luxurious. Pairing it with fresh raspberries not only enhances the flavor but also adds a refreshing touch.
For those looking to personalize this dessert, consider using different fruits for the topping. Strawberries, blueberries, or even a mix can work wonderfully. You can also substitute the cream with coconut milk for a dairy-free option. This flexibility makes it a great choice for various dietary needs.
Ingredients
- 2 cups heavy cream
- 1/2 cup granulated sugar
- 1 tablespoon gelatin powder
- 1/4 cup cold water
- 1 vanilla bean, split and scraped
- 1/2 teaspoon vanilla extract
- Fresh raspberries for topping
- Raspberry sauce (store-bought or homemade)
Instructions
- Prepare the Gelatin: In a small bowl, sprinkle the gelatin over cold water. Let it sit for about 5 minutes until it blooms.
- Heat the Cream: In a saucepan, combine heavy cream, sugar, and the scraped vanilla bean along with its pod. Heat over medium until the sugar dissolves, but do not boil.
- Mix in Gelatin: Remove the saucepan from heat. Stir in the bloomed gelatin until fully dissolved. Add vanilla extract and mix well.
- Pour and Chill: Strain the mixture into serving cups or jars. Refrigerate for at least 4 hours, or until set.
- Serve: Once set, top with fresh raspberries and drizzle with raspberry sauce before serving.
Cooking Tip: If you want a sweeter panna cotta, adjust the sugar to your taste. For a lighter version, you can use half-and-half instead of heavy cream. Enjoy this delightful dessert as a sweet ending to your Mother’s Day celebration!
Delicious Funfetti Cake For Colorful Celebrations
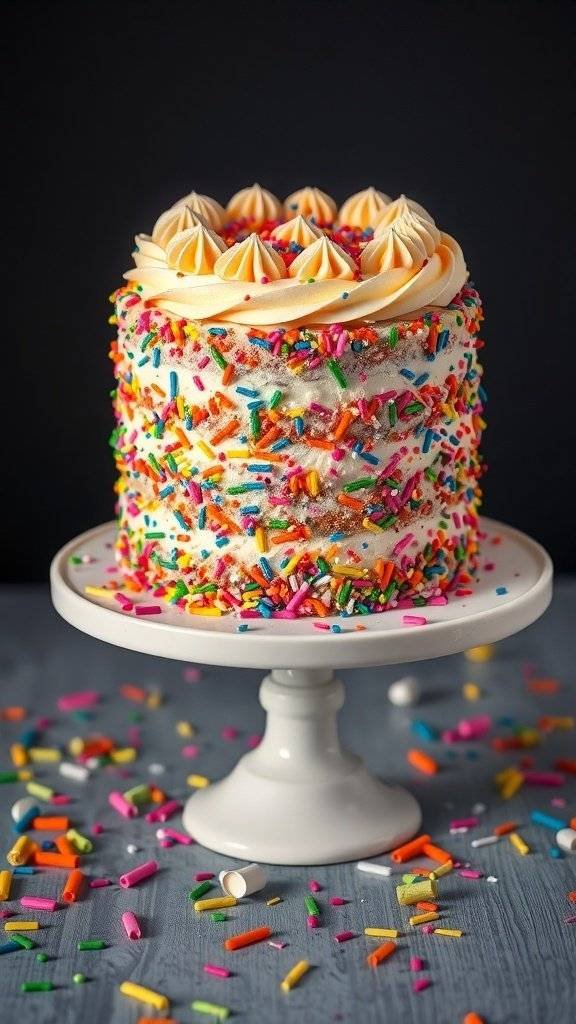
This Funfetti cake is a perfect choice for Mother’s Day celebrations. Its vibrant colors and playful sprinkles make it a delightful treat that brings joy to any gathering. The layers of fluffy vanilla cake are filled with colorful sprinkles, making each slice a surprise. Top it off with a creamy frosting, and you have a showstopper dessert that everyone will love.
Making this cake is simple and fun. You can involve the kids in adding the sprinkles or decorating the cake. It’s a great way to create memories while baking. Plus, the cake looks stunning on the table, making it a centerpiece for your Mother’s Day dessert ideas.
Ingredients
- 2 ¾ cups all-purpose flour
- 1 tablespoon baking powder
- ½ teaspoon salt
- 1 cup unsalted butter, softened
- 2 cups granulated sugar
- 4 large eggs
- 1 tablespoon vanilla extract
- 1 cup milk
- 1 cup rainbow sprinkles
- 4 cups powdered sugar
- 1 cup unsalted butter, softened (for frosting)
- 2 teaspoons vanilla extract (for frosting)
- 2-4 tablespoons milk (for frosting)
Instructions
- Preheat the oven to 350°F (175°C). Grease and flour three 8-inch round cake pans.
- In a bowl, mix flour, baking powder, and salt. Set aside.
- In a large bowl, beat the softened butter and sugar until light and fluffy. Add eggs one at a time, mixing well after each addition. Stir in vanilla extract.
- Gradually add the dry ingredients to the wet mixture, alternating with milk. Fold in the rainbow sprinkles.
- Divide the batter evenly among the prepared pans. Bake for 25-30 minutes or until a toothpick comes out clean.
- Let the cakes cool in the pans for 10 minutes, then transfer to wire racks to cool completely.
- For the frosting, beat the softened butter until creamy. Gradually add powdered sugar and vanilla extract. Add milk until you reach the desired consistency.
- Once the cakes are cool, frost the top of one layer, add the second layer, and frost again. Repeat with the third layer. Decorate the sides and top with additional sprinkles.
Cooking Tips: If you want a lighter cake, you can substitute half of the butter with applesauce. For a dairy-free option, use almond milk and dairy-free butter in the frosting. Enjoy this colorful cake as a sweet way to celebrate Mother’s Day!
Delight In Classic Tiramisu With Layers Of Flavor
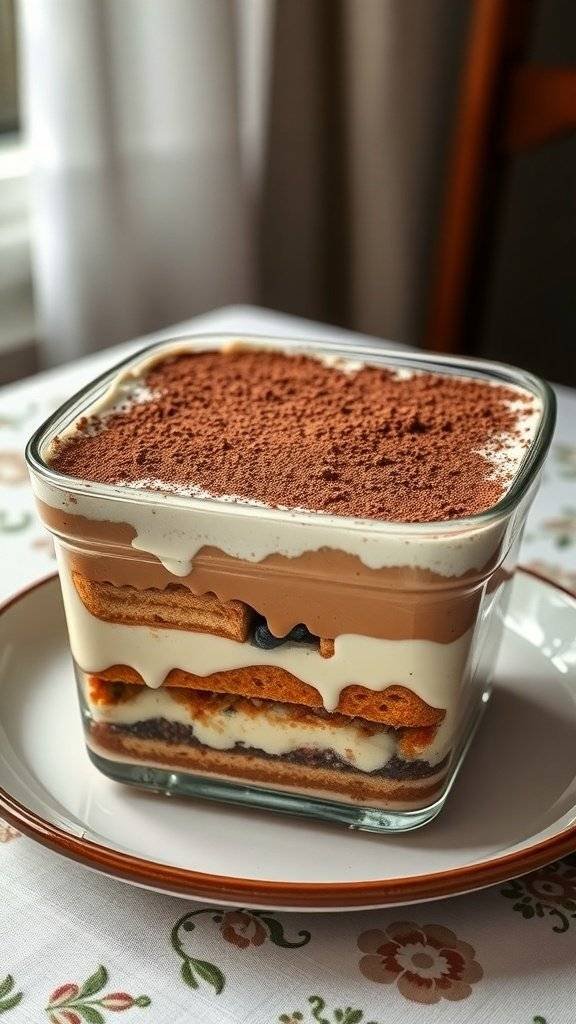
Tiramisu is a classic dessert that never fails to impress. Its rich layers of coffee-soaked ladyfingers and creamy mascarpone make it a favorite for many. This dessert is perfect for Mother’s Day, bringing a touch of elegance to your celebration.
The image shows a beautifully layered tiramisu, topped with a dusting of cocoa powder. The layers are visible, showcasing the creamy filling and the coffee-soaked biscuits. It’s a treat that looks as good as it tastes!
Making tiramisu is easier than you might think. You can prepare it ahead of time, allowing the flavors to meld beautifully. Plus, it’s a no-bake dessert, which means less fuss in the kitchen!
For those who want to customize, consider using different flavors. You can swap coffee for espresso or even use flavored liqueurs for a twist. This dessert is versatile and can cater to various tastes.
Ingredients
- 1 cup strong brewed coffee, cooled
- 3 tablespoons coffee liqueur (optional)
- 3 large eggs, separated
- 1/2 cup granulated sugar
- 1 cup mascarpone cheese
- 1 cup heavy cream
- 24 ladyfingers
- Cocoa powder for dusting
Instructions
- Mix the Coffee: In a shallow dish, combine the brewed coffee and coffee liqueur. Set aside.
- Prepare the Cream: In a bowl, beat the egg yolks and sugar until pale and creamy. Add the mascarpone cheese and mix until smooth.
- Whip the Cream: In another bowl, whip the heavy cream until stiff peaks form. Gently fold this into the mascarpone mixture.
- Layer the Dessert: Quickly dip each ladyfinger into the coffee mixture, then layer them in a dish. Spread half of the mascarpone mixture over the ladyfingers. Repeat with another layer of dipped ladyfingers and the remaining mascarpone mixture.
- Chill: Cover and refrigerate for at least 4 hours, or overnight for best results.
- Serve: Before serving, dust the top with cocoa powder. Enjoy!
Cooking Tip: If you want a lighter version, you can use low-fat mascarpone or Greek yogurt. For a non-alcoholic version, simply skip the coffee liqueur.
Ingredient Substitution: If you can’t find ladyfingers, sponge cake or pound cake can work as a substitute. Just cut them into strips and follow the same dipping process.
Rich And Creamy Cheesecake With A Perfect Crust
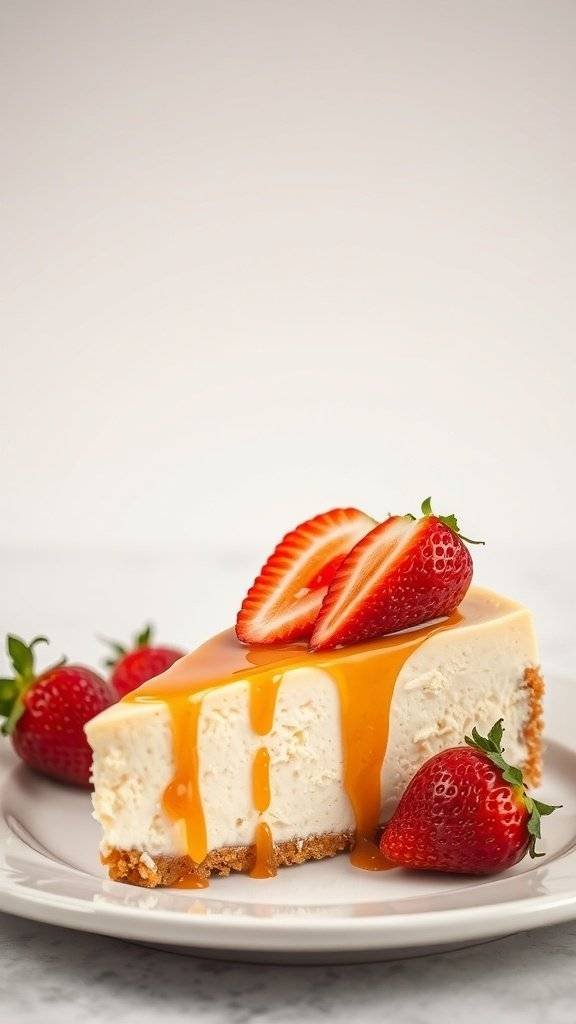
Cheesecake is a classic choice for Mother’s Day dessert ideas. This rich and creamy cheesecake is sure to impress. With its smooth texture and delightful flavor, it’s a treat that everyone will love. The golden crust adds a perfect crunch, making each bite a delicious experience.
Fresh strawberries on top not only enhance the look but also add a burst of flavor. Drizzling caramel sauce over the cheesecake gives it that extra touch of sweetness, making it a standout dessert for any celebration.
Now, let’s get into the recipe so you can whip this up for your special day!
Ingredients
- 1 ½ cups graham cracker crumbs
- ½ cup unsalted butter, melted
- 2 cups cream cheese, softened
- 1 cup granulated sugar
- 1 teaspoon vanilla extract
- 3 large eggs
- 1 cup sour cream
- ½ cup caramel sauce
- Fresh strawberries for garnish
Instructions
- Preheat your oven to 325°F (160°C). Prepare a 9-inch springform pan by greasing it lightly.
- Make the crust: In a bowl, combine graham cracker crumbs and melted butter. Press this mixture firmly into the bottom of the springform pan. Bake for 10 minutes, then remove and let it cool.
- Prepare the filling: In a large mixing bowl, beat together cream cheese and sugar until smooth. Add vanilla extract and mix well. Incorporate eggs one at a time, mixing gently after each addition. Finally, stir in sour cream until combined.
- Pour the filling over the cooled crust. Bake for 50-60 minutes, or until the center is set but slightly jiggly.
- Turn off the oven and let the cheesecake cool inside for about an hour. This helps prevent cracks. Once cooled, refrigerate for at least 4 hours or overnight.
- Before serving, drizzle caramel sauce over the top and garnish with fresh strawberries.
Cooking tips: If you want a lighter version, you can substitute cream cheese with Neufchâtel cheese. For a gluten-free option, use gluten-free graham crackers. Enjoy this delightful cheesecake with your loved ones!
Refreshing Berry Galette For A Rustic Touch

This refreshing berry galette is a delightful dessert that adds a rustic charm to your Mother’s Day celebration. The golden, flaky crust cradles a colorful mix of fresh berries, making it both beautiful and delicious. With its simple preparation, it’s perfect for those who want to impress without spending hours in the kitchen.
The galette is versatile, allowing you to use whatever berries you have on hand. Raspberries, blueberries, and blackberries create a vibrant medley that’s sure to please. Dusting the top with powdered sugar adds a touch of sweetness and elegance.
For a little extra flavor, consider adding a splash of lemon juice or a sprinkle of cinnamon to the berry mixture. This will enhance the natural sweetness of the fruits. Serve it warm with a scoop of vanilla ice cream or a dollop of whipped cream for a truly delightful experience.
Ingredients
- 1 pre-made pie crust (store-bought or homemade)
- 2 cups mixed berries (raspberries, blueberries, blackberries)
- 1/4 cup granulated sugar
- 1 tablespoon cornstarch
- 1 tablespoon lemon juice
- 1 teaspoon vanilla extract
- 1 egg (for egg wash)
- Powdered sugar (for dusting)
Instructions
- Preheat the oven to 375°F (190°C).
- In a bowl, mix the berries with granulated sugar, cornstarch, lemon juice, and vanilla extract. Let it sit for about 10 minutes.
- Roll out the pie crust on a baking sheet lined with parchment paper. Create a slight border around the edges.
- Spoon the berry mixture into the center of the crust, leaving the edges free.
- Fold the edges of the crust over the berries, creating pleats as you go.
- Beat the egg and brush it over the crust for a golden finish.
- Bake for 25-30 minutes, or until the crust is golden brown and the berries are bubbly.
- Let it cool slightly, then dust with powdered sugar before serving.
Cooking Tip: If you don’t have cornstarch, you can substitute it with all-purpose flour. For a gluten-free option, use a gluten-free pie crust and cornstarch.
Ingredient Substitution: Feel free to swap out the berries for your favorites. Strawberries or even peaches work wonderfully!
Classic Apple Pie With A Flaky Crust
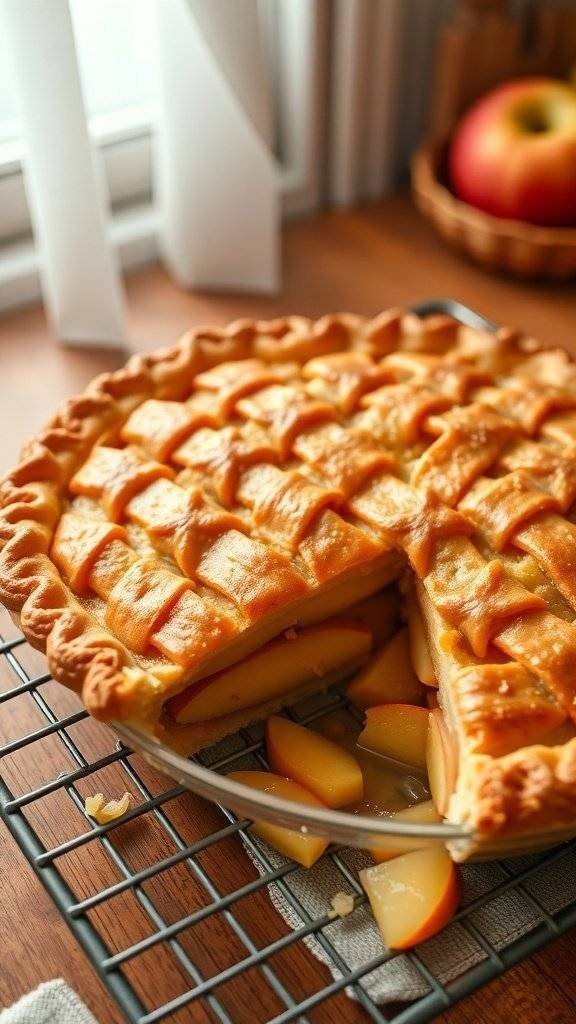
Nothing says comfort like a classic apple pie. This dessert is a perfect choice for Mother’s Day, bringing warmth and nostalgia to the table. The golden, flaky crust cradles tender, spiced apples, creating a delightful balance of textures and flavors.
When you slice into this pie, the aroma of cinnamon and baked apples fills the air, making it hard to resist. It’s a dish that invites everyone to gather around and share stories, making it a wonderful addition to any Mother’s Day celebration.
For those looking to make this pie, here’s a simple recipe to follow:
Ingredients
- 2 ½ cups all-purpose flour
- 1 teaspoon salt
- 1 tablespoon granulated sugar
- 1 cup unsalted butter, chilled and diced
- 6 to 8 tablespoons ice water
- 6 to 8 apples, peeled and sliced (Granny Smith or Honeycrisp work well)
- ¾ cup granulated sugar
- 2 tablespoons all-purpose flour
- 1 teaspoon ground cinnamon
- 1 tablespoon lemon juice
- 1 egg, beaten (for egg wash)
Instructions
- Make the Crust: In a bowl, mix flour, salt, and sugar. Cut in the butter until the mixture resembles coarse crumbs. Stir in ice water, a tablespoon at a time, until the dough forms. Divide into two balls, wrap in plastic, and chill for at least an hour.
- Prepare the Filling: In a large bowl, combine sliced apples, sugar, flour, cinnamon, and lemon juice. Toss until the apples are well coated.
- Assemble the Pie: Preheat your oven to 425°F (220°C). Roll out one dough ball on a floured surface to fit your pie dish. Place it in the dish and fill with the apple mixture. Roll out the second dough ball and place it over the filling. Seal the edges and cut slits in the top for steam to escape.
- Bake: Brush the top with the beaten egg. Bake for 15 minutes, then reduce the temperature to 350°F (175°C) and bake for an additional 35-45 minutes, until the apples are soft and the crust is golden brown.
- Cool and Serve: Let the pie cool for a bit before slicing. Serve warm with a scoop of vanilla ice cream for an extra treat!
Cooking Tips: If you want a sweeter pie, feel free to add more sugar to the filling. For a twist, try adding a pinch of nutmeg or a splash of vanilla extract. You can also substitute half of the butter with shortening for an even flakier crust.
Sweet And Tangy Key Lime Pie For A Tropical Twist

Key lime pie is a classic dessert that brings a burst of tropical flavor to any occasion. This sweet and tangy treat is perfect for Mother’s Day, offering a refreshing contrast to heavier desserts. The creamy filling, made from key lime juice, sweetened condensed milk, and egg yolks, sits atop a crunchy graham cracker crust. Topped with whipped cream and lime slices, it’s a delightful way to celebrate.
The vibrant colors of the pie, with its bright yellow filling and green lime accents, make it visually appealing. It’s not just about looks; the combination of sweet and tart flavors is sure to please everyone. Plus, it’s easy to make, allowing you to spend more time with your loved ones.
For those looking to try something different, consider using regular limes if key limes are hard to find. You can also swap out the graham cracker crust for a cookie crust made from your favorite cookies. This pie can be made ahead of time, making it a stress-free dessert option.
Ingredients
- 1 ½ cups graham cracker crumbs
- ½ cup granulated sugar
- ½ cup unsalted butter, melted
- 4 large egg yolks
- 1 can (14 oz) sweetened condensed milk
- ¾ cup key lime juice (fresh or bottled)
- 1 teaspoon lime zest
- Whipped cream for topping
- Lime slices for garnish
Instructions
- Preheat the oven to 350°F (175°C).
- In a bowl, mix graham cracker crumbs, sugar, and melted butter until combined. Press the mixture into the bottom and up the sides of a pie pan.
- Bake the crust for 8-10 minutes until lightly golden. Remove from the oven and let it cool.
- In a separate bowl, whisk together egg yolks, sweetened condensed milk, key lime juice, and lime zest until smooth.
- Pour the filling into the cooled crust and bake for an additional 15 minutes.
- Allow the pie to cool at room temperature, then refrigerate for at least 3 hours before serving.
- Top with whipped cream and garnish with lime slices before serving.
Cooking Tips: For a creamier filling, make sure to whisk the ingredients well. If you prefer a sweeter pie, add a bit more sugar. You can also use a store-bought crust to save time.
Ingredient Substitutions: If you don’t have key limes, regular limes work just fine. For a gluten-free option, use gluten-free graham crackers or almond flour for the crust.
Heavenly Carrot Cake With Creamy Frosting

Carrot cake is a classic dessert that brings warmth and joy to any celebration, especially on Mother’s Day. This delightful cake is moist, flavorful, and topped with a rich cream cheese frosting that makes it irresistible. The layers are beautifully decorated with fresh flowers and nuts, giving it a charming touch that’s perfect for the occasion.
To make this cake, you’ll need some simple ingredients that you might already have in your kitchen. Carrots provide natural sweetness and moisture, while spices like cinnamon and nutmeg add depth to the flavor. The creamy frosting is made with cream cheese, which balances the sweetness of the cake perfectly.
For those who want to switch things up, you can substitute walnuts for pecans, or even leave out the nuts entirely if you prefer a nut-free version. If you want a healthier twist, consider using whole wheat flour instead of all-purpose flour. This cake is not just delicious; it’s also a great way to show love and appreciation on Mother’s Day.
Elegant Raspberry Macarons For A Sophisticated Treat

Raspberry macarons are a delightful choice for Mother’s Day dessert ideas. Their delicate pink hue and sweet raspberry flavor make them visually stunning and delicious. These treats are perfect for showing appreciation on this special day.
Each macaron features a crisp shell with a soft, chewy center. The raspberry filling adds a fruity burst that pairs beautifully with the almond flavor of the shells. Serve them on a lovely plate alongside fresh raspberries and flowers for an elegant presentation.
Making macarons can seem tricky, but with a little patience, you can create these sophisticated treats at home. They’re sure to impress any mom!
Ingredients
- 1 cup almond flour
- 1 3/4 cups powdered sugar
- 3 large egg whites, aged
- 1/4 cup granulated sugar
- 1/2 teaspoon vanilla extract
- 1/4 teaspoon cream of tartar
- Pink food coloring
- 1/2 cup unsalted butter, softened
- 1 cup raspberry puree (strained)
- 1 cup powdered sugar (for filling)
Instructions
- Prepare the Dry Ingredients: In a bowl, sift together almond flour and powdered sugar. Set aside.
- Whip the Egg Whites: In a clean bowl, whip egg whites with cream of tartar until soft peaks form. Gradually add granulated sugar and continue whipping until stiff peaks form. Add vanilla extract and pink food coloring to achieve your desired shade.
- Combine Mixtures: Gently fold the dry ingredients into the egg whites in three additions. The batter should flow like lava.
- Pipe the Macarons: Transfer the batter to a piping bag and pipe small circles onto a baking sheet lined with parchment paper. Tap the baking sheet to remove air bubbles and let them rest for 30-60 minutes until a skin forms.
- Bake: Preheat the oven to 300°F (150°C). Bake macarons for 15-20 minutes. Let them cool completely before removing from the sheet.
- Make the Filling: Beat softened butter until creamy. Gradually add powdered sugar and raspberry puree, mixing until smooth.
- Assemble: Pair the macaron shells and pipe filling onto one half before sandwiching with another shell.
Cooking Tips: Make sure your egg whites are at room temperature for better volume. If you don’t have almond flour, you can grind blanched almonds in a food processor until fine.
Ingredient Substitutions: For a different flavor, try using lemon or chocolate filling instead of raspberry. You can also use gel food coloring for more vibrant colors.
Satisfying Peanut Butter Brownies With A Fudgy Texture
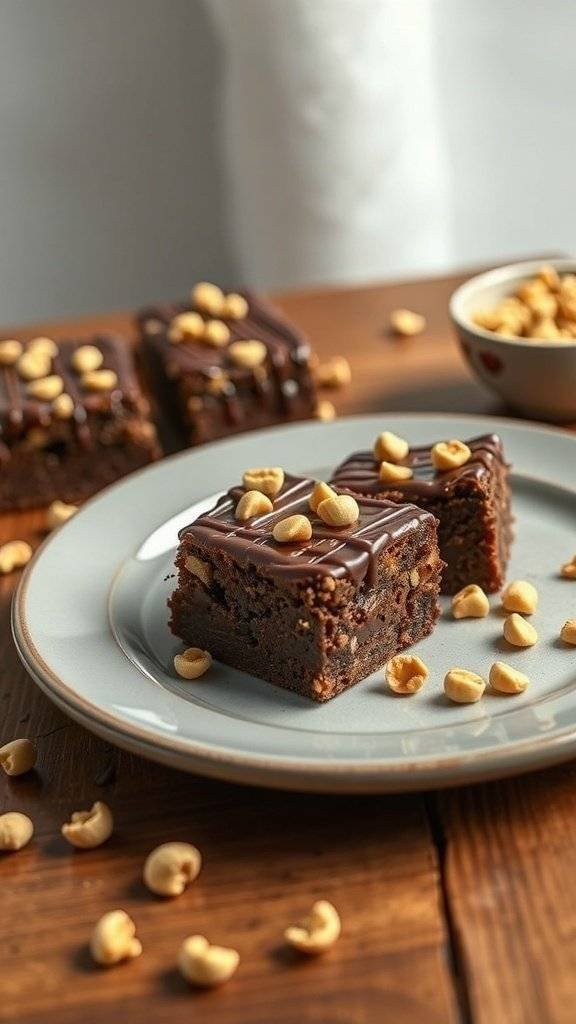
Peanut butter brownies are a delightful treat that combines rich chocolate with the creamy goodness of peanut butter. These brownies are perfect for Mother’s Day dessert ideas, bringing a smile to any mom’s face. The fudgy texture makes them incredibly satisfying, and the addition of chocolate drizzle and peanuts on top adds a lovely crunch.
Making these brownies is simple and fun. You can enjoy baking them together with your kids or surprise your mom with a homemade batch. The aroma of chocolate and peanut butter wafting through the kitchen is sure to create a warm atmosphere.
For those looking to customize, feel free to swap out ingredients. You can use almond butter instead of peanut butter for a different flavor. If you want to make them gluten-free, substitute regular flour with almond flour or a gluten-free blend.
Ingredients
- 1 cup creamy peanut butter
- 1/2 cup unsalted butter, melted
- 1 cup granulated sugar
- 1/2 cup brown sugar, packed
- 3 large eggs
- 1 teaspoon vanilla extract
- 1 cup all-purpose flour
- 1/2 cup cocoa powder
- 1/2 teaspoon baking powder
- 1/4 teaspoon salt
- 1/2 cup chocolate chips (optional)
- 1/4 cup chopped peanuts for topping
Instructions
- Preheat the oven to 350°F (175°C) and grease a 9×9-inch baking pan.
- In a large bowl, mix together the peanut butter, melted butter, granulated sugar, and brown sugar until smooth.
- Add the eggs one at a time, mixing well after each addition. Stir in the vanilla extract.
- In another bowl, whisk together the flour, cocoa powder, baking powder, and salt.
- Gradually add the dry ingredients to the wet mixture, stirring until just combined. If using, fold in the chocolate chips.
- Pour the batter into the prepared baking pan and smooth the top. Sprinkle chopped peanuts on top.
- Bake for 25-30 minutes, or until a toothpick comes out with a few moist crumbs.
- Let the brownies cool in the pan before cutting into squares. Drizzle with melted chocolate if desired.
These peanut butter brownies are sure to be a hit this Mother’s Day. Enjoy them warm with a scoop of vanilla ice cream for an extra treat!
Charming Coconut Cream Pie With Tropical Vibes

This Coconut Cream Pie is a delightful treat that brings a taste of the tropics right to your table. With its creamy filling and crunchy crust, it’s perfect for celebrating Mother’s Day. The pie is topped with fluffy whipped cream and a sprinkle of toasted coconut, making it as beautiful as it is delicious.
The bright colors in the background and the fresh coconuts around the pie add to its tropical charm. This dessert not only looks stunning but also tastes amazing, making it a fantastic choice for any Mother’s Day celebration.
Ingredients
- 1 pre-made graham cracker crust
- 2 cups coconut milk
- 1/2 cup granulated sugar
- 1/4 cup cornstarch
- 1/4 teaspoon salt
- 4 large egg yolks
- 1 teaspoon vanilla extract
- 1 cup shredded coconut (toasted)
- 1 cup heavy cream
- 2 tablespoons powdered sugar
- Extra toasted coconut for garnish
Instructions
- Prepare the Filling: In a saucepan, combine coconut milk, sugar, cornstarch, and salt. Cook over medium heat, stirring constantly until it thickens.
- Add Egg Yolks: Once thickened, remove from heat. Stir in egg yolks and vanilla extract until smooth.
- Mix in Coconut: Fold in the toasted shredded coconut. Pour the mixture into the graham cracker crust and let it cool in the fridge for at least 4 hours.
- Make the Whipped Cream: In a bowl, whip the heavy cream and powdered sugar until soft peaks form.
- Top the Pie: Spread the whipped cream over the chilled pie and sprinkle extra toasted coconut on top before serving.
Cooking Tips: For a richer flavor, use full-fat coconut milk. If you prefer a lighter version, you can substitute half of the coconut milk with almond milk. You can also use a homemade crust if you want to elevate the pie even more!
Delightful Chocolate Chip Cookies With A Classic Twist

Chocolate chip cookies are a classic treat that everyone loves. These delightful cookies bring a warm, homey feel to any Mother’s Day celebration. The image shows a tray of freshly baked cookies, golden brown and studded with rich chocolate chips. They look soft and chewy, perfect for pairing with a glass of milk.
Making these cookies is simple and fun. You can involve the kids or surprise your mom with a batch made from scratch. The aroma of cookies baking will fill your home, creating a cozy atmosphere that everyone will enjoy.
For a special twist, consider adding a sprinkle of sea salt on top before baking. This enhances the chocolate flavor and adds a delightful contrast. You can also swap out some chocolate chips for nuts or dried fruit if you want to mix things up.
Ingredients
- 2 1/4 cups all-purpose flour
- 1 teaspoon baking soda
- 1/2 teaspoon salt
- 1 cup unsalted butter, softened
- 3/4 cup granulated sugar
- 3/4 cup brown sugar, packed
- 1 teaspoon vanilla extract
- 2 large eggs
- 2 cups chocolate chips
Instructions
- Preheat your oven to 375°F (190°C).
- In a bowl, mix flour, baking soda, and salt. Set aside.
- In another bowl, cream together the softened butter, granulated sugar, brown sugar, and vanilla until smooth.
- Add the eggs one at a time, mixing well after each addition.
- Gradually add the flour mixture to the wet ingredients, stirring until combined.
- Fold in the chocolate chips.
- Drop rounded tablespoons of dough onto a baking sheet lined with parchment paper.
- Bake for 9-11 minutes or until the edges are golden. Let them cool on the baking sheet for a few minutes before transferring to a wire rack.
Cooking Tips: If you want a chewier cookie, chill the dough for 30 minutes before baking. You can also use half brown sugar and half white sugar for a richer flavor.
Ingredient Substitutions: If you’re out of butter, you can use coconut oil or margarine. For a dairy-free option, use dairy-free chocolate chips and a plant-based butter substitute.
Refreshing Sorbet For A Light Finish

When it comes to celebrating Mother’s Day, a light and refreshing dessert can be the perfect way to end the meal. Sorbet is not only delicious but also a great choice for those looking for something fruity and cool. The vibrant colors and fresh ingredients make it visually appealing, too!
This sorbet, bursting with flavors from fresh fruits, is a delightful treat. It’s simple to make and can be customized with your favorite fruits. Imagine a bowl filled with a beautiful pink sorbet, garnished with mint leaves, surrounded by slices of citrus and berries. It’s a feast for the eyes and the palate!
Making sorbet at home is easier than you might think. You can use a blender or food processor to whip up the mixture, and then freeze it until it’s ready to serve. It’s a great way to incorporate seasonal fruits, and you can adjust the sweetness to your liking.
Here’s a quick recipe to create a refreshing sorbet that will impress your mom this Mother’s Day!
Ingredients
- 4 cups of fresh watermelon, cubed
- 1/4 cup of granulated sugar (adjust based on sweetness preference)
- 1 tablespoon of fresh lime juice
- Mint leaves for garnish
Instructions
- Blend the watermelon cubes in a blender until smooth.
- Add sugar and lime juice, blending until well combined.
- Pour the mixture into a shallow dish and freeze for about 2 hours, stirring every 30 minutes to break up any ice crystals.
- Once the sorbet is firm, scoop it into bowls and garnish with mint leaves.
- Serve immediately and enjoy the refreshing taste!
Cooking Tips: If you want to switch things up, try using other fruits like strawberries or mangoes. You can also use honey or agave syrup instead of sugar for a different sweetness. If you prefer a creamier texture, consider adding a splash of coconut milk.
Warm And Cozy Chocolate Chip Skillet Cookie
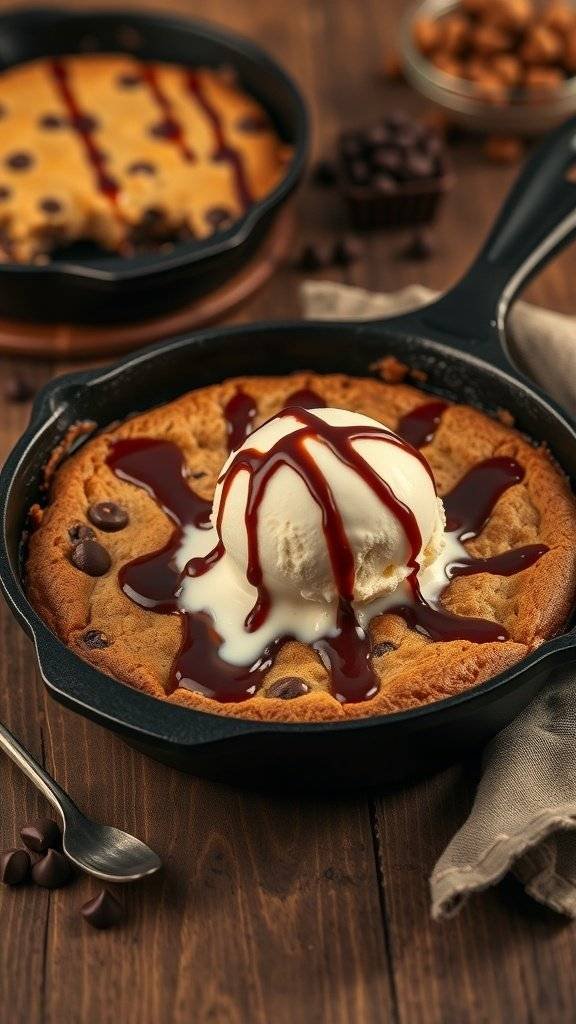
This warm and cozy chocolate chip skillet cookie is the perfect treat for Mother’s Day. Imagine a giant cookie, baked right in a skillet, topped with a scoop of vanilla ice cream and drizzled with chocolate sauce. It’s a delightful way to show love and appreciation on this special day.
The beauty of this dessert lies in its simplicity. You can whip it up quickly, and it’s sure to impress. The cookie is soft and gooey in the center, while the edges are slightly crispy. Pairing it with ice cream creates a wonderful contrast of temperatures and textures.
To make this treat even more special, consider adding some nuts or swapping chocolate chips for white chocolate or butterscotch chips. You can also use gluten-free flour if needed. This dessert is versatile and can cater to different tastes.
Ingredients
- 1 cup unsalted butter, softened
- 3/4 cup brown sugar, packed
- 1/2 cup granulated sugar
- 1 teaspoon vanilla extract
- 2 large eggs
- 2 1/4 cups all-purpose flour
- 1 teaspoon baking soda
- 1/2 teaspoon salt
- 2 cups chocolate chips
Instructions
- Preheat your oven to 350°F (175°C).
- In a large bowl, cream together the softened butter, brown sugar, and granulated sugar until smooth.
- Add in the vanilla extract and eggs, mixing well.
- In another bowl, whisk together the flour, baking soda, and salt. Gradually add this to the wet mixture, stirring until just combined.
- Fold in the chocolate chips.
- Spread the dough evenly in a greased skillet.
- Bake for 25-30 minutes, or until the edges are golden and the center is set.
- Let it cool slightly before serving. Top with a scoop of ice cream and drizzle with chocolate sauce.
Cooking Tips: If you want a richer flavor, try browning the butter before mixing it with the sugars. For a fun twist, add a pinch of sea salt on top before serving.
Ingredient Substitutions: You can replace the all-purpose flour with almond flour for a gluten-free option. If you’re out of eggs, try using a flaxseed meal or applesauce as a substitute.
You may also like:
– Sinister Candy Station Ideas for an Unforgettable Halloween Party
– Gothic Hors D’Oeuvres To Impress Your Gotham Guests
– 21 Children’s Birthday Cakes Inspired by Gotham City
If you enjoyed this blog you can visit us or check out our other blogs and learn a bit about us.
Disclaimer: This blog post is inspired by fictional universes and characters created by their respective rights holders. All related content and imagery remain the property of their respective rights holder. This fan-inspired content is for entertainment and commentary purposes only and is not affiliated with or endorsed by HBO, Disney, Warner Bros., Lionsgate, or any other rights holders. To explore the official source material, please visit:
HBO