

Get ready to whip up some intergalactic treats with our collection of futuristic deserts inspired by the Star Wars universe! These recipes combine imaginative techniques and out-of-this-world flavors, featuring everything from light-speed mousse to galaxy-inspired cakes. Get your culinary lightsaber ready, and explore the magic of utilizing unique ingredients and mold shapes that capture the essence of beloved characters and planets, making each treat not just a dessert, but a thrilling experience for your taste buds!
Death Star Lemon Tart
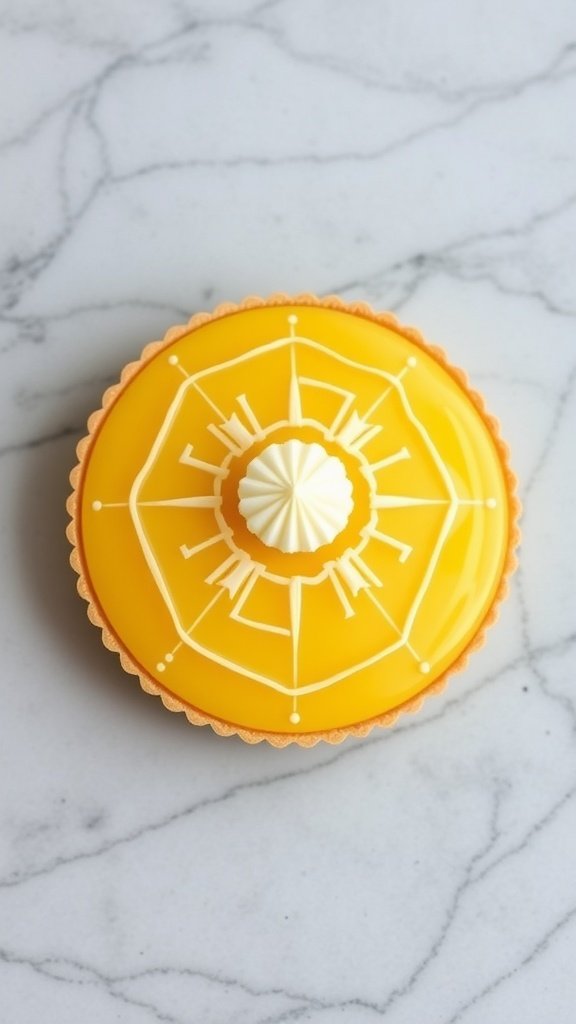
The Death Star Lemon Tart is a fun and zesty dessert that brings a taste of the galaxy right to your kitchen. With its bright lemon flavor and creamy filling, it’s sure to impress both Star Wars fans and dessert lovers alike. Plus, it’s simple enough to whip up for any occasion!
This tart features a buttery crust and a smooth lemon curd that balances sweetness with a tangy kick. It’s a delightful treat that’s visually striking and delicious, making it a perfect addition to your futuristic desserts collection.
Ingredients
- 1 pre-made tart shell (9-inch)
- 1 cup granulated sugar
- 3 large eggs
- 1/2 cup fresh lemon juice
- 1 tablespoon lemon zest
- 1/2 cup unsalted butter, melted
- 1/4 teaspoon salt
- Whipped cream (for serving)
Instructions
- Preheat the oven to 350°F (175°C).
- In a mixing bowl, whisk together the sugar, eggs, lemon juice, lemon zest, melted butter, and salt until well combined.
- Pour the lemon mixture into the pre-made tart shell.
- Bake for 25-30 minutes, or until the filling is set and slightly golden.
- Allow the tart to cool completely before serving. Top with whipped cream if desired.
Cloud City Vanilla Bean Panna Cotta
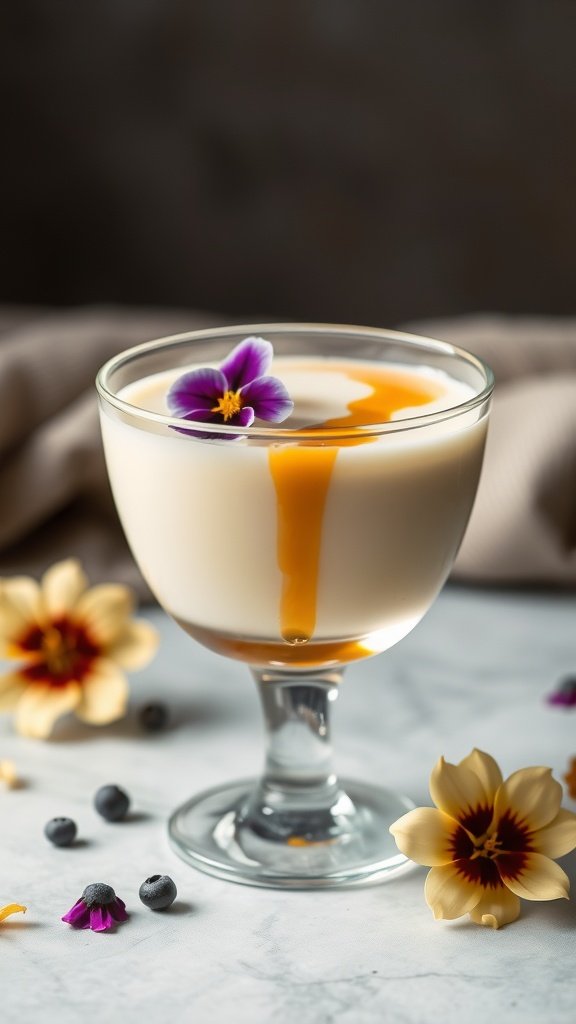
Cloud City Vanilla Bean Panna Cotta is a delightful dessert that brings a taste of the galaxy to your table. This creamy treat is infused with rich vanilla flavor, making it both smooth and satisfying. It’s simple to prepare, requiring just a few ingredients and minimal effort, perfect for any occasion.
The panna cotta has a light texture that melts in your mouth, complemented by a drizzle of caramel or fresh fruit. It’s a futuristic dessert that feels luxurious without being overly complicated, making it a great choice for both novice and experienced cooks.
Ingredients
- 2 cups heavy cream
- 1 cup whole milk
- 1/2 cup granulated sugar
- 1 tablespoon vanilla bean paste
- 2 1/2 teaspoons gelatin powder
- 3 tablespoons cold water
- Caramel sauce or fresh berries for topping
Instructions
- Prepare the Gelatin: In a small bowl, sprinkle gelatin over cold water. Let it sit for about 5 minutes until it blooms.
- Heat the Cream Mixture: In a saucepan, combine heavy cream, milk, sugar, and vanilla bean paste. Heat over medium heat until the sugar dissolves and the mixture is warm, but not boiling.
- Add Gelatin: Remove the saucepan from heat and stir in the bloomed gelatin until fully dissolved.
- Pour into Molds: Pour the mixture into individual serving cups or molds. Refrigerate for at least 4 hours, or until set.
- Serve: Once set, carefully unmold the panna cotta if using molds. Drizzle with caramel sauce or top with fresh berries before serving.
Tatooine Sand Dunes Chocolate Mousse
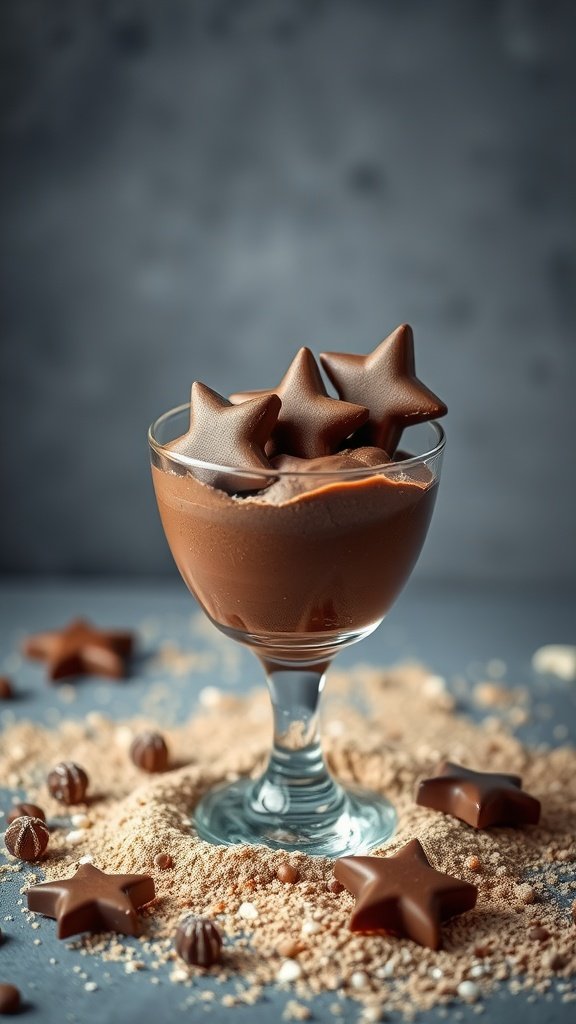
Imagine a dessert that captures the essence of Tatooine’s sandy landscapes in a deliciously rich chocolate mousse. This recipe combines smooth chocolate with a light, airy texture, making it a delightful treat for any Star Wars fan. The taste is indulgent yet balanced, perfect for satisfying your sweet tooth without being overwhelming.
Making this mousse is simple and fun! With just a few ingredients and minimal steps, you’ll have a futuristic dessert that looks as good as it tastes. Whether you’re hosting a themed party or just want to treat yourself, this chocolate mousse is sure to impress.
Ingredients
- 1 cup heavy cream
- 1/2 cup semi-sweet chocolate chips
- 2 tablespoons granulated sugar
- 1 teaspoon vanilla extract
- 1/4 teaspoon salt
- Chocolate star candies for garnish
Instructions
- Melt the Chocolate: In a microwave-safe bowl, combine the chocolate chips and heat in 30-second intervals, stirring until smooth. Let it cool slightly.
- Whip the Cream: In a separate bowl, whip the heavy cream, sugar, vanilla, and salt until soft peaks form.
- Combine: Gently fold the melted chocolate into the whipped cream until fully incorporated, being careful not to deflate the mixture.
- Chill: Spoon the mousse into serving glasses and refrigerate for at least 2 hours to set.
- Garnish: Before serving, top with chocolate star candies for a fun, themed touch.
Wookiee Coconut Cream Pie
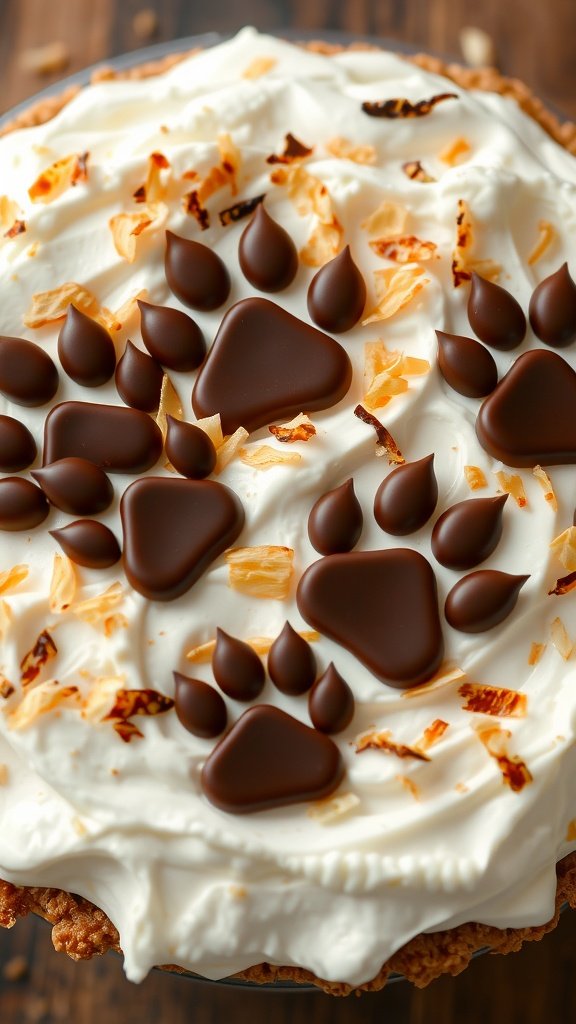
Wookiee Coconut Cream Pie is a delightful treat inspired by the beloved Star Wars universe. This pie combines a creamy coconut filling with a crunchy crust, making it a perfect dessert for fans and foodies alike. The taste is rich and tropical, with a hint of sweetness that will transport you to a galaxy far, far away.
This recipe is simple to make, even for beginners. With just a few ingredients and straightforward steps, you can whip up this futuristic dessert in no time. Whether you’re hosting a themed party or just craving something sweet, this pie is sure to impress!
Ingredients
- 1 pre-made pie crust
- 1 cup shredded coconut, toasted
- 1 cup heavy cream
- 1/2 cup sweetened condensed milk
- 1/4 cup coconut milk
- 1 teaspoon vanilla extract
- 1/4 teaspoon salt
- Chocolate candies for decoration
Instructions
- Preheat the oven to 350°F (175°C). Bake the pie crust according to package instructions until golden brown. Let it cool completely.
- In a mixing bowl, combine heavy cream, sweetened condensed milk, coconut milk, vanilla extract, and salt. Whip until the mixture is thick and creamy.
- Fold in the toasted shredded coconut gently until well mixed.
- Pour the coconut cream mixture into the cooled pie crust, smoothing the top with a spatula.
- Chill the pie in the refrigerator for at least 2 hours to set.
- Before serving, decorate the top with chocolate candies to resemble Wookiee paw prints. Enjoy your Wookiee Coconut Cream Pie!
Sith Lord Red Velvet Cupcakes
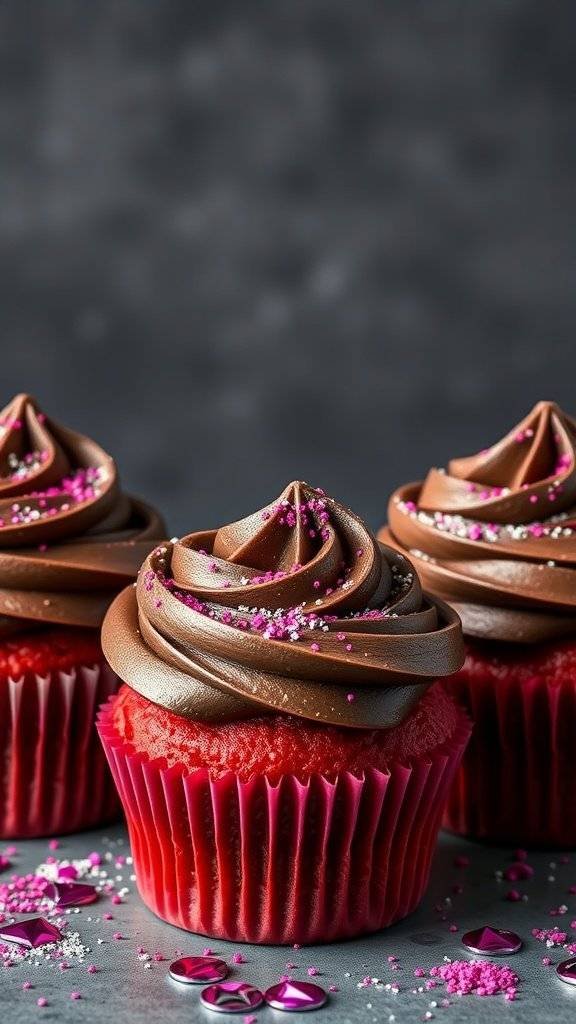
These Sith Lord Red Velvet Cupcakes are a delightful twist on a classic treat, perfect for fans of the galaxy far, far away. With their rich red color and smooth chocolate frosting, they offer a sweet taste that’s both familiar and exciting.
Making these cupcakes is simple, even for beginners. The recipe is straightforward, allowing you to whip up a batch in no time. Whether you’re hosting a themed party or just want to indulge, these cupcakes are sure to impress!
Ingredients
- 1 ½ cups all-purpose flour
- 1 cup granulated sugar
- 1 teaspoon baking soda
- 1 teaspoon cocoa powder
- ½ teaspoon salt
- 1 cup vegetable oil
- 1 cup buttermilk, room temperature
- 2 large eggs
- 2 tablespoons red food coloring
- 1 teaspoon vanilla extract
- 1 teaspoon white vinegar
- 1 cup unsweetened cocoa powder (for frosting)
- 1 cup unsalted butter, softened
- 4 cups powdered sugar
- ½ cup heavy cream
- 1 teaspoon vanilla extract (for frosting)
Instructions
- Preheat the oven to 350°F (175°C) and line a cupcake pan with paper liners.
- In a large bowl, whisk together flour, sugar, baking soda, cocoa powder, and salt.
- In another bowl, mix together oil, buttermilk, eggs, food coloring, vanilla extract, and vinegar until well combined.
- Gradually add the wet ingredients to the dry ingredients, mixing until just combined.
- Fill each cupcake liner about two-thirds full with batter. Bake for 18-20 minutes or until a toothpick comes out clean.
- Let the cupcakes cool completely on a wire rack.
- For the frosting, beat together softened butter and cocoa powder until smooth. Gradually add powdered sugar and heavy cream, mixing until fluffy. Stir in vanilla extract.
- Frost the cooled cupcakes with the chocolate frosting and decorate with sprinkles as desired.
Ewok Forest Berry Pavlova
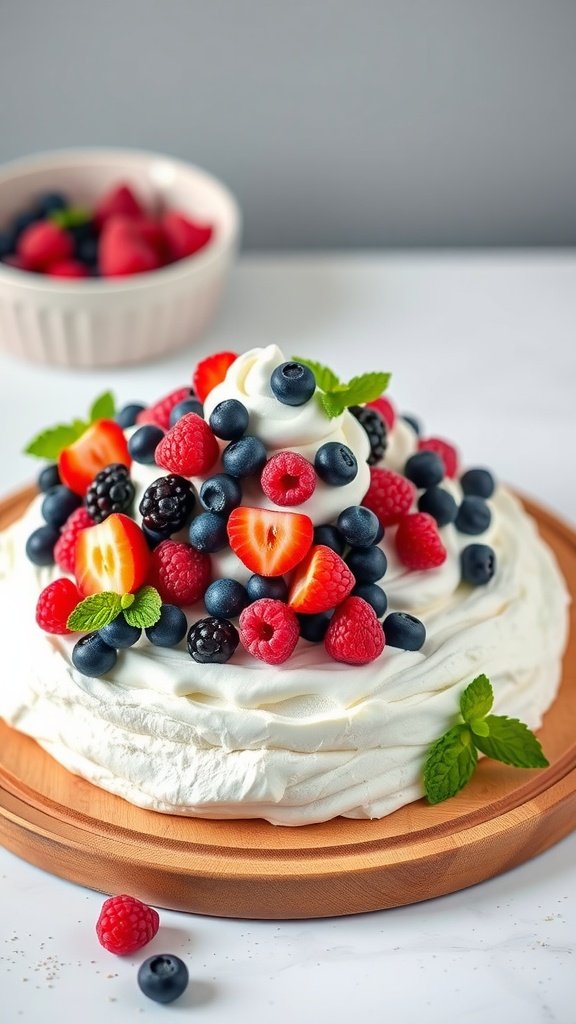
The Ewok Forest Berry Pavlova is a delightful dessert that brings a taste of the forest to your table. With its light and airy meringue base topped with a colorful array of fresh berries, this dish is both visually stunning and deliciously sweet. The combination of crispy meringue and creamy whipped topping creates a perfect balance of textures.
This recipe is simple to make, making it a great choice for both novice and experienced bakers. The vibrant berries not only add flavor but also make this dessert feel special, perfect for any occasion inspired by the whimsical world of Star Wars.
Ingredients
- 4 large egg whites
- 1 cup granulated sugar
- 1 teaspoon vanilla extract
- 1 teaspoon white vinegar
- 1 cup heavy cream
- 2 tablespoons powdered sugar
- 1 cup mixed berries (strawberries, blueberries, raspberries, blackberries)
- Fresh mint leaves for garnish
Instructions
- Preheat your oven to 275°F (135°C). Line a baking sheet with parchment paper and draw a circle about 8 inches in diameter.
- In a clean bowl, beat the egg whites until soft peaks form. Gradually add the granulated sugar, continuing to beat until the mixture is glossy and stiff peaks form. Mix in the vanilla extract and vinegar.
- Spoon the meringue onto the prepared baking sheet, shaping it into a circle with a slight well in the center.
- Bake for 1 hour, then turn off the oven and let the pavlova cool completely inside.
- Whip the heavy cream with powdered sugar until soft peaks form. Spread the whipped cream over the cooled pavlova.
- Top with mixed berries and garnish with mint leaves before serving.
Hoth Ice Crystals Blueberry Sorbet
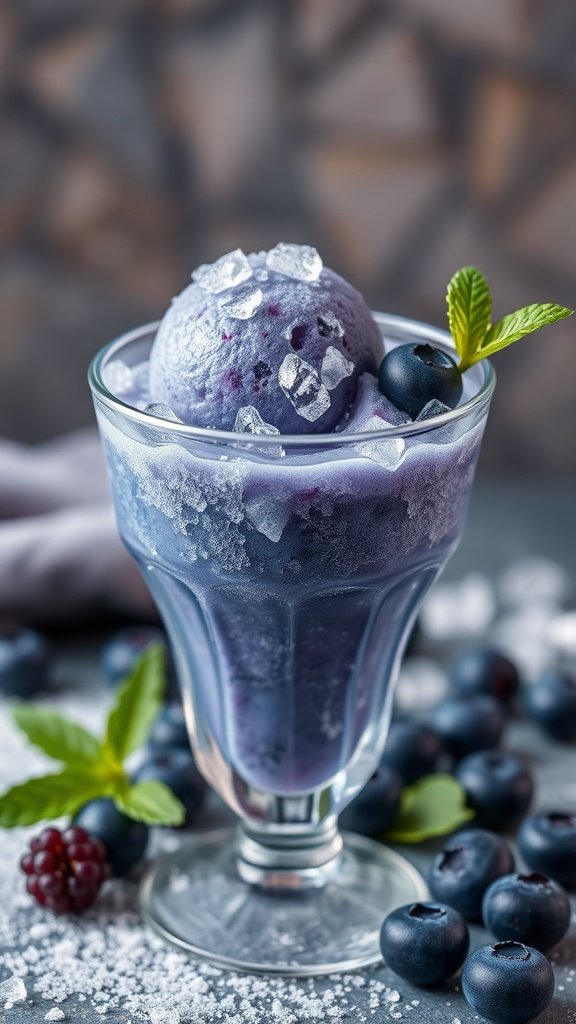
Hoth Ice Crystals Blueberry Sorbet is a refreshing treat inspired by the icy planet of Hoth from Star Wars. This sorbet combines the tartness of blueberries with a hint of sweetness, creating a delightful balance that’s perfect for any occasion. It’s simple to make, requiring just a few ingredients and minimal effort, making it a great choice for both novice and experienced cooks.
With its vibrant color and icy texture, this sorbet not only tastes amazing but also looks stunning on any dessert table. Whether you’re hosting a Star Wars-themed party or just craving something cool, this futuristic dessert is sure to impress!
Ingredients
- 2 cups fresh blueberries
- 1 cup water
- 1/2 cup granulated sugar
- 1 tablespoon lemon juice
- 1 teaspoon vanilla extract
Instructions
- Prepare the Blueberries: In a saucepan, combine blueberries, water, and sugar. Bring to a boil over medium heat, stirring occasionally. Once boiling, reduce heat and let simmer for about 5 minutes until the blueberries are soft.
- Blend the Mixture: Remove from heat and let cool slightly. Transfer the mixture to a blender, add lemon juice and vanilla extract, and blend until smooth.
- Strain the Mixture: Pour the blended mixture through a fine-mesh sieve into a bowl to remove any skins. Press down with a spatula to extract as much liquid as possible.
- Freeze the Sorbet: Pour the strained mixture into a shallow dish and place it in the freezer. Stir every 30 minutes for about 2-3 hours, until the sorbet is firm and fluffy.
- Serve: Scoop the sorbet into bowls or glasses, and enjoy your Hoth-inspired treat!
Jedi Mind Trick Matcha Cheesecake
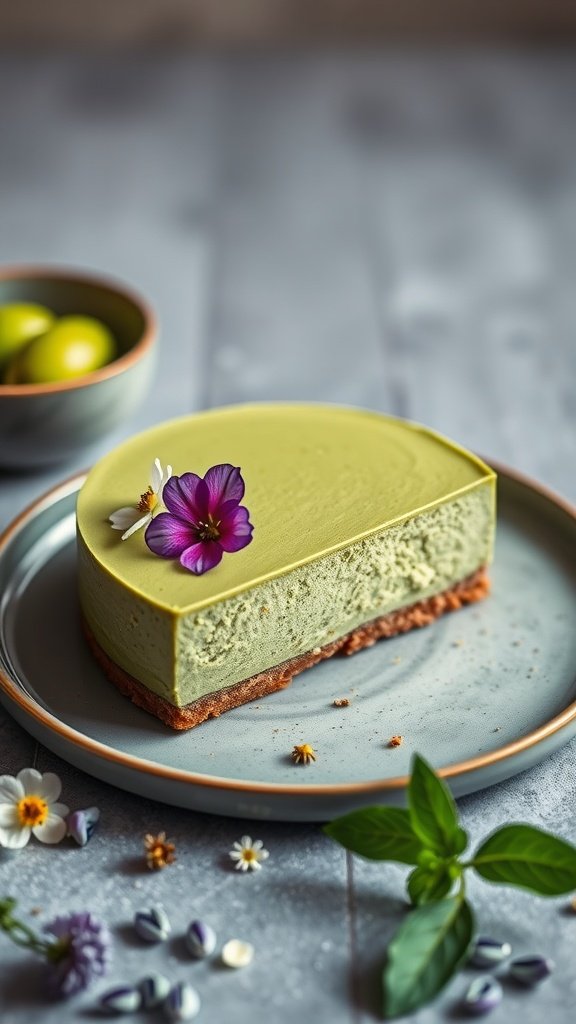
This Jedi Mind Trick Matcha Cheesecake is a delightful twist on a classic dessert. With its creamy texture and subtle earthy notes from matcha, it offers a unique taste that’s both refreshing and satisfying. Plus, it’s surprisingly simple to whip up, making it perfect for any occasion.
The vibrant green color and elegant presentation make it a standout dish, ideal for impressing guests or treating yourself. Enjoy a slice of this futuristic dessert that’s inspired by the galaxy far, far away!
Ingredients
- 1 ½ cups graham cracker crumbs
- ½ cup unsalted butter, melted
- 2 tablespoons granulated sugar
- 16 ounces cream cheese, softened
- 1 cup granulated sugar
- 3 large eggs
- 1 tablespoon vanilla extract
- 2 tablespoons matcha powder
- 1 cup sour cream
- ¼ cup heavy cream
Instructions
- Preheat the oven to 325°F (160°C). In a bowl, mix graham cracker crumbs, melted butter, and sugar until combined. Press the mixture into the bottom of a springform pan to form the crust.
- In a large bowl, beat the cream cheese and sugar until smooth. Add eggs one at a time, mixing well after each addition. Stir in vanilla extract and matcha powder until fully incorporated.
- Fold in sour cream and heavy cream until the mixture is smooth and creamy. Pour the batter over the crust in the springform pan.
- Bake for 50-60 minutes, or until the center is set but still slightly jiggly. Turn off the oven and let the cheesecake cool in the oven with the door slightly ajar for about an hour.
- Chill the cheesecake in the refrigerator for at least 4 hours, or overnight for best results. Serve chilled, garnished with fresh fruit or edible flowers if desired.
R2-D2 Raspberry Trifle
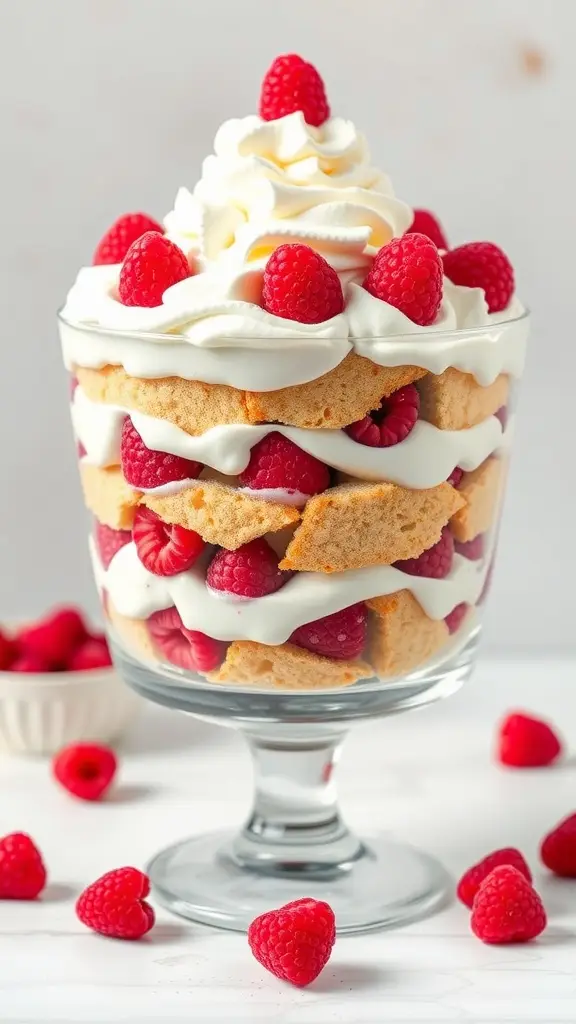
The R2-D2 Raspberry Trifle is a fun and creative dessert that brings a touch of the Star Wars universe to your kitchen. This layered treat combines creamy vanilla pudding, tart raspberry puree, and fluffy whipped cream, all served in an adorable R2-D2-shaped container. It’s not only visually appealing but also offers a delightful balance of sweet and tangy flavors.
This recipe is simple to make, making it perfect for both novice and experienced bakers. With just a few ingredients and easy steps, you can whip up this futuristic dessert in no time, impressing your friends and family with a sweet nod to a beloved sci-fi classic.
Ingredients
- 2 cups heavy cream
- 1 cup vanilla pudding mix
- 2 cups milk
- 1 cup raspberry puree (fresh or frozen raspberries blended)
- 1/4 cup granulated sugar
- 1 teaspoon vanilla extract
- Fresh raspberries for garnish
Instructions
- Prepare the Pudding: In a mixing bowl, whisk together the vanilla pudding mix and milk until smooth. Let it sit for about 5 minutes to thicken.
- Make the Whipped Cream: In another bowl, beat the heavy cream, sugar, and vanilla extract until soft peaks form.
- Layer the Trifle: In your R2-D2 container, start with a layer of raspberry puree, followed by a layer of vanilla pudding, and then a layer of whipped cream. Repeat the layers until the container is full.
- Chill: Place the trifle in the refrigerator for at least 1 hour to set.
- Garnish: Before serving, top with fresh raspberries and a dollop of whipped cream for that extra touch.
Yoda’s Green Tea Mochi

Yoda’s Green Tea Mochi is a delightful treat that brings a taste of the galaxy to your kitchen. This sweet, chewy dessert is filled with a luscious red bean paste, making it a perfect blend of flavors and textures. The green tea adds a unique twist, giving it a refreshing taste that’s both subtle and satisfying.
This recipe is simple enough for anyone to try, whether you’re a seasoned baker or a beginner. With just a few ingredients and straightforward steps, you can create these futuristic desserts that are sure to impress your friends and family!
Ingredients
- 1 cup sweet rice flour (mochi flour)
- 1/4 cup granulated sugar
- 1 cup water
- 2 tablespoons matcha green tea powder
- 1/2 cup red bean paste
- Potato starch (for dusting)
Instructions
- Mix the Ingredients: In a bowl, combine the sweet rice flour, sugar, and matcha powder. Gradually add water while stirring until you have a smooth batter.
- Steam the Mixture: Pour the batter into a heatproof dish and steam for about 20 minutes, or until it becomes firm and slightly translucent.
- Cool and Prepare: Once steamed, let it cool for a few minutes. Dust your work surface with potato starch to prevent sticking.
- Shape the Mochi: Divide the mochi into small pieces. Flatten each piece in your palm, place a small spoonful of red bean paste in the center, and wrap the mochi around it. Pinch to seal.
- Serve: Dust the finished mochi with more potato starch to keep them from sticking together. Enjoy your Yoda’s Green Tea Mochi as a fun and tasty treat!
Galactic Stardust Pudding Cups
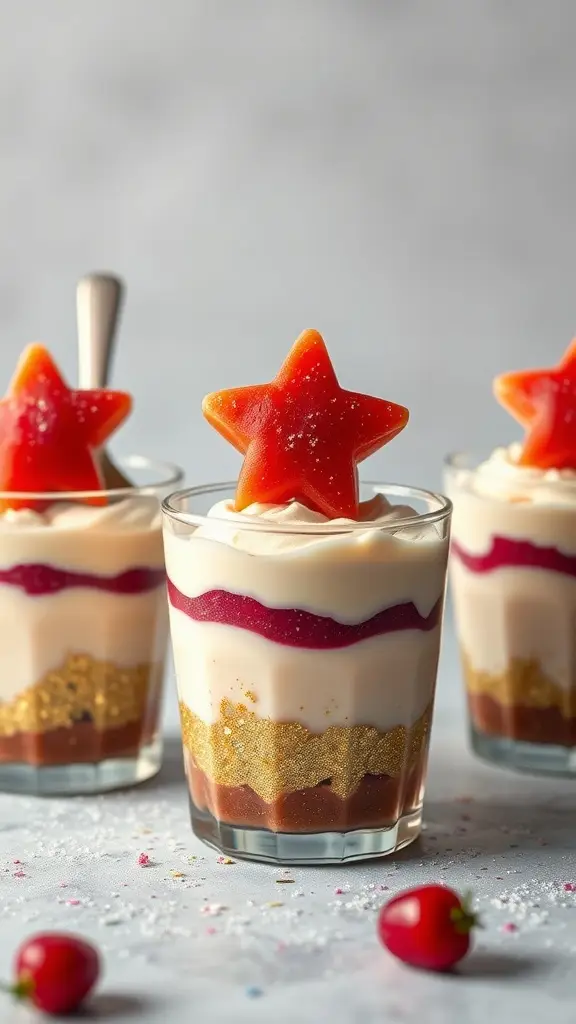
Get ready to treat your taste buds with these Galactic Stardust Pudding Cups! This fun and colorful dessert combines layers of creamy pudding, fruity jelly, and a sprinkle of edible glitter, making it a delightful addition to any futuristic themed gathering. The taste is a perfect blend of sweet and fruity, with a creamy texture that melts in your mouth.
Making these pudding cups is super simple, so even if you’re not a kitchen whiz, you’ll have no trouble whipping them up. Just layer your ingredients in clear cups, and you’ll have a stunning dessert that looks as good as it tastes. Perfect for fans of futuristic deserts!
Ingredients
- 1 cup chocolate pudding
- 1 cup vanilla pudding
- 1 cup strawberry jelly
- 1/2 cup whipped cream
- 1/4 cup edible glitter
- 3 star-shaped gummy candies
- 3 clear dessert cups
Instructions
- Layer the Base: Start by adding a layer of chocolate pudding to the bottom of each dessert cup.
- Add the Jelly: Spoon a layer of strawberry jelly over the chocolate pudding in each cup.
- Vanilla Pudding Layer: Next, add a layer of vanilla pudding on top of the jelly.
- Top with Whipped Cream: Add a dollop of whipped cream on top of the vanilla pudding layer.
- Sprinkle Glitter: Generously sprinkle edible glitter over the whipped cream for that galactic sparkle.
- Finish with a Star: Place a star-shaped gummy candy on top of each cup as a fun finishing touch.
- Chill and Serve: Refrigerate the cups for about 30 minutes before serving to let the flavors meld together.
Droid Chocolate Chip Cookies

These Droid Chocolate Chip Cookies are a fun twist on a classic favorite! With their adorable robot designs and delicious chocolatey goodness, they are sure to impress anyone who sees them. The cookies are soft and chewy, with a perfect balance of sweetness and a hint of vanilla.
Making these cookies is simple and perfect for all skill levels. Whether you’re a baking novice or a seasoned pro, you’ll find joy in creating these futuristic treats. They make a great addition to any gathering or a special treat for yourself!
Ingredients
- 2 1/4 cups all-purpose flour
- 1 teaspoon baking soda
- 1/2 teaspoon salt
- 3/4 cup unsalted butter, softened
- 1 cup brown sugar, packed
- 1/2 cup granulated sugar
- 1 teaspoon vanilla extract
- 2 large eggs
- 2 cups chocolate chips
- Blue fondant for decoration
- Black edible marker for details
Instructions
- Preheat your oven to 350°F (175°C). Line a baking sheet with parchment paper.
- In a bowl, whisk together flour, baking soda, and salt. Set aside.
- In a large mixing bowl, cream together the softened butter, brown sugar, and granulated sugar until smooth. Add the vanilla extract and eggs, mixing well.
- Gradually add the dry ingredients to the wet mixture, stirring until just combined. Fold in the chocolate chips.
- Using a cookie scoop, drop dough onto the prepared baking sheet, spacing them about 2 inches apart.
- Bake for 10-12 minutes, or until the edges are golden. Let them cool on the baking sheet for a few minutes before transferring to a wire rack.
- Once cooled, roll out the blue fondant and cut out robot shapes to place on top of each cookie. Use the black edible marker to add details to the fondant.
Jawa Juice Gelatin Shots
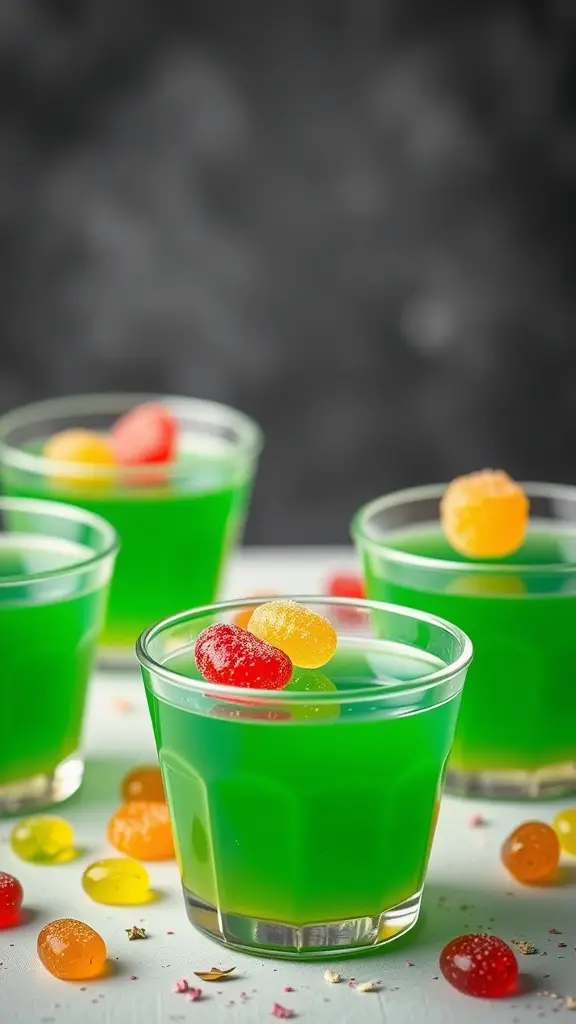
Jawa Juice Gelatin Shots are a fun and vibrant treat that brings a taste of the galaxy to your table. With a bright green color and a sweet, fruity flavor, these shots are sure to be a hit at any gathering. They are simple to make, requiring just a few ingredients and minimal prep time, making them perfect for both seasoned cooks and beginners.
These gelatin shots are not only visually appealing but also pack a punch of flavor that will delight your guests. Whether you’re hosting a themed party or just want to add a touch of the Star Wars universe to your dessert table, these shots are a great choice!
Ingredients
- 1 cup boiling water
- 1 cup cold water
- 1 package (3 oz) lime-flavored gelatin
- 1 package (3 oz) lemon-flavored gelatin
- 1/2 cup vodka (optional)
- Assorted gummy candies for garnish
Instructions
- In a mixing bowl, dissolve the lime-flavored gelatin in 1 cup of boiling water. Stir until completely dissolved.
- Add 1 cup of cold water and the vodka (if using) to the mixture. Stir well.
- Pour the mixture into shot glasses or small cups, filling them about halfway.
- In a separate bowl, repeat the process with the lemon-flavored gelatin.
- Carefully pour the lemon mixture on top of the lime layer in each shot glass.
- Refrigerate for at least 4 hours or until fully set.
- Before serving, top each shot with assorted gummy candies for a fun touch.
Tusken Raider Spiced Apple Galette
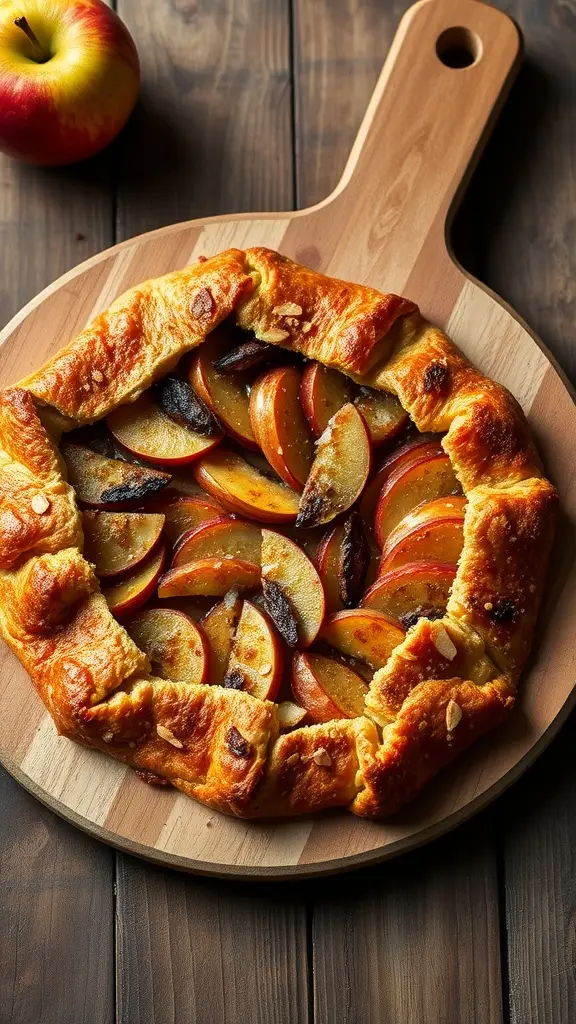
Get ready to whip up a Tusken Raider Spiced Apple Galette that’s as delightful as it is simple! This rustic dessert features tender apples spiced with cinnamon and nutmeg, all wrapped in a flaky crust. The taste is a perfect blend of sweet and spiced, making it a treat for any occasion.
Not only is this galette easy to prepare, but it also looks stunning on any table. With just a few ingredients, you can create a dish that captures the essence of futuristic deserts, inspired by the Star Wars universe. Let’s get baking!
Ingredients
- 1 pre-made pie crust
- 3 medium apples, thinly sliced
- 1/4 cup brown sugar
- 1 teaspoon ground cinnamon
- 1/4 teaspoon ground nutmeg
- 1 tablespoon lemon juice
- 1 tablespoon all-purpose flour
- 1 egg, beaten (for egg wash)
- 1 tablespoon sliced almonds (optional)
Instructions
- Preheat your oven to 375°F (190°C).
- In a large bowl, combine the sliced apples, brown sugar, cinnamon, nutmeg, lemon juice, and flour. Toss until the apples are well coated.
- Roll out the pie crust on a baking sheet lined with parchment paper. Leave about a 2-inch border around the edges.
- Arrange the apple mixture in the center of the crust, leaving the border clear. Fold the edges of the crust over the apples, pleating it as you go.
- Brush the crust with the beaten egg and sprinkle sliced almonds on top if using.
- Bake for 30-35 minutes, or until the crust is golden brown and the apples are tender.
- Let it cool slightly before slicing and serving. Enjoy your galette warm or at room temperature!
Millennium Falcon Fruit Tart
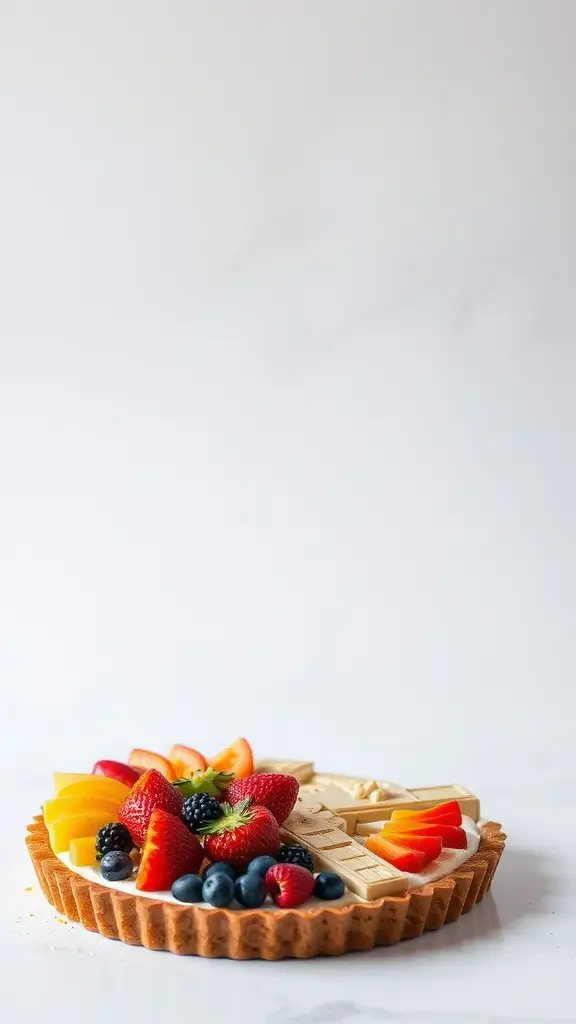
The Millennium Falcon Fruit Tart is a fun and fruity dessert that brings a taste of the galaxy to your kitchen. With a buttery crust and a colorful array of fresh fruits, this tart is as delightful to eat as it is to look at. It’s simple to make, perfect for both novice bakers and seasoned pros.
This tart combines the sweetness of fruits like strawberries, blueberries, and peaches with a creamy filling that balances everything out. It’s a refreshing treat that’s sure to impress your guests, making it a great addition to any gathering or themed party.
Ingredients
- 1 ½ cups all-purpose flour
- ½ cup unsalted butter, softened
- ¼ cup granulated sugar
- 1 large egg yolk
- 1 teaspoon vanilla extract
- ½ teaspoon salt
- 1 cup heavy cream
- ½ cup powdered sugar
- 1 teaspoon vanilla extract (for the filling)
- 1 cup strawberries, sliced
- 1 cup blueberries
- 1 cup peaches, sliced
- 1 cup blackberries
Instructions
- Make the Crust: In a bowl, mix flour, sugar, and salt. Add softened butter and egg yolk, then mix until crumbly. Press the mixture into a tart pan evenly. Chill for 30 minutes.
- Bake the Crust: Preheat the oven to 350°F (175°C). Bake the crust for 20-25 minutes until golden. Let it cool completely.
- Prepare the Filling: In a separate bowl, whip the heavy cream until soft peaks form. Gradually add powdered sugar and vanilla, continuing to whip until stiff peaks form.
- Assemble the Tart: Spread the whipped cream filling evenly over the cooled crust. Arrange the sliced fruits on top in a decorative pattern.
- Chill and Serve: Refrigerate the tart for at least 1 hour before serving. Slice and enjoy your Millennium Falcon Fruit Tart!
Bespin Cloud Fluff Cotton Candy Cake
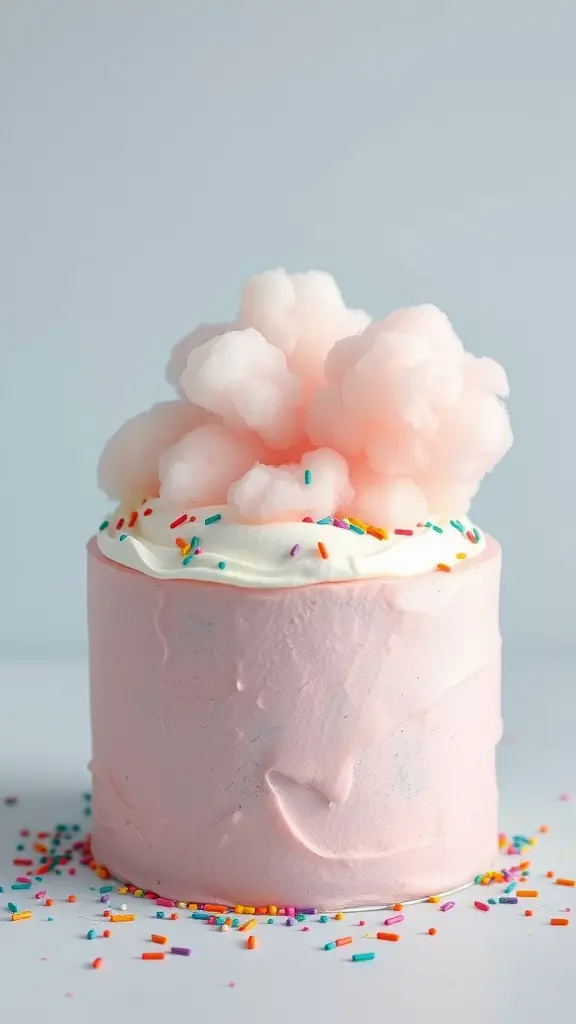
This Bespin Cloud Fluff Cotton Candy Cake is a delightful treat that brings a taste of the galaxy right to your kitchen. With its light, fluffy texture and sweet cotton candy flavor, it’s a fun dessert that’s sure to impress your guests. Plus, it’s surprisingly simple to make, making it perfect for both novice bakers and seasoned pros.
The cake features a soft pink frosting that resembles the clouds of Bespin, topped with fluffy cotton candy for that extra whimsical touch. It’s a sweet, airy dessert that captures the essence of futuristic deserts, making it a must-try for any Star Wars fan!
Ingredients
- 1 ½ cups all-purpose flour
- 1 cup granulated sugar
- 1 ½ teaspoons baking powder
- ½ teaspoon salt
- ½ cup unsalted butter, softened
- 2 large eggs
- 1 teaspoon vanilla extract
- ½ cup milk
- Pink food coloring (optional)
- 1 cup cotton candy
- 1 cup heavy cream
- 2 tablespoons powdered sugar
- Sprinkles for decoration
Instructions
- Preheat your oven to 350°F (175°C). Grease and flour a round cake pan.
- In a large bowl, mix together flour, sugar, baking powder, and salt. Add softened butter, eggs, vanilla extract, and milk. Beat until smooth.
- If desired, add a few drops of pink food coloring to the batter and mix until evenly colored.
- Pour the batter into the prepared cake pan and bake for 25-30 minutes or until a toothpick inserted in the center comes out clean.
- While the cake cools, whip the heavy cream with powdered sugar until soft peaks form.
- Once the cake is cool, frost it with whipped cream and top with cotton candy. Add sprinkles for a festive touch.
- Slice and serve your Bespin Cloud Fluff Cotton Candy Cake, and enjoy a taste of the stars!
Podracer Peanut Butter Fudge
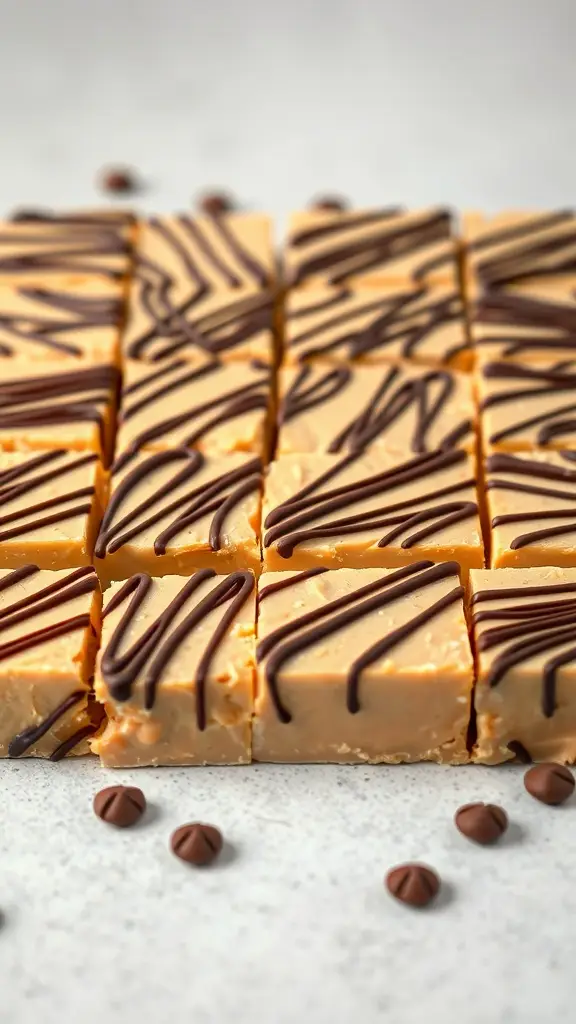
Podracer Peanut Butter Fudge is a delightful treat that brings a taste of the galaxy to your kitchen. This creamy fudge combines the rich flavor of peanut butter with a hint of chocolate, making it a perfect snack for any Star Wars fan. Plus, it’s super easy to whip up, requiring just a few ingredients and minimal effort.
The texture is smooth and melt-in-your-mouth, while the chocolate drizzle adds a fun twist. Whether you’re hosting a themed party or just craving something sweet, this futuristic dessert is sure to impress!
Ingredients
- 2 cups creamy peanut butter
- 1 cup unsweetened condensed milk
- 2 cups powdered sugar
- 1 teaspoon vanilla extract
- 1/2 cup semi-sweet chocolate chips
Instructions
- Prepare the Fudge Base: In a medium saucepan over low heat, combine peanut butter and condensed milk. Stir until smooth and well blended.
- Add Sugar and Vanilla: Remove from heat and mix in powdered sugar and vanilla extract until fully incorporated.
- Set in Pan: Pour the mixture into a greased 9×9 inch baking dish, spreading evenly. Refrigerate for about 2 hours until firm.
- Make the Chocolate Drizzle: In a microwave-safe bowl, melt chocolate chips in 30-second intervals, stirring until smooth. Drizzle over the chilled fudge.
- Cut and Serve: Once the chocolate has set, cut the fudge into squares and enjoy your Podracer Peanut Butter Fudge!
Ahsoka’s Tano Orange Creamsicle Pops
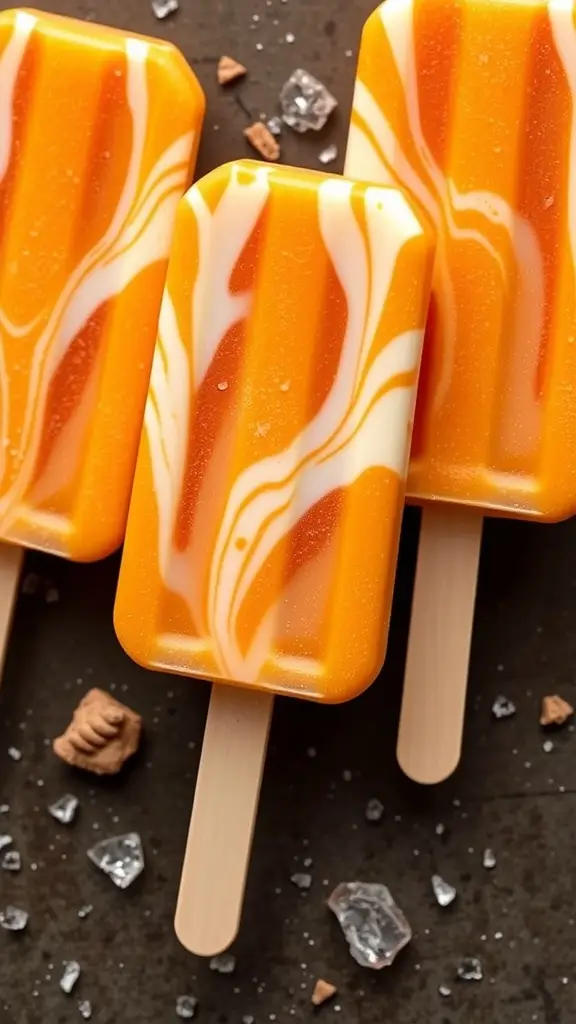
These Ahsoka’s Tano Orange Creamsicle Pops are a fun and refreshing treat inspired by the beloved character from Star Wars. With a delightful blend of sweet orange and creamy vanilla, they offer a taste that’s both nostalgic and exciting. Plus, they’re super easy to whip up, making them perfect for a quick dessert or a cool snack on a hot day.
Whether you’re a Star Wars fan or just looking for a tasty frozen treat, these pops are sure to impress. They’re vibrant, flavorful, and can be made with just a few simple ingredients. Grab your molds and let’s get started on this futuristic dessert!
Ingredients
- 2 cups orange juice
- 1 cup coconut milk
- 1/4 cup honey or maple syrup
- 1 teaspoon vanilla extract
- 1/4 cup Greek yogurt (optional for creaminess)
Instructions
- In a mixing bowl, combine the orange juice, coconut milk, honey or maple syrup, and vanilla extract. Stir until well mixed.
- If you want extra creaminess, fold in the Greek yogurt until smooth.
- Pour the mixture into popsicle molds, filling them about 3/4 full.
- Insert sticks and freeze for at least 4-6 hours or until solid.
- To remove the pops, run warm water over the outside of the molds for a few seconds. Enjoy your Ahsoka-inspired treats!
Force-Fed Chocolate Chip Pancakes
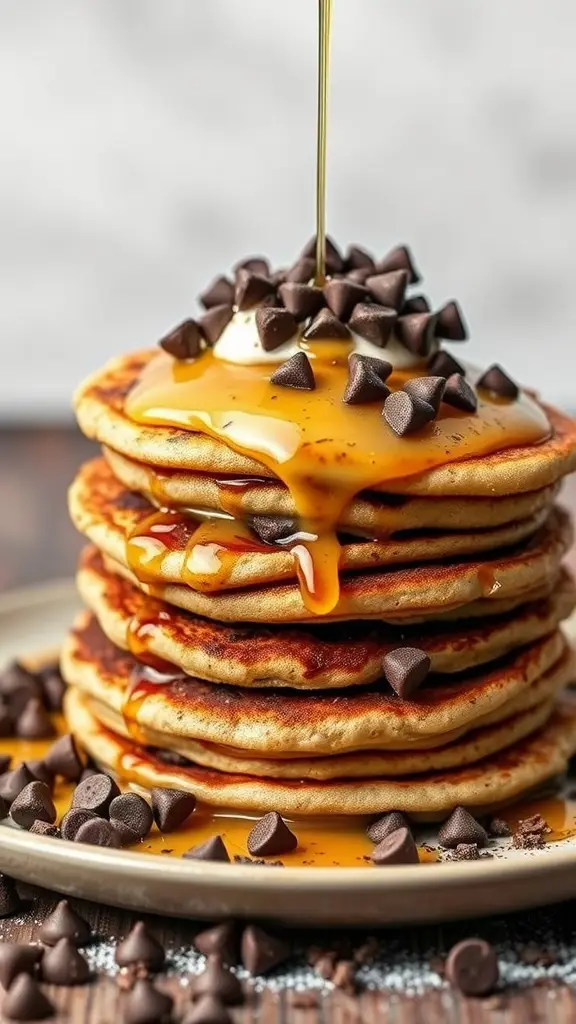
These Force-Fed Chocolate Chip Pancakes are a delightful twist on a classic breakfast favorite. With a fluffy texture and rich chocolate flavor, they are perfect for anyone looking to add a little fun to their morning routine. Simple to whip up, this recipe is great for both novice cooks and seasoned chefs alike.
Imagine sinking your teeth into warm pancakes, dripping with syrup and dotted with gooey chocolate chips. It’s a sweet treat that brings a smile to anyone’s face, making breakfast feel like a special occasion. Whether you’re serving them to family or enjoying them solo, these pancakes are sure to impress!
Ingredients
- 1 cup all-purpose flour
- 2 tablespoons granulated sugar
- 1 tablespoon baking powder
- 1/4 teaspoon salt
- 1 cup milk
- 1 large egg
- 2 tablespoons unsalted butter, melted
- 1/2 cup chocolate chips
- Maple syrup, for serving
Instructions
- Mix Dry Ingredients: In a large bowl, combine flour, sugar, baking powder, and salt.
- Combine Wet Ingredients: In another bowl, whisk together milk, egg, and melted butter.
- Combine Mixtures: Pour the wet ingredients into the dry ingredients and stir until just combined. Fold in the chocolate chips.
- Cook Pancakes: Heat a non-stick skillet over medium heat. Pour about 1/4 cup of batter for each pancake. Cook until bubbles form on the surface, then flip and cook until golden brown.
- Serve: Stack the pancakes on a plate, drizzle with maple syrup, and enjoy!
Leia’s Royal Raspberry Tarts
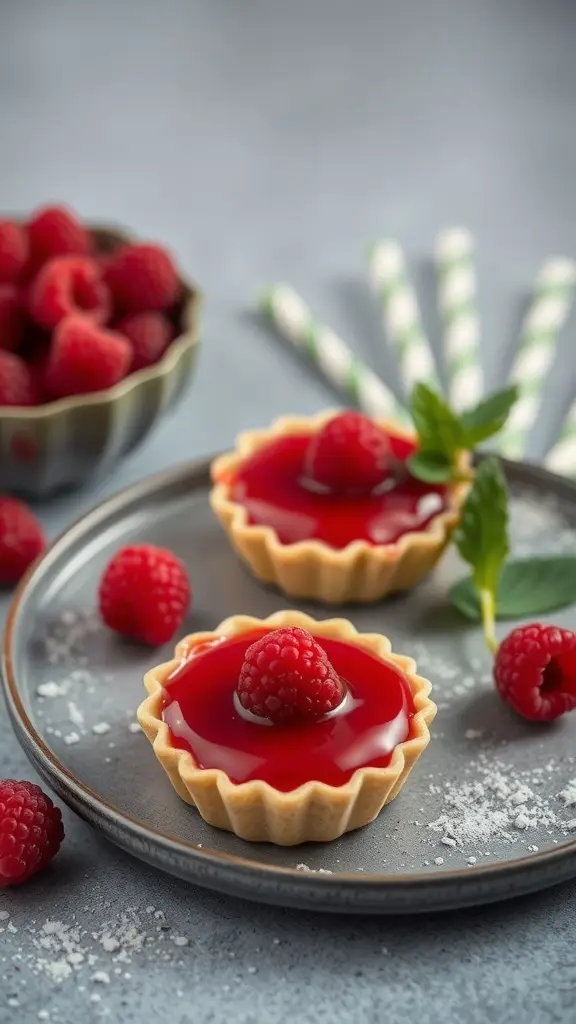
Leia’s Royal Raspberry Tarts are a delightful treat that brings a touch of the galaxy to your kitchen. With a buttery crust and a sweet raspberry filling, these tarts are both refreshing and satisfying. They are simple to make, making them perfect for both novice bakers and seasoned pros.
The tartness of the raspberries balances beautifully with the sweetness of the glaze, creating a flavor that’s out of this world. Serve them at your next gathering, and watch them disappear faster than the Millennium Falcon in hyperdrive!
Ingredients
- 1 cup all-purpose flour
- 1/4 cup powdered sugar
- 1/2 cup unsalted butter, softened
- 1 cup fresh raspberries
- 1/2 cup raspberry jam
- 1 tablespoon lemon juice
- 1 tablespoon cornstarch
- 1/4 cup water
- Mint leaves for garnish
Instructions
- Preheat your oven to 350°F (175°C). In a bowl, mix flour and powdered sugar. Cut in the butter until crumbly. Press the mixture into tartlet pans.
- Bake the crusts for about 15 minutes or until lightly golden. Remove from the oven and let cool.
- In a saucepan, combine raspberry jam, lemon juice, cornstarch, and water. Cook over medium heat until thickened, stirring constantly.
- Once thick, remove from heat and gently fold in fresh raspberries.
- Fill each cooled tart shell with the raspberry mixture. Chill in the refrigerator for at least 30 minutes before serving.
- Garnish with mint leaves and enjoy your futuristic dessert!
Sarlacc Pit Chocolate Lava Cake
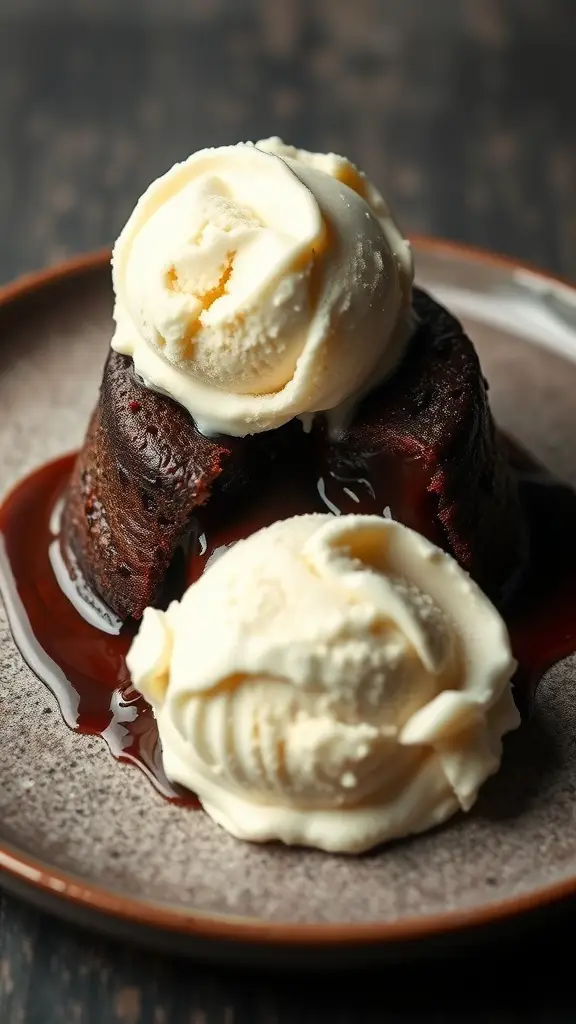
This Sarlacc Pit Chocolate Lava Cake is a fun twist on the classic dessert, inspired by the iconic Star Wars creature. With its rich chocolate flavor and gooey center, it’s a treat that will satisfy any sweet tooth. The combination of warm chocolate and cold ice cream creates a delightful contrast that’s hard to resist.
Making this cake is surprisingly simple, perfect for both novice bakers and seasoned pros. In just a few steps, you can whip up this futuristic dessert that’s sure to impress your guests or make a cozy night in feel special.
Ingredients
- 1/2 cup unsalted butter
- 1 cup semi-sweet chocolate chips
- 2 large eggs
- 2 large egg yolks
- 1/4 cup granulated sugar
- 2 tablespoons all-purpose flour
- 1/4 teaspoon salt
- Vanilla ice cream, for serving
Instructions
- Preheat your oven to 425°F (220°C) and grease four ramekins.
- In a microwave-safe bowl, melt the butter and chocolate chips together until smooth, stirring every 30 seconds.
- In another bowl, whisk together the eggs, egg yolks, and sugar until light and fluffy.
- Gently fold the melted chocolate mixture into the egg mixture, then add the flour and salt, mixing until just combined.
- Divide the batter evenly among the prepared ramekins and place them on a baking sheet.
- Bake for 12-14 minutes, until the edges are firm but the center is still soft.
- Let the cakes cool for 1 minute, then carefully invert them onto plates. Serve immediately with a scoop of vanilla ice cream on top.
Chewbacca’s Chewy Caramel Brownies
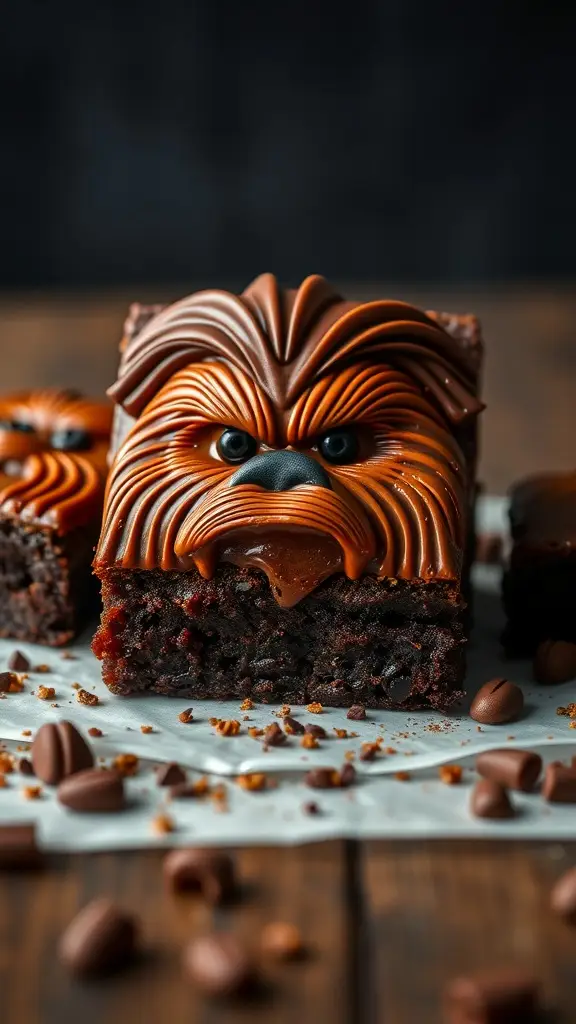
Chewbacca’s Chewy Caramel Brownies are a fun and delicious treat inspired by the beloved Wookiee from Star Wars. These brownies are rich and fudgy, with a gooey caramel layer that adds a delightful sweetness. They are simple to make, perfect for both novice bakers and seasoned pros looking for a quick dessert.
The combination of chocolate and caramel creates a flavor that is both comforting and exciting, making these brownies a hit at any gathering. Whether you’re hosting a Star Wars movie night or just craving something sweet, these brownies are sure to impress!
Ingredients
- 1 cup unsalted butter
- 2 cups granulated sugar
- 4 large eggs
- 1 teaspoon vanilla extract
- 1 cup all-purpose flour
- 1 cup unsweetened cocoa powder
- 1/2 teaspoon salt
- 1 cup chocolate chips
- 1 cup caramel sauce
- 1/2 cup chopped nuts (optional)
Instructions
- Preheat the oven to 350°F (175°C) and grease a 9×13 inch baking pan.
- In a saucepan, melt the butter over medium heat. Once melted, remove from heat and stir in the sugar until well combined.
- Add the eggs one at a time, mixing well after each addition. Stir in the vanilla extract.
- In a separate bowl, whisk together the flour, cocoa powder, and salt. Gradually add this mixture to the wet ingredients, stirring until just combined.
- Fold in the chocolate chips and nuts, if using.
- Pour half of the brownie batter into the prepared pan and spread evenly. Drizzle half of the caramel sauce over the batter.
- Pour the remaining brownie batter on top and finish with the rest of the caramel sauce, swirling it gently with a knife.
- Bake for 30-35 minutes, or until a toothpick inserted in the center comes out with a few moist crumbs.
- Let cool before cutting into squares and serving. Enjoy your Futuristic Deserts!
TIE Fighter Tiramisu
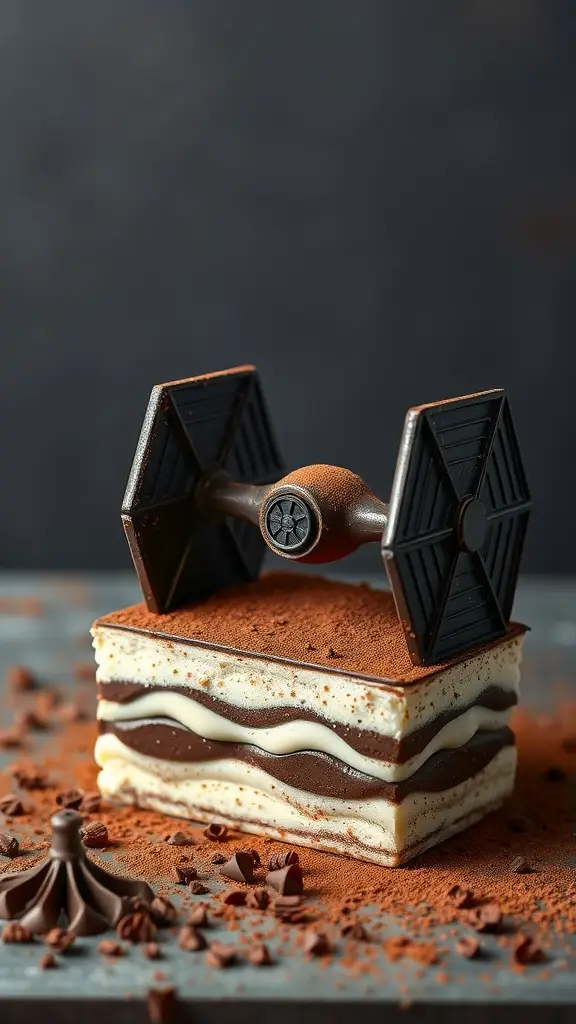
Get ready to take your taste buds on a cosmic journey with this TIE Fighter Tiramisu! This dessert combines rich layers of coffee-soaked ladyfingers with creamy mascarpone, creating a delightful balance of flavors. The chocolate and coffee notes come together to make a treat that’s both indulgent and refreshing.
This recipe is simple enough for anyone to tackle, making it a great choice for both novice bakers and seasoned pros. Plus, the TIE Fighter design adds a fun twist that will impress your guests and make your dessert table truly stand out in the galaxy of futuristic deserts!
Ingredients
- 1 cup strong brewed coffee, cooled
- 3 tablespoons coffee liqueur (optional)
- 3 large eggs, separated
- 1/2 cup granulated sugar
- 1 cup mascarpone cheese
- 1 cup heavy cream
- 1 teaspoon vanilla extract
- 24 ladyfingers
- Cocoa powder for dusting
- Chocolate shavings for decoration
Instructions
- Prepare the Coffee Mixture: In a shallow dish, combine the brewed coffee and coffee liqueur. Set aside.
- Make the Cream Mixture: In a bowl, whisk the egg yolks and sugar until pale and creamy. Add the mascarpone cheese and mix until smooth.
- Whip the Cream: In another bowl, whip the heavy cream and vanilla extract until stiff peaks form. Gently fold the whipped cream into the mascarpone mixture.
- Assemble the Tiramisu: Quickly dip each ladyfinger into the coffee mixture, ensuring they are soaked but not soggy. Layer half of the soaked ladyfingers in a rectangular dish. Spread half of the mascarpone mixture over the ladyfingers.
- Repeat the Layers: Add another layer of soaked ladyfingers followed by the remaining mascarpone mixture. Smooth the top with a spatula.
- Chill: Cover the dish and refrigerate for at least 4 hours, or overnight for best results.
- Serve: Before serving, dust the top with cocoa powder and garnish with chocolate shavings. Cut into squares and enjoy your TIE Fighter Tiramisu!
Starfighter Strawberry Shortcake
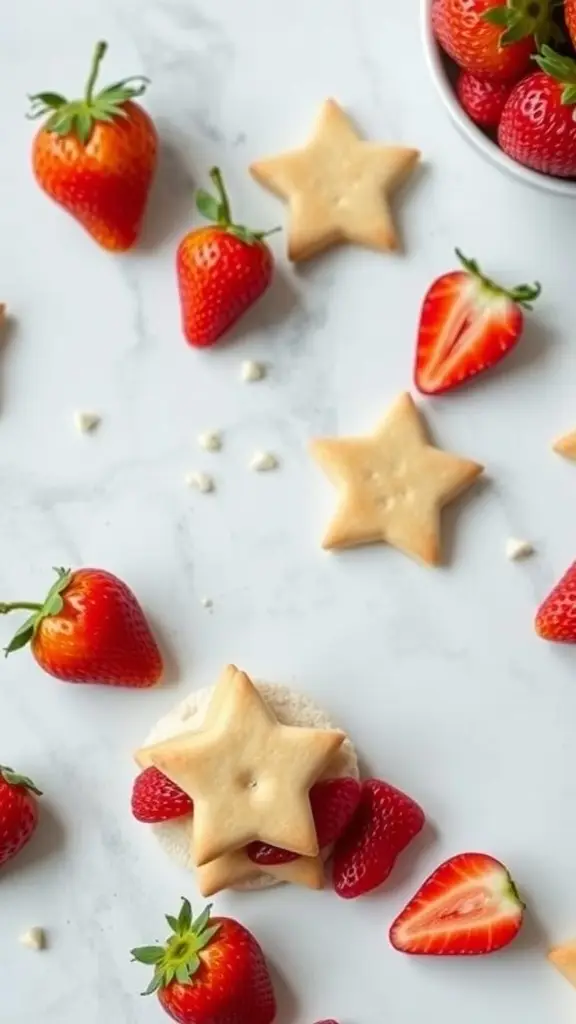
Starfighter Strawberry Shortcake is a fun twist on a classic dessert, perfect for fans of both sweet treats and sci-fi. This recipe combines light, buttery cookies shaped like stars with fresh strawberries, creating a delightful balance of flavors and textures. It’s simple to make, making it a great choice for both novice bakers and seasoned pros.
The sweetness of the strawberries pairs perfectly with the buttery cookies, offering a refreshing taste that’s perfect for any occasion. Whether you’re hosting a themed party or just want to enjoy a sweet treat, this dessert is sure to impress!
Ingredients
- 1 cup unsalted butter, softened
- 1 cup granulated sugar
- 2 large eggs
- 1 teaspoon vanilla extract
- 3 cups all-purpose flour
- 1 teaspoon baking powder
- 1/2 teaspoon salt
- 2 cups fresh strawberries, hulled and sliced
- 1/4 cup powdered sugar (for dusting)
Instructions
- Preheat the oven to 350°F (175°C). In a large bowl, cream together the softened butter and granulated sugar until light and fluffy.
- Add the eggs and vanilla extract, mixing until well combined. In another bowl, whisk together the flour, baking powder, and salt.
- Gradually add the dry ingredients to the wet mixture, stirring until a dough forms. Roll out the dough on a floured surface to about 1/4 inch thick.
- Use a star-shaped cookie cutter to cut out shapes and place them on a baking sheet lined with parchment paper. Bake for 8-10 minutes or until the edges are lightly golden.
- Let the cookies cool completely. Once cooled, layer the sliced strawberries between two star cookies. Dust with powdered sugar before serving.
Lightsaber Lemonade Pops

Lightsaber Lemonade Pops are a fun and refreshing treat inspired by the iconic lightsabers from Star Wars. These colorful popsicles are bursting with zesty lemon flavor, making them perfect for a hot day. Easy to make, they require just a few simple ingredients and a bit of freezing time.
With their vibrant colors and tangy taste, these pops are sure to impress both kids and adults alike. Whether you’re hosting a Star Wars-themed party or just looking for a cool snack, these futuristic desserts are a delightful choice!
Ingredients
- 2 cups lemonade
- 1 cup water
- 1/4 cup sugar (optional)
- Food coloring (blue, green, red, or any colors you prefer)
- Lemon slices for garnish
Instructions
- Mix the lemonade and water in a bowl. If you like it sweeter, add sugar and stir until dissolved.
- Divide the mixture into separate bowls, depending on how many colors you want to create.
- Add a few drops of food coloring to each bowl and mix until you achieve your desired colors.
- Pour the colored lemonade mixture into popsicle molds, filling them about 3/4 full.
- Insert the popsicle sticks and freeze for at least 4-6 hours or until solid.
- To serve, run warm water over the outside of the molds for a few seconds to help release the pops. Garnish with lemon slices if desired.
C-3PO Golden Honey Cake
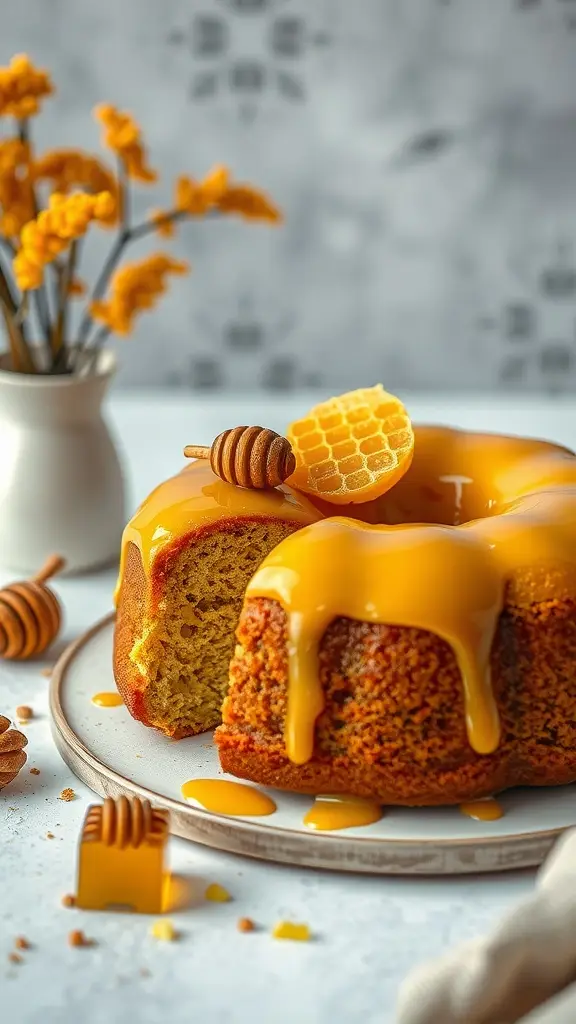
This C-3PO Golden Honey Cake is a delightful treat inspired by the iconic droid from Star Wars. With its sweet honey flavor and moist texture, this cake is sure to please anyone with a sweet tooth. It’s simple to make, making it perfect for both novice bakers and seasoned pros.
The golden hue of the cake, reminiscent of C-3PO’s shiny exterior, adds a fun twist to your dessert table. Topped with a luscious honey glaze, this cake is not just a feast for the eyes but also a delicious addition to your futuristic desserts collection.
Ingredients
- 2 cups all-purpose flour
- 1 cup granulated sugar
- 1/2 cup unsalted butter, softened
- 1 cup honey
- 3 large eggs
- 1/2 cup milk
- 1 tablespoon baking powder
- 1/2 teaspoon salt
- 1 teaspoon vanilla extract
- 1/4 cup honey for glaze
Instructions
- Preheat the oven to 350°F (175°C). Grease and flour a bundt pan.
- In a large bowl, cream together the softened butter and sugar until light and fluffy. Add the eggs one at a time, mixing well after each addition.
- Stir in the honey and vanilla extract until well combined.
- In another bowl, whisk together the flour, baking powder, and salt. Gradually add this dry mixture to the wet ingredients, alternating with the milk. Mix until just combined.
- Pour the batter into the prepared bundt pan and smooth the top. Bake for 30-35 minutes, or until a toothpick inserted into the center comes out clean.
- Let the cake cool in the pan for 10 minutes before transferring it to a wire rack to cool completely.
- For the glaze, gently heat the 1/4 cup of honey until it’s pourable. Drizzle it over the cooled cake before serving.
Droid Delight Chocolate Bark
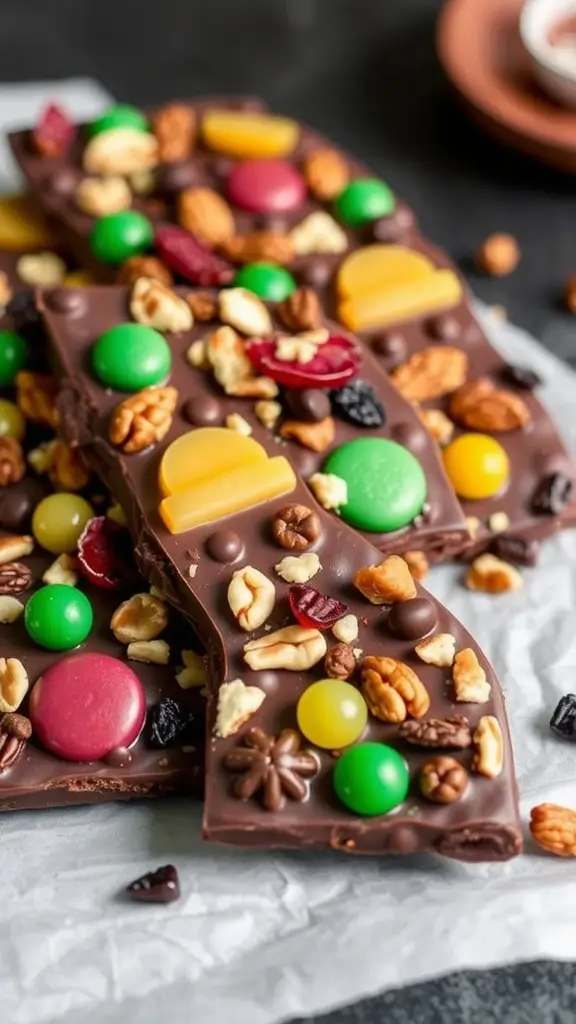
Droid Delight Chocolate Bark is a fun and easy treat that brings a touch of the galaxy to your kitchen. With its rich chocolate flavor and crunchy mix-ins, this bark is perfect for satisfying your sweet tooth. It’s simple to make, requiring just a few ingredients and minimal time, making it a great choice for both kids and adults.
This chocolate bark is not only delicious but also visually appealing, with cute droid shapes and a variety of nuts and dried fruits sprinkled throughout. It’s a delightful way to enjoy a futuristic dessert inspired by the Star Wars universe!
Ingredients
- 8 oz dark chocolate, chopped
- 4 oz milk chocolate, chopped
- 1/2 cup mixed nuts (almonds, cashews, walnuts)
- 1/4 cup dried cranberries
- 1/4 cup white chocolate chips
- 1/4 teaspoon sea salt
Instructions
- Melt the Chocolates: In a microwave-safe bowl, combine the dark and milk chocolate. Heat in 30-second intervals, stirring in between, until fully melted and smooth.
- Prepare the Bark: Line a baking sheet with parchment paper. Pour the melted chocolate onto the sheet and spread it out evenly to about 1/4 inch thick.
- Add Toppings: Sprinkle the mixed nuts, dried cranberries, and white chocolate chips over the melted chocolate. Press them down gently to ensure they stick.
- Chill: Place the baking sheet in the refrigerator for about 30 minutes, or until the chocolate is set.
- Break into Pieces: Once set, remove the bark from the fridge and break it into pieces. Sprinkle with sea salt before serving.
Bantha Blueberry Muffins
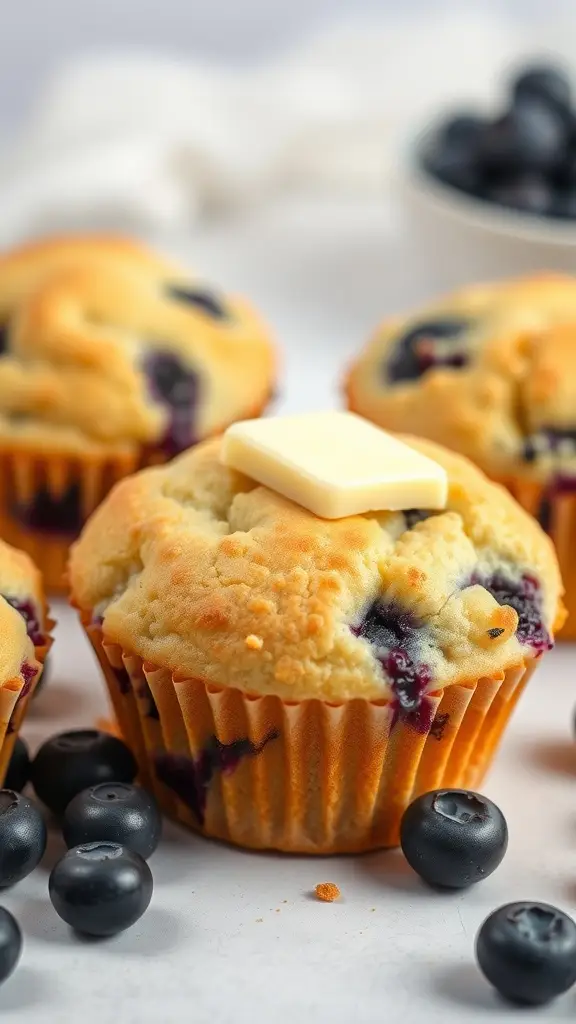
Bantha Blueberry Muffins are a delightful treat inspired by the iconic universe of Star Wars. These muffins are bursting with juicy blueberries, offering a sweet and slightly tart flavor that pairs perfectly with a warm pat of butter on top. They are simple to make, making them a great option for both novice bakers and seasoned pros alike.
With a fluffy texture and a golden-brown crust, these muffins will transport you to a galaxy far, far away. Perfect for breakfast or a snack, they are sure to please everyone in your household. Let’s get baking!
Ingredients
- 2 cups all-purpose flour
- 1 cup granulated sugar
- 2 teaspoons baking powder
- 1/2 teaspoon baking soda
- 1/2 teaspoon salt
- 1/2 cup unsalted butter, melted
- 1 cup buttermilk
- 2 large eggs
- 1 teaspoon vanilla extract
- 1 1/2 cups fresh blueberries
Instructions
- Preheat the oven to 375°F (190°C) and line a muffin tin with paper liners.
- In a large bowl, whisk together the flour, sugar, baking powder, baking soda, and salt.
- In another bowl, combine the melted butter, buttermilk, eggs, and vanilla extract. Mix well.
- Pour the wet ingredients into the dry ingredients and stir until just combined. Gently fold in the blueberries.
- Divide the batter evenly among the muffin cups, filling each about 2/3 full.
- Bake for 18-20 minutes, or until a toothpick inserted into the center comes out clean.
- Allow the muffins to cool in the pan for a few minutes before transferring them to a wire rack to cool completely.
Naboo Nectarine Sorbet
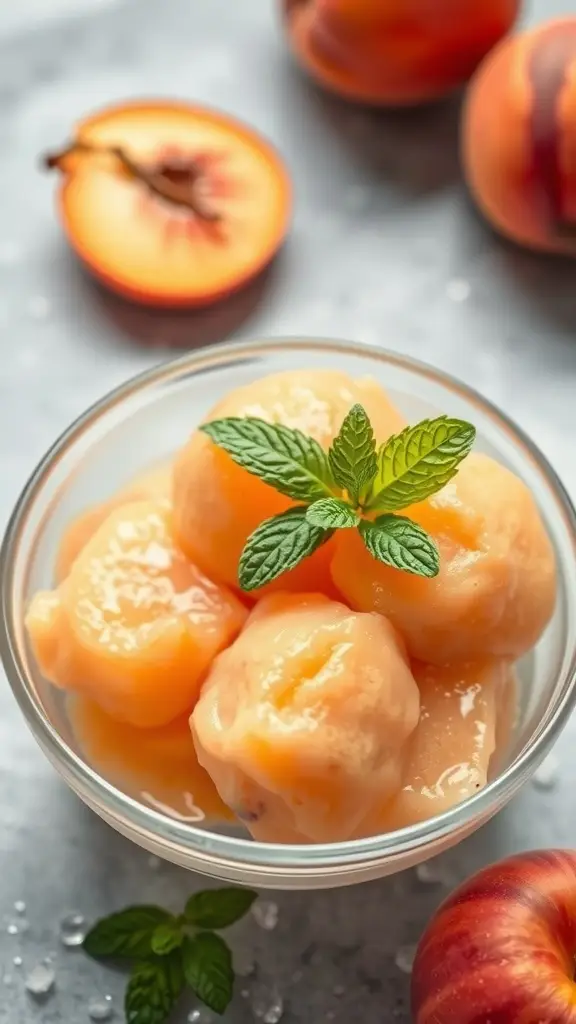
Naboo Nectarine Sorbet is a refreshing treat inspired by the lush landscapes of Naboo. This sorbet captures the sweet and tangy essence of ripe nectarines, making it a delightful dessert for any occasion. It’s simple to whip up, requiring just a few ingredients and minimal effort.
The taste is light and fruity, perfect for cooling down on a warm day. With its vibrant color and smooth texture, this sorbet is not only delicious but also a feast for the eyes, bringing a touch of the galaxy to your table.
Ingredients
- 4 ripe nectarines, pitted and chopped
- 1/2 cup granulated sugar
- 1 cup water
- 1 tablespoon lemon juice
- Fresh mint leaves for garnish
Instructions
- Prepare the Nectarines: In a blender, combine the chopped nectarines, sugar, water, and lemon juice. Blend until smooth.
- Chill the Mixture: Pour the mixture into a bowl and refrigerate for about 1-2 hours until it’s well chilled.
- Freeze the Sorbet: Transfer the chilled mixture into an ice cream maker and churn according to the manufacturer’s instructions until it reaches a soft-serve consistency. If you don’t have an ice cream maker, pour the mixture into a shallow dish and freeze, stirring every 30 minutes until firm.
- Serve: Scoop the sorbet into bowls and garnish with fresh mint leaves. Enjoy your galactic-inspired treat!
Galaxy Glazed Donuts
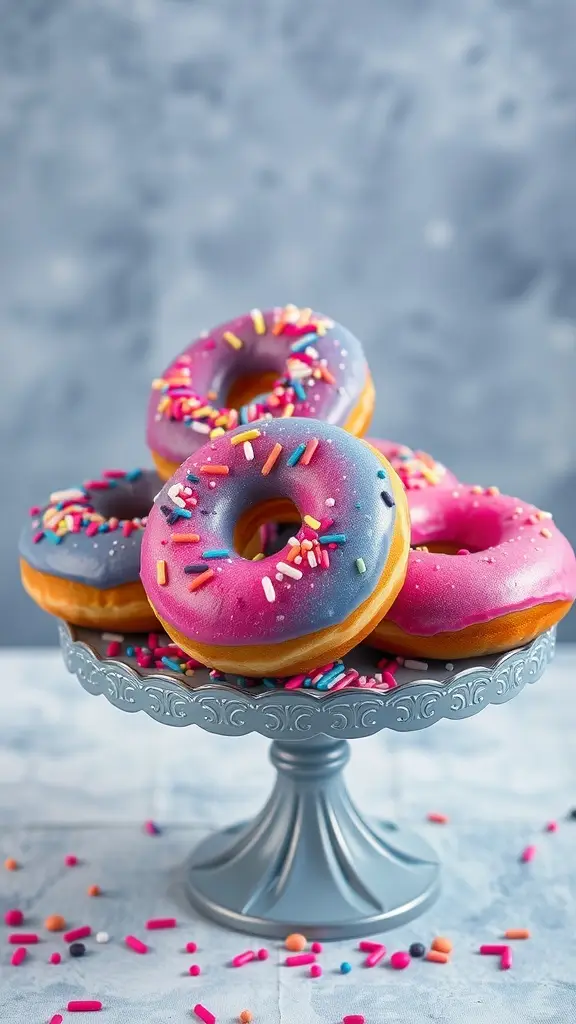
These Galaxy Glazed Donuts are a fun twist on a classic treat, inspired by the vibrant colors of the cosmos. With their eye-catching swirls of pink and blue, they taste as good as they look, offering a sweet and fluffy bite that will delight your taste buds.
Making these donuts is simple and perfect for any skill level. Whether you’re a baking novice or a seasoned pro, you’ll enjoy creating these futuristic desserts that are sure to impress at any gathering.
Ingredients
- 2 cups all-purpose flour
- 1/2 cup granulated sugar
- 2 teaspoons baking powder
- 1/2 teaspoon salt
- 1/2 cup milk
- 1/4 cup unsalted butter, melted
- 1 large egg
- 1 teaspoon vanilla extract
- 1 cup powdered sugar
- 2 tablespoons milk (for glaze)
- Food coloring (blue and pink)
- Sprinkles (for decoration)
Instructions
- Preheat your oven to 375°F (190°C) and grease a donut pan.
- In a bowl, mix flour, sugar, baking powder, and salt. In another bowl, whisk together milk, melted butter, egg, and vanilla.
- Combine the wet and dry ingredients until just mixed. Do not overmix.
- Fill each donut cavity about halfway with the batter. Bake for 10-12 minutes until golden.
- Let the donuts cool for a few minutes before transferring them to a wire rack.
- For the glaze, mix powdered sugar and milk until smooth. Divide the glaze into two bowls and add blue food coloring to one and pink to the other.
- Dunk the cooled donuts into the glazes, allowing excess to drip off. Add sprinkles while the glaze is still wet.
- Let the donuts set for a few minutes before serving. Enjoy your galaxy-inspired treats!
Bounty Hunter Black Forest Cake
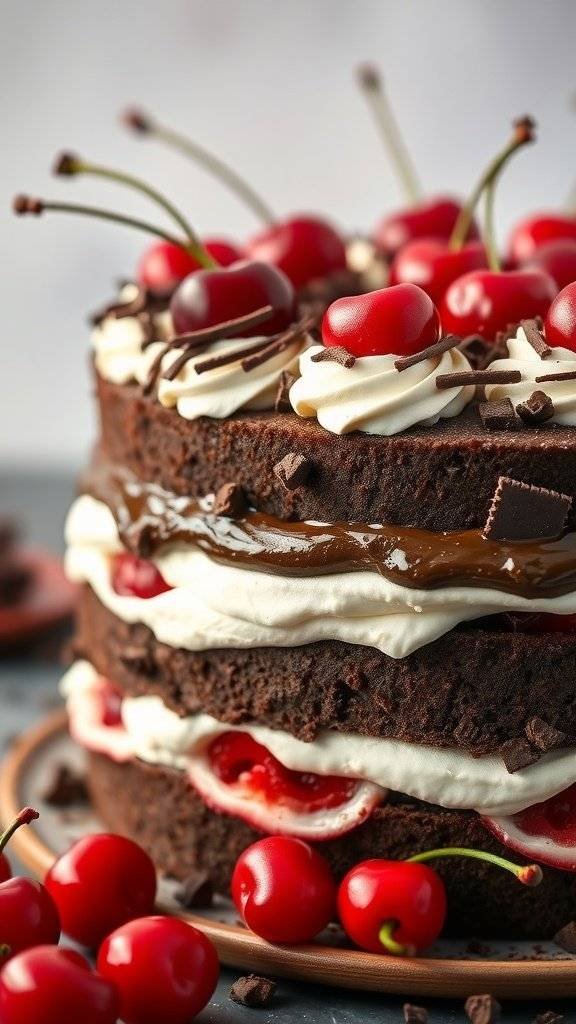
The Bounty Hunter Black Forest Cake is a delightful twist on the classic dessert. This cake features rich chocolate layers, creamy whipped frosting, and a burst of cherry flavor that will take your taste buds on a journey. It’s not overly complicated to make, making it a great choice for both novice and experienced bakers.
With its dark, luscious layers and sweet cherry filling, this cake is perfect for any occasion. Whether you’re celebrating a special event or just treating yourself, this dessert is sure to impress. Get ready to create a slice of the galaxy right in your kitchen!
Ingredients
- 2 cups all-purpose flour
- 1 3/4 cups granulated sugar
- 3/4 cup unsweetened cocoa powder
- 1 1/2 teaspoons baking powder
- 1 1/2 teaspoons baking soda
- 1 teaspoon salt
- 2 large eggs
- 1 cup whole milk
- 1/2 cup vegetable oil
- 2 teaspoons vanilla extract
- 1 cup boiling water
- 1 jar (24 oz) cherry pie filling
- 2 cups heavy whipping cream
- 1/4 cup powdered sugar
- Chocolate shavings for garnish
Instructions
- Preheat your oven to 350°F (175°C). Grease and flour two 9-inch round cake pans.
- In a large bowl, combine flour, sugar, cocoa powder, baking powder, baking soda, and salt. Mix well.
- Add eggs, milk, oil, and vanilla to the dry ingredients. Beat on medium speed for 2 minutes. Stir in boiling water until well combined.
- Pour the batter evenly into the prepared pans. Bake for 30-35 minutes or until a toothpick inserted in the center comes out clean.
- Let the cakes cool in the pans for 10 minutes, then remove from pans and cool completely on wire racks.
- Once cooled, slice each cake in half horizontally to create four layers.
- Whip the heavy cream with powdered sugar until soft peaks form.
- On a serving plate, place one layer of cake. Spread a layer of cherry pie filling, followed by whipped cream. Repeat with the next two layers.
- Top with the final layer of cake and spread whipped cream on top and around the sides. Garnish with chocolate shavings and cherries.
- Chill for at least 1 hour before serving. Enjoy your Bounty Hunter Black Forest Cake!
You may also like:
– 23 Easy Dinner Recipes Inspired by Qarth – GOT
– 19 Breakfast Recipes Inspired by the Gatsby Roaring 1920s
– 21 Children’s Birthday Cakes Inspired by Gotham City
If you enjoyed this blog you can visit us or check out our other blogs and learn a bit about us.
Disclaimer: This blog post is inspired by fictional universes and characters created by their respective rights holders. All related content and imagery remain the property of their respective rights holder. This fan-inspired content is for entertainment and commentary purposes only and is not affiliated with or endorsed by HBO, Disney, Warner Bros., Lionsgate, or any other rights holders. To explore the official source material, please visit:
HBO