

Showstopping GOT Tiered Cakes are not just desserts; they’re grand creations that bring a touch of Westerosi magic to any celebration. Whether you’re channeling the elegance of King’s Landing or the ruggedness of the North, these impressive cakes are sure to wow your guests. With a focus on flavor and visual impact, we cover essential cooking tips and ingredient substitutions to help you craft your own striking masterpiece at home.
Delightfully Decadent Chocolate Ganache Cake

Imagine a towering cake that steals the show at any gathering. This chocolate ganache cake is not just a dessert; it’s a centerpiece. The smooth, glossy ganache drips down the sides, creating a mouthwatering effect that tempts everyone. Topped with fresh berries, it’s a feast for the eyes and the taste buds.
This cake is perfect for fans of GOT Tiered Cakes, bringing a touch of drama and elegance to your table. The rich chocolate flavor pairs beautifully with the tartness of the berries, making every bite a delightful experience.
When making this cake, you can switch things up a bit. If you prefer a lighter cake, consider using a sponge cake instead of a dense chocolate cake. You can also swap out the berries for your favorite fruits, like sliced bananas or even citrus segments, to add a different twist.
Ingredients
- 2 cups all-purpose flour
- 2 cups granulated sugar
- 3/4 cup unsweetened cocoa powder
- 1 1/2 teaspoons baking powder
- 1 1/2 teaspoons baking soda
- 1 teaspoon salt
- 2 large eggs
- 1 cup whole milk
- 1/2 cup vegetable oil
- 2 teaspoons vanilla extract
- 1 cup boiling water
- 1 cup heavy cream
- 8 ounces semi-sweet chocolate, chopped
- Fresh berries for topping
Instructions
- Preheat your oven to 350°F (175°C). Grease and flour two 9-inch round cake pans.
- In a large bowl, mix flour, sugar, cocoa powder, baking powder, baking soda, and salt. Add eggs, milk, oil, and vanilla. Beat on medium speed for 2 minutes. Stir in boiling water until well combined.
- Pour the batter evenly into the prepared pans. Bake for 30-35 minutes or until a toothpick comes out clean. Let the cakes cool in the pans for 10 minutes, then remove them from the pans and cool completely on wire racks.
- For the ganache, heat the heavy cream in a saucepan until it just begins to simmer. Remove from heat and add the chopped chocolate. Stir until smooth and glossy.
- Once the cakes are cool, place one layer on a serving plate. Pour a portion of the ganache over the top, allowing it to drip down the sides. Place the second layer on top and repeat the process.
- Finish by decorating the top with fresh berries. Serve and enjoy!
Cooking Tip: If you want a richer flavor, consider adding a splash of espresso to the batter. For a dairy-free version, substitute almond milk and coconut cream.
Exquisite Red Velvet Layer Cake With Cream Cheese Frosting
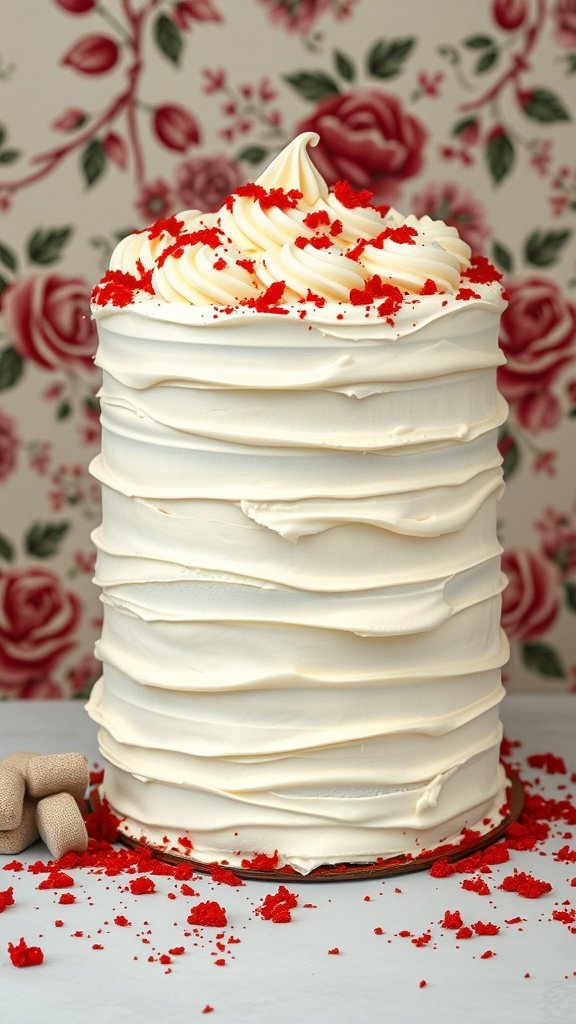
This stunning red velvet layer cake is a showstopper, perfect for any occasion. The rich red color, paired with smooth cream cheese frosting, makes it a delightful treat that catches the eye and pleases the palate. The layers are beautifully stacked, creating a tall and elegant appearance that’s sure to impress your guests.
The cake’s texture is soft and moist, while the cream cheese frosting adds a tangy sweetness that balances the flavors perfectly. Topped with a sprinkle of red velvet crumbs, this cake not only tastes amazing but looks fantastic too. It’s a great centerpiece for celebrations, especially for fans of GOT Tiered Cakes!
Ingredients
- 2 ½ cups all-purpose flour
- 1 ½ cups granulated sugar
- 1 teaspoon baking soda
- 1 teaspoon salt
- 1 teaspoon cocoa powder
- 1 ½ cups vegetable oil
- 1 cup buttermilk, room temperature
- 2 large eggs
- 2 tablespoons red food coloring
- 1 teaspoon vanilla extract
- 1 teaspoon white vinegar
- 8 oz cream cheese, softened
- 1 cup unsalted butter, softened
- 4 cups powdered sugar
- 1 teaspoon vanilla extract (for frosting)
Instructions
- Preheat the oven to 350°F (175°C). Grease and flour three 9-inch round cake pans.
- In a large bowl, whisk together flour, sugar, baking soda, salt, and cocoa powder.
- In another bowl, mix oil, buttermilk, eggs, food coloring, vanilla, and vinegar until well combined.
- Gradually add the wet ingredients to the dry ingredients, mixing until just combined.
- Divide the batter evenly among the prepared pans. Bake for 25-30 minutes or until a toothpick comes out clean.
- Let the cakes cool in the pans for 10 minutes, then transfer to wire racks to cool completely.
- For the frosting, beat cream cheese and butter together until smooth. Gradually add powdered sugar and vanilla, mixing until creamy.
- Once the cakes are cool, place one layer on a serving plate. Spread a layer of frosting on top, then add the second layer and repeat. Top with the final layer and frost the top and sides of the cake.
- Decorate with red velvet crumbs for a beautiful finish. Slice and enjoy!
Cooking Tips: If you want a deeper red color, feel free to add a bit more food coloring. For a lighter version, you can substitute half of the oil with applesauce. Make sure all ingredients are at room temperature for the best texture.
Lemon Zest And Blueberry Delight Cake
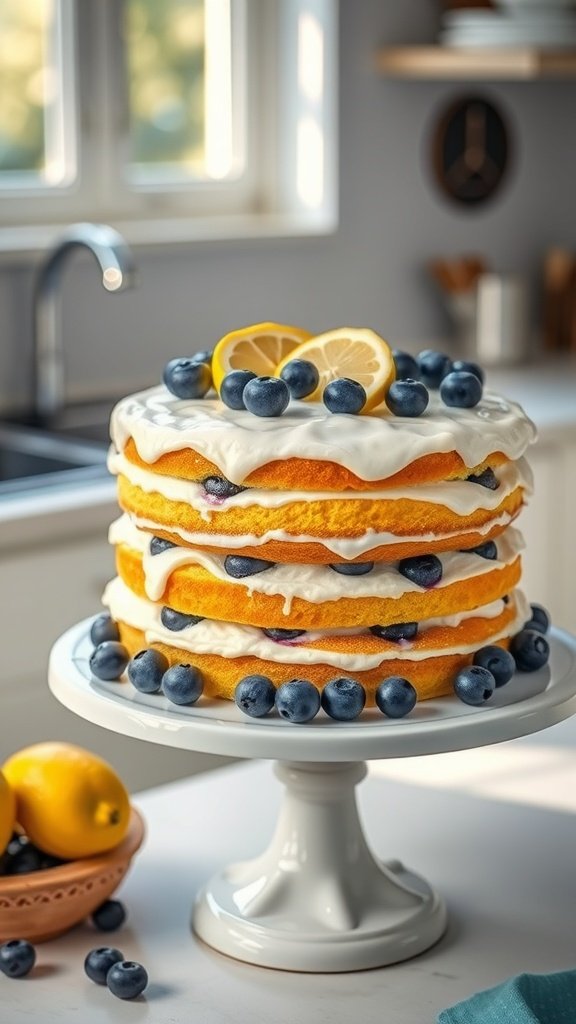
Imagine a cake that captures the essence of summer with its bright colors and refreshing flavors. The Lemon Zest and Blueberry Delight Cake is a showstopper, perfect for any occasion. This tiered cake features layers of fluffy lemon sponge, creamy frosting, and juicy blueberries, making it a delightful treat.
The cake is beautifully decorated with fresh blueberries and lemon slices on top, creating an eye-catching centerpiece. The combination of zesty lemon and sweet blueberries is a match made in heaven. Each bite is light and refreshing, making it ideal for warm days or special celebrations.
For those who love baking, this cake is a fun project. It’s not just about the taste; it’s about the joy of creating something beautiful. Plus, it’s a great way to impress your friends and family!
Ingredients
- 2 cups all-purpose flour
- 1 ½ cups granulated sugar
- 1 tablespoon baking powder
- ½ teaspoon salt
- ½ cup unsalted butter, softened
- 1 cup milk
- 3 large eggs
- 2 tablespoons lemon zest
- 1 teaspoon vanilla extract
- 1 cup fresh blueberries
- 2 cups heavy cream
- ½ cup powdered sugar
- 1 teaspoon lemon juice
Instructions
- Preheat the oven to 350°F (175°C). Grease and flour three 8-inch round cake pans.
- In a large bowl, mix flour, sugar, baking powder, and salt. Add softened butter, milk, eggs, lemon zest, and vanilla. Beat until smooth.
- Gently fold in the blueberries. Divide the batter evenly among the prepared pans.
- Bake for 25-30 minutes or until a toothpick comes out clean. Let the cakes cool in the pans for 10 minutes before transferring to wire racks.
- For the frosting, whip the heavy cream with powdered sugar and lemon juice until soft peaks form.
- Once the cakes are completely cool, layer them with frosting in between. Frost the top and sides of the cake, then decorate with extra blueberries and lemon slices.
- Chill for at least 30 minutes before serving to set the frosting.
Cooking Tips: If you want to make this cake gluten-free, substitute all-purpose flour with a gluten-free blend. You can also use frozen blueberries if fresh ones aren’t available, just make sure to thaw and drain them first. Enjoy your baking!
Ultimate Strawberry Shortcake With Whipped Cream
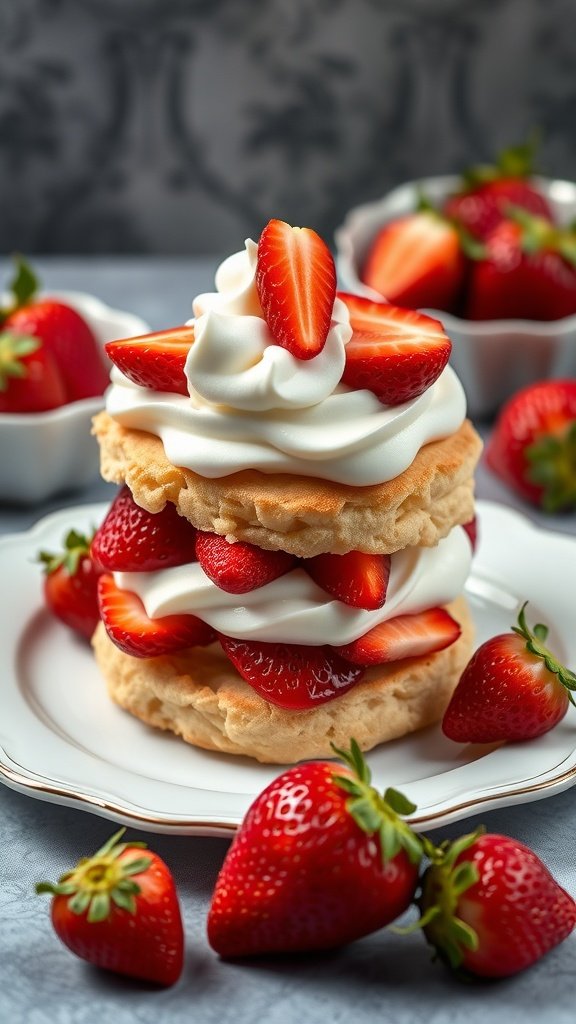
When it comes to showstopping desserts, nothing quite compares to a classic strawberry shortcake. This delightful treat layers fluffy biscuits, fresh strawberries, and whipped cream, creating a perfect balance of flavors and textures. The vibrant red strawberries pop against the light cream, making it not only delicious but also a feast for the eyes.
To make this cake even more special, consider using strawberries that are in season for the best flavor. You can also switch up the whipped cream with a flavored version, like vanilla or almond, to add a twist. This dessert is perfect for any occasion, whether it’s a summer picnic or a fancy dinner party.
Here’s how to whip up this ultimate strawberry shortcake:
Ingredients
- 2 cups all-purpose flour
- 1/4 cup granulated sugar
- 1 tablespoon baking powder
- 1/2 teaspoon salt
- 1/2 cup unsalted butter, cold and cubed
- 1 cup heavy cream
- 2 cups fresh strawberries, hulled and sliced
- 1/4 cup powdered sugar (for whipped cream)
- 1 teaspoon vanilla extract
Instructions
- Preheat your oven to 425°F (220°C). Line a baking sheet with parchment paper.
- In a large bowl, mix flour, granulated sugar, baking powder, and salt. Add the cold butter and mix until the mixture resembles coarse crumbs.
- Pour in the heavy cream and stir until just combined. Do not overmix.
- Turn the dough onto a floured surface and gently knead it a few times. Pat it into a 1-inch thick rectangle and cut out rounds using a biscuit cutter.
- Place the rounds on the prepared baking sheet and bake for 15-20 minutes or until golden brown.
- While the biscuits cool, whip the heavy cream with powdered sugar and vanilla until soft peaks form.
- To assemble, slice the biscuits in half. Layer strawberries and whipped cream between the halves, then top with more strawberries and cream.
Cooking Tips: For a richer flavor, you can add a tablespoon of lemon zest to the biscuit dough. If you prefer a lighter whipped cream, try using coconut cream instead of heavy cream.
Enjoy this delightful strawberry shortcake as part of your GOT Tiered Cakes collection, and watch it steal the show at your next gathering!
Tropical Paradise Coconut Cake With Pineapple Filling
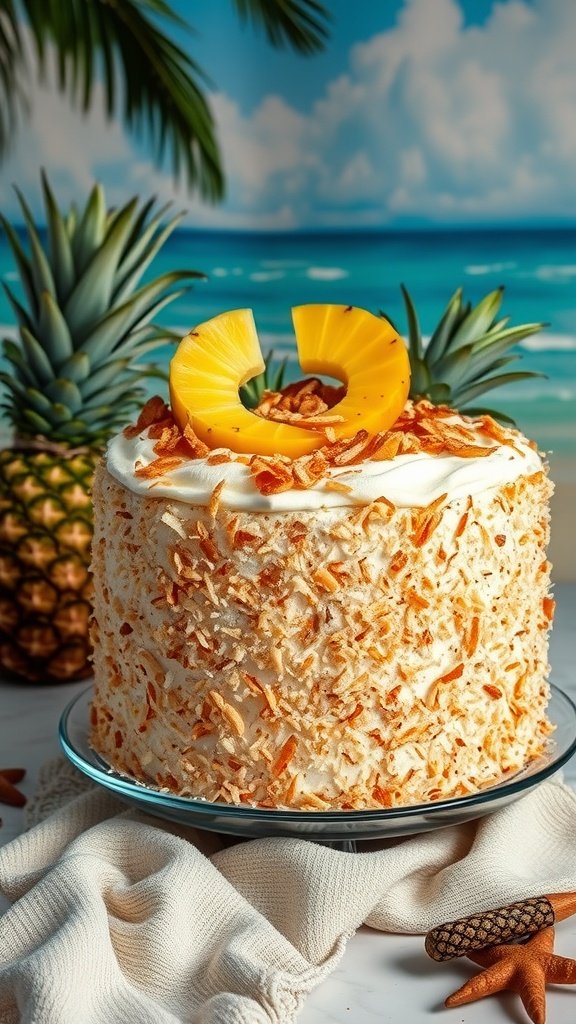
Imagine a cake that transports you straight to a tropical beach. This Tropical Paradise Coconut Cake is a showstopper, perfect for any celebration. With its fluffy layers filled with sweet pineapple and covered in toasted coconut, it’s a delightful treat that captures the essence of summer.
The cake is beautifully decorated, featuring a generous layer of coconut flakes and topped with fresh pineapple slices. The vibrant colors and textures make it a feast for the eyes and the taste buds. It’s a great centerpiece for gatherings, and everyone will be asking for a slice!
Making this cake is easier than you might think. You’ll need simple ingredients that come together to create a moist and flavorful dessert. Plus, it’s a fantastic way to impress your friends and family with your baking skills.
Ingredients
- 2 cups all-purpose flour
- 1 1/2 cups granulated sugar
- 1 tablespoon baking powder
- 1/2 teaspoon salt
- 1 cup unsweetened coconut milk
- 1/2 cup unsalted butter, softened
- 4 large eggs
- 1 cup shredded coconut
- 1 cup crushed pineapple, drained
- 1 cup heavy cream
- 1/4 cup powdered sugar
- 1 cup toasted coconut flakes for decoration
Instructions
- Preheat your oven to 350°F (175°C). Grease and flour two 9-inch round cake pans.
- In a large bowl, mix flour, sugar, baking powder, and salt. Add coconut milk, softened butter, and eggs. Beat until smooth and creamy.
- Fold in shredded coconut and crushed pineapple until evenly distributed.
- Divide the batter between the prepared pans. Bake for 25-30 minutes or until a toothpick comes out clean.
- Let the cakes cool in the pans for 10 minutes, then transfer to wire racks to cool completely.
- For the frosting, whip heavy cream and powdered sugar until soft peaks form. Spread a layer of frosting between the cooled cake layers and on top and sides of the cake.
- Press toasted coconut flakes onto the sides of the cake and garnish with pineapple slices on top.
Cooking Tips: If you want a richer flavor, consider using coconut cream instead of coconut milk. You can also substitute the crushed pineapple with mango for a different tropical twist. Enjoy this cake chilled for the best experience!
Moist Carrot Cake With Cream Cheese Frosting

When it comes to showstopping GOT Tiered Cakes, a moist carrot cake with cream cheese frosting is a true delight. This cake stands tall with its three layers, each filled with the rich flavors of carrots and spices. The cream cheese frosting drapes over the layers like a soft blanket, making it visually stunning and incredibly tasty.
The cake is adorned with fresh flowers and walnuts, adding a touch of elegance. The natural sweetness of the carrots pairs perfectly with the tangy frosting, creating a balance that everyone loves. This cake is perfect for celebrations or just a cozy afternoon treat.
For those looking to make this cake, here’s a simple recipe to follow. You can easily swap out ingredients based on what you have at home. For instance, if you don’t have walnuts, pecans work just as well. If you’re looking for a lighter option, you can substitute some of the oil with unsweetened applesauce.
Ingredients
- 2 cups all-purpose flour
- 2 cups granulated sugar
- 1 teaspoon baking powder
- 1 teaspoon baking soda
- 1 teaspoon ground cinnamon
- 1/2 teaspoon ground nutmeg
- 1/2 teaspoon salt
- 1 cup vegetable oil
- 4 large eggs
- 3 cups grated carrots
- 1 cup crushed pineapple, drained
- 1 cup walnuts, chopped (or pecans)
- 8 oz cream cheese, softened
- 1/2 cup unsalted butter, softened
- 4 cups powdered sugar
- 1 teaspoon vanilla extract
Instructions
- Preheat your oven to 350°F (175°C). Grease and flour three 9-inch round cake pans.
- In a large bowl, mix flour, sugar, baking powder, baking soda, cinnamon, nutmeg, and salt.
- In another bowl, whisk together oil and eggs until combined. Stir in grated carrots and crushed pineapple.
- Combine the wet and dry ingredients, mixing until just combined. Fold in the chopped walnuts.
- Divide the batter evenly among the prepared pans. Bake for 25-30 minutes or until a toothpick comes out clean.
- Let the cakes cool in the pans for 10 minutes, then transfer to wire racks to cool completely.
- For the frosting, beat together cream cheese and butter until smooth. Gradually add powdered sugar and vanilla, mixing until creamy.
- Once the cakes are cool, spread frosting between the layers and over the top and sides of the cake. Decorate with additional walnuts and edible flowers if desired.
Enjoy your homemade moist carrot cake with cream cheese frosting, a true centerpiece for any occasion!
Rich And Creamy Tiramisu Layer Cake
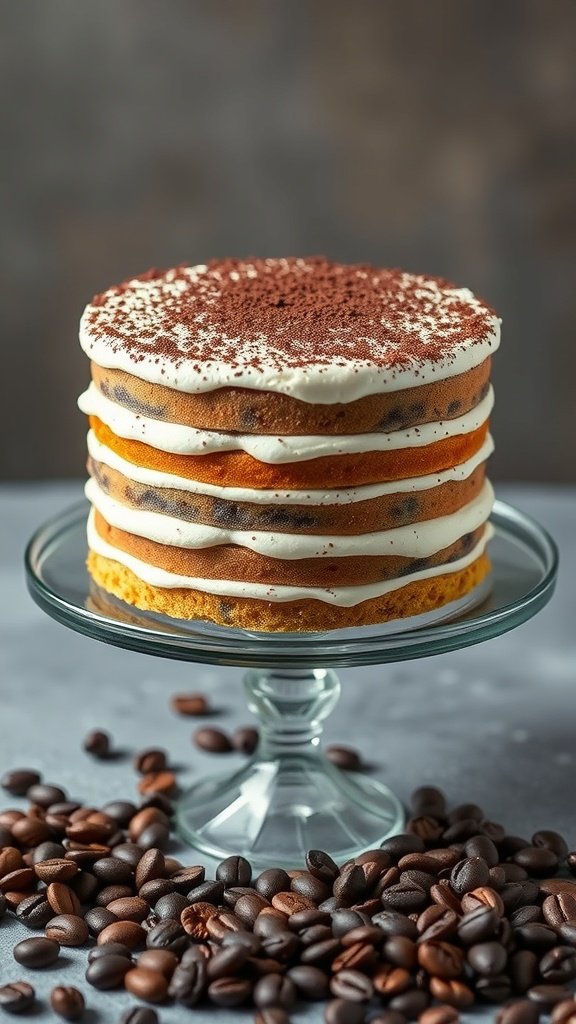
Imagine a cake that brings together the classic flavors of tiramisu in a stunning layered design. This Rich and Creamy Tiramisu Layer Cake is a perfect showstopper for any occasion. Each layer is soft and fluffy, filled with a luscious coffee-infused cream that makes every bite a delight.
The cake features alternating layers of coffee-soaked sponge and a rich mascarpone frosting, topped with a dusting of cocoa powder. The combination of textures and flavors is simply irresistible. It’s a fantastic way to impress your guests while satisfying your sweet tooth.
For those who love the idea of GOT Tiered Cakes, this dessert takes the tiered concept to a new level with its elegant presentation and rich taste. It’s not just a treat; it’s a centerpiece!
Ingredients
- 1 cup strong brewed coffee, cooled
- 4 large eggs
- 1 cup granulated sugar
- 1 cup all-purpose flour
- 1 teaspoon baking powder
- 1/2 cup unsalted butter, melted
- 1 cup mascarpone cheese
- 1 cup heavy cream
- 1/2 cup powdered sugar
- 1 teaspoon vanilla extract
- Cocoa powder for dusting
Instructions
- Preheat your oven to 350°F (175°C). Grease and flour three 8-inch round cake pans.
- In a bowl, whisk together eggs and granulated sugar until light and fluffy. Gradually add melted butter and coffee, mixing well.
- In another bowl, combine flour and baking powder. Slowly add to the egg mixture, stirring until just combined.
- Divide the batter evenly among the prepared pans. Bake for 25-30 minutes or until a toothpick comes out clean. Let cool in pans for 10 minutes before transferring to wire racks.
- For the frosting, beat mascarpone cheese, heavy cream, powdered sugar, and vanilla extract until soft peaks form.
- Once the cakes are cool, place one layer on a serving plate. Spread a layer of frosting on top, then repeat with the second and third layers.
- Dust the top with cocoa powder before serving. Enjoy your delicious tiramisu layer cake!
Cooking Tips: If you want a stronger coffee flavor, use espresso instead of brewed coffee. You can also substitute the mascarpone with cream cheese for a different twist. Make sure to let the cake chill for a few hours before serving; it helps the flavors meld beautifully!
Decadent S’Mores Cake With Toasted Marshmallow Frosting
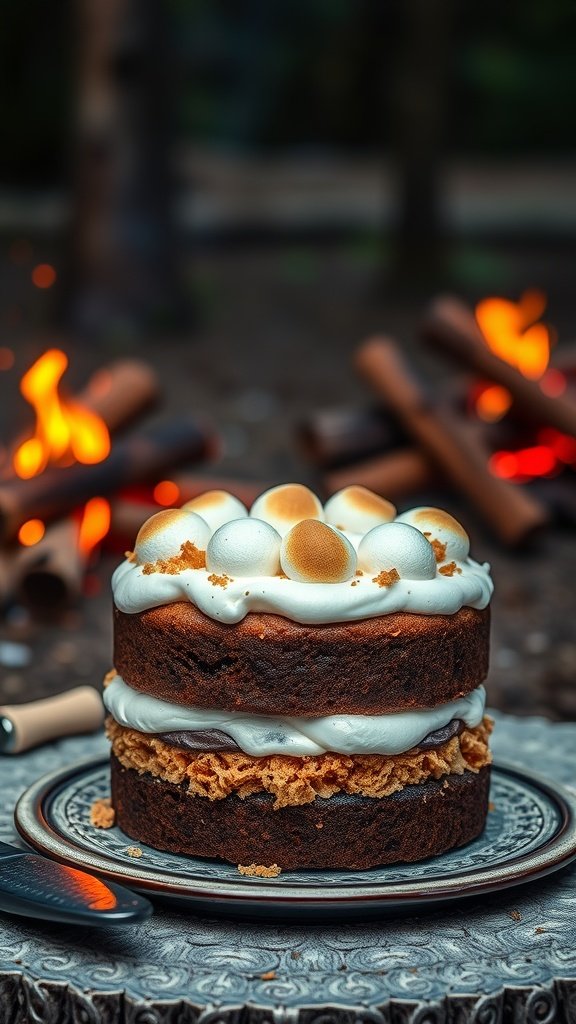
Imagine a cake that captures the essence of a campfire treat. This S’mores cake is a showstopper, perfect for any gathering. The layers of rich chocolate cake are complemented by a creamy toasted marshmallow frosting that takes you right back to those cozy nights by the fire.
The cake is beautifully layered, showcasing a crunchy graham cracker base that adds texture and flavor. Topped with perfectly toasted marshmallows, it’s a feast for the eyes as much as it is for the taste buds. This is one of those GOT Tiered Cakes that will leave everyone wanting more!
Ingredients
- 1 ¾ cups all-purpose flour
- 1 ¾ cups granulated sugar
- ¾ cup unsweetened cocoa powder
- 1 ½ teaspoons baking powder
- 1 ½ teaspoons baking soda
- 1 teaspoon salt
- 2 large eggs
- 1 cup whole milk
- ½ cup vegetable oil
- 2 teaspoons vanilla extract
- 1 cup boiling water
- 1 cup graham cracker crumbs
- 1 cup heavy cream
- 1 cup mini marshmallows
- ½ cup powdered sugar
- 1 teaspoon vanilla extract (for frosting)
Instructions
- Preheat the oven to 350°F (175°C). Grease and flour two 9-inch round cake pans.
- In a large bowl, mix flour, sugar, cocoa powder, baking powder, baking soda, and salt. Add eggs, milk, oil, and vanilla. Beat on medium speed for 2 minutes. Stir in boiling water until well combined.
- Pour the batter evenly into the prepared pans. Bake for 30-35 minutes or until a toothpick comes out clean. Let cool in pans for 10 minutes, then transfer to wire racks to cool completely.
- For the frosting, whip the heavy cream until soft peaks form. Gradually add powdered sugar and vanilla, continuing to whip until stiff peaks form.
- Assemble the cake by placing one layer on a serving plate. Spread a layer of frosting on top, then sprinkle with graham cracker crumbs. Place the second layer on top and frost the entire cake.
- Top with mini marshmallows and use a kitchen torch to toast them lightly. Serve and enjoy!
Cooking Tips: If you want a richer chocolate flavor, consider adding a bit of espresso powder to the batter. For a lighter frosting, you can substitute half of the heavy cream with whipped topping.
Ingredient Substitutions: If you don’t have graham crackers, crushed digestive biscuits work well too. For a gluten-free option, use a gluten-free flour blend in place of all-purpose flour.
Elegant Vanilla Bean Layer Cake With Raspberry Jam
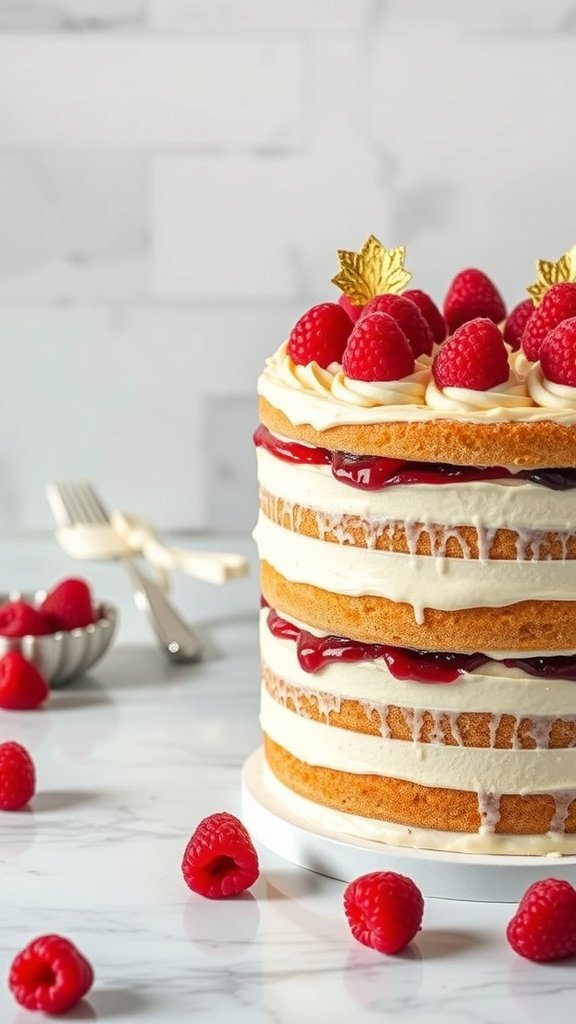
This stunning vanilla bean layer cake is a showstopper, perfect for any celebration. The layers are light and fluffy, filled with a delightful raspberry jam that adds a burst of flavor. Topped with creamy frosting and fresh raspberries, it’s not just a treat for the taste buds but also a feast for the eyes.
The cake features three generous layers, each showcasing the beautiful contrast between the soft vanilla sponge and the vibrant raspberry jam. The addition of fresh raspberries on top elevates its appeal, making it a perfect centerpiece for gatherings. Whether you’re a fan of Game of Thrones or just love tiered cakes, this recipe will surely impress.
For those looking to customize, consider using different jams or fruits. You can swap the raspberry jam for strawberry or blueberry for a unique twist. If you’re short on time, store-bought frosting works well too!
Ingredients
- 2 ½ cups all-purpose flour
- 2 ½ teaspoons baking powder
- ½ teaspoon salt
- 1 cup unsalted butter, softened
- 2 cups granulated sugar
- 4 large eggs
- 1 tablespoon vanilla bean paste
- 1 cup whole milk
- 1 cup raspberry jam
- 2 cups heavy cream
- ½ cup powdered sugar
- Fresh raspberries for decoration
Instructions
- Preheat the oven to 350°F (175°C). Grease and flour three 8-inch round cake pans.
- In a bowl, whisk together flour, baking powder, and salt. Set aside.
- In a large mixing bowl, cream together the softened butter and granulated sugar until light and fluffy. Add eggs one at a time, mixing well after each addition. Stir in the vanilla bean paste.
- Gradually add the dry ingredients to the butter mixture, alternating with the milk. Mix until just combined.
- Divide the batter evenly among the prepared pans. Bake for 25-30 minutes or until a toothpick inserted in the center comes out clean.
- Let the cakes cool in the pans for 10 minutes before transferring to wire racks to cool completely.
- Once cooled, place one layer on a serving plate. Spread a layer of raspberry jam on top. Add the second layer and repeat. Place the final layer on top.
- In a separate bowl, whip the heavy cream and powdered sugar until stiff peaks form. Frost the top and sides of the cake with the whipped cream.
- Decorate with fresh raspberries and serve!
Cooking Tip: For a richer flavor, consider adding a splash of almond extract to the cake batter. You can also use a mix of different berries for the jam layer to create a delightful medley of flavors.
Ingredient Substitution: If you don’t have vanilla bean paste, vanilla extract works just fine. For a dairy-free version, substitute the butter and milk with plant-based alternatives.
Chocolate Chip Cookie Dough Layer Cake
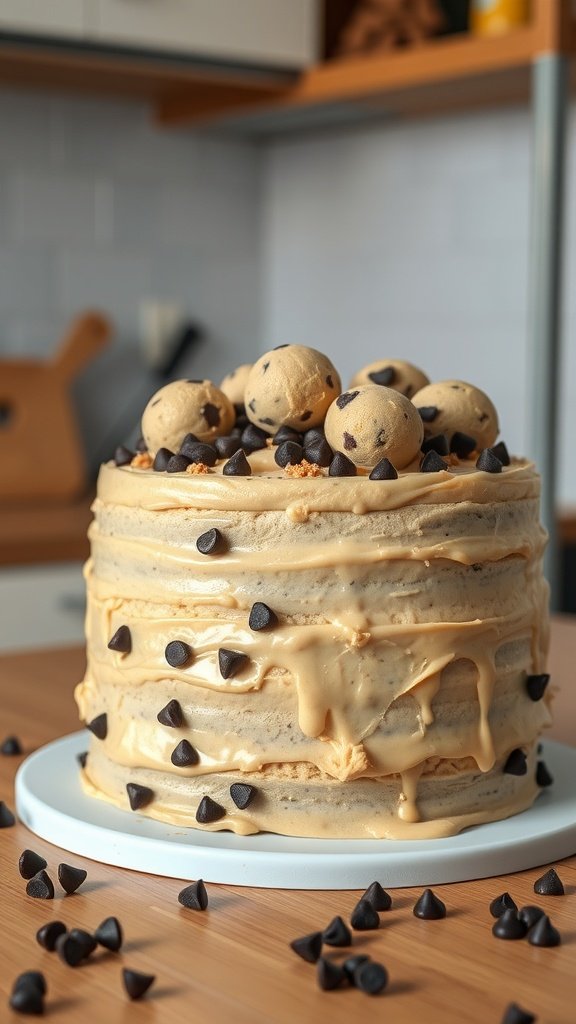
Get ready to feast your eyes on this stunning Chocolate Chip Cookie Dough Layer Cake! This cake is a true showstopper, perfect for any celebration. With its multiple layers, each filled with cookie dough goodness, it’s a dessert that will impress everyone.
The cake features soft, fluffy layers that are generously frosted with a creamy cookie dough frosting. Topped with cookie dough balls and chocolate chips, it’s a delightful treat that looks as good as it tastes. This cake is not just a feast for the eyes; it’s a delicious combination of flavors that will have everyone coming back for seconds.
When making this cake, you can use store-bought cookie dough for a quick option or whip up your own for a homemade touch. If you want to switch things up, consider using dark chocolate chips or adding nuts for extra crunch. This cake is versatile and can be tailored to your taste!
Ingredients
- 2 1/2 cups all-purpose flour
- 1 1/2 teaspoons baking powder
- 1 teaspoon baking soda
- 1/2 teaspoon salt
- 1 cup unsalted butter, softened
- 1 cup granulated sugar
- 1 cup brown sugar, packed
- 4 large eggs
- 2 teaspoons vanilla extract
- 2 cups chocolate chips
- 1 cup cookie dough (homemade or store-bought)
- 1 cup heavy cream
- 1 cup powdered sugar
Instructions
- Preheat the oven to 350°F (175°C). Grease and flour three 9-inch round cake pans.
- In a bowl, whisk together flour, baking powder, baking soda, and salt. Set aside.
- In a large mixing bowl, cream together the softened butter, granulated sugar, and brown sugar until light and fluffy. Add eggs one at a time, mixing well after each addition. Stir in vanilla extract.
- Gradually add the dry ingredients to the wet mixture, mixing until just combined. Fold in chocolate chips.
- Divide the batter evenly among the prepared pans. Bake for 25-30 minutes or until a toothpick comes out clean. Let the cakes cool in the pans for 10 minutes before transferring to wire racks to cool completely.
- For the frosting, beat the heavy cream until soft peaks form. Gradually add powdered sugar and mix until stiff peaks form. Fold in cookie dough gently.
- Once the cakes are completely cool, spread frosting between each layer and on top of the cake. Decorate with extra cookie dough balls and chocolate chips.
- Slice and enjoy your delicious Chocolate Chip Cookie Dough Layer Cake!
Cooking Tips: If you want a richer flavor, try browning the butter before mixing it with the sugars. For a lighter cake, substitute half of the butter with unsweetened applesauce.
Ingredient Substitutions: You can use gluten-free flour for a gluten-free version or coconut sugar instead of brown sugar for a healthier option.
Indulgent Peanut Butter Cup Cake
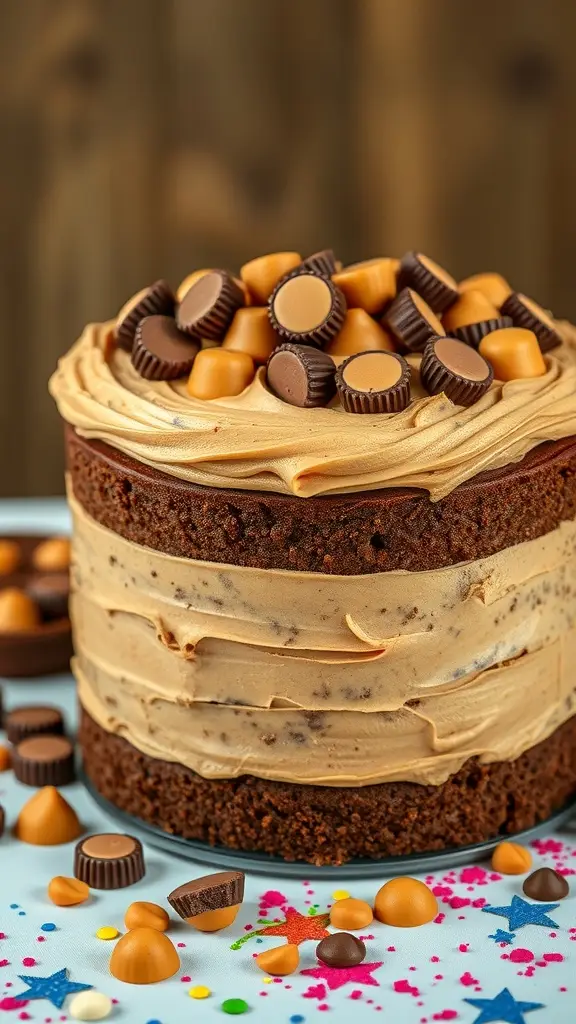
The Indulgent Peanut Butter Cup Cake is a true showstopper, perfect for any celebration. This cake features rich layers of chocolate cake, creamy peanut butter frosting, and a generous topping of peanut butter cups. The combination of flavors is simply irresistible!
As you look at this stunning cake, you can see the smooth, creamy frosting that envelops each layer. The chocolate cake is moist and fluffy, while the peanut butter frosting adds a delightful creaminess. Topped with an assortment of peanut butter cups, this cake is a feast for the eyes and the taste buds.
To make this cake, gather your ingredients and follow the simple steps below. You can even customize it by using different types of chocolate or adding a sprinkle of sea salt for an extra kick!
Ingredients
- 1 3/4 cups all-purpose flour
- 1 3/4 cups granulated sugar
- 3/4 cup unsweetened cocoa powder
- 1 1/2 teaspoons baking powder
- 1 1/2 teaspoons baking soda
- 1 teaspoon salt
- 2 large eggs
- 1 cup whole milk
- 1/2 cup vegetable oil
- 2 teaspoons vanilla extract
- 1 cup boiling water
- 1 cup creamy peanut butter
- 1/2 cup unsalted butter, softened
- 4 cups powdered sugar
- 1/4 cup heavy cream
- Peanut butter cups for topping
Instructions
- Preheat your oven to 350°F (175°C). Grease and flour two 9-inch round cake pans.
- In a large bowl, mix flour, sugar, cocoa powder, baking powder, baking soda, and salt. Add eggs, milk, oil, and vanilla. Beat on medium speed for 2 minutes.
- Stir in boiling water until well combined. Pour the batter evenly into the prepared pans.
- Bake for 30-35 minutes or until a toothpick comes out clean. Let the cakes cool in the pans for 10 minutes, then transfer to wire racks to cool completely.
- For the frosting, beat peanut butter and butter together until smooth. Gradually add powdered sugar and heavy cream, mixing until fluffy.
- Once the cakes are cool, spread frosting between the layers and on top. Decorate with peanut butter cups.
Cooking Tips: If you want a richer chocolate flavor, consider using dark cocoa powder. For a lighter frosting, you can substitute half of the peanut butter with whipped cream cheese.
This cake is sure to impress anyone who lays eyes on it. Enjoy every slice of this indulgent treat!
Classic Italian Cream Cake With Nuts And Coconut
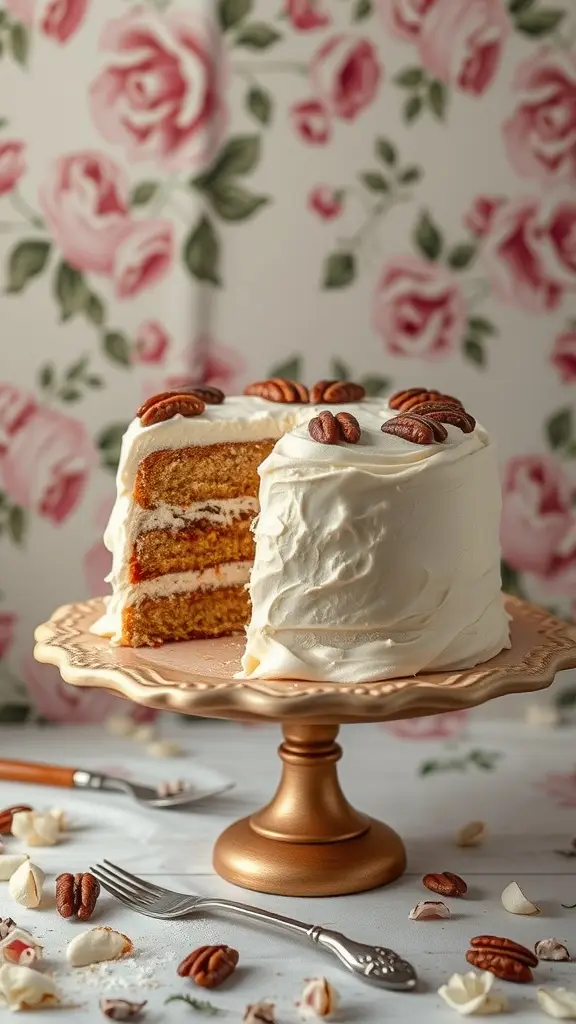
This Classic Italian Cream Cake is a true showstopper, perfect for any occasion. The layers are light and fluffy, filled with a delightful mix of nuts and coconut. The cake is beautifully frosted with a cream cheese icing that adds a rich, tangy flavor. The presentation is stunning, with the cake sitting elegantly on a golden pedestal, surrounded by pecans and delicate meringues.
The combination of textures and flavors makes this cake a favorite. The nuts provide a satisfying crunch, while the coconut adds a tropical twist. It’s a cake that not only looks amazing but tastes incredible too. Whether you’re celebrating a birthday or just want to treat yourself, this cake is sure to impress.
Ingredients
- 2 cups all-purpose flour
- 1 teaspoon baking soda
- 1/2 teaspoon salt
- 1 cup unsalted butter, softened
- 2 cups granulated sugar
- 4 large eggs, separated
- 1 teaspoon vanilla extract
- 1 cup buttermilk
- 1 cup shredded coconut
- 1 cup chopped pecans
- 8 oz cream cheese, softened
- 4 cups powdered sugar
- 1/2 cup unsalted butter, softened
- 1 teaspoon vanilla extract (for frosting)
Instructions
- Preheat the oven to 350°F (175°C). Grease and flour three 9-inch round cake pans.
- In a bowl, mix flour, baking soda, and salt. Set aside.
- In a large bowl, cream together the butter and sugar until light and fluffy. Add egg yolks one at a time, mixing well after each addition. Stir in vanilla.
- Gradually add the flour mixture and buttermilk, alternating between the two, until just combined. Fold in coconut and pecans.
- In another bowl, beat egg whites until stiff peaks form. Gently fold the egg whites into the batter.
- Divide the batter evenly among the prepared pans. Bake for 25-30 minutes or until a toothpick comes out clean. Let the cakes cool in the pans for 10 minutes before transferring to wire racks.
- For the frosting, beat together cream cheese, butter, powdered sugar, and vanilla until smooth and creamy.
- Once the cakes are completely cool, frost between the layers and on the top and sides of the cake. Decorate with additional pecans and coconut if desired.
Cooking Tips: For a richer flavor, toast the pecans before adding them to the batter. If you prefer a lighter frosting, you can use whipped cream instead of cream cheese. You can also substitute the buttermilk with regular milk mixed with a tablespoon of vinegar for a similar effect.
Sassy Lemon Meringue Cake With Zesty Whip
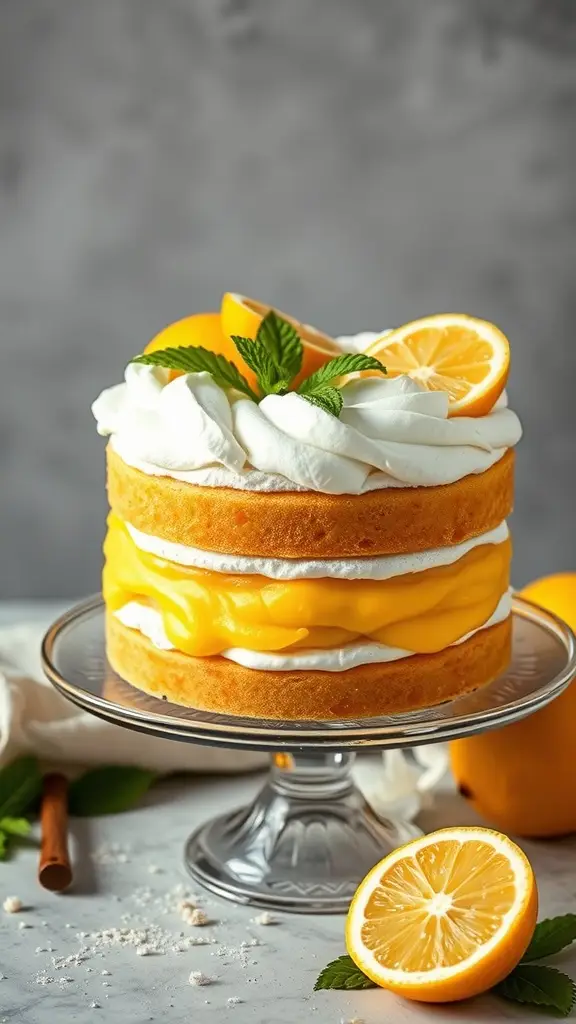
This Sassy Lemon Meringue Cake is a real showstopper! With its bright yellow filling and fluffy whipped topping, it brings a burst of sunshine to any gathering. The layers of soft sponge cake are perfectly complemented by the tangy lemon curd and sweet meringue, making it a delightful treat for any occasion.
The cake is not just about looks; it’s packed with flavor. The zesty lemon filling adds a refreshing twist, while the whipped cream topping provides a light and airy finish. Garnished with lemon slices and mint leaves, this cake is as pleasing to the eye as it is to the palate.
Ready to impress your guests? Let’s get baking!
Ingredients
- 1 ½ cups all-purpose flour
- 1 cup granulated sugar
- ½ cup unsalted butter, softened
- 3 large eggs
- 1 tablespoon baking powder
- ½ cup milk
- 1 cup lemon curd (store-bought or homemade)
- 1 cup heavy cream
- 2 tablespoons powdered sugar
- 1 teaspoon vanilla extract
- Fresh lemon slices and mint for garnish
Instructions
- Preheat your oven to 350°F (175°C). Grease and flour two 8-inch round cake pans.
- In a mixing bowl, cream together the softened butter and granulated sugar until light and fluffy. Add the eggs one at a time, mixing well after each addition.
- In another bowl, combine the flour and baking powder. Gradually add this to the butter mixture, alternating with the milk. Mix until just combined.
- Divide the batter evenly between the prepared pans. Bake for 25-30 minutes, or until a toothpick inserted in the center comes out clean. Let the cakes cool in the pans for 10 minutes, then transfer to wire racks to cool completely.
- Once cooled, place one cake layer on a serving plate. Spread the lemon curd evenly over the top. Place the second layer on top.
- In a separate bowl, whip the heavy cream with powdered sugar and vanilla until soft peaks form. Spread the whipped cream over the top of the cake.
- Garnish with fresh lemon slices and mint leaves. Slice and serve!
Cooking Tips: If you want a richer flavor, consider adding a bit of lemon zest to the batter. For a lighter version, you can use Greek yogurt instead of butter.
Ingredient Substitutions: If you don’t have lemon curd, you can make a quick version by mixing lemon juice, sugar, and egg yolks over low heat until thickened. You can also use a dairy-free cream alternative for the whipped topping.
Gourmet Matcha Green Tea Layer Cake
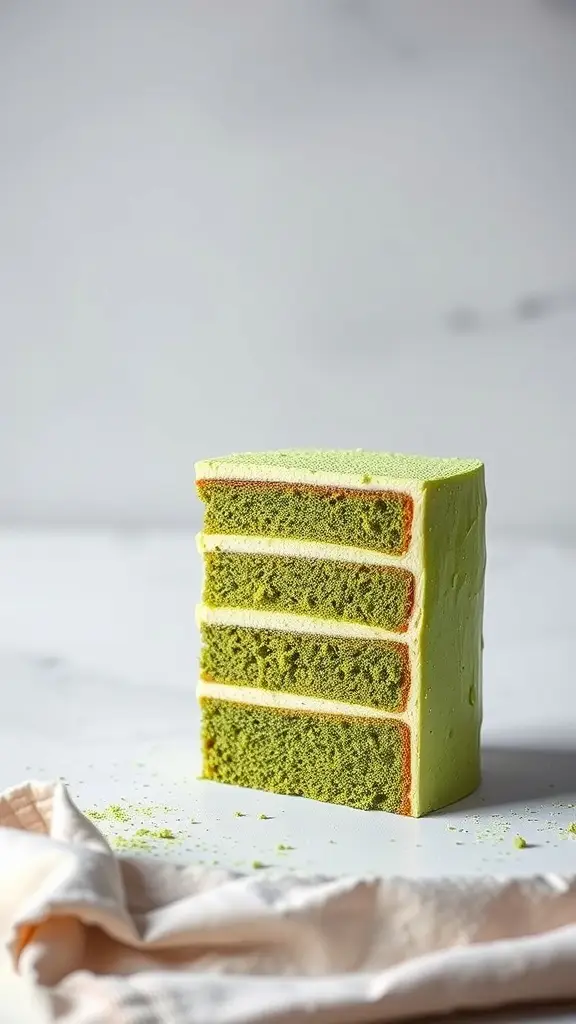
Imagine a cake that not only looks stunning but also tastes amazing. The Gourmet Matcha Green Tea Layer Cake is a showstopper, perfect for any occasion. Its vibrant green layers are made with high-quality matcha, giving it a rich flavor and a beautiful appearance. Each slice reveals a delightful contrast between the soft, fluffy cake and the smooth frosting.
This cake is not just about looks; it’s packed with flavor. The matcha adds an earthy note that pairs wonderfully with the sweetness of the frosting. It’s a great way to impress your guests and satisfy your sweet tooth at the same time. Plus, it’s a fun twist on traditional tiered cakes, making it a standout choice for those who love unique desserts.
Ready to bake your own? Here’s a simple recipe to get you started!
Ingredients
- 2 cups all-purpose flour
- 1 1/2 cups granulated sugar
- 1/2 cup unsalted butter, softened
- 1 cup milk
- 4 large eggs
- 2 tablespoons matcha green tea powder
- 2 teaspoons baking powder
- 1 teaspoon vanilla extract
- 1/2 teaspoon salt
- 2 cups heavy cream (for frosting)
- 1/2 cup powdered sugar (for frosting)
- 1 tablespoon matcha green tea powder (for frosting)
Instructions
- Preheat your oven to 350°F (175°C). Grease and flour three 8-inch round cake pans.
- In a large bowl, cream together the softened butter and granulated sugar until light and fluffy. Add in the eggs, one at a time, mixing well after each addition.
- In another bowl, whisk together the flour, baking powder, matcha powder, and salt. Gradually add this dry mixture to the wet ingredients, alternating with the milk. Stir in the vanilla extract.
- Divide the batter evenly among the prepared pans. Bake for 25-30 minutes, or until a toothpick inserted into the center comes out clean. Let the cakes cool in the pans for 10 minutes before transferring to wire racks to cool completely.
- For the frosting, whip the heavy cream until soft peaks form. Gradually add the powdered sugar and matcha powder, continuing to whip until stiff peaks form.
- Once the cakes are completely cool, spread a layer of frosting between each cake layer. Frost the top and sides of the cake as desired.
- Slice, serve, and enjoy your Gourmet Matcha Green Tea Layer Cake!
Cooking Tips: If you want a stronger matcha flavor, feel free to add more matcha powder to the batter or frosting. For a lighter cake, you can substitute half of the all-purpose flour with cake flour.
Ingredient Substitutions: If you don’t have matcha powder, you can use green tea powder, but the flavor will be different. For a dairy-free option, substitute the butter and milk with coconut oil and almond milk.
Fluffy Angel Food Cake With Seasonal Fruits
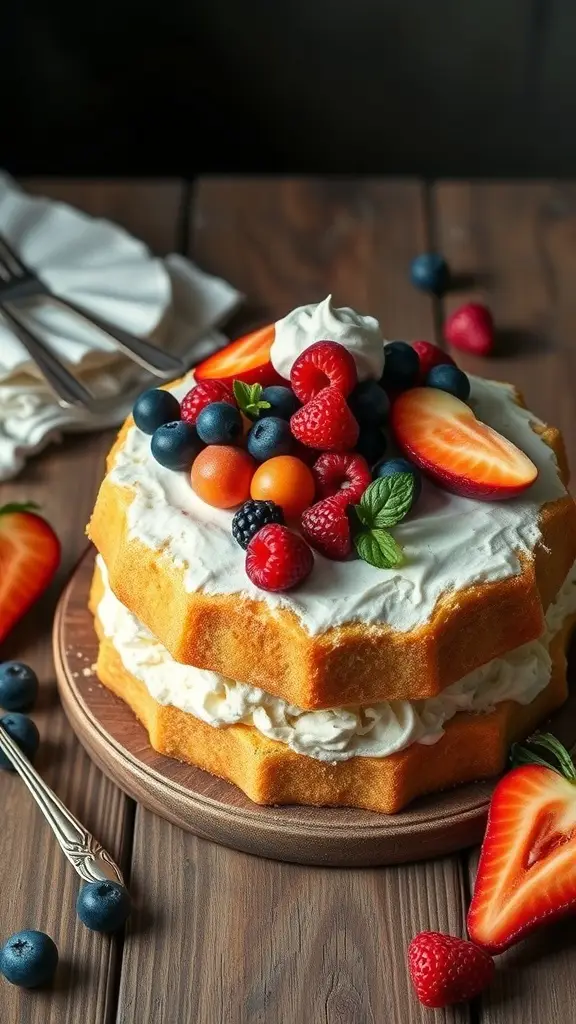
Imagine a cake that looks as light as a cloud and tastes like a dream. That’s what a fluffy angel food cake is all about! This cake is perfect for showcasing seasonal fruits, making it a star in any dessert lineup. The light, airy texture pairs beautifully with fresh berries and other fruits, creating a delightful balance of flavors.
The cake itself is made primarily from egg whites, sugar, and flour, resulting in a soft and spongy treat. Top it off with whipped cream and a colorful array of fruits, and you have a showstopper that fits right into the GOT Tiered Cakes theme. It’s not just a dessert; it’s a centerpiece!
When it comes to seasonal fruits, you can’t go wrong with strawberries, blueberries, raspberries, and peaches. They add a burst of color and flavor that elevates the cake to another level. Feel free to mix and match based on what’s available at your local market!
Ingredients
- 1 cup egg whites (about 8-10 large eggs)
- 1 cup granulated sugar
- 1 cup cake flour
- 1 teaspoon cream of tartar
- 1 teaspoon vanilla extract
- 1/4 teaspoon salt
- 2 cups mixed seasonal fruits (strawberries, blueberries, raspberries, peaches)
- 1 cup heavy whipping cream
- 2 tablespoons powdered sugar
Instructions
- Preheat your oven to 350°F (175°C). In a large mixing bowl, beat the egg whites until foamy. Add cream of tartar and continue beating until soft peaks form.
- Gradually add granulated sugar, beating until stiff peaks form. Gently fold in vanilla extract and salt.
- Sift cake flour over the egg mixture in three parts, folding gently after each addition to maintain the airy texture.
- Pour the batter into an ungreased tube pan and smooth the top. Bake for 30-35 minutes until golden and a toothpick comes out clean.
- Once baked, invert the pan to cool completely. After cooling, run a knife around the edges to release the cake.
- Whip the heavy cream with powdered sugar until soft peaks form. Spread whipped cream over the cooled cake.
- Top with your choice of seasonal fruits and serve!
Cooking Tips: Make sure to use room temperature egg whites for better volume. If you don’t have cake flour, you can substitute it with all-purpose flour by removing 2 tablespoons and adding 2 tablespoons of cornstarch.
Enjoy this fluffy angel food cake as a light dessert or a sweet treat at your next gathering!
Chocolate Raspberry Layer Cake With Ganache Glaze
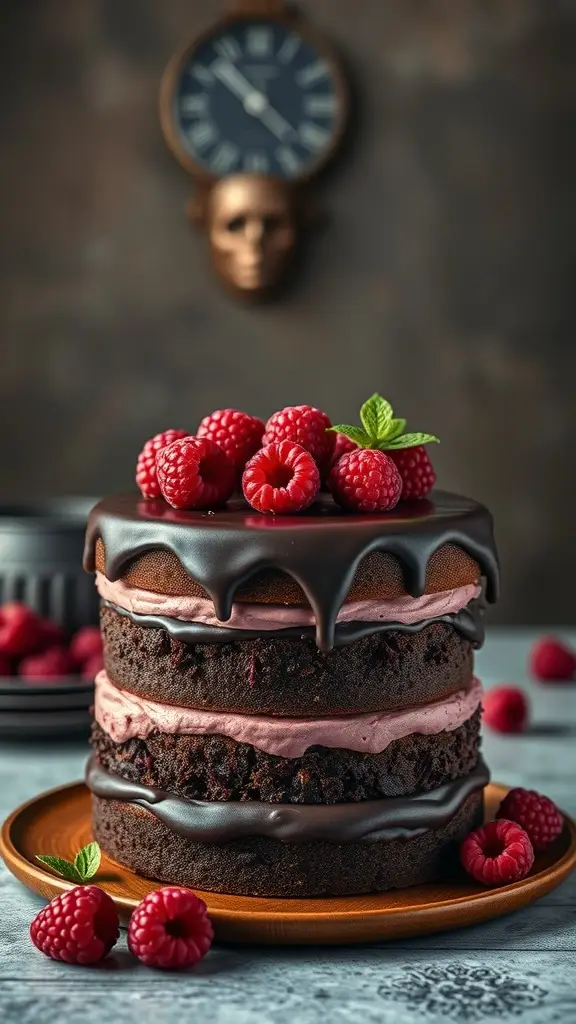
This Chocolate Raspberry Layer Cake is a true showstopper, perfect for any occasion. With its rich chocolate layers and fresh raspberry filling, it brings a delightful balance of flavors. The glossy ganache glaze adds a touch of elegance, making it a centerpiece worthy of any celebration.
The cake features three moist chocolate layers, each filled with a luscious raspberry cream. Topped with a generous drizzle of chocolate ganache and fresh raspberries, it’s both beautiful and delicious. This creation is a fantastic addition to the world of GOT Tiered Cakes, combining drama and taste in every slice.
For those looking to impress, this cake is sure to do the trick. Serve it at parties, birthdays, or just as a treat for yourself. Pair it with a scoop of vanilla ice cream for an extra special dessert!
Ingredients
- 1 ¾ cups all-purpose flour
- 1 ¾ cups granulated sugar
- ¾ cup unsweetened cocoa powder
- 1 ½ teaspoons baking powder
- 1 ½ teaspoons baking soda
- 1 teaspoon salt
- 2 large eggs
- 1 cup whole milk
- ½ cup vegetable oil
- 2 teaspoons vanilla extract
- 1 cup boiling water
- 2 cups fresh raspberries
- 1 cup heavy cream
- 8 ounces cream cheese, softened
- 1 cup powdered sugar
- 8 ounces semi-sweet chocolate, chopped
- ½ cup unsalted butter
Instructions
- Preheat the oven to 350°F (175°C). Grease and flour three 9-inch round cake pans.
- In a large bowl, mix flour, sugar, cocoa powder, baking powder, baking soda, and salt. Add eggs, milk, oil, and vanilla. Beat on medium speed for 2 minutes. Stir in boiling water until well combined.
- Pour the batter evenly into the prepared pans. Bake for 30-35 minutes or until a toothpick comes out clean. Let cool for 10 minutes before transferring to wire racks.
- For the raspberry filling, whip the heavy cream until soft peaks form. In another bowl, beat the cream cheese and powdered sugar until smooth. Gently fold in the whipped cream and fresh raspberries.
- Once the cakes are cool, place one layer on a serving plate. Spread a layer of raspberry filling on top. Repeat with the second layer and finish with the third layer on top.
- For the ganache, heat the butter and chopped chocolate in a saucepan over low heat until melted and smooth. Let it cool slightly before pouring over the top of the cake, allowing it to drip down the sides.
- Garnish with additional fresh raspberries and serve!
Cooking Tips: If you want a richer flavor, you can substitute buttermilk for the whole milk. For a lighter cake, use egg whites instead of whole eggs. You can also use frozen raspberries if fresh ones are not available, just make sure to thaw and drain them well.
Nutty Maple Pecan Layer Cake
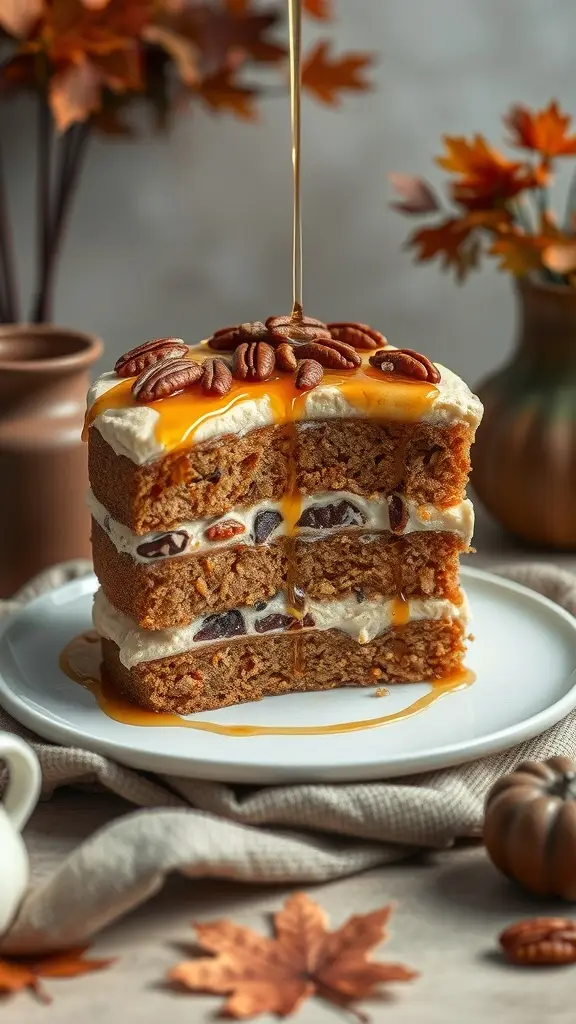
Get ready to be wowed by this Nutty Maple Pecan Layer Cake! This cake is a delightful treat that combines rich flavors and textures. Each layer is moist and filled with crunchy pecans, making it a perfect centerpiece for any gathering.
The cake is beautifully topped with a creamy frosting that has a hint of maple syrup, adding a sweet touch to the nutty goodness. Drizzling extra maple syrup on top gives it that extra flair, making it a true showstopper among GOT Tiered Cakes.
For those who love a bit of crunch, the pecans not only add flavor but also a satisfying texture. This cake is perfect for fall celebrations or any occasion where you want to impress your guests.
Ingredients
- 2 cups all-purpose flour
- 1 cup granulated sugar
- 1 teaspoon baking powder
- 1 teaspoon baking soda
- 1/2 teaspoon salt
- 1 cup unsalted butter, softened
- 4 large eggs
- 1 cup buttermilk
- 1 teaspoon vanilla extract
- 1 cup chopped pecans
- 1/2 cup maple syrup
- 1 cup cream cheese, softened
- 2 cups powdered sugar
- 1/4 cup maple syrup (for frosting)
- Extra pecans for decoration
Instructions
- Preheat your oven to 350°F (175°C). Grease and flour three 9-inch round cake pans.
- In a large bowl, mix flour, sugar, baking powder, baking soda, and salt. Add the softened butter and mix until crumbly.
- In another bowl, whisk together eggs, buttermilk, and vanilla. Gradually add this to the dry ingredients, mixing until just combined. Fold in the chopped pecans.
- Divide the batter evenly among the prepared pans. Bake for 25-30 minutes, or until a toothpick comes out clean. Let them cool in the pans for 10 minutes before transferring to wire racks.
- For the frosting, beat together cream cheese, powdered sugar, and maple syrup until smooth and creamy.
- Once the cakes are completely cool, layer them with frosting in between each layer. Frost the top and sides of the cake, then drizzle with extra maple syrup and top with pecans.
Cooking Tips: If you want a lighter cake, you can substitute half of the butter with applesauce. For a nut-free version, simply omit the pecans or replace them with chocolate chips. Enjoy this delicious cake with friends and family!
Classic Funfetti Cake For A Festive Touch
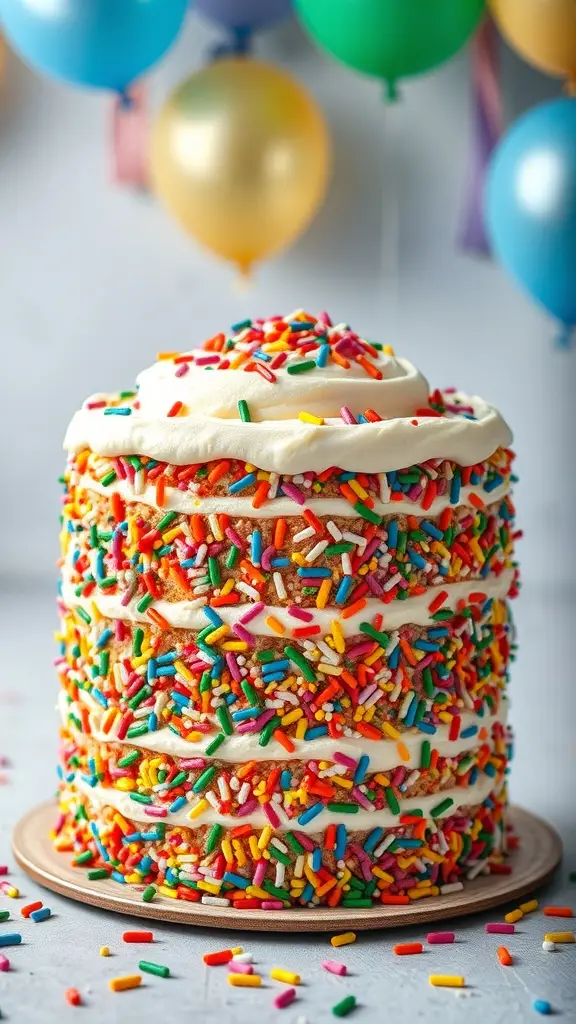
The classic funfetti cake is a delightful treat that brings joy to any celebration. With its vibrant colors and playful sprinkles, it’s a perfect match for the showstopping GOT Tiered Cakes theme. This cake not only looks amazing but tastes fantastic too!
Imagine layers of fluffy vanilla cake, each filled with colorful sprinkles that pop with flavor. The creamy frosting on top adds a rich touch, making it a hit at parties. Whether it’s a birthday, a holiday, or just a fun gathering, this cake is sure to impress.
To make it even more special, you can customize the sprinkles to match your event’s theme. Plus, it’s easy to whip up, making it a go-to recipe for any occasion.
Ingredients
- 2 ¾ cups all-purpose flour
- 1 tablespoon baking powder
- ½ teaspoon salt
- 1 cup unsalted butter, softened
- 2 cups granulated sugar
- 4 large eggs
- 1 tablespoon vanilla extract
- 1 cup milk
- 1 cup rainbow sprinkles
- 3 cups powdered sugar
- 1 cup cream cheese, softened
- ½ cup unsalted butter, softened
- 1 teaspoon vanilla extract (for frosting)
Instructions
- Preheat your oven to 350°F (175°C). Grease and flour three 8-inch round cake pans.
- In a bowl, mix flour, baking powder, and salt. Set aside.
- In another bowl, cream together the softened butter and sugar until light and fluffy. Add eggs one at a time, mixing well after each addition. Stir in vanilla.
- Gradually add the dry ingredients to the wet mixture, alternating with milk. Mix until just combined. Fold in the rainbow sprinkles.
- Divide the batter evenly among the prepared pans. Bake for 25-30 minutes or until a toothpick comes out clean.
- Let the cakes cool in the pans for 10 minutes, then turn them out onto wire racks to cool completely.
- For the frosting, beat together cream cheese, softened butter, powdered sugar, and vanilla until smooth.
- Once the cakes are cool, spread frosting between the layers and on top of the cake. Decorate with additional sprinkles.
Cooking Tips: Make sure your butter is at room temperature for easy mixing. If you want a lighter cake, you can substitute half of the butter with applesauce.
Enjoy this funfetti cake at your next gathering, and watch it become the star of the show!
Lavender Honey Cake For A Floral Twist
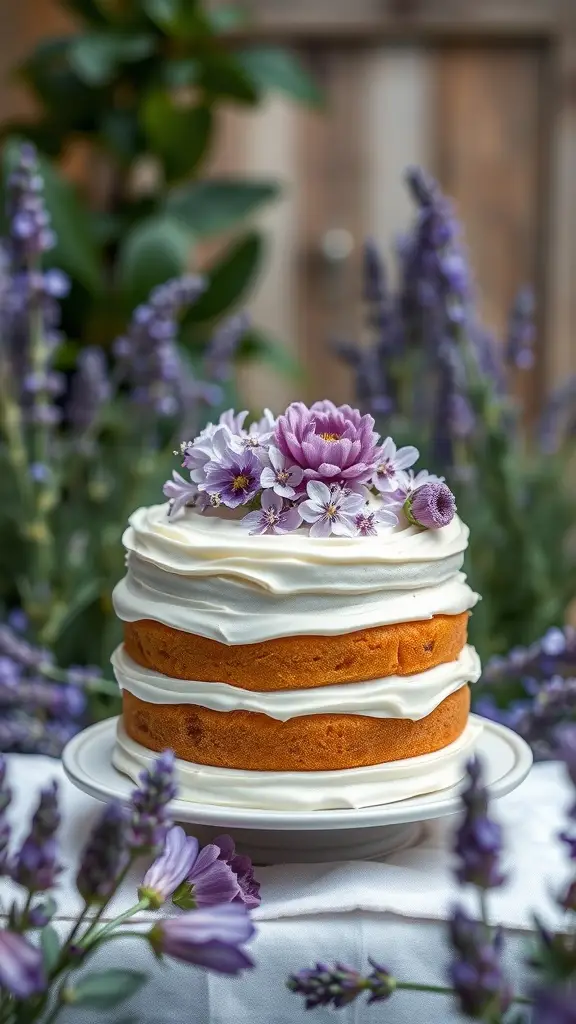
When it comes to showstopping GOT Tiered Cakes, a Lavender Honey Cake truly shines. This cake is not just a treat for the taste buds but also a feast for the eyes. The soft, layered sponge is adorned with delicate floral decorations, making it perfect for any celebration.
The combination of lavender and honey offers a unique flavor that’s both fragrant and sweet. The cake is beautifully frosted, creating a lovely contrast with the vibrant flowers that sit atop. This cake is sure to impress your guests and elevate any gathering.
To make your own Lavender Honey Cake, gather the following ingredients:
Ingredients
- 2 cups all-purpose flour
- 1 1/2 teaspoons baking powder
- 1/2 teaspoon baking soda
- 1/4 teaspoon salt
- 1/2 cup unsalted butter, softened
- 1 cup granulated sugar
- 3 large eggs
- 1/2 cup honey
- 1 tablespoon dried lavender buds
- 1 cup buttermilk
- 1 teaspoon vanilla extract
- 2 cups heavy whipping cream
- 1/4 cup powdered sugar
- Fresh flowers for decoration (optional)
Instructions
- Preheat your oven to 350°F (175°C). Grease and flour three 8-inch round cake pans.
- In a bowl, whisk together flour, baking powder, baking soda, and salt. Set aside.
- In another bowl, cream the softened butter and granulated sugar until light and fluffy. Add eggs one at a time, mixing well after each addition.
- Stir in honey and lavender buds. Then, alternate adding the flour mixture and buttermilk to the butter mixture, starting and ending with the flour.
- Pour the batter evenly into the prepared pans. Bake for 25-30 minutes, or until a toothpick inserted in the center comes out clean.
- Let the cakes cool in the pans for 10 minutes before transferring to wire racks to cool completely.
- For the frosting, whip the heavy cream and powdered sugar until stiff peaks form. Frost the cooled cakes, layering them with whipped cream in between.
- Decorate the top with fresh flowers for a stunning finish.
Cooking Tips: If you can’t find dried lavender, you can use lavender extract instead. Just a teaspoon will do! For a lighter cake, substitute half the all-purpose flour with almond flour.
This Lavender Honey Cake is not just a dessert; it’s a centerpiece that will leave everyone talking!
You may also like:
– 23 Easy Dinner Recipes Inspired by Qarth – GOT
– 19 Breakfast Recipes Inspired by the Gatsby Roaring 1920s
– 21 Children’s Birthday Cakes Inspired by Gotham City
If you enjoyed this blog you can visit us or check out our other blogs and learn a bit about us.
Disclaimer: This blog post is inspired by fictional universes and characters created by their respective rights holders. All related content and imagery remain the property of their respective rights holder. This fan-inspired content is for entertainment and commentary purposes only and is not affiliated with or endorsed by HBO, Disney, Warner Bros., Lionsgate, or any other rights holders. To explore the official source material, please visit:
HBO