
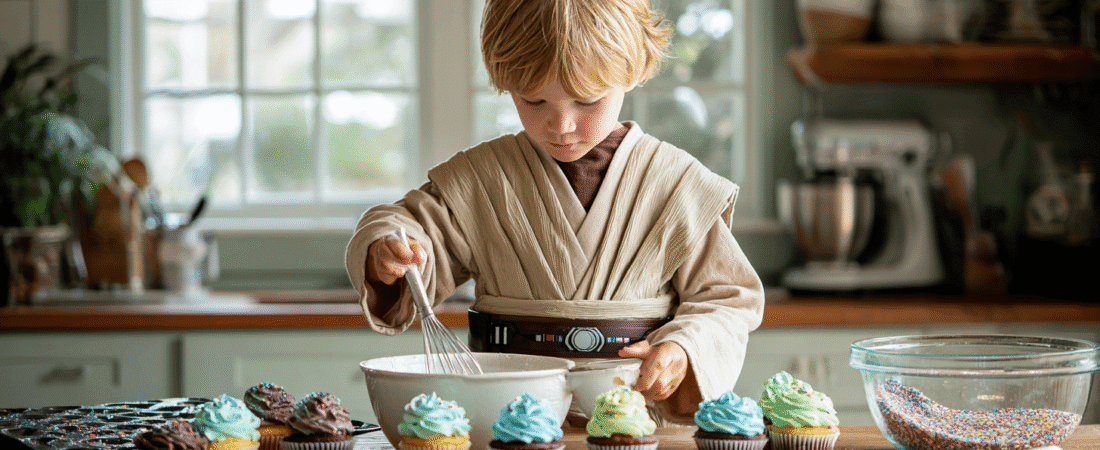
It’s time for our 10 best Star Wars cake ideas! There’s a galaxy of fun waiting as you turn your kitchen into a Star Wars bakery playground. These ten easy cake ideas guide you to create favorites like a Death Star surprise, a BB-8 dome, and a lightsaber-layer cake you can customize for any celebration. Perfect for delighting young padawans and hardcore fans alike.
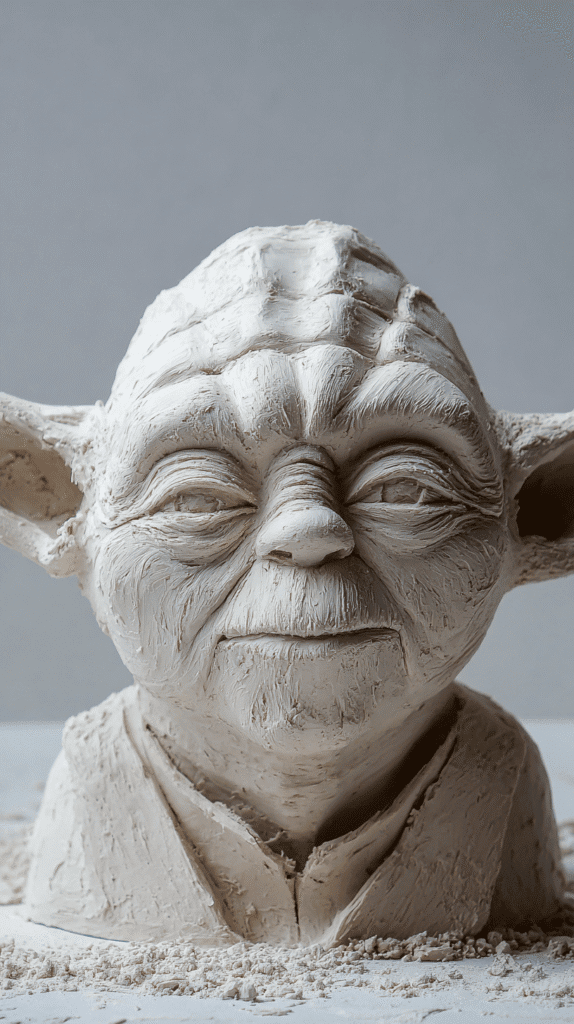
Yoda Cake
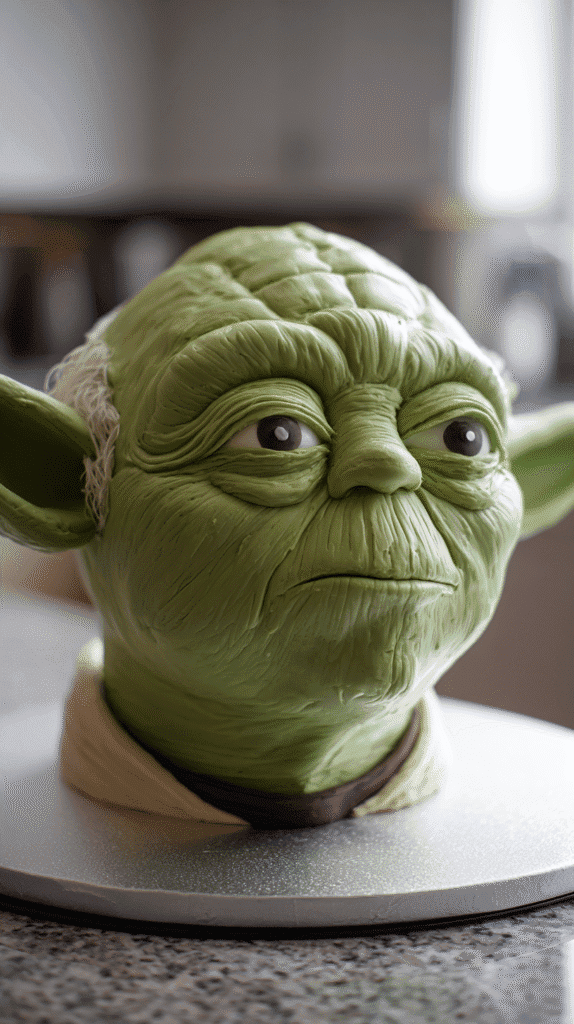
You can make a charming Yoda cake by shaping a round or dome cake into his head and using simple decorations to capture his wise expression. Use a layered cake for height, carve gently to form the chin and cheeks, and plan where the ears and eyes will sit before you start frosting.
With these Star Wars cake ideas, your decorating choices can be as simple or detailed as you like: smooth buttercream for a classic look, or rolled fondant for sharper facial features. Small details like lightly shaded wrinkles and tiny edible pearls for eyes bring personality without requiring advanced skills.
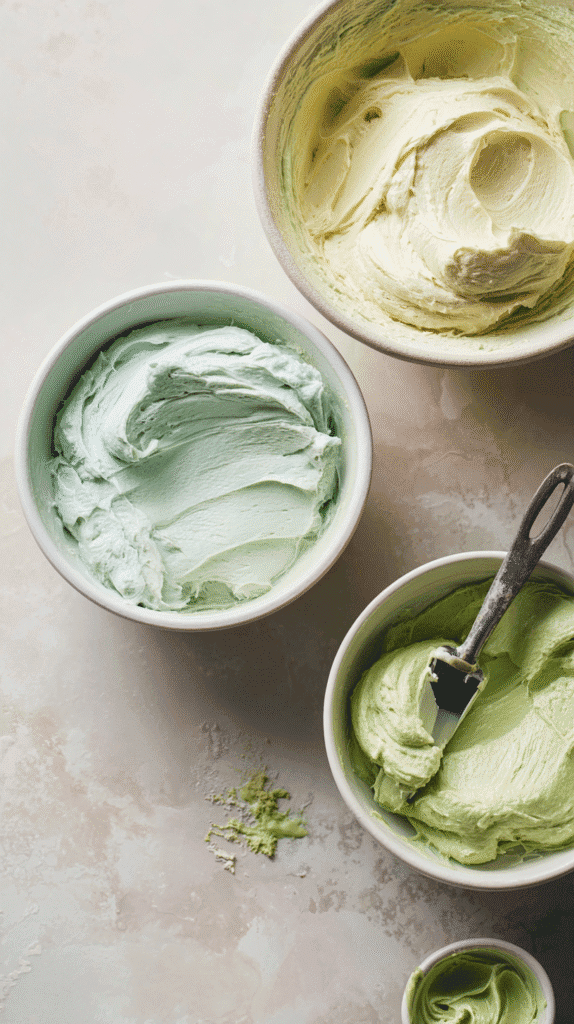
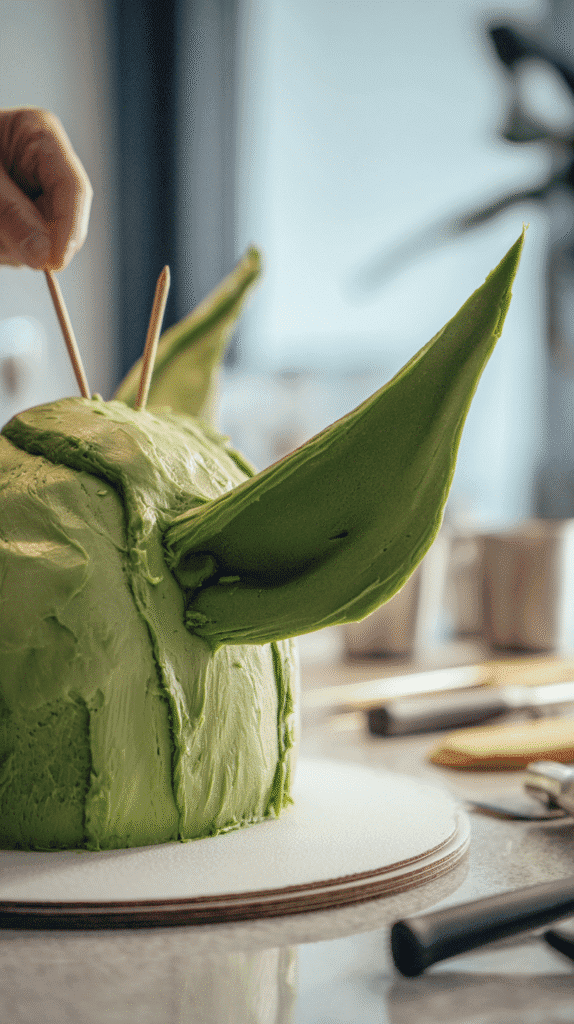
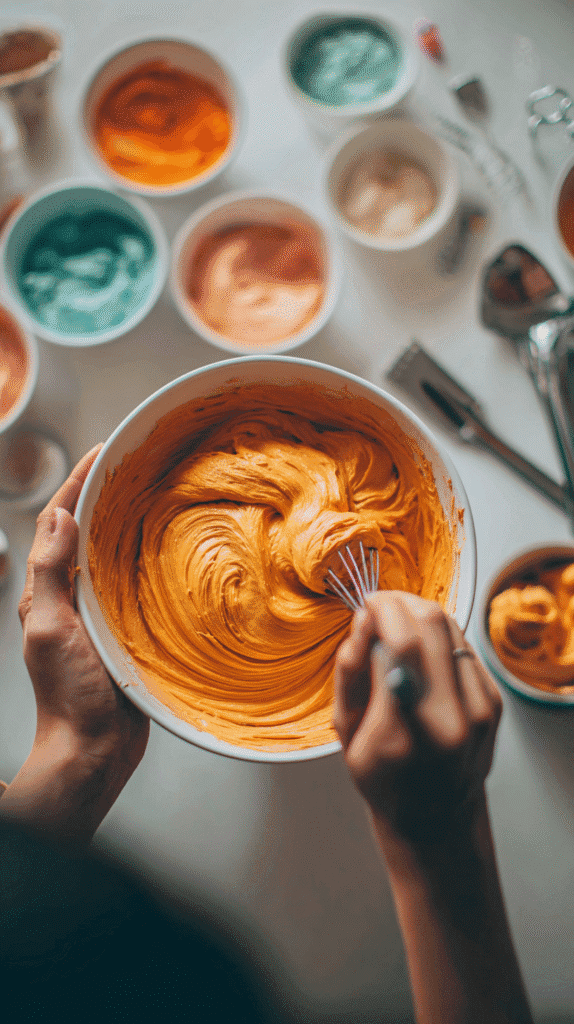
Green frosting

You’ll get the best Yoda green by starting with white buttercream and adding gel food coloring a little at a time until you reach the shade you like. Mix thoroughly to avoid streaks, and test a small spoonful because the color can deepen as it sits or bakes.
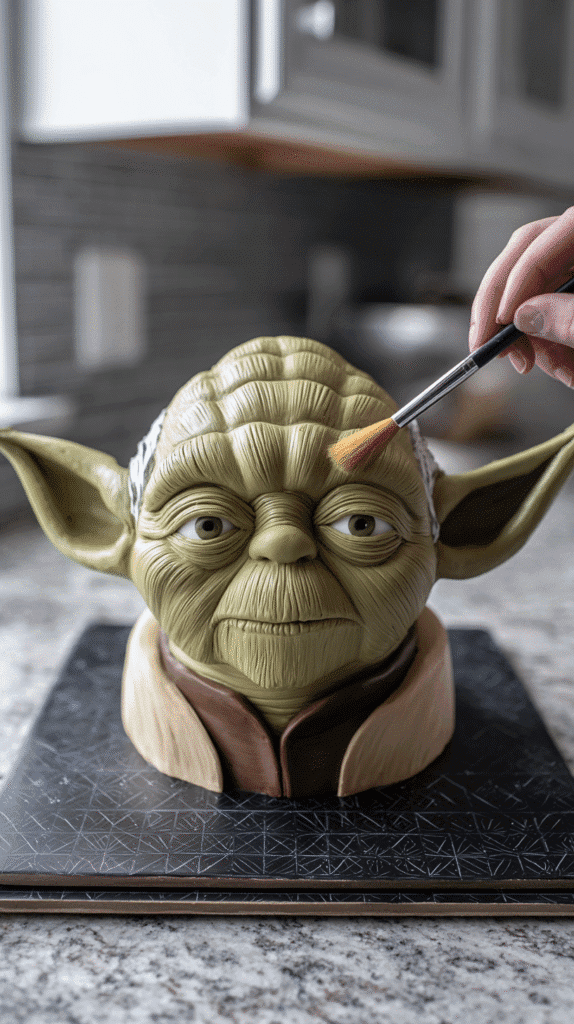
Your texture choices matter: a slightly stiffer buttercream holds piped details and wrinkles, while a smoother, softer batch is easier to spread for a clean finish. If you want subtle highlights or shadows, tint small amounts slightly darker or lighter and blend them gently with a brush or spatula.
Ear details
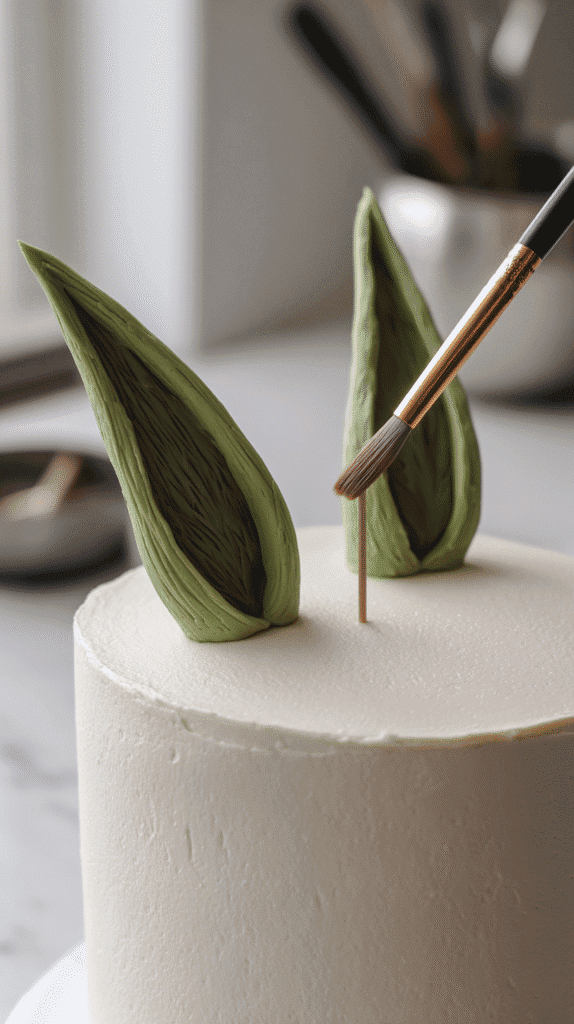
You can craft Yoda’s ears from fondant, gum paste, or molded rice cereal treats, shaping them into the long, tapered triangles that give him his distinctive silhouette. Attach them to the cake with toothpicks or skewers pushed into the base of each ear and anchored into the cake, then blend the seam with frosting so they look natural.
For added stability, let fondant ears dry slightly on a foam pad so they hold their shape, and insert supports only when the frosting is firm to avoid slippage; you can also paint inner ear details with a darker green or a tiny wash of brown to add depth and character.
Ingredients for Yoda Cake
Cake:
- 1–2 round cakes (6–8 inch, vanilla, chocolate, or your preferred flavor)
- Buttercream for stacking and crumb coating
Decorating:
- Green buttercream or white buttercream with green gel food coloring
- Small fondant or gum paste for ears
- Lightly colored edible pearls or black fondant for eyes (optional)
- Additional green shades for shading highlights (optional)
Tools:
- Serrated knife for carving
- Offset spatula or palette knife
- Piping bags and tips (#3 or #233 for details)
- Small brush for shading
- Toothpicks or skewers for attaching ears
- Foam pad (optional, for drying fondant ears)
Directions: How to Make a Yoda Cake
Estimated time: 3–4 hours | Skill level: Intermediate
1 – Bake the Base

- Prepare your favorite cake batter (vanilla, chocolate, or matcha for an extra-green surprise).
- Bake in a 9-inch round pan or dome-shaped pan to form Yoda’s head shape.
- Allow the cake to cool completely before trimming or frosting.
2 – Shape the Head
- Level the top and carve the cooled cake gently to create Yoda’s chin and cheekbones.
- Lightly mark where the eyes and ears will go using a toothpick.
- Brush away crumbs with a pastry brush.
3 – Crumb Coat and Chill
- Apply a thin layer of buttercream to seal crumbs, then chill for 15–20 minutes.
- This creates a smooth base for your final layer.
4 – Mix Yoda Green Frosting
- Start with white buttercream and slowly add green gel food coloring until you get a soft sage tone.
- For dimension, make two small bowls: one slightly darker and one slightly lighter for shading.
5 – Frost the Cake
- Cover the entire cake with your base green frosting, smoothing it with an offset spatula.
- Use the darker shade to gently blend shadows under the eyes and along wrinkles.
- Pipe or brush lighter green onto the cheeks and forehead for highlights.
6 – Add Facial Details
- Use a small round piping tip or sculpting tool to add wrinkles and definition.
- Add small edible pearls, black fondant dots, or piped buttercream for Yoda’s eyes.
7 – Make and Attach the Ears
- Shape two long, tapered ears from fondant, gum paste, or rice cereal treats.
- Allow them to dry slightly on a foam pad so they hold their curve.
- Insert toothpicks or skewers into the base of each ear, then press them gently into the cake.
- Blend the seams with frosting so they look natural.
8 – Final Touches
- Use a food-safe brush to paint light brown or darker green shading inside the ears.
- Chill the finished cake for 15–20 minutes before serving to set the buttercream.
- Optional: display on a black or star-patterned board for a galactic effect.
Darth Vader Cake
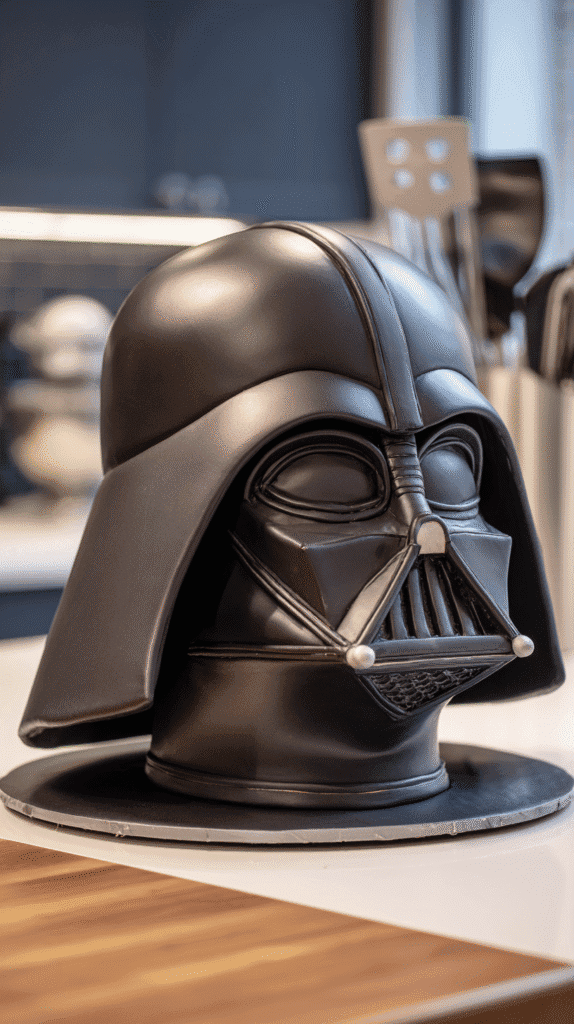
You can build an impressive Darth Vader cake with simple techniques that still capture the menacing look—think tall, smooth black surface and glossy highlights. Start with a sturdy layered cake or carve a single domed cake for the helmet silhouette, then plan your details so you work from large shapes to small accents.
Your goal is a bold, clean finish: deep black fondant, crisp mask lines, and subtle metallic touches to bring out the contours without overcomplicating the build. Keep tools and reference images close so you can match Vader’s iconic profile as you go.
Black fondant
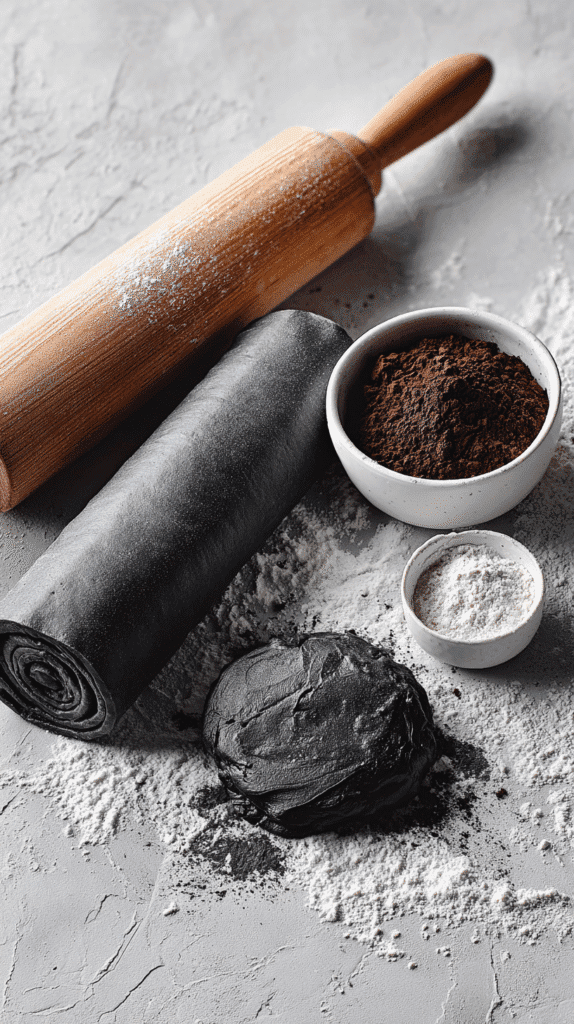
Use gel food coloring to tint white fondant to a true black, and knead until the color is even—this gives you more control than buying pre-colored fondant. Roll the fondant thin for a smooth drape, dusting your surface lightly with cornstarch or powdered sugar to prevent sticking, and use a smoothing tool to eliminate air pockets and wrinkles.
To avoid a washed-out look, add a touch of black cocoa powder or brown gel color to deepen the tone if the fondant looks flat. Keep leftover fondant wrapped airtight to prevent drying while you work on the helmet details.
Helmet design
For the helmet shape, carve a domed cake or stack rounds and shave them into a smooth hemisphere that matches Vader’s silhouette; alternatively, use a foam dome as an internal support. Cover the dome with black fondant and focus on getting the forehead slope and eye recesses proportionate—these large planes define the character.
Add mask features using thinner fondant layers and small molded pieces for the mouth vent, cheek ridges, and nose bridge; use edible black paint or gel to deepen recesses and a light silver or gray dust for highlights so the helmet looks dimensional rather than flat.
Use templates traced from a photo to cut symmetrical pieces, and employ simple modeling tools or a small ball tool to create curved lines and vent indentations; for a glossy finish, brush on a tiny amount of clear piping gel or edible glaze to mimic the helmet’s reflective surface.
Ingredients for Darth Vader Cake
Cake:
- 1–2 tall layered cakes (6–8 inch rounds or domed cake)
- Buttercream for stacking and crumb coating
Decorating:
- Black fondant (or white fondant tinted with black gel food coloring)
- Optional: black cocoa powder or brown gel color to deepen black tones
- Edible silver or gray dust for helmet highlights
- Small fondant pieces for mask features (mouth vent, cheek ridges, nose bridge)
- Edible black paint or gel for recesses
- Clear piping gel or edible glaze for a glossy helmet finish
Tools:
- Serrated knife for carving
- Offset spatula and bench scraper
- Rolling pin for fondant
- Smoothing tool for fondant
- Small modeling tools or ball tool for mask lines and vent indentations
- Brush for edible paint or dusting
- Templates or reference images for mask symmetry
Directions: How to Make a Darth Vader Cake
Estimated time: 4–5 hours | Skill level: Intermediate to Advanced
1. Bake and Prepare the Base
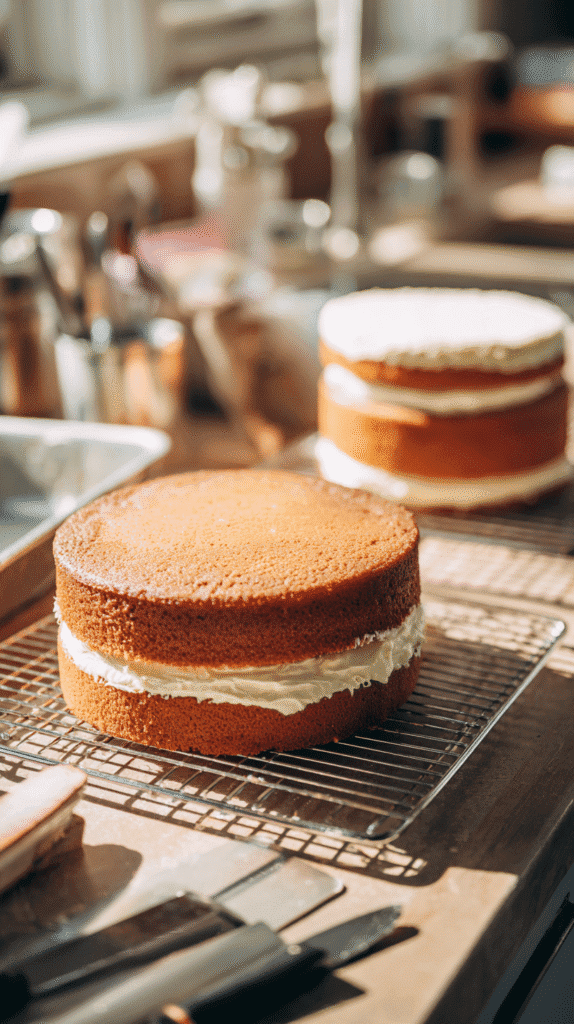
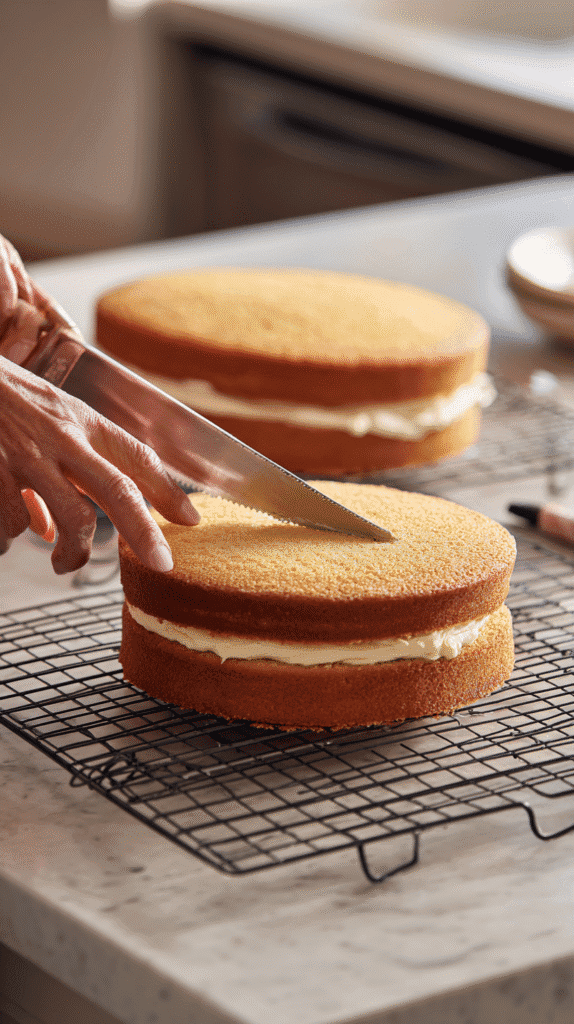
- Bake two 8-inch round cakes or one large dome-shaped cake for the helmet base.
- Allow the cakes to cool completely, then level the tops.
- Stack layers with buttercream filling to create height and stability.
- Chill the cake for at least 20 minutes before carving.
2. Shape the Helmet
- Using a serrated knife, carve the top into a smooth dome shape resembling Vader’s helmet.
- If needed, use a printed photo as a visual guide to achieve accurate slopes and angles.
- Brush away crumbs and apply a light crumb coat of buttercream.
- Chill again to firm up before adding fondant.
3. Prepare the Black Fondant
- Tint white fondant using black gel food coloring, kneading until the color is even.
- Add a small amount of black cocoa powder or brown gel to achieve a deeper, richer tone.
- Dust your surface with cornstarch or powdered sugar to prevent sticking.
- Roll out the fondant thinly and cover the chilled cake, smoothing from top to bottom with a fondant smoother.
4. Create the Mask Details

- Use reference images or a printed template to mark key facial lines and mask shapes.
- Cut thin fondant strips and panels to form the mouth vent, cheek ridges, and nose bridge.
- Attach details using edible glue or a small dab of water.
- Gently press lines or indentations with a ball tool to define edges and contours.
5. Add Highlights and Finishing Touches
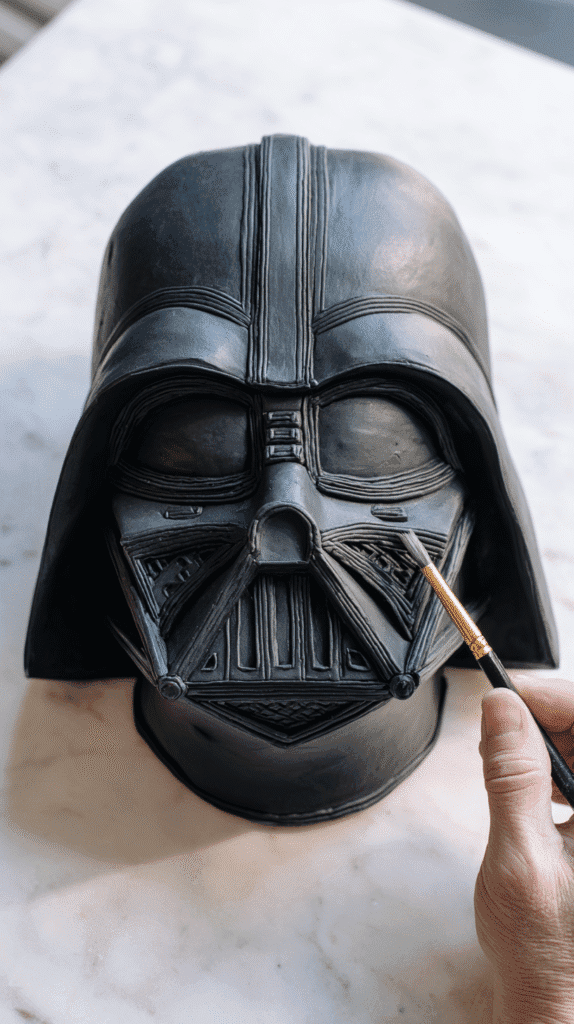
- Brush edible silver or gray dust lightly along edges for subtle metallic highlights.
- Deepen eye recesses and vent details using edible black paint or gel.
- For a polished, glossy helmet finish, brush a thin layer of clear piping gel or edible glaze over the fondant.
- Chill the cake for 15 minutes to set the surface before serving.
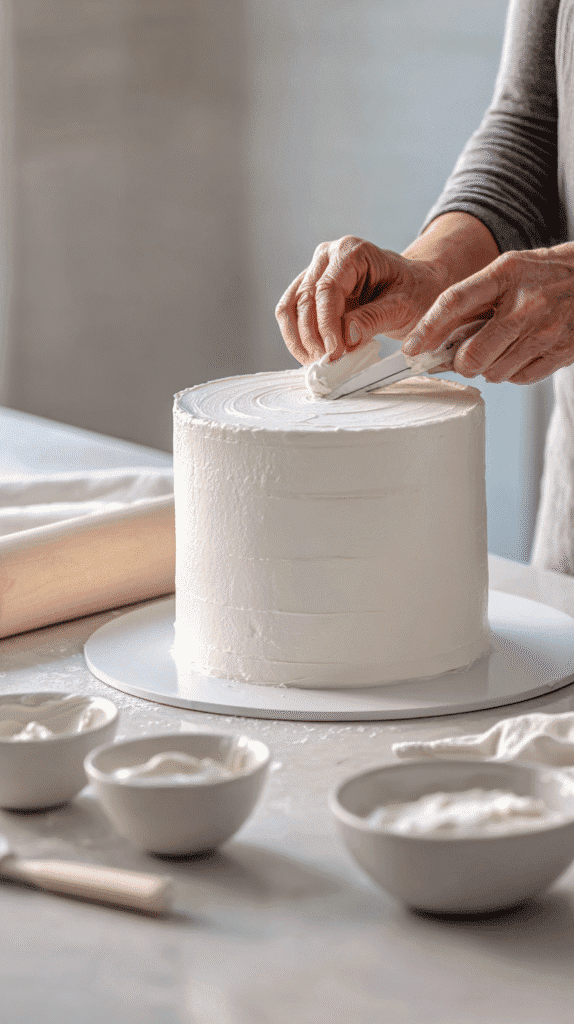
Stormtrooper Cake
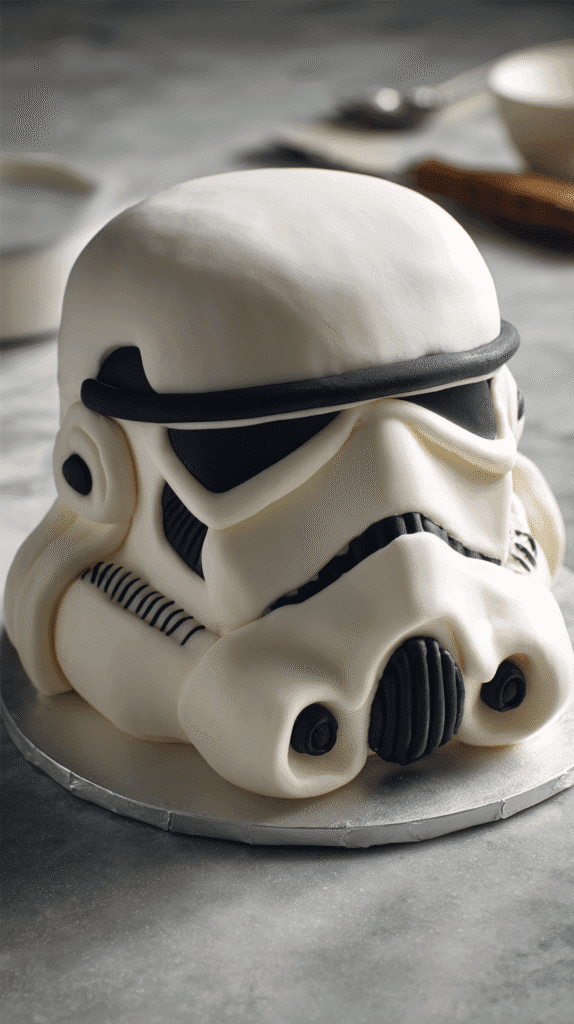
You can make a striking Stormtrooper cake at home by keeping the design clean and focused on contrast: a smooth white surface with crisp black helmet details. Pick a single-tier round cake for an easier build, or a two-tier for extra impact, and plan your design with a printed template so you can transfer the key shapes accurately to your cake.
Work at a relaxed pace and use tools you already have—an offset spatula, a bench scraper and a small piping tip will take you a long way. Chilling between steps helps maintain sharp lines, and choosing either fondant or well-smoothed buttercream lets you match your comfort level while still getting that iconic Stormtrooper look.
White base
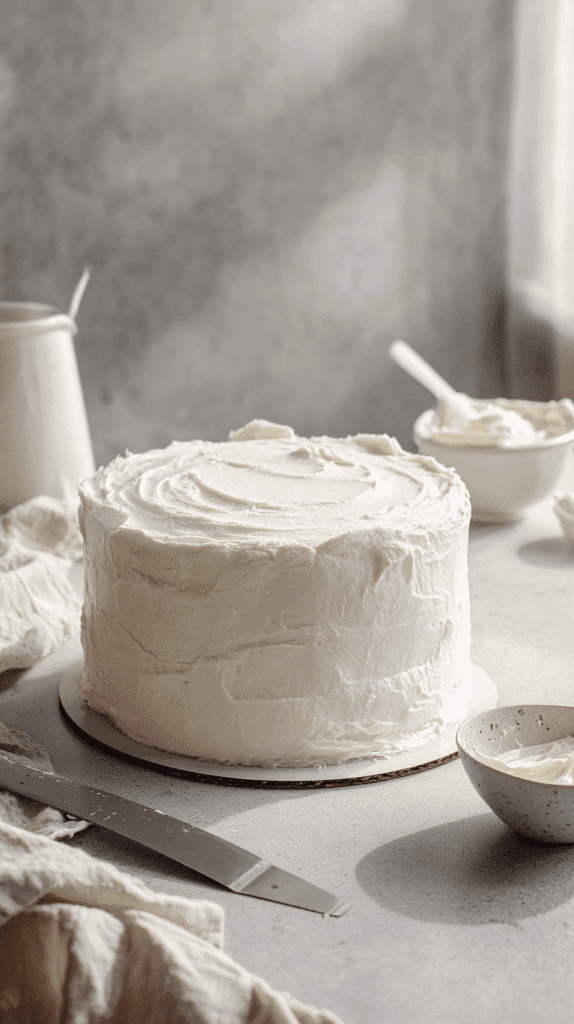
Start with a thin crumb coat to lock in stray crumbs, chill the cake, then apply your final white layer. If you use buttercream, aim for a firm, slightly stiff consistency and smooth with a bench scraper while spinning the cake on a turntable; if you use fondant, roll it evenly and drape it gently, smoothing from the center outward to avoid air pockets.
Keep the white bright by using high-quality white icing or a touch of white gel color designed for icings, and work in a cool room so the finish sets cleanly. Small imperfections can be hidden later with black details, so focus on an even surface rather than perfection.
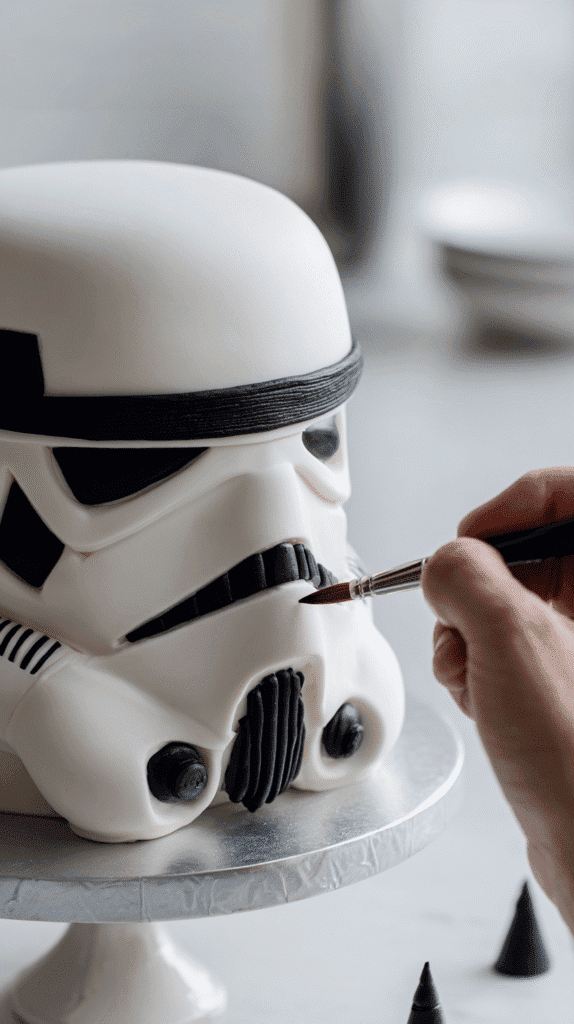
Face pattern
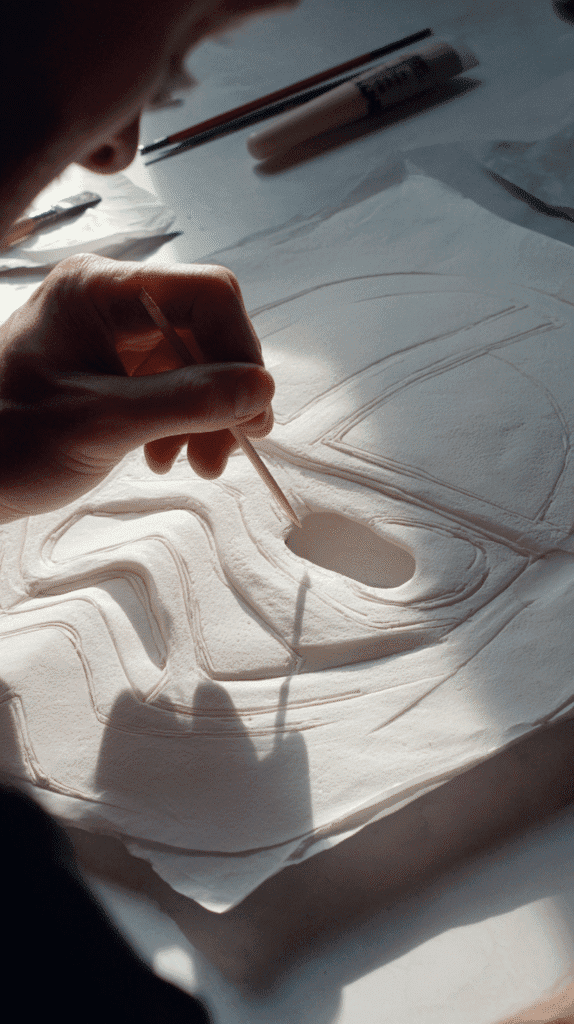
Print a Stormtrooper helmet template to match your cake size, cut the shapes from parchment and lightly trace the outlines onto the white surface with a toothpick. Fill in the traced lines with black fondant cut to shape, or pipe royal icing or black buttercream using a small round tip for sharp edges and smooth curves.
Place the eye visors and mouth details symmetrically, stepping back to check balance as you work, and use thin strips of fondant or a steady piped line for the thinner accents. If you prefer less piping, an edible black marker or gel-painted details give clean results with minimal tools.
For crisper shapes, make a stencil from cardstock and hold it steady while you spread black modeling chocolate or royal icing over it, then lift carefully; if cutting black fondant, use a sharp blade and slightly dust the surface with cornstarch to prevent sticking, and practice the shapes on parchment before applying them to your cake.
Ingredients for Stormtrooper Cake
Cake:
- 1–2 round cakes (6–8 inch, single-tier or two-tier)
- Buttercream for stacking and crumb coating
Decorating:
- White buttercream or fondant for the base
- Black fondant, royal icing, or black buttercream for helmet details
- Edible black markers or gel paint for fine lines and accents
- Optional: thin strips of fondant for small details
- Templates or printed helmet outline for accuracy
Tools:
- Serrated knife for carving
- Offset spatula and bench scraper
- Bench scraper for smooth icing or fondant
- Piping bags with small round tips for black details
- Toothpick or stencil for transferring template
- Edible brush for painting fine details
- Turntable for ease of decorating
Directions: How to Make a Stormtrooper Cake
Estimated time: 3–4 hours | Skill level: Intermediate
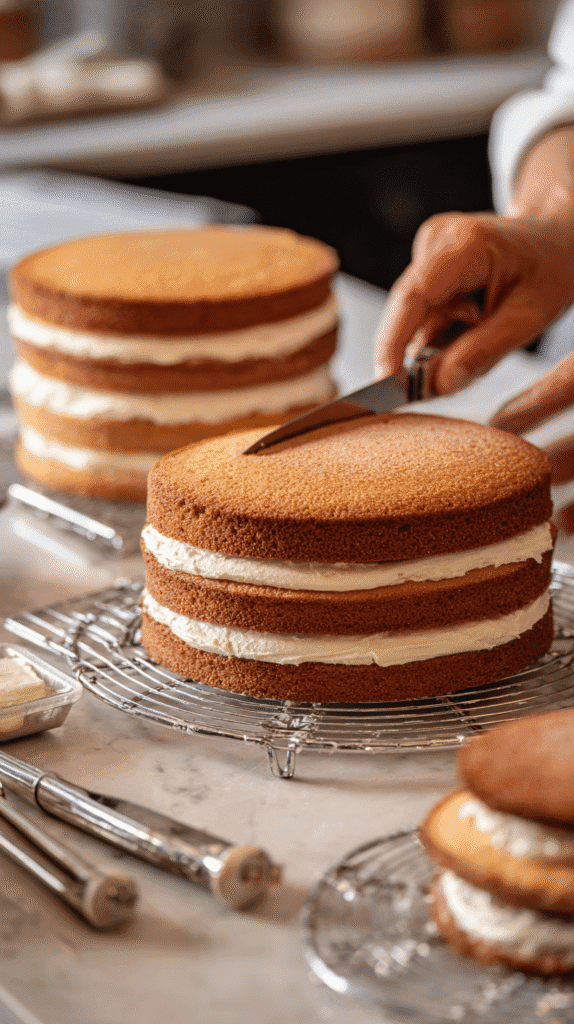
1. Bake and Prepare the Cake
- Bake one or two 8-inch round cakes, depending on your desired height.
- Let them cool completely, then level the tops with a serrated knife.
- Stack with buttercream between layers and chill for 20 minutes to firm up.
- Lightly mark where the face and visor areas will sit before frosting or covering.
2. Apply the White Base Layer
- Spread a thin crumb coat of white buttercream to lock in crumbs, then chill again.
- Apply a smooth final layer of white buttercream using a bench scraper on a turntable.
- If using fondant, roll it evenly and drape over the chilled cake, smoothing from the center outward.
- Use high-quality white icing or a small touch of white gel color to brighten the surface.
- Chill briefly to set before adding details.
3. Create and Transfer the Face Pattern
- Print or sketch a Stormtrooper helmet template scaled to your cake.
- Cut the key shapes (eyes, mouth, vents) from parchment or cardstock.
- Lightly trace the outlines onto the cake using a toothpick or clean skewer.
- Step back frequently to ensure symmetry.
4. Add the Black Details
- Roll out black fondant and cut pieces to match your traced shapes, or use black buttercream or royal icing with a small round piping tip.
- Press fondant gently onto the cake using a clean brush of water or edible glue.
- For piping, hold your tip steady and use short, smooth movements to create clean lines.
- Use an edible black marker or gel paint for smaller details if preferred.
5. Finishing Touches and Shine
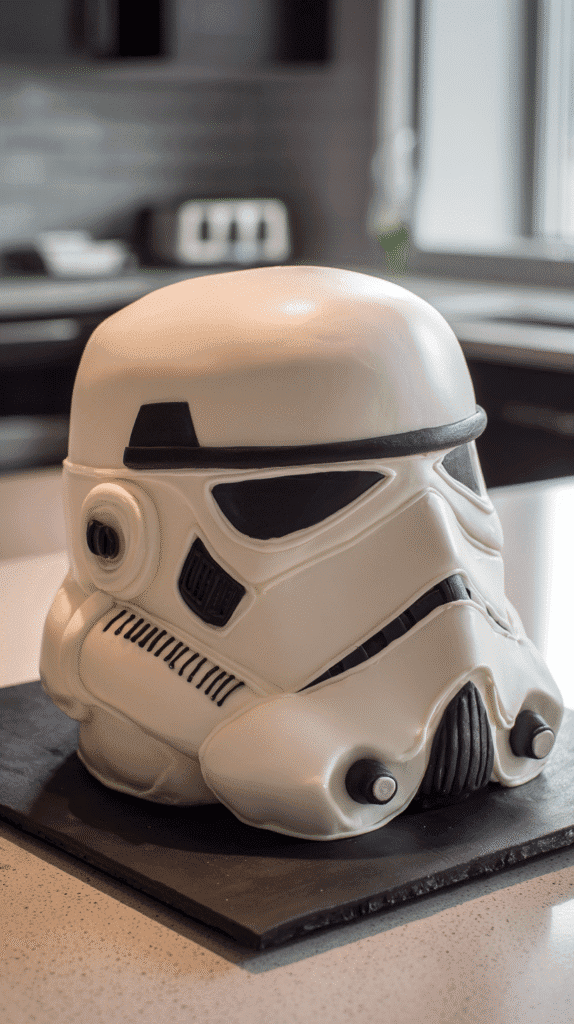
- Refine edges by outlining with a thin line of black icing or brushing lightly with black gel for depth.
- Chill the cake 15–20 minutes to set.
- Optional: add subtle shadows with a small brush and diluted black edible paint for a more dimensional effect.
- Serve on a dark cake board for contrast to make the white pop.
Millennium Falcon Cake
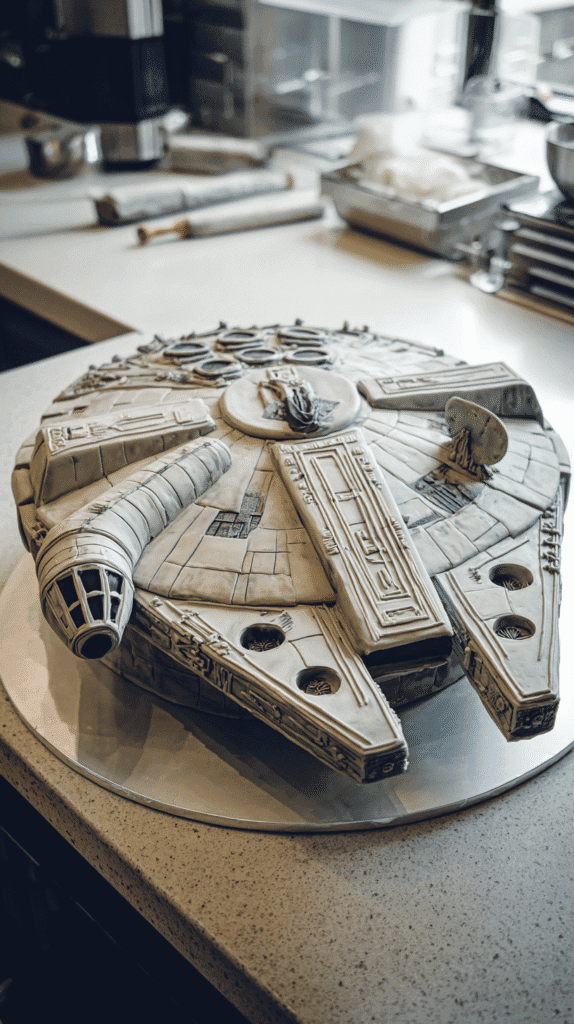
You can make a show-stopping Millennium Falcon cake with simple shapes and a few decorating tricks. Start with stacked round cakes and carve the signature saucer and cockpit silhouette, then use gray icing, fondant accents, and darker panels to bring the ship to life.
Plan your steps so you assemble, chill, and refine in stages: carve the basic shape, apply a thin crumb coat, chill to set, then add the final detailing. Small fondant pieces, piped lines, and edible dusts will give your Falcon that lived-in, engineered look without pro tools.
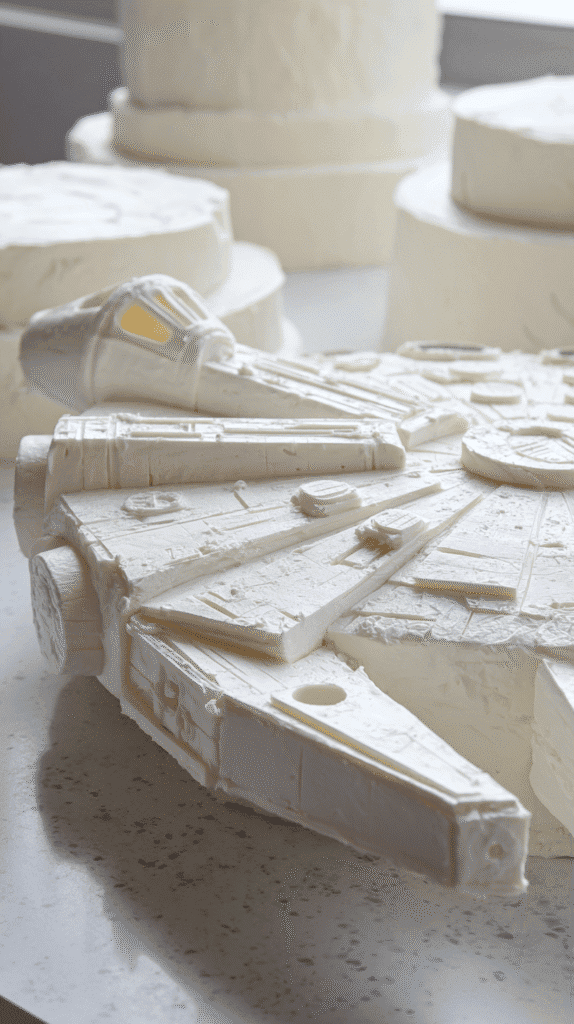
Starship shape
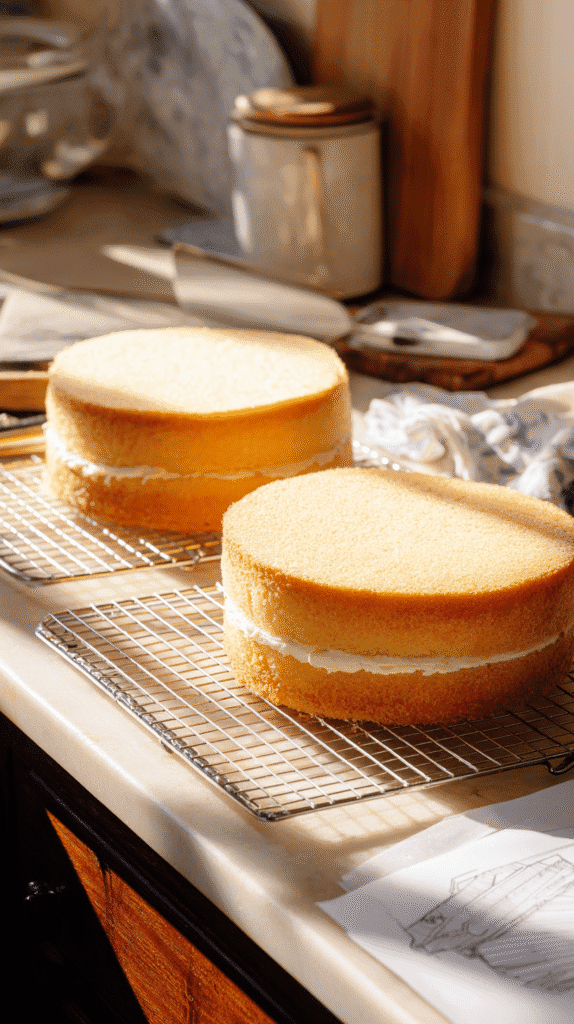
To get the Falcon silhouette, bake two round cakes and offset them slightly before trimming away a small wedge to form the cockpit indentation. Use a small rolled log of cake or a carved rectangle for the cockpit section and attach it with buttercream so the overall profile reads like the ship.
Support heavier sections with dowels and chill the cake between carving and decorating so your cuts stay clean. Cut small semicircles or fondant pieces for the front mandibles and add a raised central radar dish from a frosted cookie or molded fondant.
Gray icing
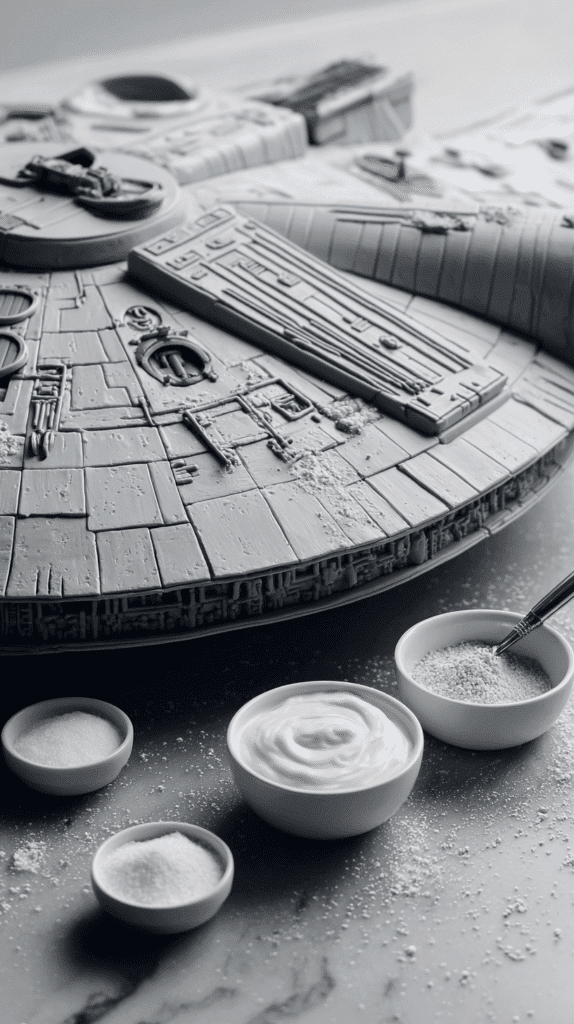
Mix your gray by adding tiny amounts of black gel color to white buttercream or fondant until you reach the shade you like — work slowly so you don’t overshoot to a muddy tone. Aim for a cool neutral gray and test a smear on parchment to check how it dries under your lighting.
Apply a thin crumb coat first and chill the cake, then smooth a final layer with a bench scraper or fondant smoother for that sleek starship finish. Use slightly darker gray accents for paneling and a lighter wash for highlights to create depth.
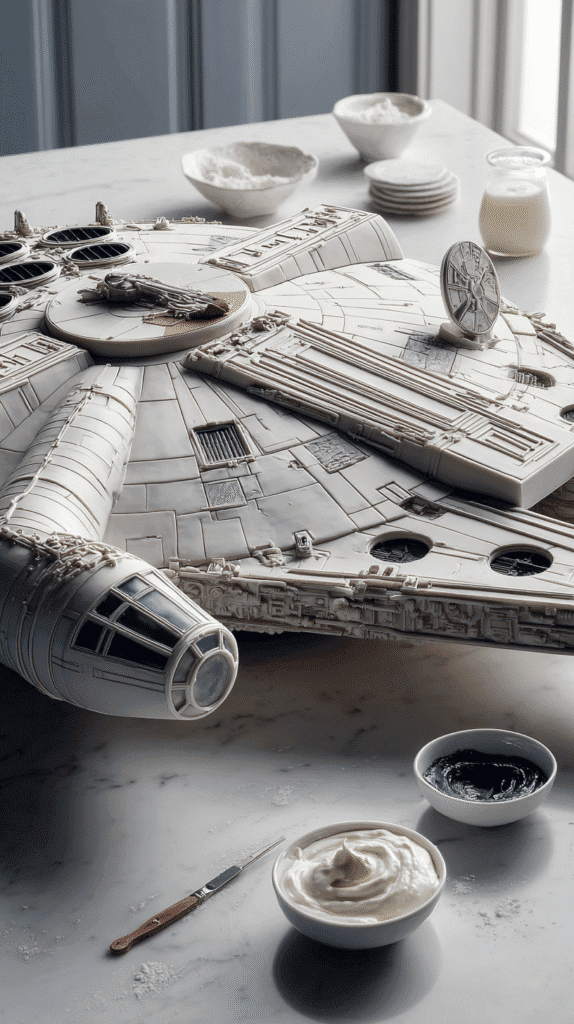
For extra realism, add panel lines with a small piping tip or edible marker, dust selected areas with silver luster dust, and attach tiny fondant vents, grilles, and antennae so your Falcon looks like it flew straight out of the hangar bay.
Ingredients for Millennium Falcon Cake
Cake:
- 2–3 round cakes (6–8 inch) for stacking and carving
- Buttercream for stacking, crumb coating, and attaching pieces
- Optional: small cookie or cake piece for raised radar dish
Decorating:
- Gray buttercream or fondant for the base
- Darker gray for panel accents
- Lighter gray or white for highlights
- Small fondant pieces for vents, grilles, antennae, and mandibles
- Edible silver or gray dust for metallic touches
- Edible markers or gel paint for panel lines and detailing
Tools:
- Serrated knife for carving the saucer shape and cockpit
- Offset spatula and bench scraper for smoothing
- Piping bags and small round tips for lines and accents
- Fondant tools for shaping vents and antennas
- Brush for edible dust or paint
- Turntable for easy decorating
Directions: How to Make a Millennium Falcon Cake
Estimated time: 4–5 hours | Skill level: Intermediate to Advanced
1. Bake and Prepare the Base Cakes
- Bake two 9-inch round cakes and let them cool completely on wire racks.
- Level the tops and stack with a thin layer of buttercream in between.
- Chill for 20 minutes to firm up before carving.
- Print or sketch a simple Millennium Falcon outline as a cutting guide.

2. Carve the Starship Shape
- Offset one round cake slightly and trim a small wedge from the side to create the cockpit indentation.
- Carve a small rectangle or rolled log of cake for the cockpit tube and attach it with buttercream.
- Shape the front into two tapered mandibles using a serrated knife.
- Use dowels or straws for internal support if any parts overhang slightly.
- Chill again to hold the structure before frosting.
3. Apply the Crumb Coat and Chill
- Spread a thin crumb coat of buttercream to lock in crumbs.
- Chill the cake for 15–20 minutes to set the surface.
- This will make the next frosting layer smoother and cleaner.
4. Mix and Apply Gray Icing
- Tint white buttercream or fondant with tiny amounts of black gel food coloring to achieve a neutral gray.
- If it looks too dark, add more white; aim for a cool metallic shade.
- Cover the cake evenly with the gray icing, smoothing it with a bench scraper or fondant smoother.
- For panel effects, use slightly darker or lighter gray tones to add depth.
5. Add Details and Finishing Touches
- Use thin strips or small pieces of darker gray fondant to form panels and vents.
- Attach a round fondant or cookie radar dish to the top center using edible glue.
- Draw or pipe faint panel lines with black buttercream or an edible marker.
- Dust select areas with silver or gunmetal luster dust for a metallic finish.
- Chill briefly before serving to keep the structure firm and the details sharp.
R2-D2 Cake
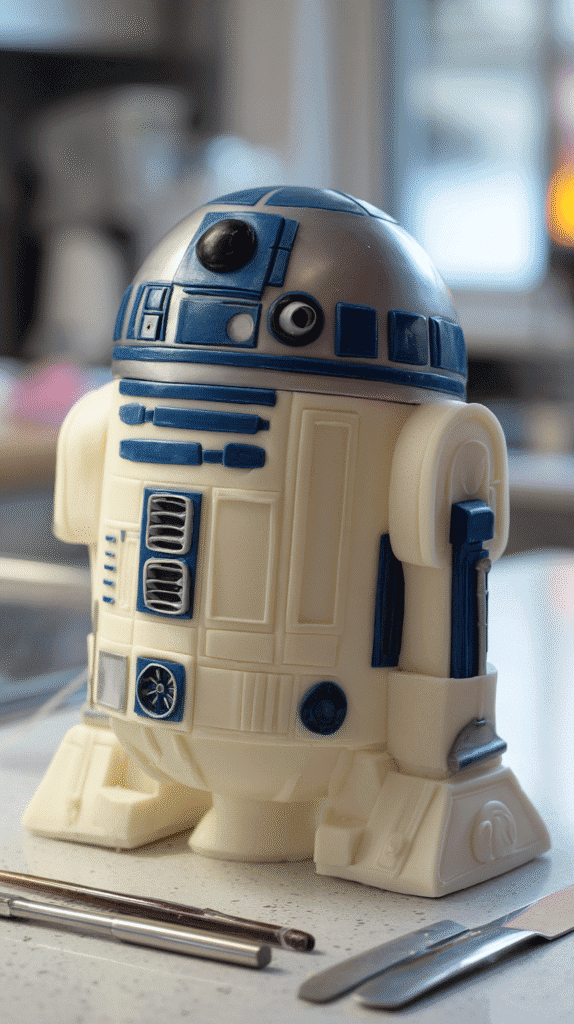
You can make an R2-D2 cake at home by stacking round cakes into a short cylinder, covering with white fondant and adding metallic and blue details for that iconic look. Use edible silver paint or luster dust for panels and small fondant shapes for sensors and vents to capture the droid’s personality.
Keep the design simple if you’re new to decorating: focus on bold shapes and a few signature markings rather than tiny details. A steady buttercream base, chilled between steps, makes it easier to apply fondant and keep lines clean.
Blue accents
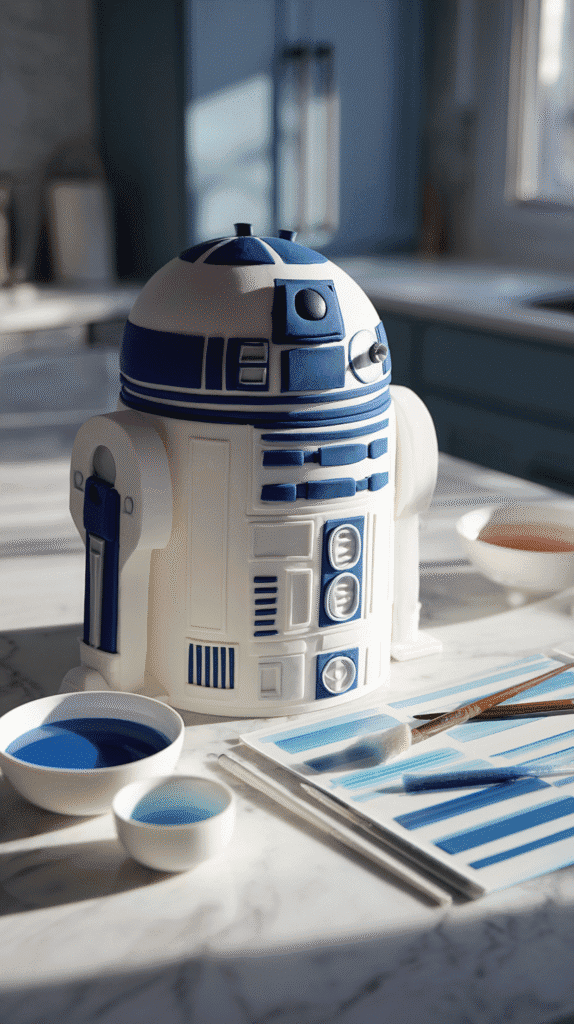
Use two or three shades of blue to add depth—navy for panels, medium blue for stripes, and a lighter blue for small highlights. Cut thin fondant strips or pipe royal icing for the straight lines and use small circular cutters for the round details on the dome and body.
If you prefer painting, mix gel food color with a clear alcohol or lemon extract and brush on gradients for a hand-painted finish. Stencils can help keep shapes consistent, and a small round piping tip helps you outline details before filling them in.
Cylinder shape
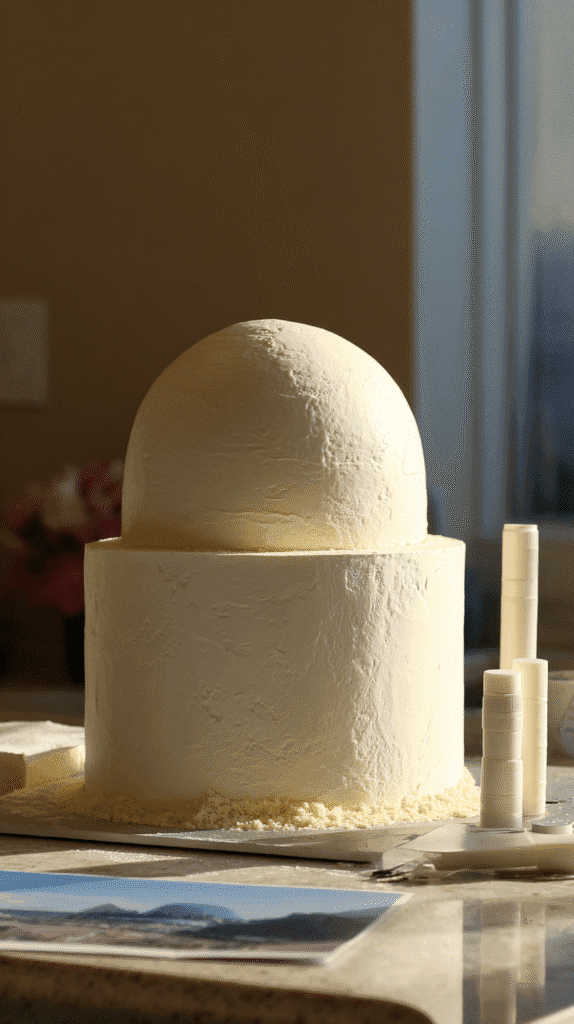
Bake two or three 6–8 inch round layers and stack them with a thin layer of buttercream between each to build a sturdy cylinder. Level each cake so the sides are even, then apply a crumb coat and chill the cake to set the surface before smoothing the final layer of buttercream or applying fondant.
Support the cake with a central dowel and optional side dowels if it’s taller than two layers, then use a bench scraper to get sharp, straight sides for a mechanical look. For the dome head, bake a half-sphere or carve a rounded top from an extra layer and attach it with a small amount of buttercream.
To avoid sagging, use a dense cake recipe like pound cake or a stabilized sponge, and trim the layers to be slightly shorter than you want the final cake, since fondant and buttercream add a little height; chilling between steps keeps everything firm and makes handling the cake much easier.
Ingredients for R2-D2 Cake
Cake:
- 2–3 round cakes (6–8 inch) for stacking into a short cylinder
- Buttercream for stacking, crumb coating, and smoothing
- Optional: half-sphere or extra layer for the dome head
Decorating:
- White fondant or buttercream for the base
- Blue fondant or buttercream in two or three shades for panels and stripes
- Small fondant or modeling chocolate pieces for sensors, vents, and dome details
- Edible silver paint or luster dust for metallic accents
- Optional: edible markers or gel paint for fine lines
Tools:
- Serrated knife for leveling and carving
- Offset spatula and bench scraper for smoothing
- Piping bags with small round tips for blue details
- Small fondant tools or cutters for sensors and panels
- Brush for edible paint or luster dust
- Dowels or central skewer for internal support
- Turntable for ease of decorating
Directions: How to Make an R2-D2 Cake
Estimated time: 4–5 hours | Skill level: Intermediate
1. Bake and Prepare the Cake Layers
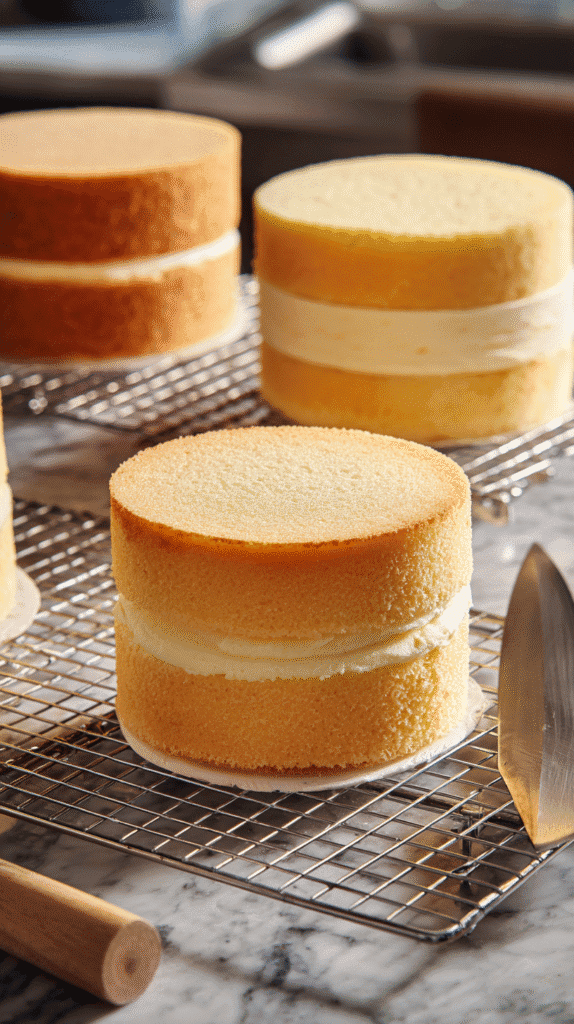
- Bake two or three 6–8 inch round cakes using a dense recipe such as vanilla pound or butter cake for better carving stability.
- Allow to cool completely, then level each layer so the sides are even.
- Stack with thin layers of buttercream in between, forming a short cylinder.
- Insert a central dowel for support if the cake is more than two layers tall.
- Chill for 20 minutes to firm up before trimming or frosting.
2. Shape the Dome and Structure
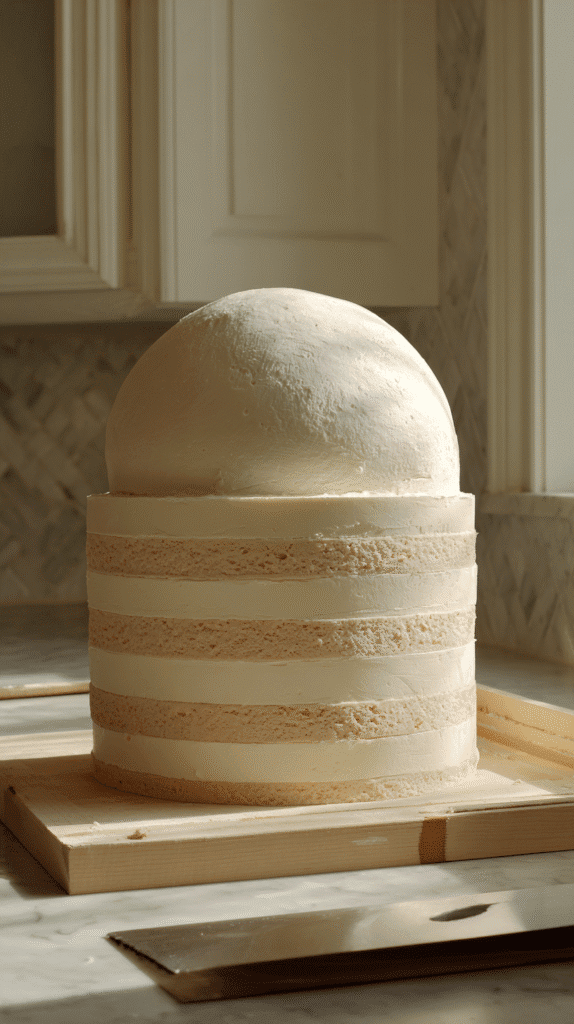
- Bake one half-sphere cake (using a dome pan) or carve a rounded top from an extra layer.
- Attach the dome to the top of the cylinder with a small amount of buttercream.
- Check proportions against an R2-D2 image to ensure the silhouette looks correct.
- Apply a thin crumb coat to the entire cake and chill again.
3. Cover with Fondant or Buttercream
- For a smooth mechanical look, cover the body with white fondant or a clean layer of white buttercream.
- Use a bench scraper to achieve sharp, straight sides.
- Smooth the dome carefully, trimming excess fondant around the base.
- Chill to set before adding colored accents.
4. Create Blue and Silver Details
- Mix two or three shades of blue fondant: navy for main panels, medium blue for stripes, and light blue for highlights.
- Cut thin strips for panel lines and small circles for sensors and buttons.
- Attach with a dab of water or edible glue, spacing details evenly around the body.
- Paint metallic panels with edible silver paint or luster dust.
- Use a small round piping tip or edible marker to outline shapes for definition.
5. Add Final Droid Touches
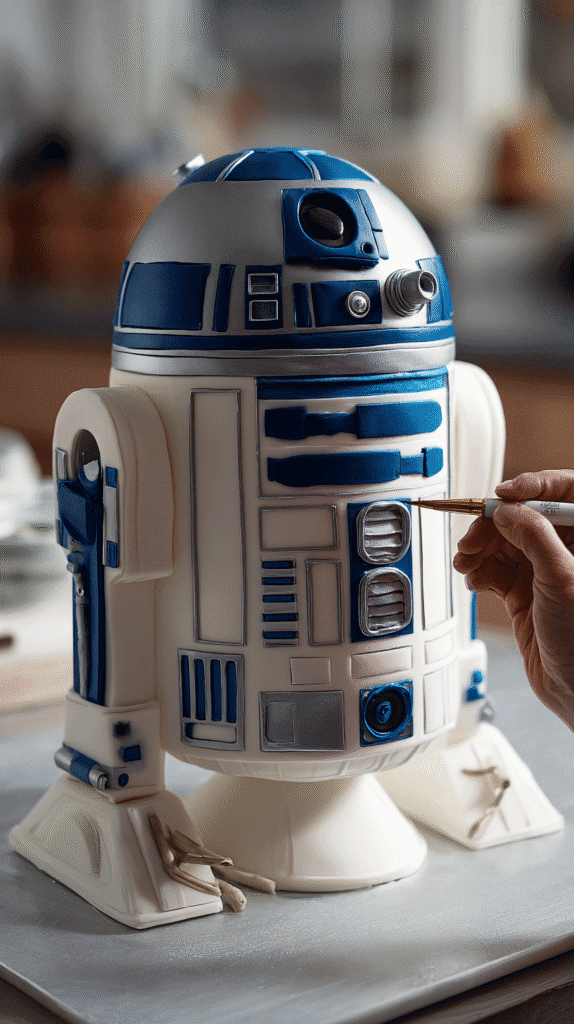
- Use small fondant discs for the eye lens and sensors; paint the large eye black with a silver rim.
- Add subtle shading or hand-painted gradients using diluted gel color and a fine brush.
- Chill briefly to keep the structure firm before serving.
- Optional: place the cake on a silver or space-themed board for presentation.
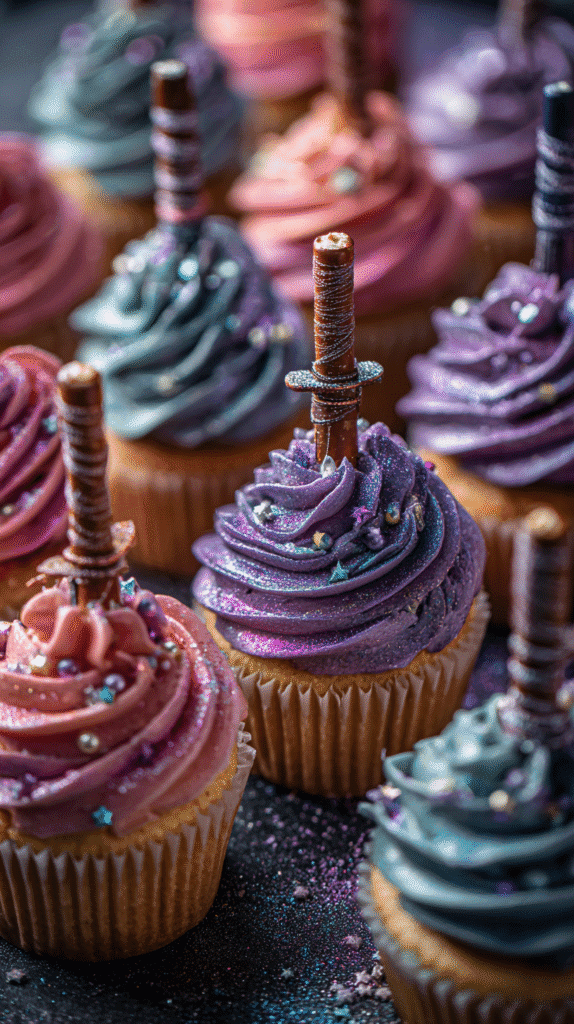
Lightsaber Cupcakes
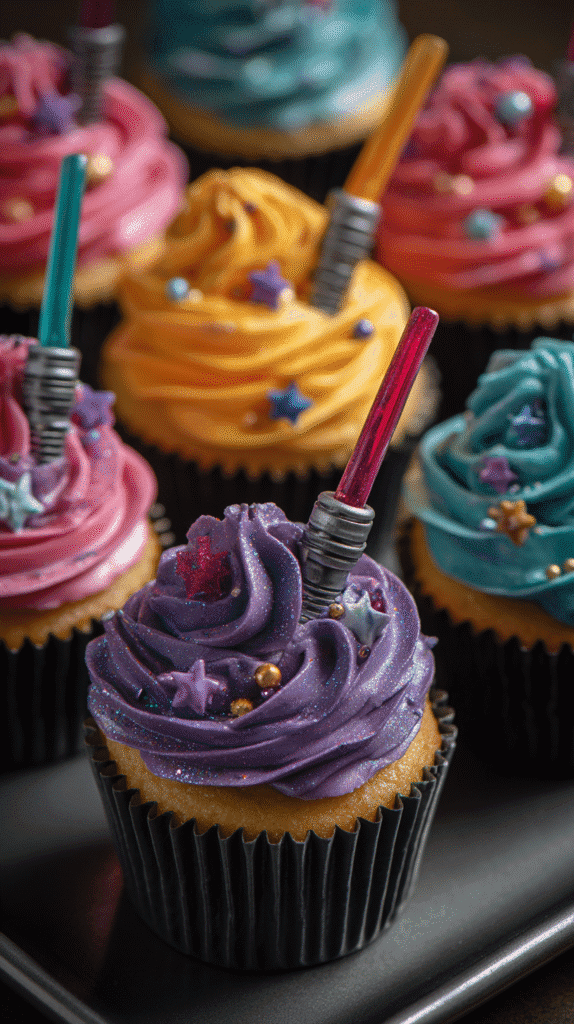
You can turn ordinary cupcakes into a galaxy-famous dessert by adding bright, glowing “blades” and metallic hilts. Bake your favorite cupcakes, pipe a generous swirl of frosting on each, and press a decorated pretzel stick into the center so it looks like a tiny lightsaber rising from the frosting.
To make them pop, use contrasting colors for the frosting and hilt—think bright blue or green blades with a silver or black handle. Add edible glitter or metallic food paint to the hilt for that polished, sci-fi finish that will make your guests do a double take.
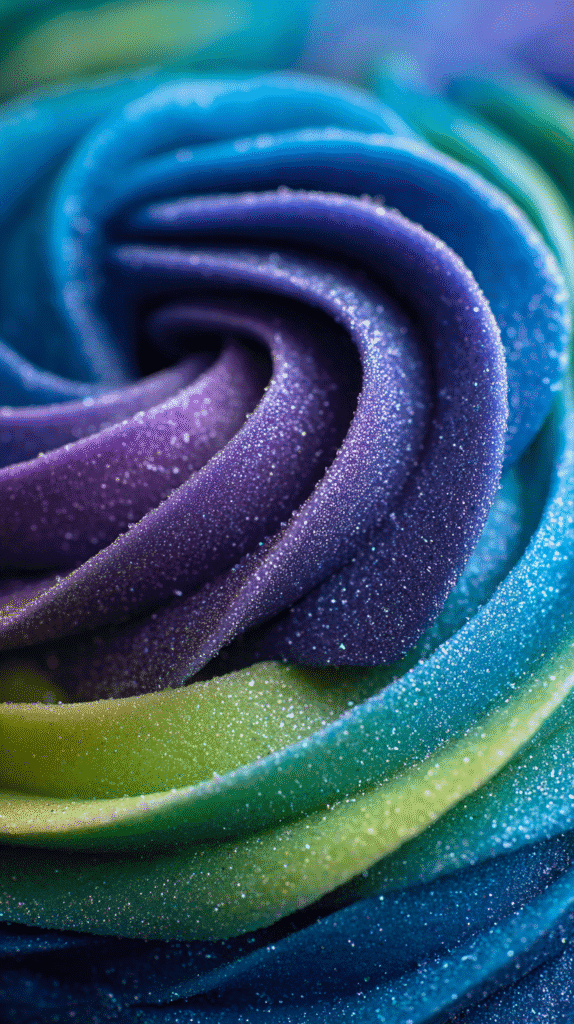
Colorful frosting
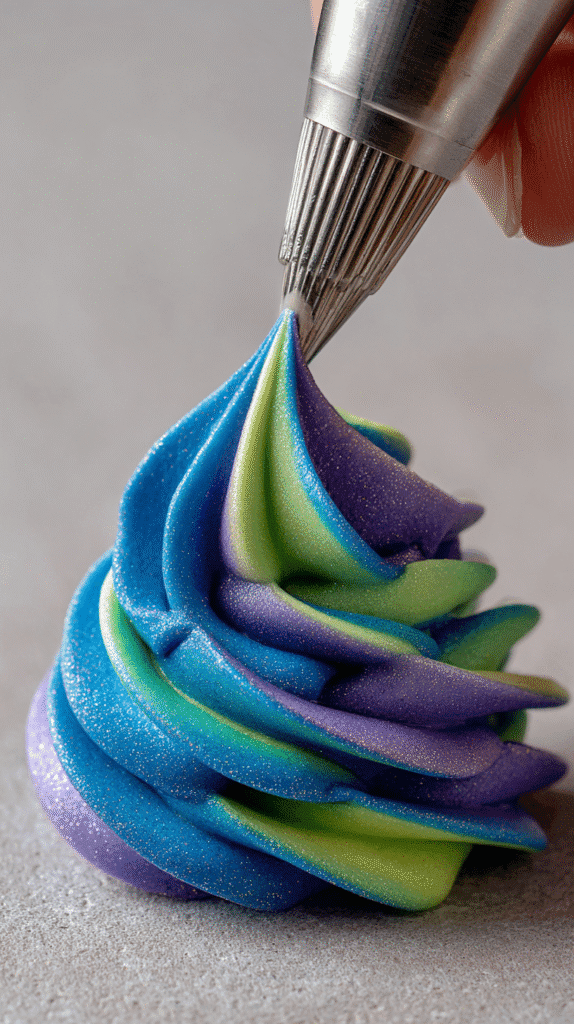
Get bold with gel food colors and a multi-color piping bag to create swirled, luminous blades that mimic a lightsaber’s glow. Load two or three shades into a single piping bag and pipe from the center outward for a seamless gradient effect that looks like light streaming from the blade.
For extra sheen, brush a little pearl dust or edible shimmer over the top once the frosting is set, and use a narrow round or star tip for crisp edges that help the blade stand out. Keep your frosting slightly stiffer than usual so it supports the pretzel without collapsing.
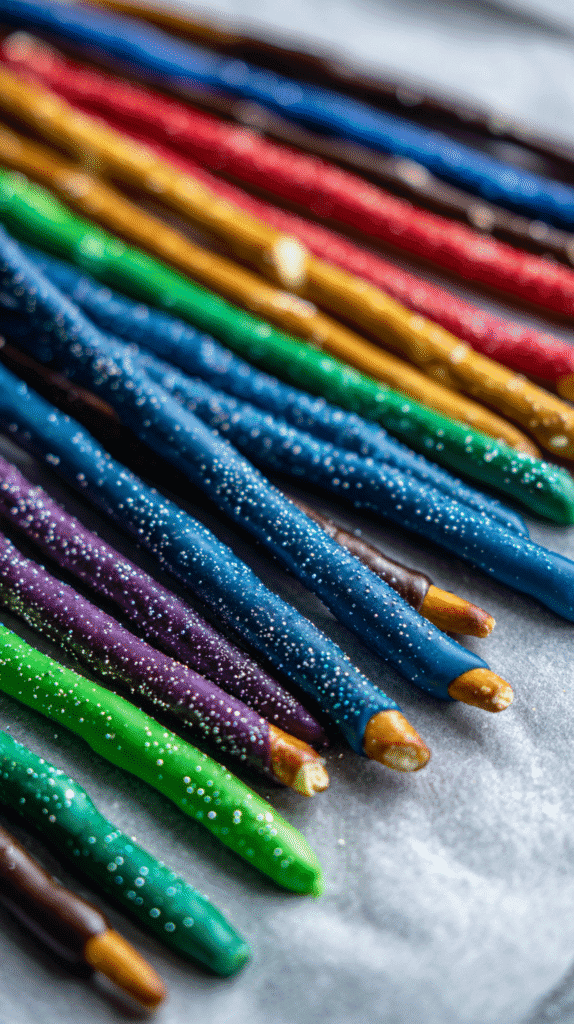
Pretzel sticks
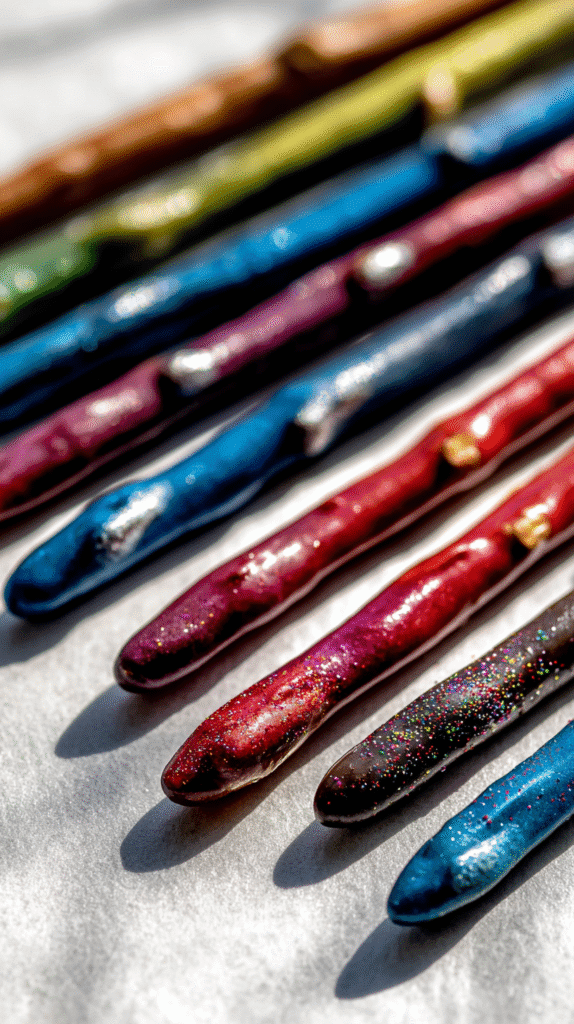
Dip pretzel rods or broken pretzel sticks into melted candy melts or white chocolate tinted with oil-based coloring to create the lightsaber blades—choose bright hues like blue, green, red, or purple. Lay them on parchment to set, and sprinkle colored sugar or tiny star sprinkles on the wet coating for a sparkling effect.
For the hilt, dip just the bottom inch of the pretzel into dark-colored coating or pipe a contrasting frosting wrap around the base to form the handle. You can add small details with edible silver paint or a contrasting icing to mimic switches and grips.
Use full-length pretzel rods for tall blades or cut them to size for bite-friendly cupcakes; store coated pretzels flat in an airtight container to keep them crisp, and insert them into the frosting while the coating is fully set so the finish doesn’t smear.
Ingredients for Lightsaber Cupcakes
Cake:
- Your favorite cupcake recipe (12–24 cupcakes)
- Buttercream for frosting the cupcakes
Decorating:
- Gel food colors for bright frosting colors (blue, green, red, purple, etc.)
- White or colored candy melts for lightsaber blades
- Pretzel rods or broken pretzel sticks for lightsaber handles/blades
- Edible glitter or metallic food paint for hilts
- Optional: pearl dust or edible shimmer for blade glow
Tools:
- Piping bags and tips (round or star tips for frosting)
- Offset spatula or small spatula for smoothing frosting
- Parchment paper for setting coated pretzels
- Small brush for edible glitter or metallic paint
- Cupcake liners and a baking tray
- Optional: multi-color piping bag for gradient/blended lightsaber blades
Directions: How to Make Lightsaber Cupcakes
Estimated time: 2–3 hours | Skill level: Easy to Intermediate
1. Bake and Prepare the Cupcakes
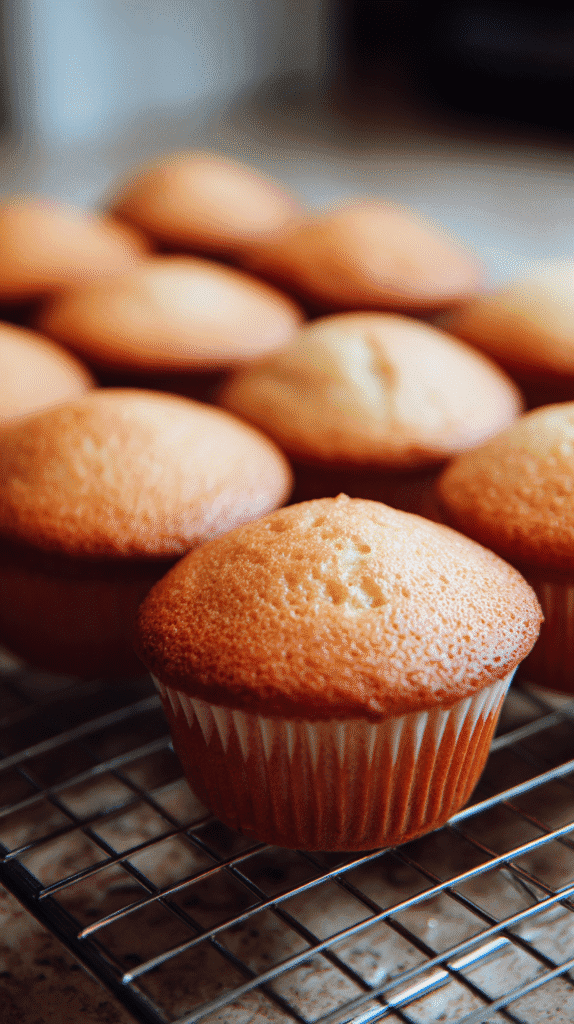
- Bake a batch of your favorite cupcakes (vanilla, chocolate, or red velvet work best).
- Let them cool completely on a wire rack before frosting.
- Prepare your frosting — buttercream or cream cheese works well — and divide it into portions for different colors if desired.
2. Create the Lightsaber Blades
- Melt candy melts or white chocolate and tint with oil-based gel food coloring in blue, green, red, or purple.
- Dip pretzel rods or sticks into the colored coating, leaving about 1 inch at the base uncoated for the hilt.
- Lay coated pretzels on parchment paper and sprinkle lightly with colored sugar or edible glitter while still wet.
- Let them set completely at room temperature or in the fridge for 10–15 minutes.
3. Make the Hilts (Handles)
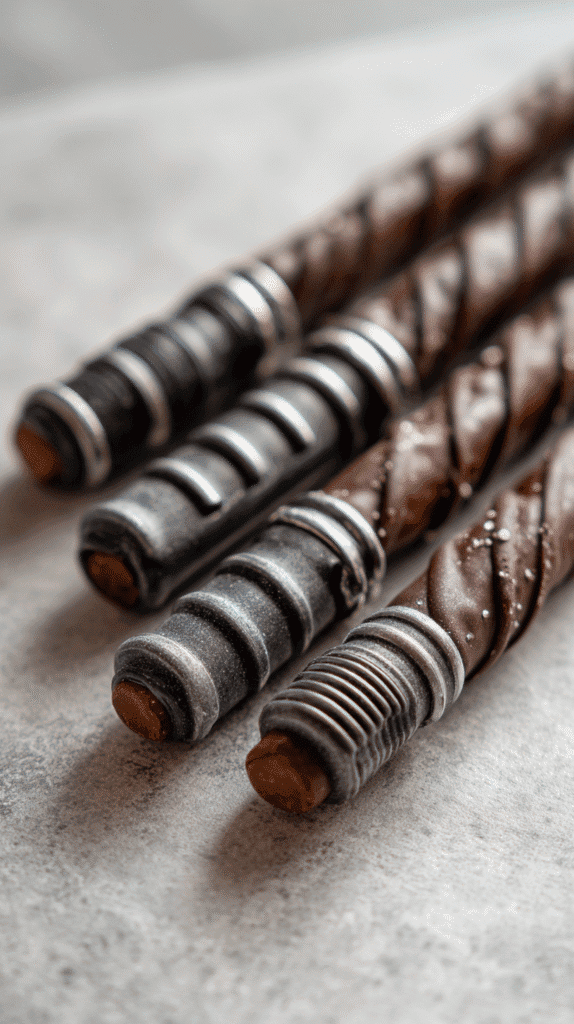
- Once the blades are dry, dip the uncoated ends into melted dark chocolate or gray-tinted candy coating to form hilts.
- For added realism, paint small silver accents or black icing lines to mimic switches and grips.
- Set aside to harden fully before inserting into cupcakes.
4. Prepare the Colorful Frosting
- Divide frosting into two or three shades that complement your lightsaber colors.
- Spoon each color into a single piping bag side-by-side for a swirled gradient effect.
- Use a narrow round or star piping tip and pipe from the center outward to create a glowing, radiant look.
- For a luminous effect, dust lightly with pearl dust or edible shimmer once set.
5. Assemble the Cupcakes
- Press one decorated pretzel lightsaber into the center of each frosted cupcake.
- Ensure the frosting is firm enough to hold the pretzel upright — chill briefly if needed.
- Add a few edible star sprinkles or glitter around the base for a galactic finish.
- Display on a dark tray or board for a dramatic “in the galaxy” presentation.
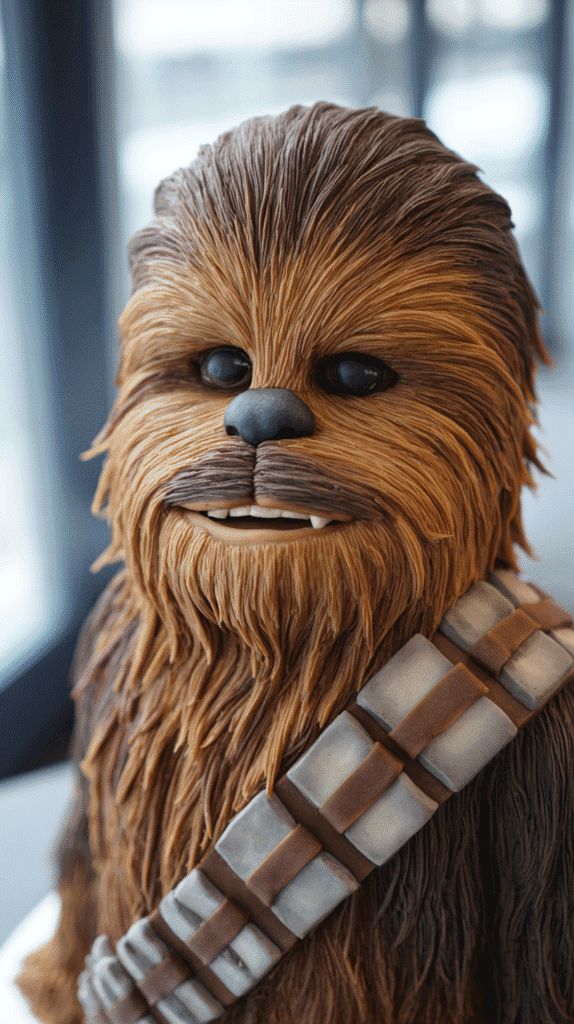
Chewbacca Cake
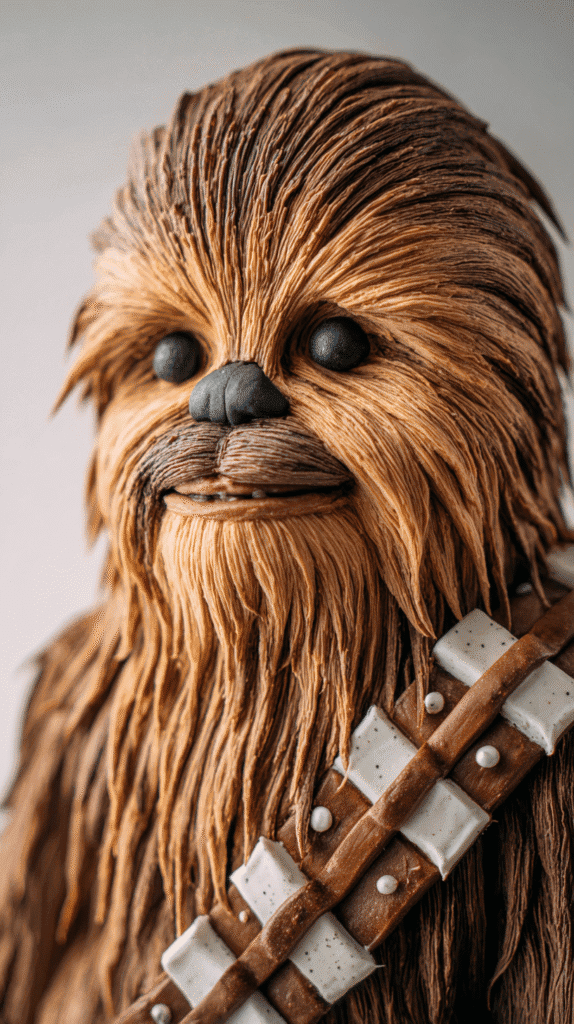
You can make a Chewbacca cake by starting with a tall round or oblong cake to mimic his lanky body, then stacking and carving gently to get the right silhouette. Cover the cake with a crumb coat of chocolate buttercream so your final layers go on smoothly, and keep your tools nearby so you can work quickly while the frosting is soft and spreadable.
You’ll want to focus on texture and character rather than perfect realism — guests will love the recognizable silhouette, lots of shaggy frosting, and a fun bandolier across the chest. Use a chilled cake board and a steady turntable to make piping and sculpting easier, and plan an assembly order so small pieces like ears and the muzzle are added last.
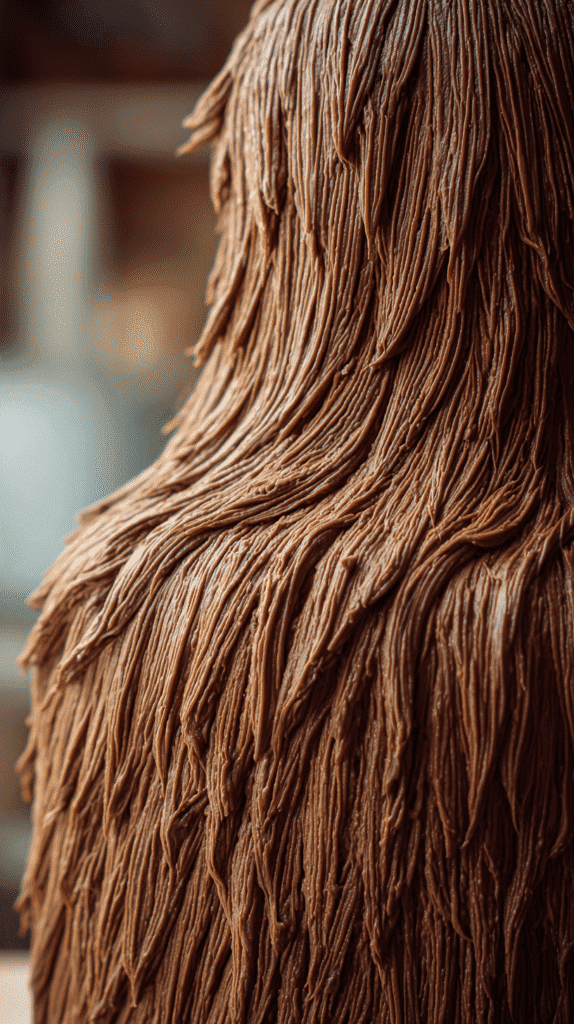
Brown fur texture
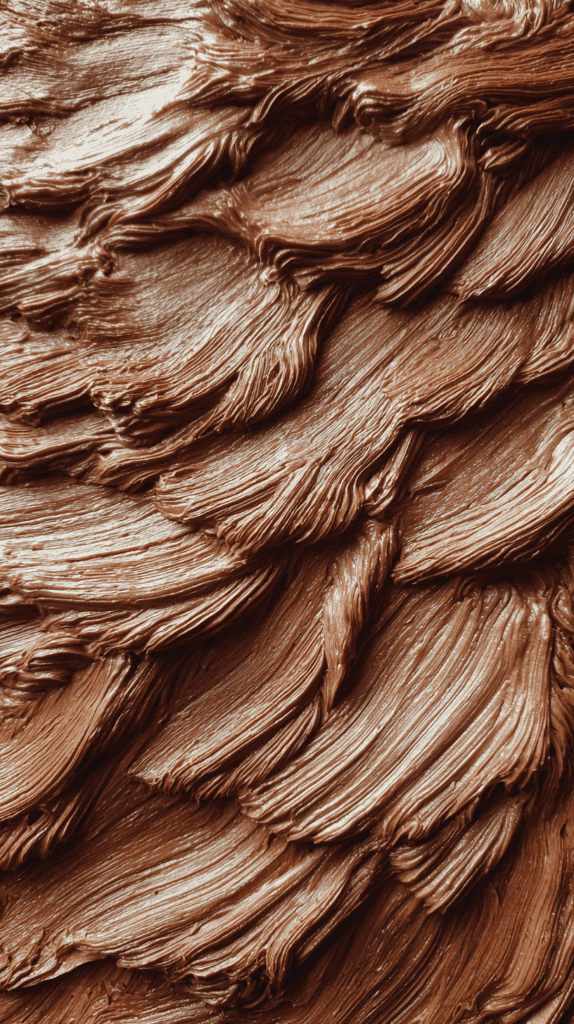
For the fur, tint buttercream in two or three shades of brown so you can layer color and add depth; darker tones in the recesses and lighter highlights on raised areas make the fur pop. A #233 or grass piping tip works great: pipe short, overlapping strands all over the cake, varying the length slightly to create a lived-in look that reads like Chewbacca’s coat from across the room.
If you want a more rustic finish, use an offset spatula or small palette knife to pull gentle strokes through the frosting for longer hair, and finish with a light dusting of brown cocoa powder or powdered food color to give shadows and natural variation. Chilled frosting holds shape better, so pipe in sections and return the cake to the fridge between passes if needed.
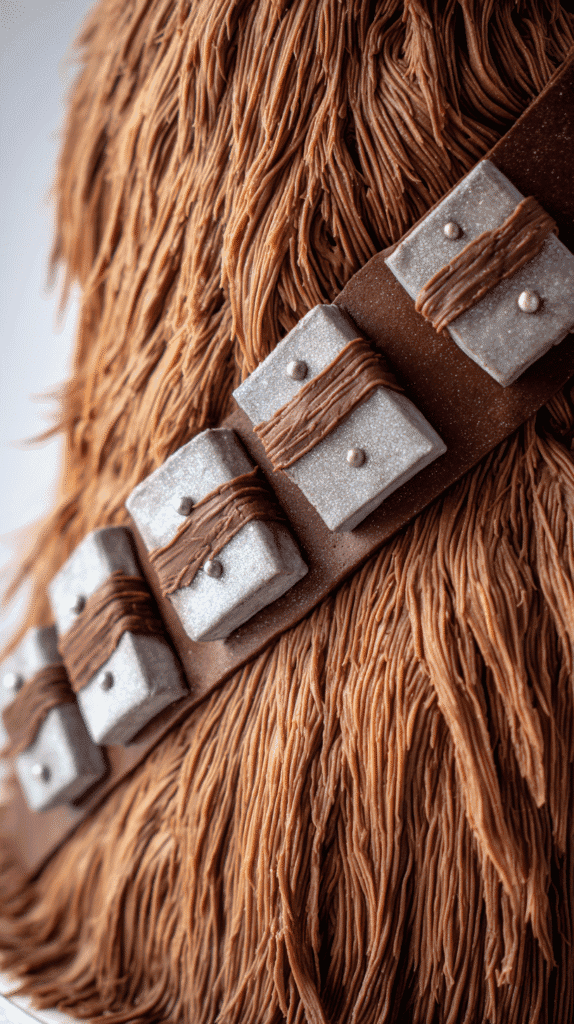
Wookiee details
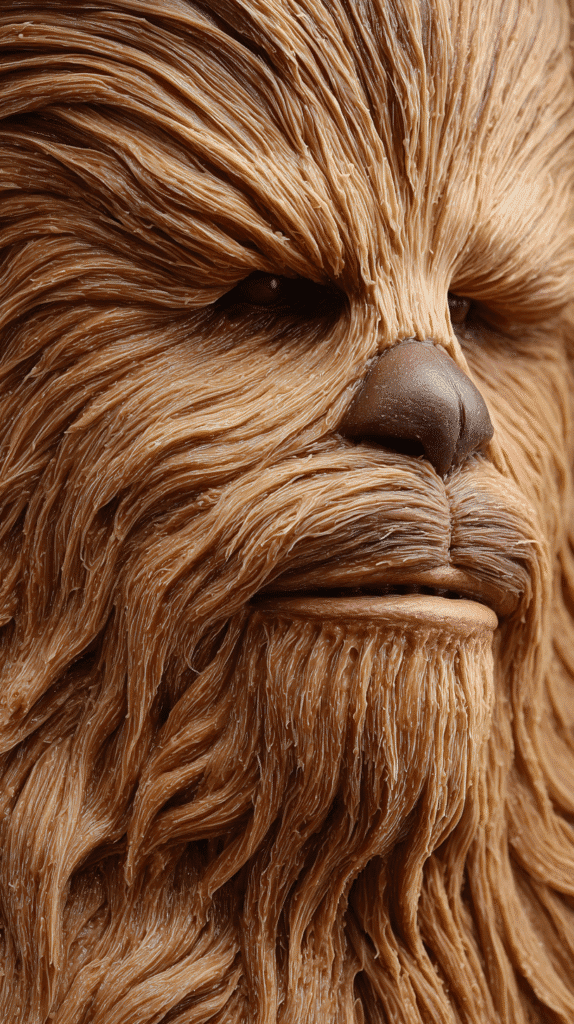
Add personality with the bandolier, face details, and accessories: roll out chocolate or caramel-colored fondant for the strap and square pouches, and secure them with a dab of buttercream. Form the eyes and nose from small pieces of dark fondant or modeling chocolate, positioning them to give your Chewbacca a warm, slightly mischievous expression.
To make the bandolier look worn, gently score the fondant with a knife and dust edges with darker food color; attach buckles and pouch details with edible glue or a little water and press lightly so they sit flush against the fur. Small edible pearls or silver dragees can act as rivets if you want extra shine without overworking the design.
Ingredients for Chewbacca Cake
Cake:
- 1–2 tall round or oblong cakes for the body shape
- Buttercream for stacking, crumb coating, and smoothing
Decorating:
- Brown buttercream in two or three shades for fur texture
- Chocolate or caramel-colored fondant for the bandolier and pouches
- Small pieces of dark fondant or modeling chocolate for eyes and nose
- Optional: small edible pearls or silver dragees for rivets
- Cocoa powder or powdered food color for shading and highlights
Tools:
- Serrated knife for carving body and shaping
- Offset spatula or small palette knife for spreading and texturing fur
- Piping bags and tips (#233 or grass tip for fur)
- Turntable for easy decorating
- Small modeling tools or toothpick for bandolier and face details
- Brush for shading with cocoa powder or food color
Directions: How to Make a Chewbacca Cake
Estimated time: 4–5 hours | Skill level: Intermediate
1. Bake and Prepare the Base Cake

- Bake a tall round or oblong cake to mimic Chewbacca’s body.
- Allow the cake to cool completely, then level the tops with a serrated knife.
- Stack layers with thin buttercream between them to create height.
- Apply a thin crumb coat of chocolate buttercream and chill for 15–20 minutes to set.
2. Carve the Silhouette
- Using a serrated knife, gently carve the cake to refine Chewbacca’s silhouette, including the shoulders, head, and torso.
- Work slowly and keep a reference image nearby to maintain recognizable proportions.
- Chill again if necessary to firm the structure before adding details.
3. Create the Fur Texture
- Tint buttercream in two or three shades of brown: dark for recesses, lighter for highlights.
- Using a #233 or grass piping tip, pipe short, overlapping strands all over the cake to mimic fur.
- Vary strand lengths and directions slightly for a more natural, “shaggy” look.
- Optional: use an offset spatula or small palette knife to pull longer, rustic strokes through the frosting.
- Chill between piping sections to help the frosting hold its shape.
4. Add the Bandolier and Accessories
- Roll out chocolate or caramel-colored fondant for Chewbacca’s bandolier strap and square pouches.
- Attach with a small dab of buttercream, pressing lightly so they sit flush against the fur.
- Score lightly and dust edges with darker food color for a worn, realistic effect.
- Optionally, add small edible pearls or silver dragees as rivets.
5. Add Facial Details
- Form the eyes and nose from small pieces of dark fondant or modeling chocolate.
- Position carefully to give Chewbacca a warm, slightly mischievous expression.
- Step back frequently to ensure the face looks balanced and recognizable.
- Chill the finished cake briefly before serving to set the fur texture and details.
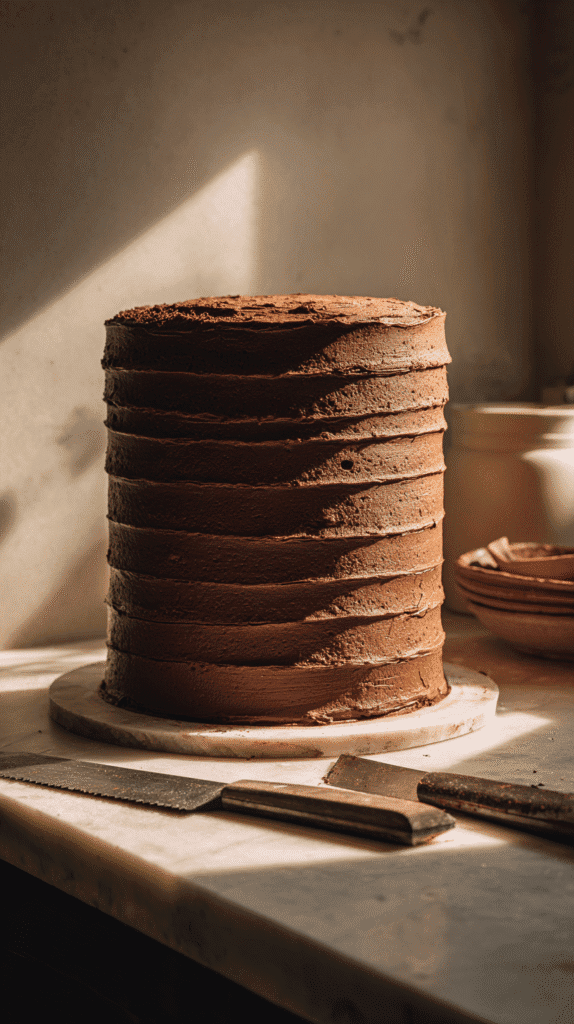
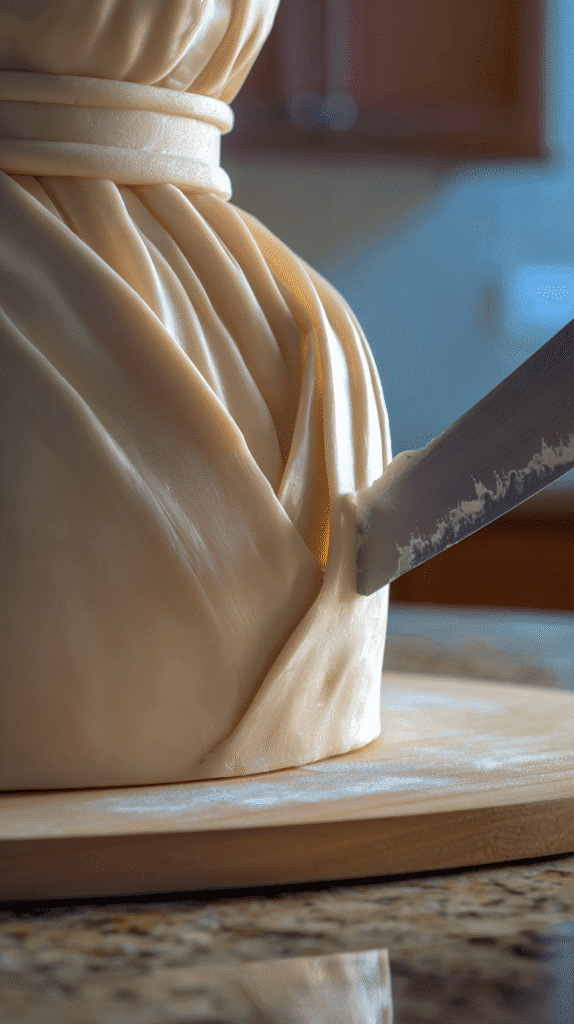
Jedi Robe Cake
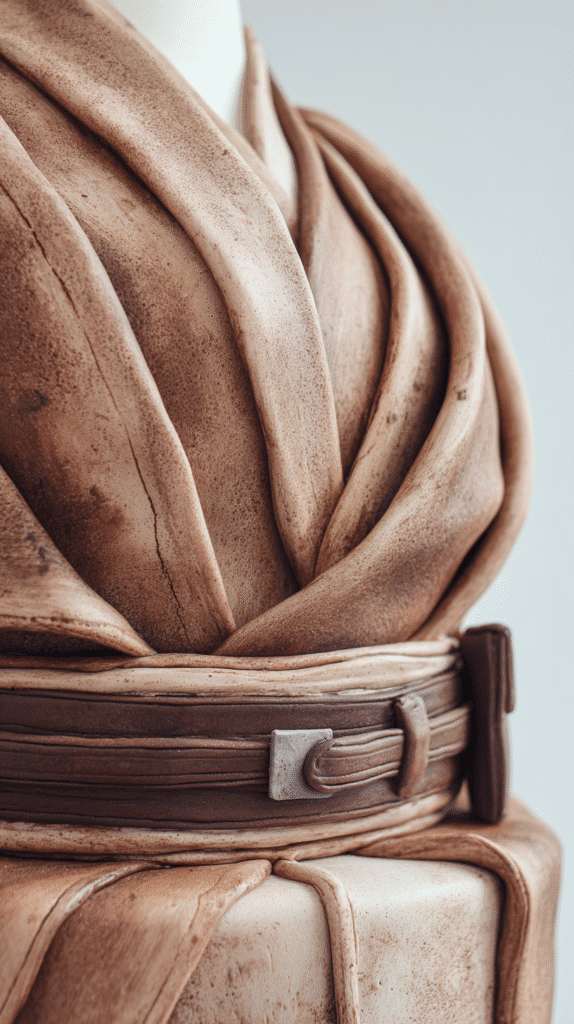
You can transform a simple sheet or round cake into a convincing Jedi robe by focusing on clean lines and layered textures. Carve the top to form a gentle V-neck and add overlapping panels with fondant or piped buttercream to mimic the robe’s drape, keeping the silhouette simple so it feels authentic without being intimidating to make.
Your finishing touches—belt straps, subtle stitching lines, and a matte brown finish—bring the look together. Work in shades of brown and tan for depth, and add a small fondant buckle or edible metallic paint to suggest the belt hardware for an instantly recognizable Star Wars vibe.
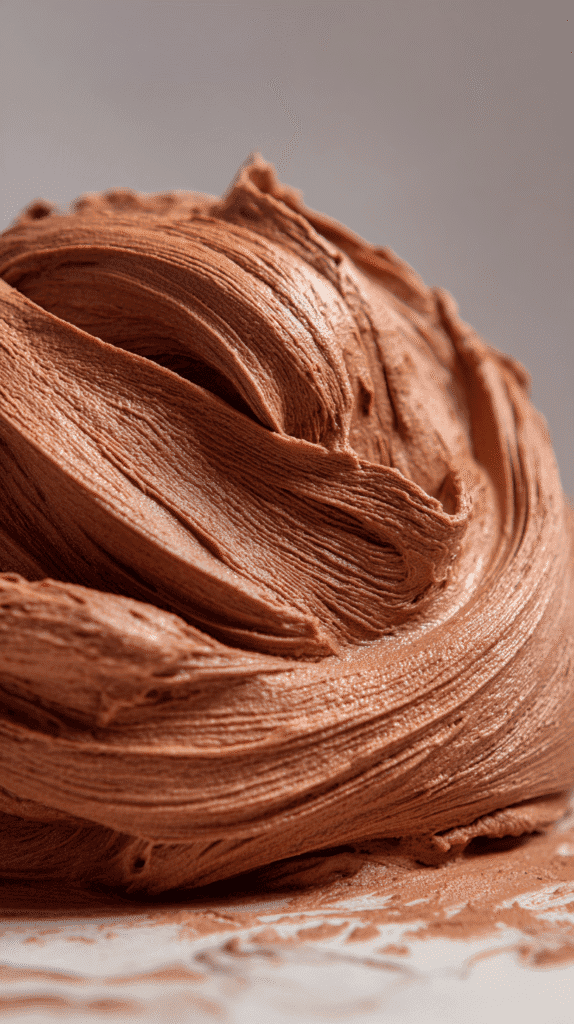
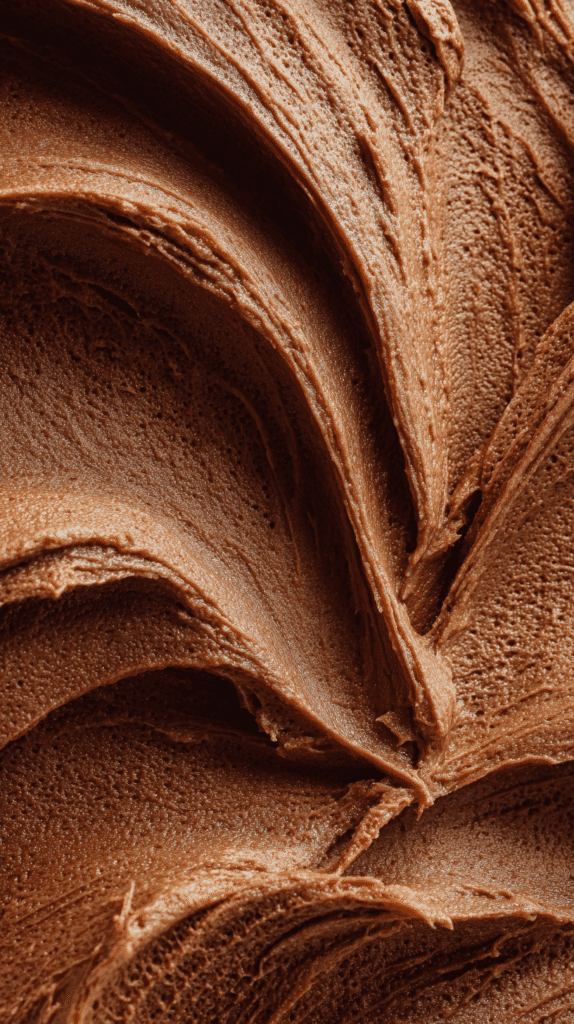
Brown icing
You can create rich brown icing by starting with chocolate buttercream or by adding cocoa powder to a vanilla base for a deeper, slightly drier finish. Adjust the shade with tiny drops of gel food color to avoid over-thinning the frosting; gel gives you control without watering down the texture.
For a smooth robe look, crumb-coat first and chill the cake before applying the final layer so you get clean edges. If you want a softer, fabric-like appearance, use a spatula to create gentle sweeping strokes or a stiff brush to stipple light texture into the surface.
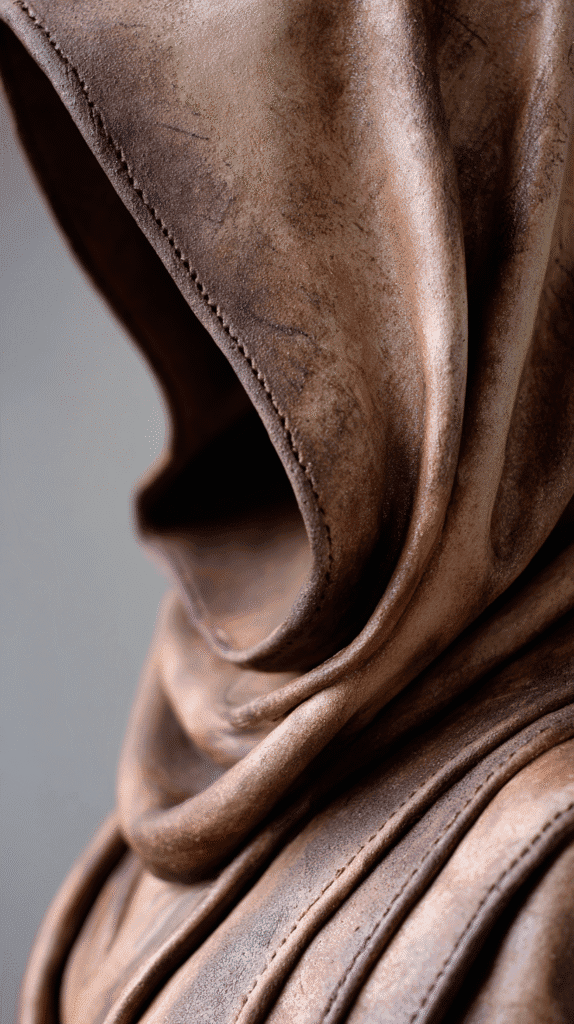
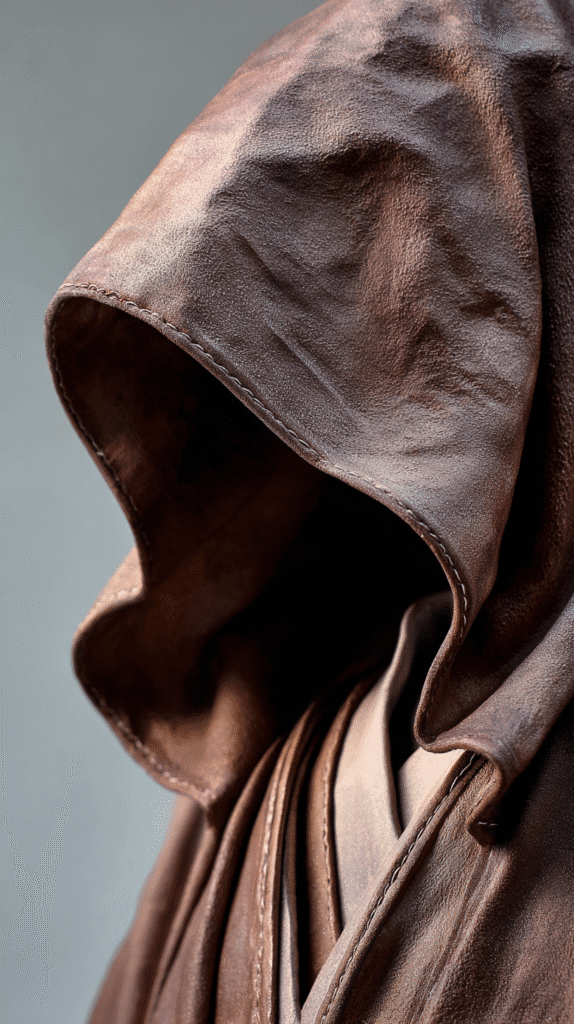
Hood decoration
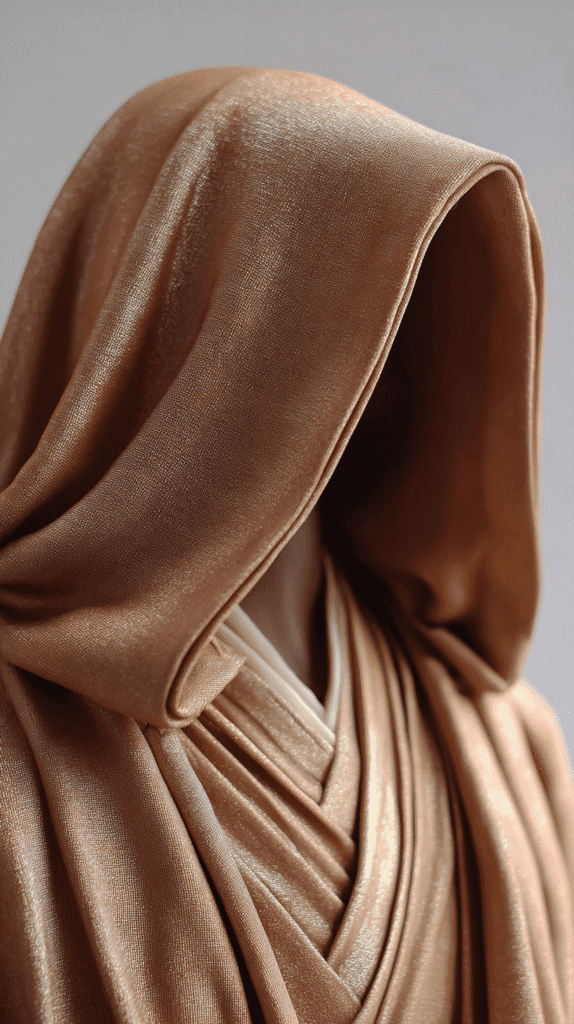
You can form the hood by shaping a separate piece of cake or building it from fondant draped over a light support like a small bowl or rice-paper base. Position it so it slightly overlaps the neckline and use a little water or edible glue to blend the seam into the main cake for a seamless effect.
To give the hood realistic folds, score shallow lines with a modeling tool or use a veining tool to create soft creases while the fondant is still pliable. Shade the recesses with a touch of cocoa powder or diluted edible paint to add depth and make the folds read as fabric from across the table.
For extra detail, add tiny fondant stitches along the hood’s edge and dust the outer rim with a matte finishing powder to cut shine and reinforce the cloth-like appearance.
Ingredients for Jedi Robe Cake
Cake:
- 1 sheet cake or round cake (8–10 inch)
- Buttercream for stacking, crumb coating, and smoothing
- Optional: extra small piece of cake or fondant for the hood
Decorating:
- Brown buttercream for the robe base
- Tan or lighter brown buttercream for layered panels and texture
- Fondant or modeling chocolate for belt straps and buckle
- Edible metallic paint or gold/silver dust for belt hardware details
- Optional: stiff brush or veining tool for subtle stitching lines
Tools:
- Serrated knife for carving neckline and panels
- Offset spatula and bench scraper for smoothing
- Piping bags and small tips for detail work
- Fondant tools or small modeling tools for belt and hood
- Brush for edible paint or shading
- Turntable for easy decorating
Directions: How to Make a Jedi Robe Cake
Estimated time: 3–4 hours | Skill level: Intermediate
1. Bake and Prepare the Cake
- Bake a sheet cake or a round cake as your base.
- Allow it to cool completely, then level the top if needed.
- Apply a thin crumb coat of chocolate or brown buttercream and chill for 15–20 minutes to set.
2. Carve the Robe Shape
- Lightly carve a gentle V-neck on the top of the cake to mimic a robe neckline.
- Smooth the sides and top for a clean base before adding panels or folds.
- Chill again if the cake feels soft to maintain shape while decorating.
3. Apply Brown Icing for the Robe
- Tint chocolate buttercream or vanilla buttercream with cocoa powder and a touch of brown gel food color to achieve the desired matte brown shade.
- Spread a smooth layer over the cake using an offset spatula or bench scraper.
- Optional: create gentle sweeping strokes or stippled texture with a stiff brush to simulate fabric folds.
4. Add Overlapping Panels and Hood
- Create overlapping robe panels with fondant or piped buttercream strips.
- For the hood, form a separate piece of cake or drape brown fondant over a small support (like a bowl or rice paper base).
- Position the hood slightly overlapping the neckline, blending seams with a little water or edible glue.
- Score shallow lines or creases with a modeling tool to mimic fabric folds.
5. Add Finishing Details
- Shade recesses lightly with cocoa powder or diluted edible paint for depth.
- Add small fondant belt straps and a tiny buckle; dust with edible metallic paint for hardware details.
- Optional: add tiny fondant stitches along panel edges and dust with matte finishing powder to reinforce a cloth-like appearance.
- Chill the finished cake briefly to set textures and ensure clean lines before serving.
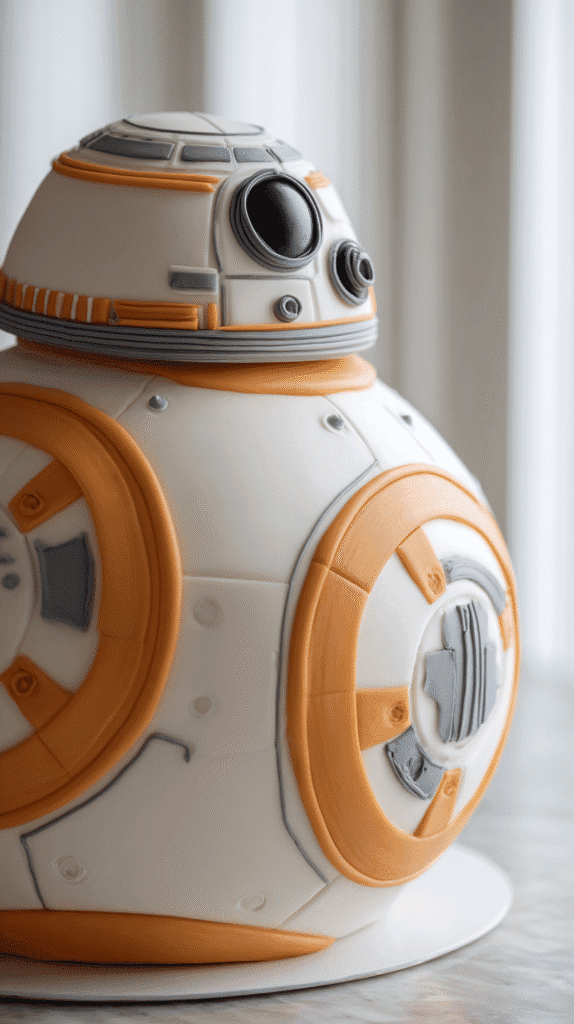
BB-8 Cake
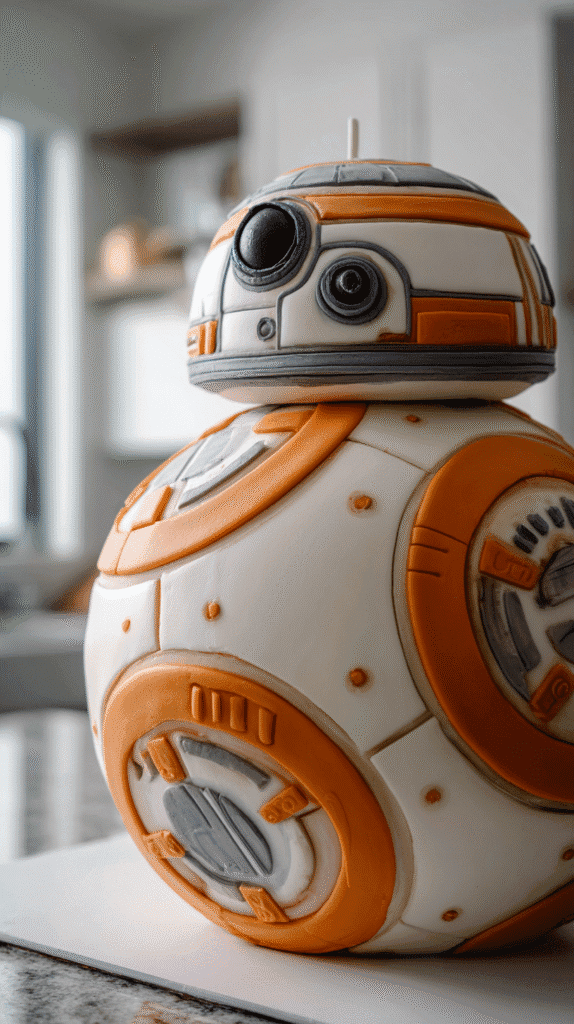
You can make a charming BB-8 cake at home by focusing on the spherical silhouette and the orange-and-white panels that give the droid its personality. Use dome pans or stack and carve layers into a rounded shape, then smooth with buttercream or cover with fondant to create a clean canvas for details.
Keep the build simple: bake, chill, crumb-coat, and finish your surface before adding panels, lines, and the eye. Small touches like gray accents, a contrasting eye, and a few edible metallic highlights will make your BB-8 instantly recognizable without needing advanced skills.
Round shape
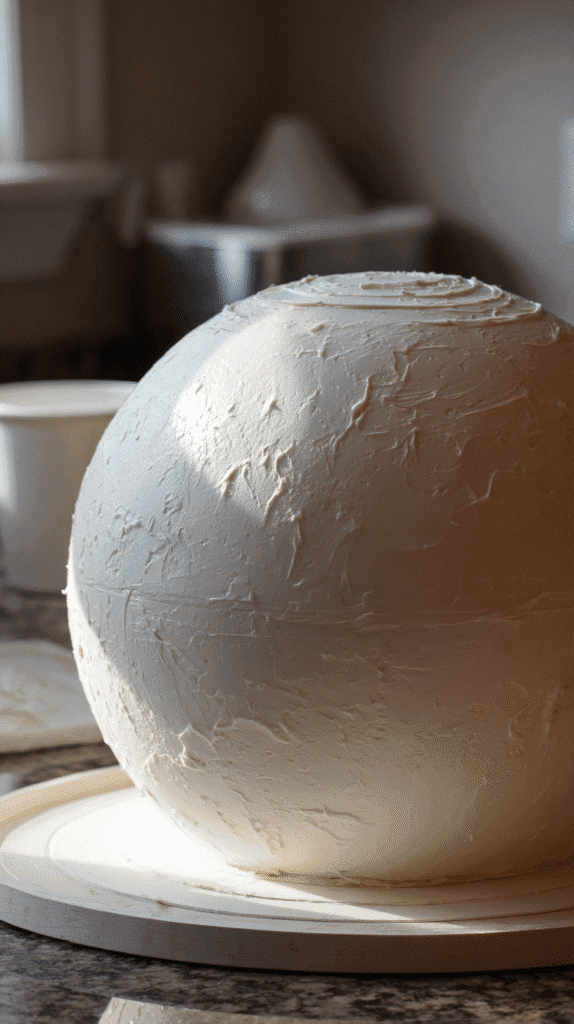
To get the round BB-8 body, use hemisphere (dome) cake pans or bake cakes in bowls and trim to shape; alternatively stack layers and carve a gentle dome with a serrated knife while the cake is cold. Chilling between cuts helps firm the crumb and makes carving much easier for you.
Support the layers with dowels or a small central skewer and apply a thin crumb coat to lock crumbs in place before the final smoothing step. If you prefer no-carve work, rice cereal treats can be molded into a dome and covered with fondant for a fast, sturdy option.
Orange details
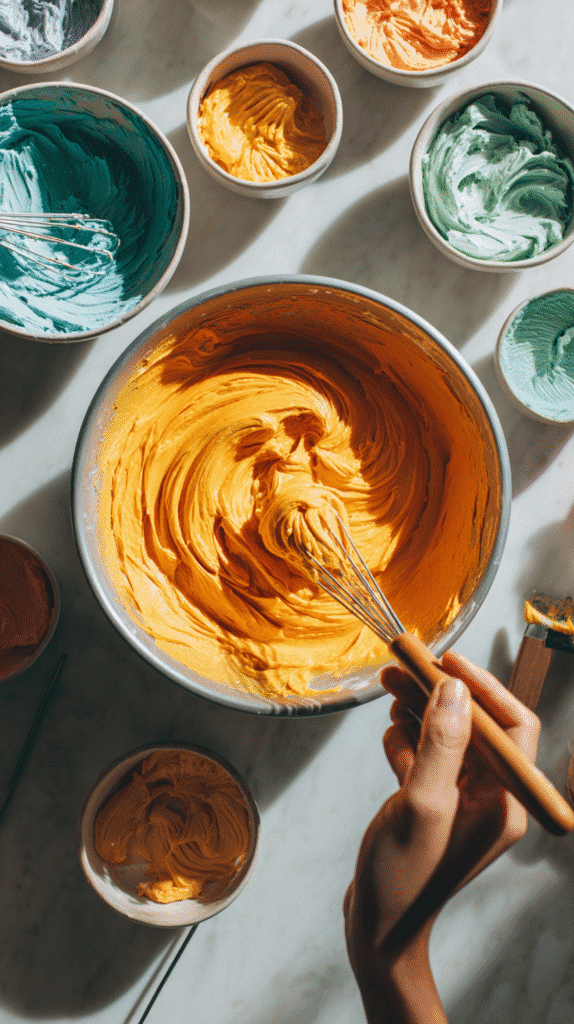
For BB-8’s orange panels, tint fondant or buttercream to a bright, slightly muted orange so it looks like the droid’s paint rather than neon. Cut panel shapes from rolled fondant using templates, or pipe the shapes with tinted buttercream and smooth edges with a small spatula or toothpick.
You can add depth by layering darker orange or brown wash in the panel recesses and outlining panels with thin gray piping for that mechanical look. Use edible markers or gel paints to add small scratches and bolts to make your BB-8 feel lived-in and authentic.
To paint on fondant, dilute gel food color with a little clear alcohol or lemon extract and build color in thin layers with a fine brush; for buttercream, use a small round piping tip and steady pressure to outline and fill, then smooth with a damp brush or palette knife for crisp panels.
Ingredients for BB-8 Cake
Cake:
- 2–3 dome or hemisphere cakes, or round cakes stacked and carved into a dome shape
- Buttercream for stacking, crumb coating, and smoothing
Decorating:
- White fondant or buttercream for the base
- Orange fondant or buttercream for panels and accents
- Gray fondant or buttercream for outlines and mechanical details
- Black fondant or buttercream for the eye
- Edible metallic paint or silver luster dust for highlights
- Optional: edible markers or gel paint for fine lines
Tools:
- Serrated knife for leveling and carving dome shape
- Offset spatula and bench scraper for smoothing
- Piping bags and small round tips for detailing
- Small fondant tools or cutters for panels and accents
- Brush for edible paint or luster dust
- Dowels or small skewers for internal support
- Turntable for ease of decorating
Directions: How to Make a BB-8 Cake
Estimated time: 4–5 hours | Skill level: Intermediate
1. Bake and Prepare the Cake

- Use hemisphere (dome) cake pans, bowls, or stack layers and carve a gentle dome to form BB-8’s body.
- Allow cakes to cool completely, then level the bottoms if needed.
- Insert dowels or a small central skewer for internal support.
- Apply a thin crumb coat of buttercream and chill for 15–20 minutes to set.
2. Shape the Round Body
- Carve gently to refine the dome silhouette if using stacked layers.
- Chill between cuts to firm the crumb and make shaping easier.
- Optional: use molded rice cereal treats covered in fondant for a no-carve alternative.
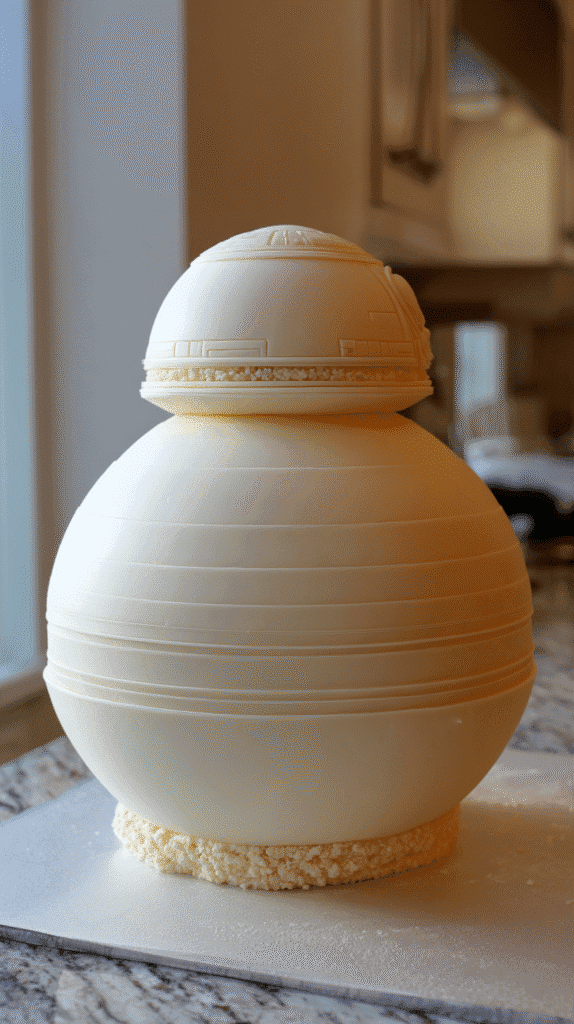
3. Apply the Base Layer
- Cover the body with smooth white buttercream or fondant for a clean canvas.
- Smooth edges with an offset spatula or fondant smoother.
- Chill briefly before adding colored panels.
4. Add Orange Panels and Details
- Tint fondant or buttercream to a bright, slightly muted orange.
- Cut panel shapes from fondant using templates or pipe shapes with tinted buttercream.
- Smooth edges with a small spatula or toothpick.
- Layer darker orange or brown washes in recesses for depth, and outline panels with thin gray piping.
5. Add Facial Features and Finishing Touches
- Create BB-8’s eye using black fondant or piped buttercream.
- Add small gray accents, scratches, or bolts using edible markers or diluted gel paint for a realistic, mechanical look.
- Brush metallic highlights with edible silver luster dust if desired.
- Chill the finished cake briefly before serving to set details.
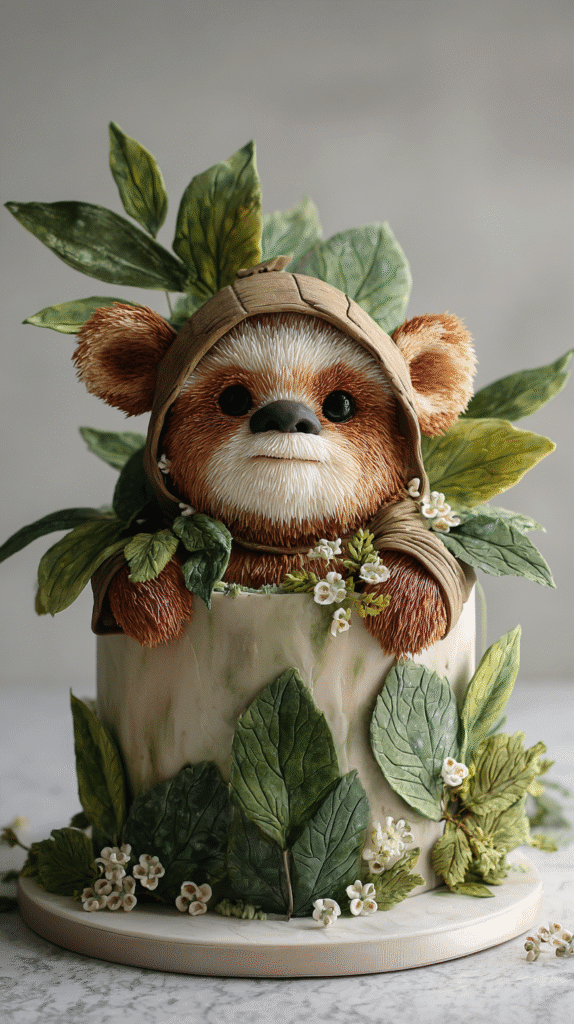
Ewok Cake
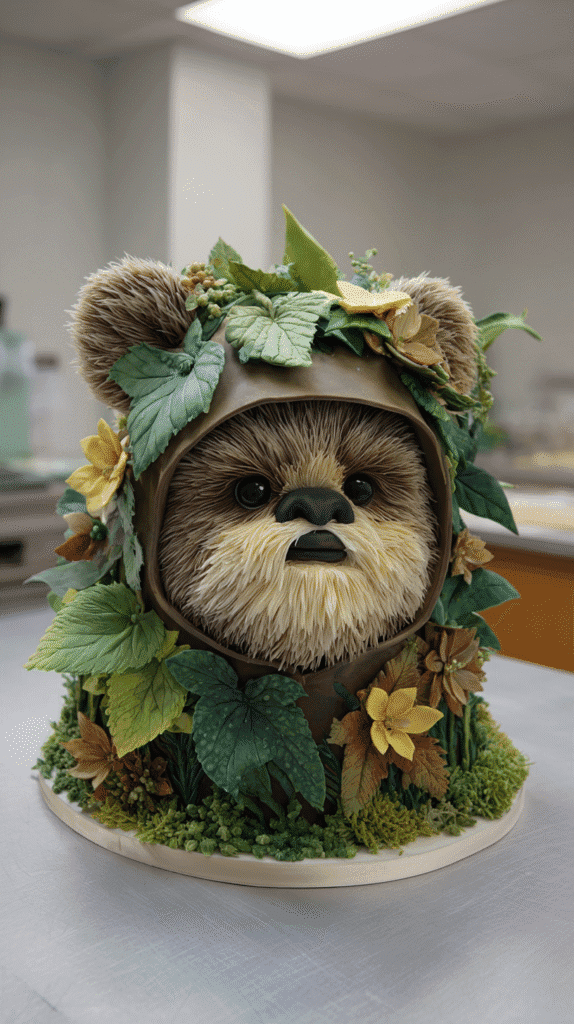
You can create an adorable Ewok cake that looks like it came from the forest moon of Endor without needing advanced tools. Start with a round or dome-shaped cake for the head, use cocoa or brown buttercream for the fur texture, and add a small hood made from fondant or a thin layer of chocolate to capture that iconic look.
Your Ewok can be personalized with different expressions and accessories — a tiny fondant spear, a flower crown, or a chocolate base to resemble mossy ground will make your cake playful and unique. Keep proportions simple: big eyes, a rounded snout, and little ears so your Ewok reads instantly cute and recognizable.
Bear-like features
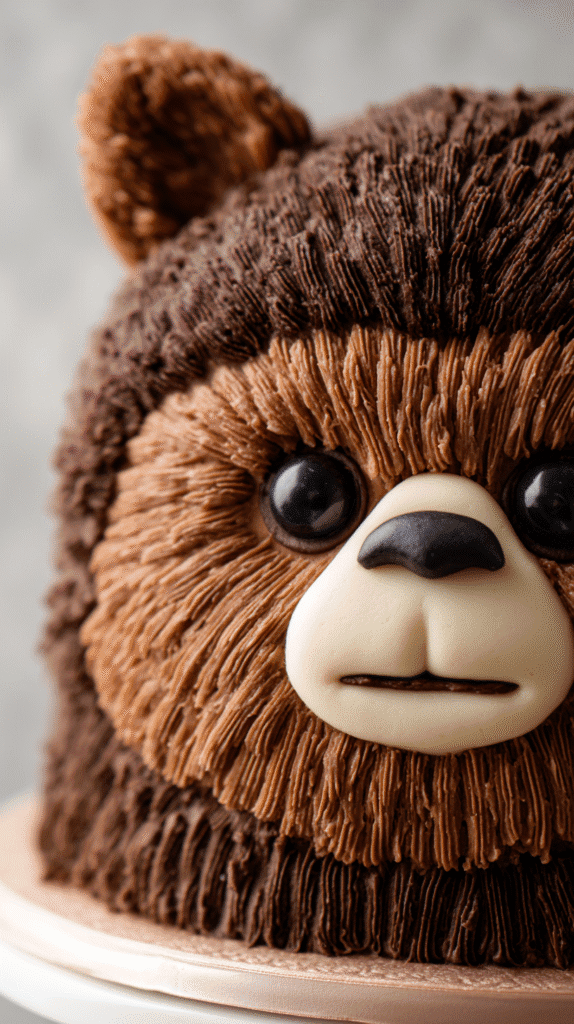
Focus on soft, rounded shapes to get the bear-like charm: a plump muzzle, circular cheeks, and rounded ears placed slightly to the side. Use a piping tip or a textured spatula to create short, feathery strokes for fur; darker accents around the eyes and muzzle add depth and character to your Ewok’s face.
You can use small fondant pieces for the nose and inner ears, and press edible pearls or chocolate chips for eyes, then brush on a tiny glaze to make them gleam. If you’re sculpting features from buttercream, chill the cake briefly between steps so the details stay crisp as you build up the layers of fur and facial highlights.
Leaf decorations
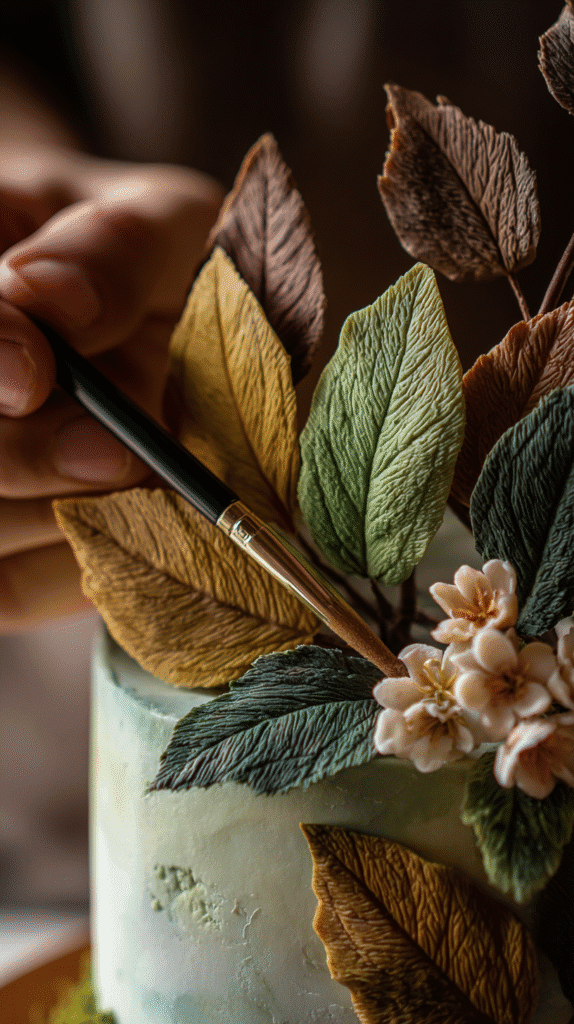
Leaf decorations bring the forest vibe and are easy to make from fondant, gum paste, wafer paper, or piped buttercream. Cut leaf shapes with small cutters or freehand them, then use a veining tool or a toothpick to add central veins and texture before drying or placing them on the cake.
Arrange leaves around the hood, at the base of the cake, or tuck a few behind the ears to frame the face and add natural color contrast. You can mix shades of green and a touch of brown or yellow to give the foliage a realistic, slightly weathered look that complements the Ewok’s rustic style.
For extra realism, dust leaf edges lightly with edible powder or gel colors to create highlights and shadows, and attach delicate wafer-paper leaves with a tiny dab of piping gel for a lifelike flutter. Small clusters of leaves combined with tiny sugar flowers or moss-like crumbled cake make your display feel like part of Endor’s undergrowth.
Ingredients for Ewok Cake
Cake:
- 1–2 round or dome-shaped cakes for the head
- Buttercream for stacking, crumb coating, and smoothing
Decorating:
- Cocoa or brown buttercream in two or three shades for fur texture
- Fondant or thin layer of chocolate for hood
- Small fondant pieces or modeling chocolate for nose and inner ears
- Edible pearls or chocolate chips for eyes
- Optional: tiny fondant spear, flower crown, or chocolate base for accessories
- Green fondant, gum paste, wafer paper, or piped buttercream for leaf decorations
- Optional: edible powder or gel colors for shading leaves and accessories
Tools:
- Serrated knife for shaping
- Offset spatula or palette knife for spreading and texturing fur
- Piping bags and tips (#233 or similar for fur)
- Small modeling tools or cutters for nose, ears, and hood
- Veining tool or toothpick for leaf details
- Brush for shading or edible dusting
- Turntable for easier decorating
Directions: How to Make an Ewok Cake
Estimated time: 3–4 hours | Skill level: Intermediate
1. Bake and Prepare the Cake
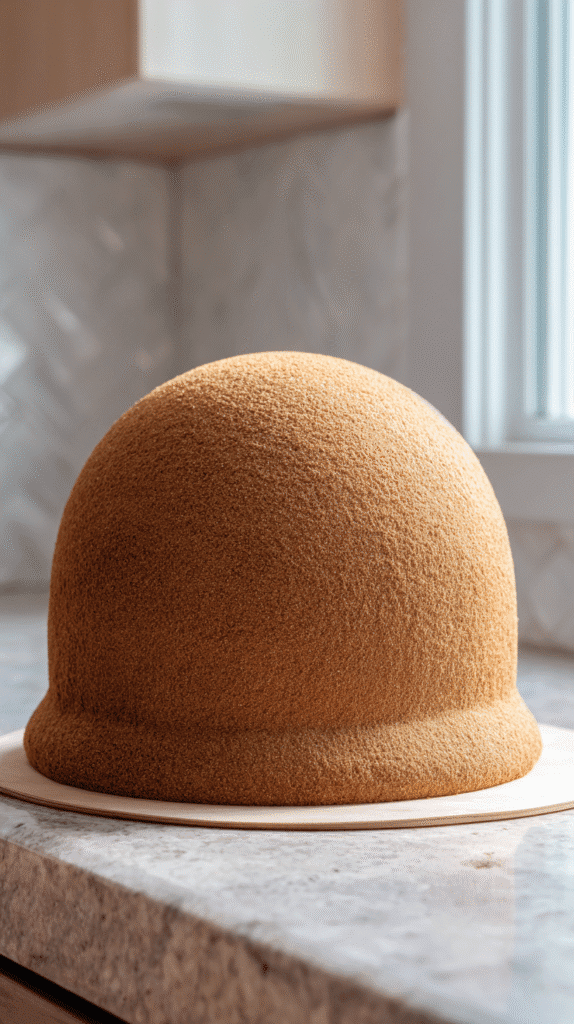
- Bake a round or dome-shaped cake for the Ewok’s head.
- Allow the cake to cool completely, then level the top if needed.
- Apply a thin crumb coat of cocoa or brown buttercream and chill for 15–20 minutes to set.
2. Shape the Face and Features
- Carve gently to define a rounded muzzle, circular cheeks, and slightly side-set ears for the bear-like charm.
- Chill the cake briefly if needed to firm up the shape before adding details.
3. Apply the Fur Texture
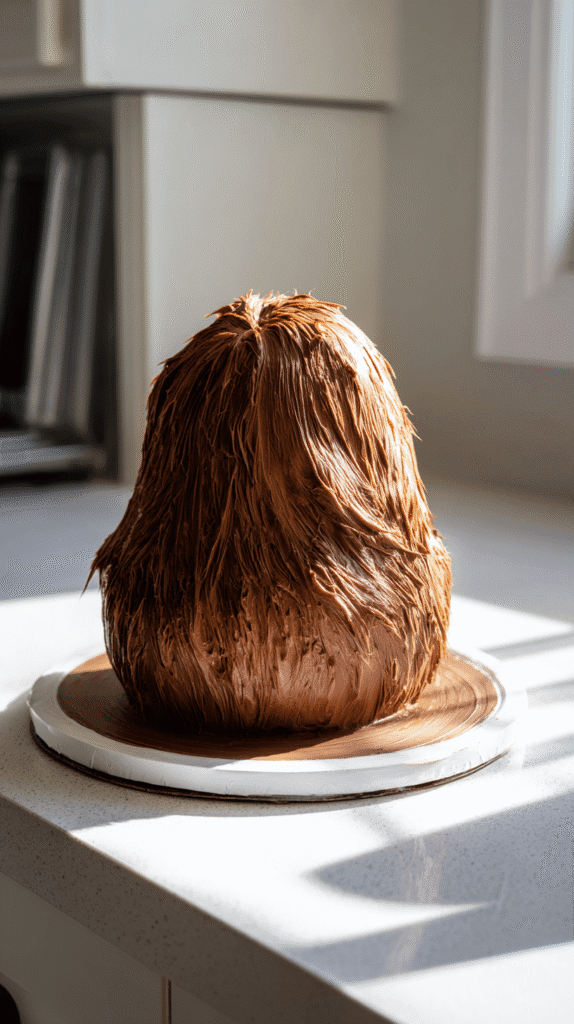
- Tint buttercream in two or three shades of brown for depth.
- Use a small piping tip or textured spatula to pipe short, feathery strokes all over the cake.
- Darker accents around the eyes, muzzle, and ears help bring the face to life.
- Chill between sections if using buttercream to keep details crisp.
4. Add Facial Features
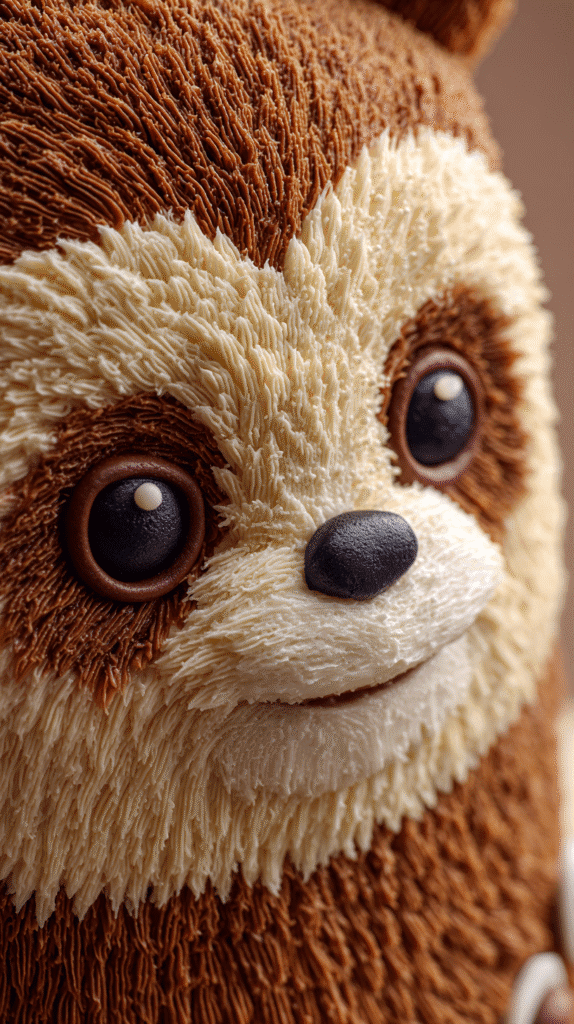
- Create the nose and inner ears with small pieces of fondant.
- Use edible pearls, chocolate chips, or fondant for the eyes and brush lightly with glaze to make them shine.
- Ensure all features are positioned proportionally to maintain the Ewok’s cute, recognizable look.
5. Add Leaf and Accessory Decorations
- Make leaves from fondant, gum paste, wafer paper, or piped buttercream.
- Vein leaves with a toothpick or veining tool and mix shades of green, brown, and yellow for a natural look.
- Arrange leaves around the hood, base, or behind ears for a forest effect.
- Optional: add tiny fondant accessories such as a spear, flower crown, or mossy base to enhance personality.
- Lightly dust leaf edges or foliage with edible powder or gel colors for highlights and shadows.
Final Words
Ultimately you can bring the galaxy to your kitchen with these Top 10 Star Wars cake ideas you can make at home, turning simple ingredients into epic scenes and beloved characters. With a little planning and creativity your cakes will delight fans of all ages and make birthdays or watch parties feel truly out of this world.
As you try different techniques—from fondant helmets to lightsaber cupcakes—you’ll build skills and confidence that make each bake easier and more fun. Trust your instincts, enjoy the process, and may your baking adventures be as bold and playful as the Star Wars universe itself.
You may also like:
– Sinister Candy Station Ideas for an Unforgettable Halloween Party
– Gothic Hors D’Oeuvres To Impress Your Gotham Guests
– 21 Children’s Birthday Cakes Inspired by Gotham City
If you enjoyed this blog you can visit us or check out our other blogs and learn a bit about us.
Disclaimer: This blog post is inspired by fictional universes and characters created by their respective rights holders. All related content and imagery remain the property of their respective rights holder. This fan-inspired content is for entertainment and commentary purposes only and is not affiliated with or endorsed by HBO, Disney, Warner Bros., Lionsgate, or any other rights holders. To explore the official source material, please visit:
HBO