
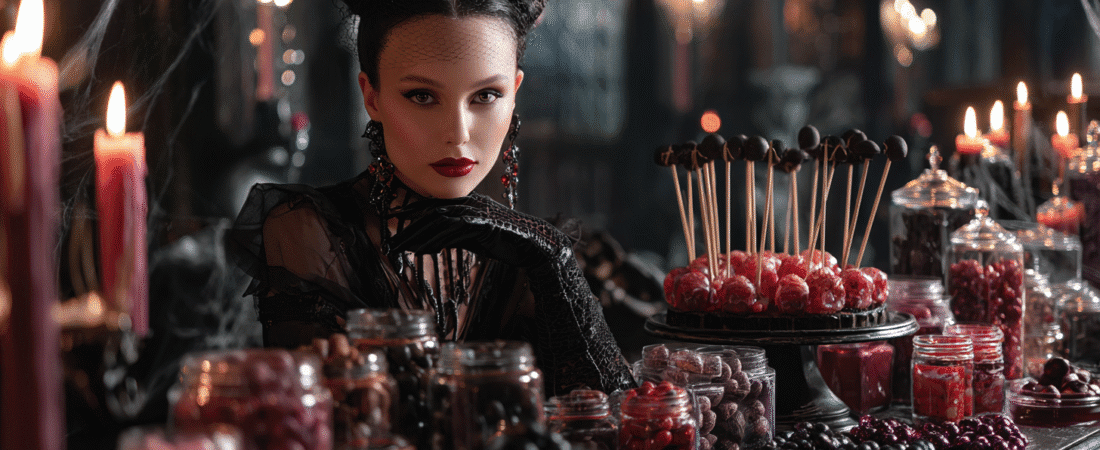
Get ready to set the stage for a Halloween that’s both spooky and sweet with “Sinister Candy Station.” This guide is packed with delightful recipes and creative ideas that are sure to impress your guests. From ghostly cupcakes to creepy cookies, we’ll share essential cooking tips, ingredient substitutions, and the tricks you need to pull off these enchanting treats without breaking a sweat.
Gothic Chocolate-Covered Skull Treats For A Spooky Twist
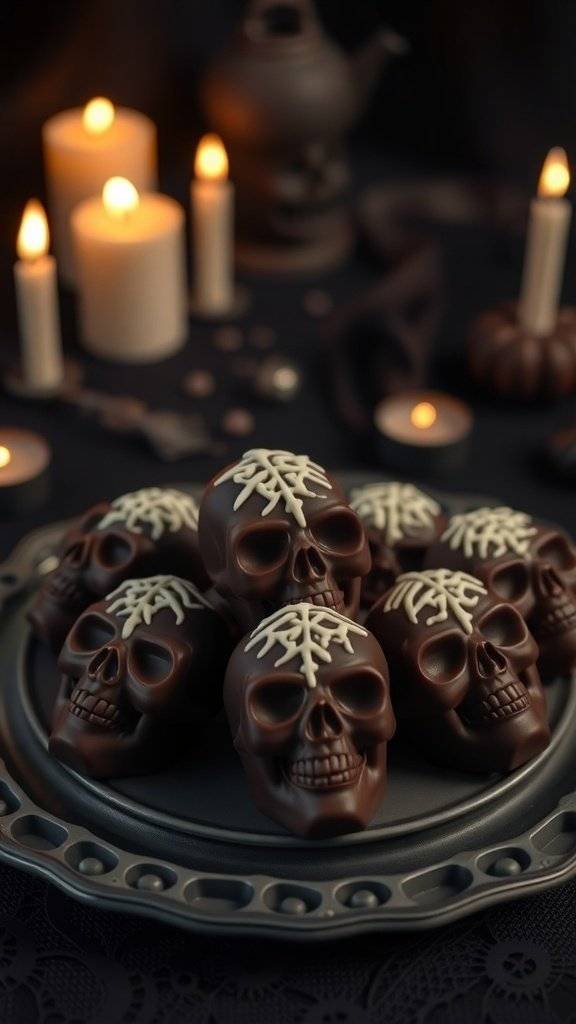
These Gothic chocolate-covered skull treats are perfect for Halloween parties. They bring a fun, spooky vibe to your table while being deliciously sweet. Each skull is crafted from rich chocolate, making them a treat that will wow your guests.
The skulls are not only eye-catching but also easy to make. You can place them on a decorative platter surrounded by candles and other Halloween decorations for a dramatic effect. The white chocolate drizzle on top adds a nice contrast and gives them a ghostly touch.
To make these treats, you’ll need just a few ingredients and some simple steps. They’re great for both kids and adults, and everyone will love the unique look and taste!
Ingredients
- 1 cup chocolate chips (dark or milk)
- 1/2 cup white chocolate chips
- Skull-shaped silicone mold
- Sprinkles (optional, for decoration)
Instructions
- Melt the chocolate chips in a microwave-safe bowl in 30-second intervals, stirring in between until smooth.
- Pour the melted chocolate into the skull-shaped mold, filling each cavity. Tap the mold gently on the counter to remove air bubbles.
- Place the mold in the fridge for about 30 minutes or until the chocolate is set.
- Once set, carefully pop the skulls out of the mold.
- Melt the white chocolate chips in the same way and use a piping bag to drizzle it over the skulls for decoration.
- If desired, add sprinkles while the white chocolate is still warm.
Cooking Tips: If you want a different flavor, try using flavored chocolate chips like mint or orange. You can also use candy melts for a more vibrant color.
Ingredient Substitutions: If you prefer a dairy-free option, use dairy-free chocolate chips. You can also substitute the white chocolate with yogurt-covered chips for a different taste.
For the perfect platter to serve these on visit here.
Mysterious Black Velvet Cupcakes With Eerie Cream Cheese Frosting
These black velvet cupcakes are a perfect addition to your Halloween treats lineup. Their dark, rich color creates a striking visual that will intrigue your guests. Topped with a swirl of eerie cream cheese frosting, they look both spooky and delicious.
The cupcakes are moist and soft, with a hint of cocoa that adds depth to their flavor. The cream cheese frosting is creamy and slightly tangy, balancing the sweetness of the cupcake. To make them even more festive, sprinkle some edible decorations like purple and black sprinkles or candy eyeballs on top.
For those who want to try their hand at baking these treats, here’s a simple recipe:
Ingredients
- 1 ¾ cups all-purpose flour
- 1 ½ cups granulated sugar
- ¾ cup unsweetened cocoa powder
- 1 ½ teaspoons baking soda
- 1 teaspoon salt
- 1 cup buttermilk
- ½ cup vegetable oil
- 2 large eggs
- 2 teaspoons vanilla extract
- 1 tablespoon black food coloring
- 8 oz cream cheese, softened
- ½ cup unsalted butter, softened
- 4 cups powdered sugar
- 1 teaspoon vanilla extract (for frosting)
Instructions
- Preheat your oven to 350°F (175°C) and line a cupcake pan with liners.
- In a large bowl, mix together flour, sugar, cocoa powder, baking soda, and salt.
- In another bowl, whisk together buttermilk, oil, eggs, vanilla, and black food coloring.
- Combine the wet and dry ingredients, mixing until just combined.
- Fill the cupcake liners about 2/3 full and bake for 18-20 minutes, or until a toothpick comes out clean.
- Let the cupcakes cool completely before frosting.
- For the frosting, beat the cream cheese and butter together until smooth. Gradually add powdered sugar and vanilla, mixing until creamy.
- Frost the cooled cupcakes and decorate with sprinkles or candy eyeballs.
Cooking tips: If you don’t have buttermilk, you can make your own by adding 1 tablespoon of vinegar or lemon juice to regular milk and letting it sit for 5 minutes. For a lighter frosting, you can use whipped cream instead of cream cheese. Enjoy these spooky treats at your Halloween gathering!
For the perfect Halloween cup cake stand check this out.
Ghoulish Green Witch’S Brew Jello Shots For Adult Parties
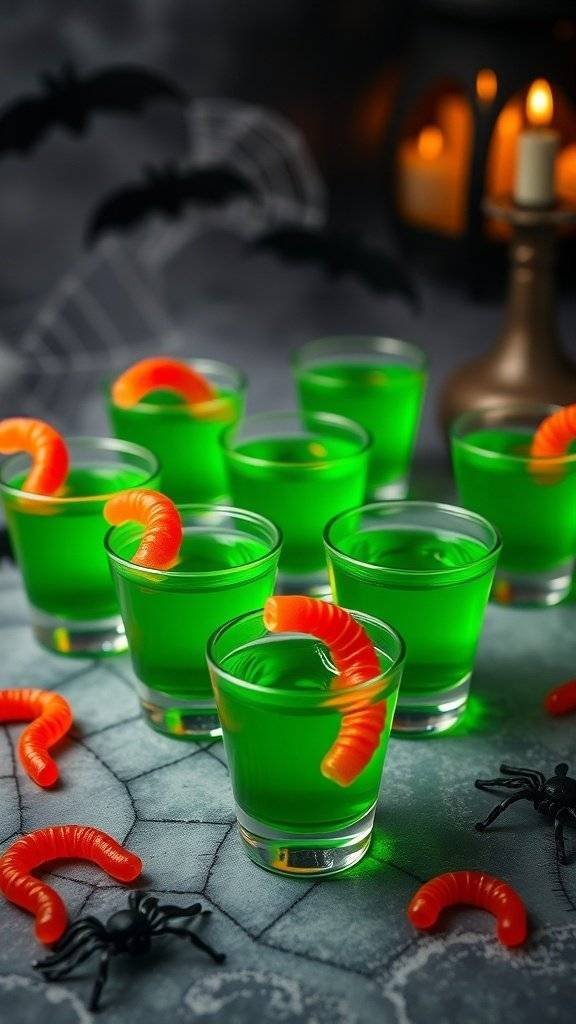
Get ready to impress your guests with these spooky Ghoulish Green Witch’s Brew Jello Shots! These vibrant green treats are perfect for Halloween parties, adding a fun twist to your dessert table. Each shot is topped with a gummy worm, making them look delightfully creepy.
To make these shots, you’ll need a few simple ingredients. The combination of lime jello and vodka creates a refreshing flavor that’s sure to be a hit. Plus, the bright green color fits right in with the Halloween theme.
Here’s how to whip up these fun treats:
Ingredients
- 1 cup boiling water
- 1 package (3 oz) lime jello
- 1 cup vodka
- 1/2 cup cold water
- Gummy worms for garnish
Instructions
- In a mixing bowl, dissolve the lime jello in 1 cup of boiling water. Stir until fully dissolved.
- Add 1 cup of vodka and 1/2 cup of cold water to the mixture. Stir well.
- Pour the mixture into shot glasses and refrigerate for at least 4 hours, or until set.
- Once set, top each shot with a gummy worm for that extra spooky touch.
Cooking tips: If you want a non-alcoholic version, simply replace the vodka with an equal amount of cold water or lemon-lime soda. You can also experiment with different jello flavors for a variety of colors and tastes.
These Ghoulish Green Witch’s Brew Jello Shots are sure to wow your guests and add a fun flair to your Halloween treats!
Creepy Crawly Chocolate-Peanut Butter Spider Cookies
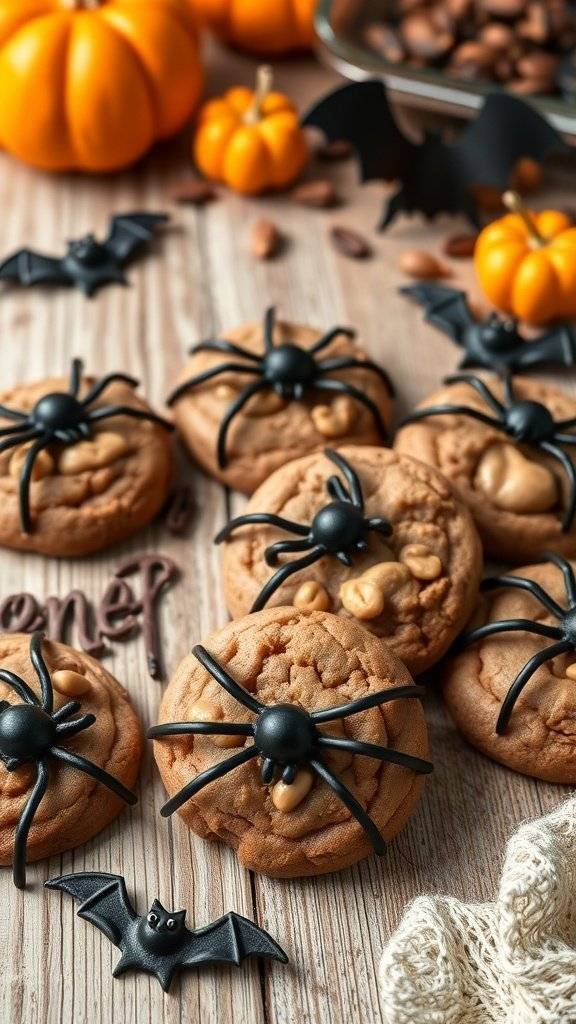
These Creepy Crawly Chocolate-Peanut Butter Spider Cookies are a fun and spooky treat for Halloween. They look like little spiders ready to crawl off your dessert table! The combination of chocolate and peanut butter is always a hit, and the playful design adds a festive touch.
Start with a soft, chewy cookie base that’s rich in flavor. The chocolate-peanut butter mixture makes them extra special. Once baked, simply top each cookie with a chocolate candy spider for that creepy effect. Your guests will be amazed by how cute and delicious these treats are!
For a twist, you can substitute the chocolate cookies with peanut butter cookies or even add some crushed nuts for a crunchy texture. If you’re looking for a nut-free option, use sunflower seed butter instead of peanut butter. These cookies are sure to be a highlight at your Halloween gathering!
Ingredients
- 1 cup creamy peanut butter
- 1/2 cup granulated sugar
- 1/2 cup brown sugar
- 1 large egg
- 1 teaspoon vanilla extract
- 1/2 teaspoon baking soda
- 1/4 teaspoon salt
- 1 cup chocolate candy spiders (for decoration)
Instructions
- Preheat your oven to 350°F (175°C) and line a baking sheet with parchment paper.
- In a large bowl, mix together the peanut butter, granulated sugar, brown sugar, egg, vanilla extract, baking soda, and salt until smooth.
- Drop spoonfuls of the dough onto the prepared baking sheet, spacing them about 2 inches apart.
- Bake for 10-12 minutes, or until the edges are lightly golden. Let them cool on the baking sheet for a few minutes before transferring them to a wire rack.
- Once cooled, place a chocolate candy spider on top of each cookie. Enjoy your spooky treats!
For the perfect serving boards visit here.
Sinister Red Velvet Cake Pops Dipped In Dark Chocolate
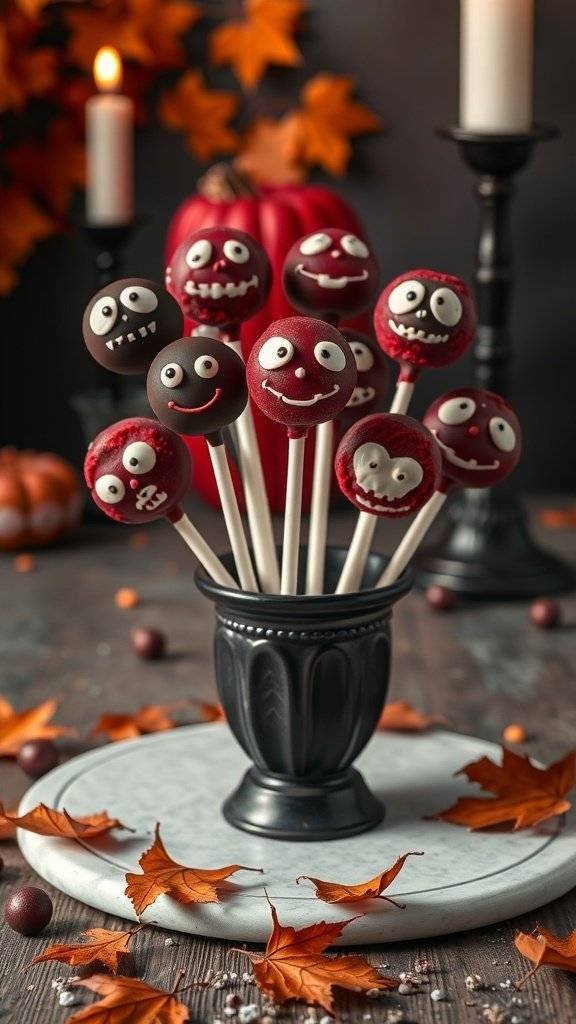
These Sinister Red Velvet Cake Pops are the perfect Halloween treats to impress your guests. With their deep red color and dark chocolate coating, they fit right into the spooky season. Each pop is adorned with playful, creepy faces that add a fun twist to your Halloween spread.
Making these cake pops is easier than you might think. Start with a moist red velvet cake, crumble it up, and mix it with cream cheese frosting. Form the mixture into balls and chill them until firm. Once ready, dip each ball in melted dark chocolate for that rich flavor. The finishing touch? Add some candy eyes or spooky designs to bring them to life!
Ingredients
- 1 box red velvet cake mix
- 3 large eggs
- 1 cup vegetable oil
- 1 cup water
- 1 cup cream cheese frosting
- 12 oz dark chocolate chips
- Candy eyes or edible decorations
Instructions
- Prepare the Cake: Preheat your oven according to the cake mix instructions. Mix the cake ingredients and bake as directed. Let it cool completely.
- Crumble the Cake: Once cooled, crumble the cake into a large bowl. Add the cream cheese frosting and mix until well combined.
- Form the Pops: Scoop out small portions of the mixture and roll them into balls. Place them on a baking sheet lined with parchment paper and chill for at least 1 hour.
- Melt the Chocolate: In a microwave-safe bowl, melt the dark chocolate chips in 30-second intervals, stirring in between until smooth.
- Dip the Pops: Insert a lollipop stick into each cake ball and dip into the melted chocolate. Allow excess chocolate to drip off before placing them back on the parchment paper.
- Add Decorations: While the chocolate is still wet, add candy eyes or other decorations to create fun faces.
- Let Set: Allow the chocolate to harden completely before serving.
Cooking Tips: If you want a richer flavor, try using cream cheese frosting with a hint of vanilla. For a fun twist, you can also use white chocolate for dipping and add food coloring for a spooky effect. If you don’t have cake mix, a homemade red velvet cake recipe works just as well!
Need a cute black vase to store your lollie pops in?
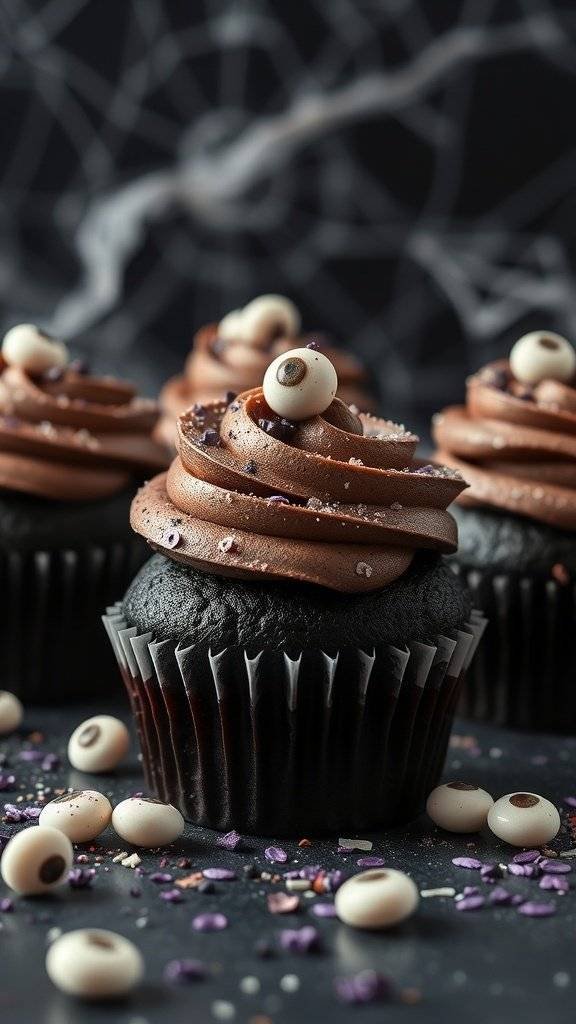
Eerie Eyeball Cupcakes With Gummy Eyeballs
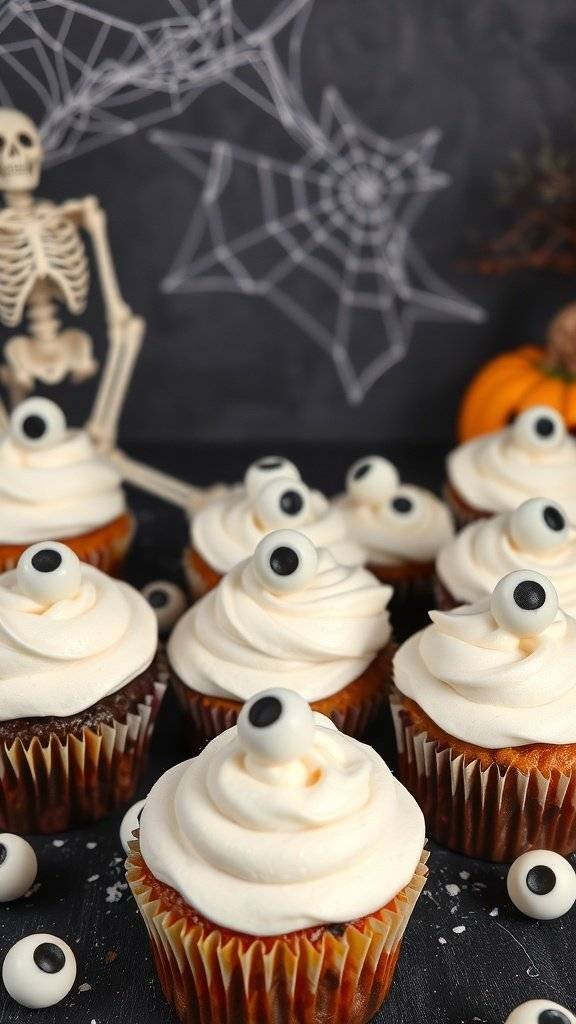
These Eerie Eyeball Cupcakes are the perfect Halloween treats to impress your guests. With their spooky design and delicious flavor, they’ll be a hit at any Halloween gathering. The fluffy frosting and gummy eyeballs create a fun and creepy vibe that fits right into the Halloween spirit.
To make these cupcakes, you’ll need some basic ingredients and a little creativity. Start with your favorite cupcake recipe, whether it’s chocolate or vanilla. Top them with a generous swirl of buttercream frosting, and then place gummy eyeballs right on top for that chilling effect. The combination of flavors and textures makes these treats irresistible.
For a fun twist, you can also experiment with different types of gummy candies. Try using gummy worms or spiders for a different look. These cupcakes not only taste great but also add a playful element to your Halloween spread.
Ingredients
- 1 ½ cups all-purpose flour
- 1 cup granulated sugar
- ½ cup unsweetened cocoa powder (for chocolate cupcakes)
- 1 teaspoon baking powder
- ½ teaspoon baking soda
- ½ teaspoon salt
- 1 large egg
- ½ cup vegetable oil
- ½ cup milk
- 1 teaspoon vanilla extract
- 1 cup butter, softened (for frosting)
- 4 cups powdered sugar
- 2 tablespoons heavy cream
- Gummy eyeballs for decoration
Instructions
- Preheat your oven to 350°F (175°C) and line a muffin tin with cupcake liners.
- In a large bowl, mix together the flour, sugar, cocoa powder (if using), baking powder, baking soda, and salt.
- Add the egg, vegetable oil, milk, and vanilla extract. Mix until well combined.
- Pour the batter into the cupcake liners, filling each about two-thirds full.
- Bake for 18-20 minutes or until a toothpick inserted in the center comes out clean. Let them cool completely.
- While the cupcakes cool, prepare the frosting. Beat the softened butter until creamy, then gradually add the powdered sugar and heavy cream. Mix until smooth and fluffy.
- Once the cupcakes are cool, frost them generously with the buttercream. Top each cupcake with a gummy eyeball.
- Serve these spooky treats at your Halloween party and watch your guests’ reactions!
Cooking Tips: If you want to make these cupcakes even more festive, consider adding food coloring to the frosting. You can also use different flavored gummy candies for variety. If you’re short on time, store-bought cupcakes can work too; just focus on the frosting and decoration!
Witch’S Cauldron Chocolate Fondue With Sinister Dippers
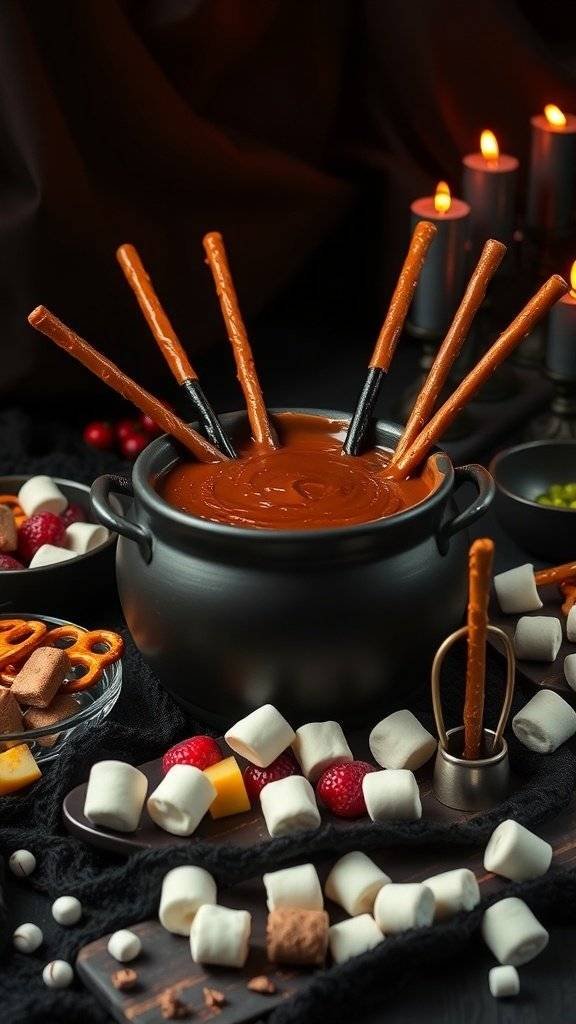
Imagine a bubbling cauldron filled with rich chocolate fondue, perfect for your Halloween gathering. This Witch’s Cauldron Chocolate Fondue not only looks spooky but also tastes divine. The dark, velvety chocolate invites your guests to dip a variety of treats, making it a fun and interactive dessert.
Surrounding the cauldron are sinister dippers like pretzel sticks, marshmallows, and fresh strawberries. Each dipper adds a unique flavor and texture, creating a delightful experience. The contrast of sweet and salty will have everyone coming back for more!
For a truly festive touch, consider adding some Halloween-themed decorations around your fondue station. Black lace, mini pumpkins, and flickering candles can enhance the spooky vibe.
Ingredients
- 1 cup heavy cream
- 2 cups semi-sweet chocolate chips
- 1 teaspoon vanilla extract
- 1 cup pretzel sticks
- 1 cup marshmallows
- 1 cup strawberries, hulled
- 1 cup cubed pound cake
- 1 cup caramel candies (optional)
Instructions
- Heat the cream in a saucepan over medium heat until it begins to simmer. Do not let it boil.
- Remove from heat and stir in the chocolate chips and vanilla extract until smooth and fully melted.
- Transfer the chocolate mixture to a fondue pot or a heatproof bowl.
- Arrange your dippers on a platter around the fondue pot.
- Serve warm and enjoy dipping your treats into the luscious chocolate!
Cooking Tips: If you want a richer flavor, try using dark chocolate instead of semi-sweet. You can also mix in a splash of flavored liqueur for an adult twist!
Ingredient Substitutions: If you don’t have heavy cream, you can use half-and-half for a lighter option. For a dairy-free version, opt for coconut cream and dairy-free chocolate chips.
Do you need a spooky black couldron for your Halloween party? Click here.
Gory Ghost Meringue Cookies For A Sweet Surprise
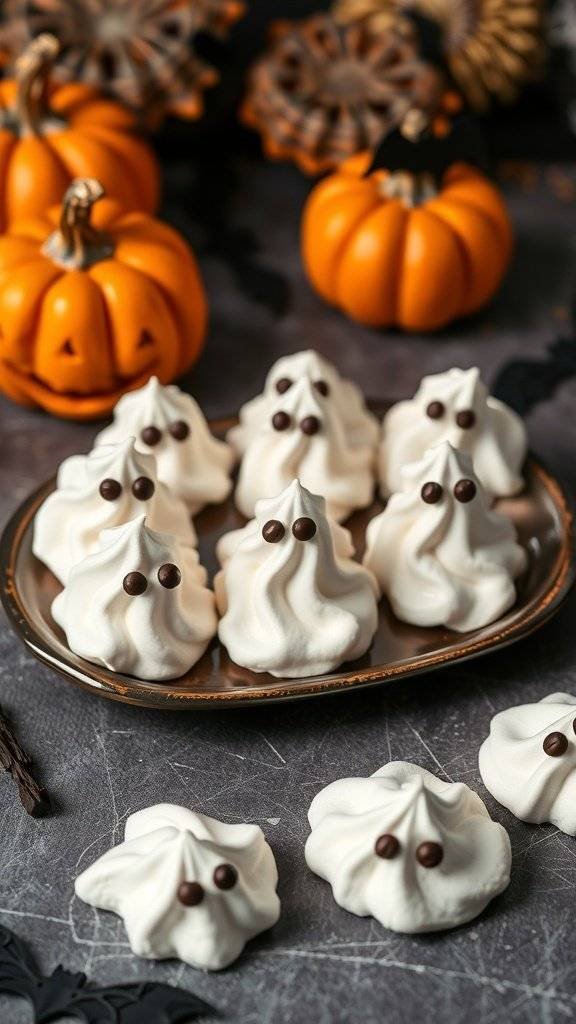
These gory ghost meringue cookies are the perfect Halloween treats to surprise and delight your guests. With their fluffy white texture and playful chocolate chip eyes, they bring a fun twist to your spooky celebrations. Set against a backdrop of festive pumpkins and autumn decor, these little ghosts will surely steal the show.
Making meringue cookies is easier than you might think! With just a few simple ingredients, you can whip up a batch that looks as good as it tastes. Plus, they’re light and airy, making them a sweet treat that won’t weigh you down during your Halloween festivities.
To make these ghostly delights, you’ll need egg whites, sugar, and a pinch of cream of tartar. The key is to whip the egg whites until they form stiff peaks, which gives the cookies their signature shape. Once baked, they’ll have a crisp exterior and a soft, chewy center.
For a fun twist, consider adding food coloring to the meringue. A hint of black or purple can make your ghosts even spookier! You can also swap out the chocolate chips for mini candies or sprinkles to create different expressions.
Ingredients
- 3 large egg whites
- 1/4 teaspoon cream of tartar
- 3/4 cup granulated sugar
- 1 teaspoon vanilla extract
- Chocolate chips (for eyes)
Instructions
- Preheat your oven to 225°F (110°C) and line a baking sheet with parchment paper.
- In a clean bowl, beat the egg whites and cream of tartar until soft peaks form.
- Gradually add the sugar, continuing to beat until stiff peaks form and the mixture is glossy.
- Mix in the vanilla extract gently.
- Using a piping bag, pipe ghost shapes onto the prepared baking sheet.
- Press chocolate chips into the meringue to create eyes.
- Bake for 1 hour, then turn off the oven and let the cookies cool inside for another hour.
- Once cooled, serve and enjoy your spooky treats!
Cooking tips: Make sure your mixing bowl is completely clean and dry to achieve the best results. If you want to make these cookies ahead of time, they store well in an airtight container for several days.
Ingredient substitutions: If you’re out of cream of tartar, you can use lemon juice or white vinegar as a substitute. For a different flavor, try adding almond extract instead of vanilla.
Are you looking for an interesting platter to put your goodies on this Halloween? Click here.
Dark Chocolate Pumpkin Truffles With A Mysterious Filling
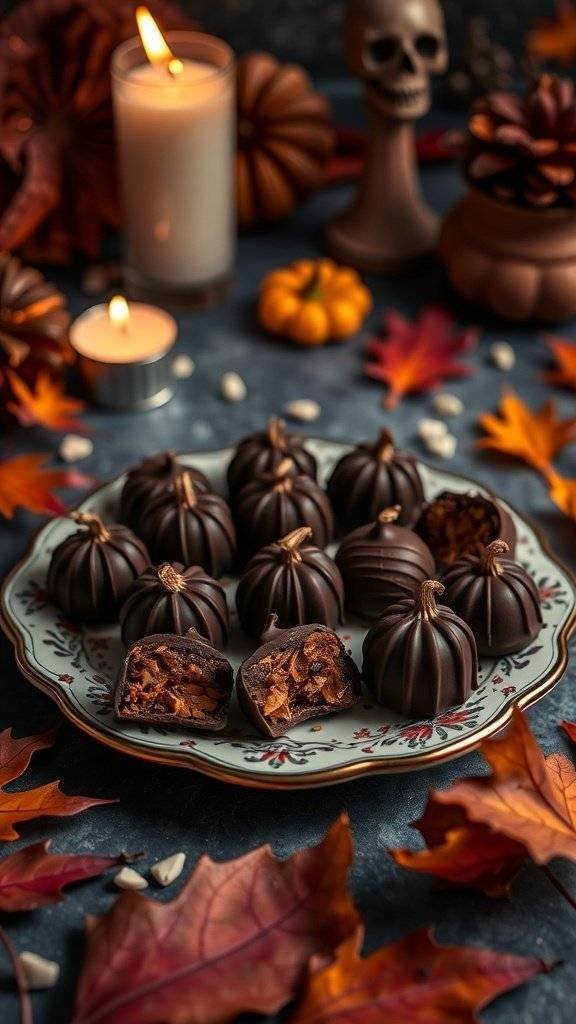
These Dark Chocolate Pumpkin Truffles are a perfect addition to your Halloween treats. They look like little pumpkins, adding a festive touch to your spooky gathering. Each truffle is coated in rich dark chocolate, with a mysterious filling that surprises everyone who takes a bite.
The truffles are arranged on a decorative plate, surrounded by autumn leaves, tiny pumpkins, and flickering candles. This setup creates a cozy yet eerie atmosphere, making your dessert table stand out. The combination of flavors and textures will surely wow your guests!
Ingredients
- 8 oz dark chocolate, chopped
- 1/2 cup heavy cream
- 1/4 cup pumpkin puree
- 1/4 teaspoon pumpkin pie spice
- 1/4 cup crushed graham crackers
- 1 tablespoon maple syrup
- 1 teaspoon vanilla extract
- Extra chocolate for coating
Instructions
- Heat the Cream: In a small saucepan, heat the heavy cream over medium heat until it just begins to simmer. Remove from heat.
- Melt the Chocolate: Add the chopped dark chocolate to the warm cream. Stir until smooth and fully melted.
- Mix in Pumpkin: Stir in the pumpkin puree, pumpkin pie spice, maple syrup, and vanilla extract until well combined.
- Chill the Mixture: Refrigerate the mixture for about 2 hours, or until it’s firm enough to scoop.
- Form the Truffles: Once chilled, use a small scoop or your hands to form balls. Roll them in crushed graham crackers for texture.
- Coat in Chocolate: Melt additional dark chocolate and dip each truffle, allowing excess to drip off. Set on parchment paper to cool.
- Serve: Once set, arrange the truffles on a festive plate and enjoy your spooky treats!
Cooking Tips: If you want a sweeter filling, add more maple syrup. For a spicier kick, increase the pumpkin pie spice. You can also substitute the heavy cream with coconut cream for a dairy-free option.
Sinister Candy Corn Marshmallow Treats For A Festive Crunch
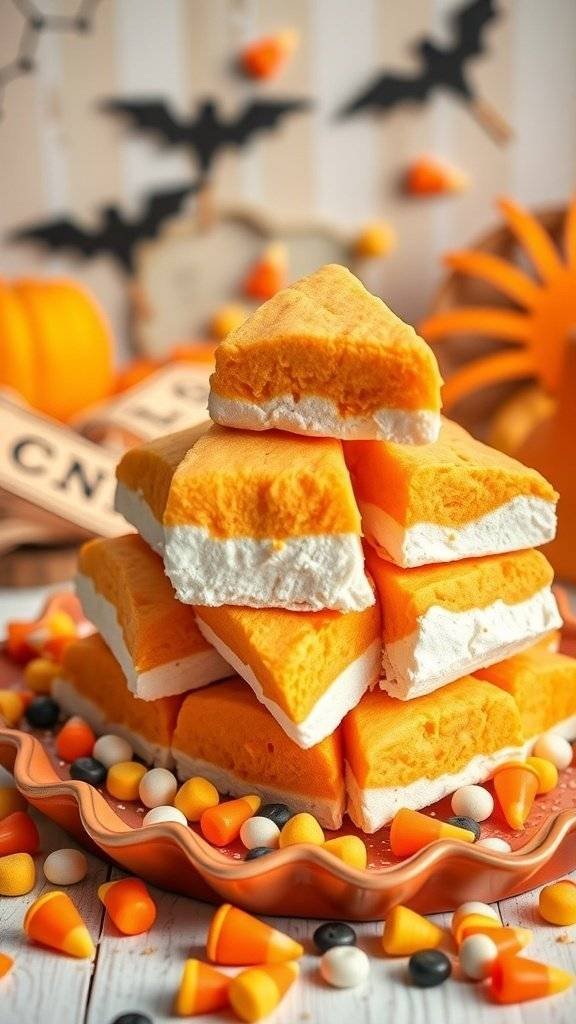
These Sinister Candy Corn Marshmallow Treats are perfect for Halloween! They combine the fun flavors of candy corn with a fluffy marshmallow texture. The vibrant orange and white layers create a striking visual that will wow your guests. You can easily make these treats at home, and they’ll add a spooky touch to your Halloween spread.
To get started, gather your ingredients. You’ll need marshmallows, butter, candy corn, and some food coloring to achieve that classic Halloween look. The preparation is simple and can be done in just a few steps.
When making these treats, consider using a non-stick cooking spray on your pan to prevent sticking. If you want to switch things up, you can use different colors or flavors of food coloring to customize your treats. You can also substitute regular marshmallows with flavored ones for an extra twist!
Ingredients
- 1 cup mini marshmallows
- 2 tablespoons unsalted butter
- 3 cups crispy rice cereal
- 1/2 cup candy corn
- 1/4 teaspoon orange food coloring
- 1/4 teaspoon yellow food coloring
Instructions
- In a large saucepan, melt the butter over low heat. Add the mini marshmallows and stir until completely melted.
- Once melted, remove from heat and mix in the crispy rice cereal until well combined.
- Divide the mixture into two bowls. In one bowl, add the orange food coloring and mix well. In the other bowl, add the yellow food coloring and mix.
- Press the orange mixture into a greased 9×9 inch pan, creating an even layer. Then, add the yellow mixture on top and press down firmly.
- Let the treats cool for about 30 minutes. Once set, cut into squares and top with candy corn for decoration.
These treats are not only fun to make but also a hit at any Halloween gathering. Enjoy the festive crunch and the delightful flavors!
For the perfect platter for these goodies click here.
Chilling Chocolate Mousse With Ghostly Whipped Cream
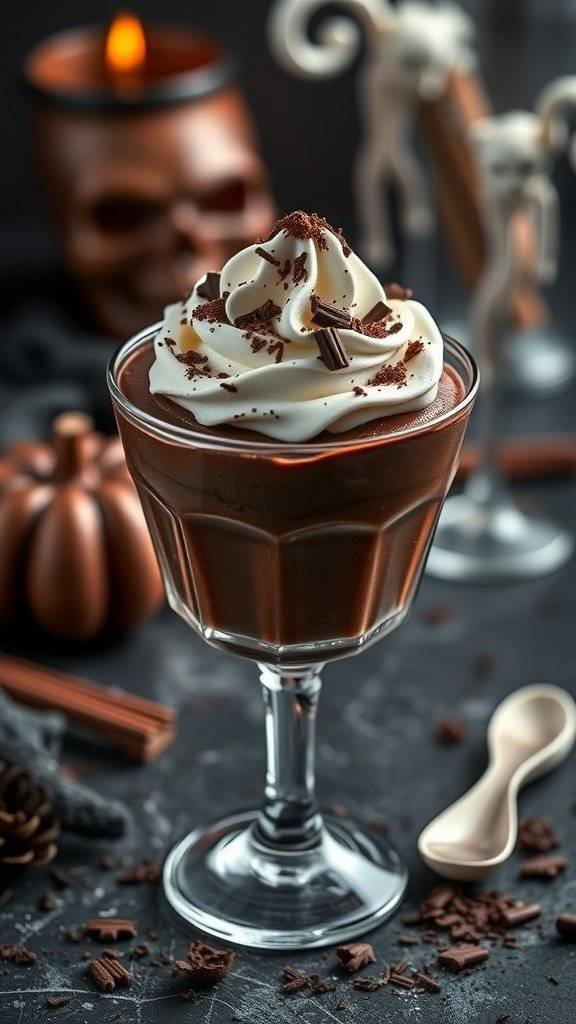
Get ready to impress your guests with this chilling chocolate mousse, perfect for your Halloween treats. The rich, dark chocolate pairs beautifully with the light, ghostly whipped cream on top. It’s a simple yet elegant dessert that brings a spooky flair to your table.
The mousse is smooth and creamy, and the whipped cream adds a fun touch. You can even sprinkle some chocolate shavings on top for that extra spooky effect. This dessert not only looks great but tastes amazing too!
To make this treat, gather your ingredients and follow the steps below. Don’t worry if you’re not a pro in the kitchen; this recipe is easy to follow and sure to wow everyone.
Ingredients
- 1 cup dark chocolate chips
- 2 tablespoons unsalted butter
- 3 large eggs, separated
- 1/4 cup granulated sugar
- 1 cup heavy cream
- 1 teaspoon vanilla extract
- Pinch of salt
- Chocolate shavings for garnish
Instructions
- Melt the Chocolate: In a heatproof bowl, combine dark chocolate and butter. Melt over a pot of simmering water, stirring until smooth. Remove from heat and let cool slightly.
- Whip the Egg Yolks: In a separate bowl, whisk the egg yolks and sugar until pale and creamy. Stir in the melted chocolate mixture until well combined.
- Beat the Egg Whites: In another bowl, beat the egg whites with a pinch of salt until stiff peaks form. Gently fold the egg whites into the chocolate mixture.
- Whip the Cream: In a separate bowl, whip the heavy cream and vanilla until soft peaks form. Carefully fold the whipped cream into the chocolate mixture until no streaks remain.
- Chill: Spoon the mousse into serving glasses and refrigerate for at least 2 hours, or until set.
- Serve: Top with ghostly whipped cream and chocolate shavings before serving. Enjoy your chilling Halloween treat!
Cooking Tips: If you want a lighter mousse, you can use egg whites only and skip the yolks. For a dairy-free version, substitute dark chocolate with dairy-free chocolate and use coconut cream instead of heavy cream.
Spooky Sugar Skull Cookies With Colorful Icing

These spooky sugar skull cookies are a fantastic addition to your Halloween treats. They bring a fun and festive vibe to any gathering. Each cookie is decorated with vibrant icing, making them not just tasty but also visually stunning. The colorful designs reflect the spirit of the Day of the Dead, celebrating life and memories in a playful way.
To make these cookies, you’ll need a few basic ingredients. The dough is simple to prepare, and the icing can be customized with your favorite colors. These cookies are perfect for decorating with friends or family, making it a fun activity for all ages.
Ingredients
- 2 3/4 cups all-purpose flour
- 1 teaspoon baking powder
- 1/2 teaspoon salt
- 1 cup unsalted butter, softened
- 1 1/2 cups granulated sugar
- 1 large egg
- 1 teaspoon vanilla extract
- 2 cups powdered sugar (for icing)
- 2-3 tablespoons milk (for icing)
- Food coloring (various colors)
Instructions
- Make the Dough: In a bowl, whisk together flour, baking powder, and salt. In another bowl, cream the butter and sugar until light and fluffy. Beat in the egg and vanilla. Gradually add the flour mixture until combined.
- Chill the Dough: Wrap the dough in plastic wrap and refrigerate for at least 1 hour.
- Preheat the Oven: Preheat your oven to 350°F (175°C). Line baking sheets with parchment paper.
- Shape and Bake: Roll out the chilled dough on a floured surface to about 1/4 inch thick. Use a skull-shaped cookie cutter to cut out cookies. Place them on the prepared baking sheets and bake for 8-10 minutes or until lightly golden.
- Prepare the Icing: In a bowl, mix powdered sugar with milk until smooth. Divide the icing into separate bowls and add food coloring to each for your desired shades.
- Decorate: Once the cookies are cool, use piping bags or a knife to decorate with colorful icing. Let the icing set before serving.
Cooking Tips: If you want a softer cookie, reduce the baking time slightly. For a fun twist, try adding spices like cinnamon or nutmeg to the dough. You can also substitute butter with coconut oil for a dairy-free option.
Enjoy these spooky sugar skull cookies at your Halloween party, and watch your guests be wowed by both their looks and taste!
Ominous Orange And Black Halloween Layered Parfaits
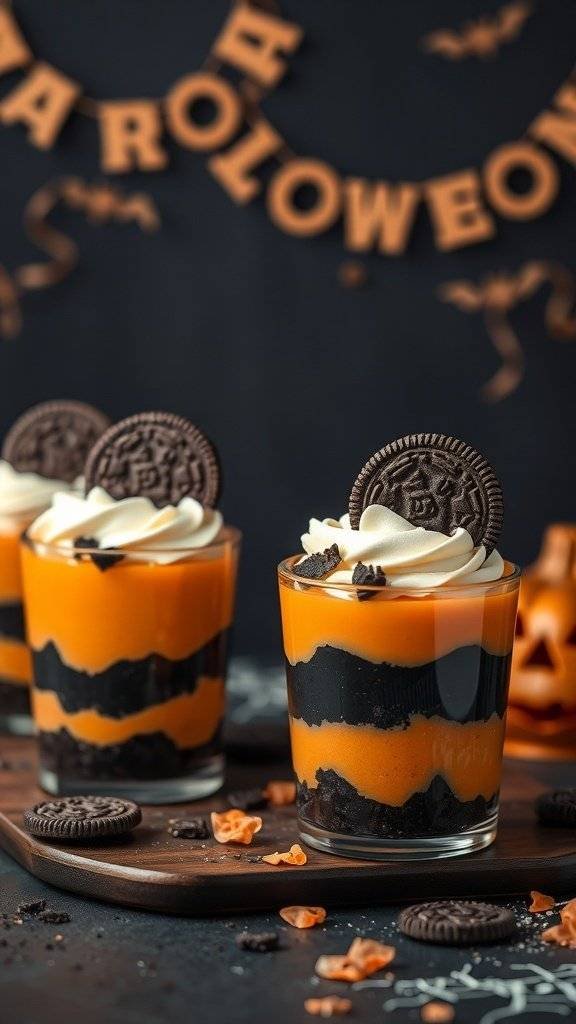
These Ominous Orange and Black Halloween Layered Parfaits are a spooky delight for your Halloween gathering. The striking contrast of orange and black layers creates an eye-catching treat that’s perfect for the season. Each parfait is filled with creamy pumpkin-flavored pudding and crushed Oreo cookies, giving a fun twist to traditional desserts.
To make these parfaits, you’ll need a few simple ingredients. The combination of flavors will surely impress your guests. Plus, they’re easy to assemble, making them a great choice for a last-minute treat!
Here’s how to whip up these Halloween treats:
Ingredients
- 2 cups pumpkin puree
- 1 cup vanilla pudding mix
- 2 cups milk
- 1 teaspoon pumpkin spice
- 1 cup whipped cream
- 1 package Oreo cookies, crushed
- 1/4 cup chocolate sprinkles (optional)
Instructions
- Prepare the Pumpkin Layer: In a bowl, mix pumpkin puree, vanilla pudding mix, milk, and pumpkin spice until smooth. Let it sit for about 5 minutes to thicken.
- Layer the Parfaits: In clear cups or glasses, start with a layer of crushed Oreos at the bottom. Add a layer of the pumpkin mixture on top, followed by another layer of crushed Oreos.
- Add Whipped Cream: Top each parfait with a generous dollop of whipped cream. Sprinkle chocolate sprinkles on top for a festive touch.
- Chill and Serve: Refrigerate the parfaits for at least 30 minutes before serving. This allows the flavors to meld together.
Cooking Tips: If you want a lighter version, you can use sugar-free pudding mix and low-fat milk. For a twist, try adding a layer of chocolate pudding for an extra flavor kick. Enjoy these spooky parfaits at your Halloween party!
Hauntingly Delicious Caramel Apple Bites With A Twist
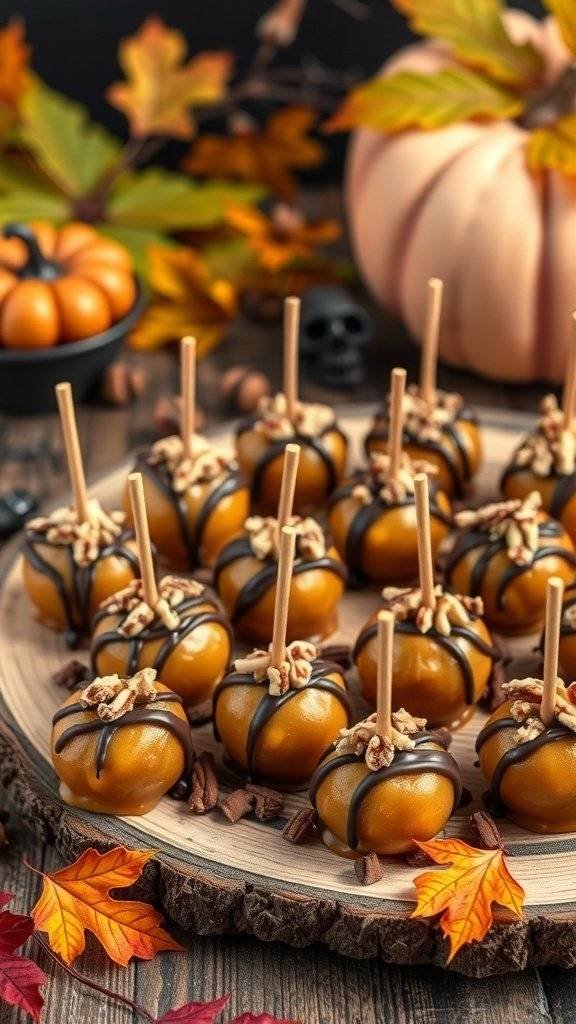
These caramel apple bites are a fun twist on the classic Halloween treat. They look like little pumpkins, perfect for your spooky gathering. The rich caramel coating, drizzled with chocolate and topped with nuts, makes them irresistible. Set them on a wooden platter surrounded by autumn leaves for a festive touch.
Making these treats is simple and enjoyable. Start by preparing your ingredients and gathering your supplies. You’ll need caramel, chocolate, nuts, and apple slices. The combination of flavors will surely impress your guests.
Here’s how to make these delicious bites:
Ingredients
- 4 medium apples
- 1 cup caramel candies
- 2 tablespoons milk
- 1/2 cup semi-sweet chocolate chips
- 1/4 cup chopped nuts (pecans or walnuts)
- Wooden sticks or skewers
Instructions
- Prepare the Apples: Wash and dry the apples. Cut them into bite-sized pieces and insert a wooden stick into each piece.
- Melt the Caramel: In a microwave-safe bowl, combine caramel candies and milk. Heat in 30-second intervals, stirring until smooth.
- Coat the Apples: Dip each apple piece into the melted caramel, allowing excess to drip off. Place them on a parchment-lined tray.
- Drizzle with Chocolate: Melt the chocolate chips in a microwave-safe bowl. Drizzle over the caramel-coated apples.
- Add Nuts: Sprinkle chopped nuts on top of the chocolate before it hardens.
- Chill: Place the tray in the refrigerator for about 30 minutes to set the caramel and chocolate.
Cooking Tips: If you want a different flavor, try using white chocolate instead of semi-sweet. You can also use different nuts or even sprinkles for a fun twist.
Ingredient Substitutions: If you don’t have caramel candies, you can use store-bought caramel sauce. For a healthier option, consider using dark chocolate or skipping the chocolate altogether.
Do you need a large wooden platter for hosting with? Click here.
Gothic Black Licorice Twists For The Bold Candy Lover
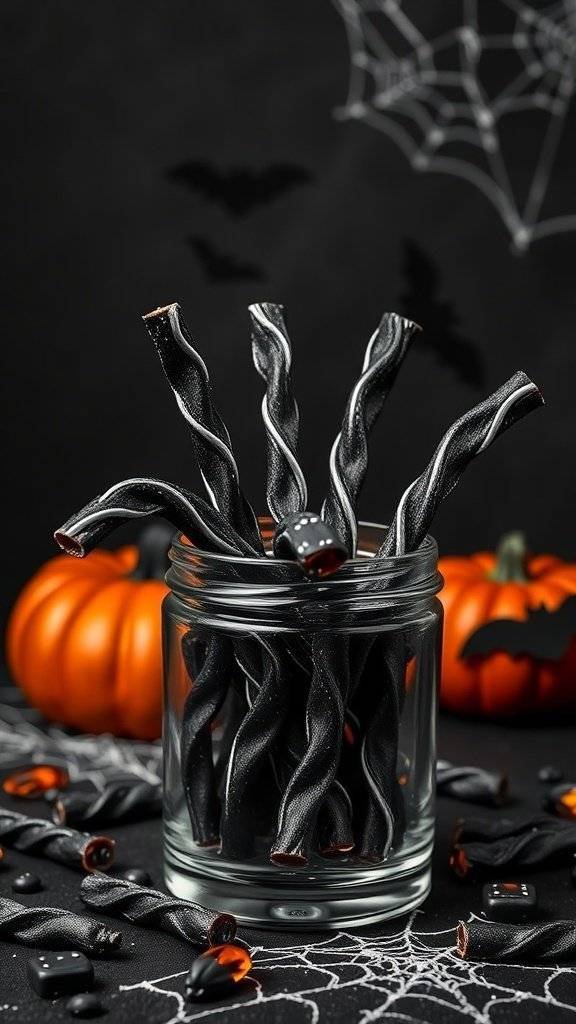
Gothic Black Licorice Twists are perfect for those who love a bold flavor. These twists stand out with their dark color and unique taste, making them an ideal addition to your Halloween treats. The combination of black licorice and a spooky vibe can wow your guests and set the tone for a hauntingly delightful evening.
Picture a glass jar filled with these twisted treats, surrounded by orange pumpkins and spider webs. The contrast of the black licorice against the vibrant orange creates a striking visual that is sure to catch the eye. Whether you’re hosting a Halloween party or just want to enjoy some spooky snacks, these licorice twists are a must-have.
Ingredients
- 2 cups all-purpose flour
- 1/2 cup black molasses
- 1/4 cup unsweetened cocoa powder
- 1/2 cup sugar
- 1 teaspoon baking soda
- 1/2 teaspoon salt
- 1/2 cup unsalted butter, softened
- 1 large egg
- 1 teaspoon anise extract
- 1/4 cup water
Instructions
- Preheat the oven to 350°F (175°C). Line a baking sheet with parchment paper.
- In a bowl, mix flour, cocoa powder, baking soda, and salt.
- In another bowl, cream together the butter and sugar until light and fluffy. Add the egg and anise extract, mixing well.
- Gradually add the dry ingredients to the wet mixture, alternating with the black molasses and water. Mix until a dough forms.
- Roll the dough into long, thin ropes and twist them to create the licorice shape. Place them on the prepared baking sheet.
- Bake for 10-12 minutes or until firm. Let them cool completely before serving.
Cooking Tips: If you want a softer texture, reduce the baking time slightly. For a sweeter twist, consider adding a bit more sugar to the dough. If you can’t find anise extract, you can substitute with fennel extract for a similar flavor.
Frankenstein Marshmallow Pops With Fun Decorations
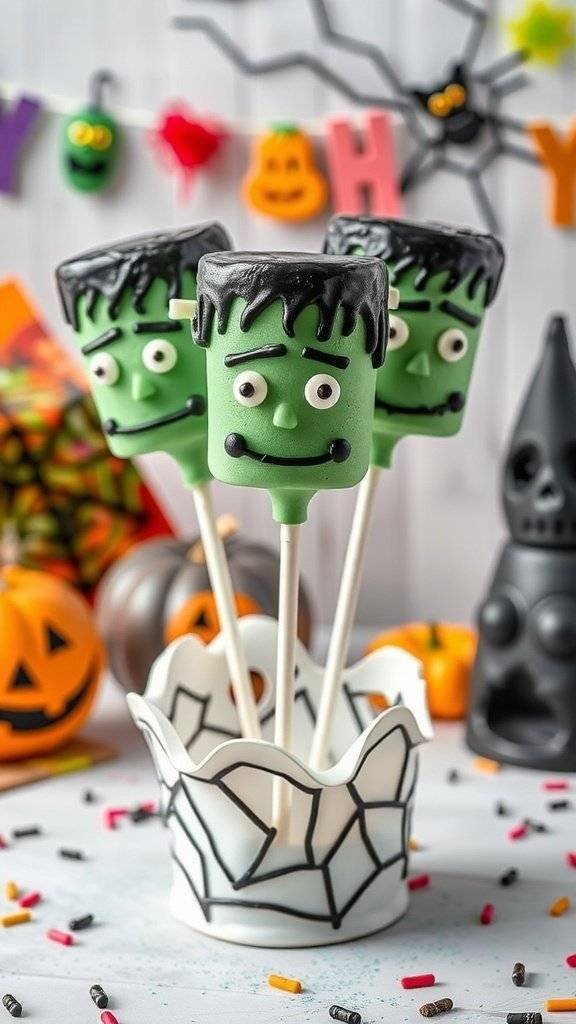
These Frankenstein Marshmallow Pops are a fun twist on Halloween treats that will surely impress your guests. Each pop features a marshmallow coated in vibrant green chocolate, complete with a playful face. The black chocolate hair adds a spooky touch, making them perfect for your Halloween gathering.
To create these delightful treats, start with some large marshmallows and lollipop sticks. The bright colors and fun decorations make them not just tasty but also a visual treat. You can place them in a decorative holder, like the one shown, to add to the festive atmosphere.
These pops are easy to make and can be customized. You can use different colors for the chocolate coating or add various toppings to make each one unique. They’re a great activity to do with kids, too!
Ingredients
- 10 large marshmallows
- 1 cup green candy melts
- 1/2 cup black candy melts
- 10 lollipop sticks
- 2 candy eyes
- Black icing for details
- Sprinkles for decoration (optional)
Instructions
- Prepare the Marshmallows: Insert a lollipop stick into each marshmallow.
- Melt the Green Chocolate: In a microwave-safe bowl, melt the green candy melts in 30-second intervals, stirring until smooth.
- Coat the Marshmallows: Dip each marshmallow into the melted green chocolate, ensuring it’s fully coated. Allow excess chocolate to drip off.
- Set and Decorate: Place the coated marshmallows upright in a styrofoam block or a decorative holder. Once set, melt the black candy melts and drizzle over the top for hair.
- Add Features: Use black icing to draw a mouth and eyebrows. Attach candy eyes to complete the face.
- Let Cool: Allow the pops to cool completely before serving. You can sprinkle some fun toppings for extra flair!
Cooking Tips: If you don’t have candy melts, you can use chocolate chips instead. Just add a bit of vegetable oil to thin it out. For a fun twist, try using colored sprinkles or edible glitter to make your pops even more festive!
These Frankenstein Marshmallow Pops are sure to be a hit at your Halloween party. Enjoy making and sharing these spooky treats!
Chilling Raspberry Blood Drip Cake For A Dramatic Dessert
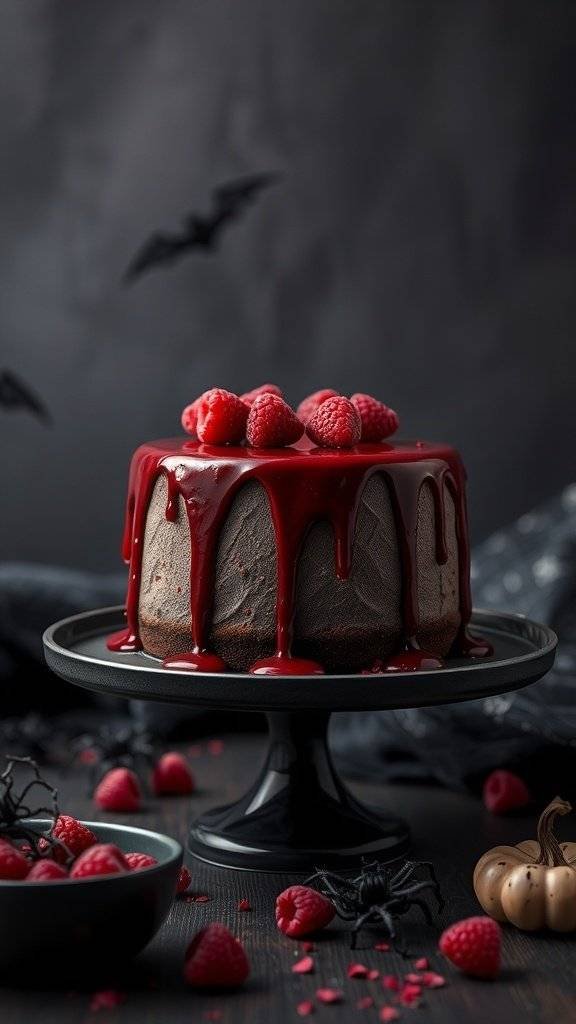
This Raspberry Blood Drip Cake is the perfect centerpiece for your Halloween treats. Its rich chocolate layers are covered in a glossy raspberry glaze that drips down the sides, resembling blood. Topped with fresh raspberries, this cake is both spooky and delicious, making it a showstopper at any Halloween gathering.
The dark, moody background adds to the cake’s gothic appeal, while the playful addition of bats and spiders creates a fun Halloween vibe. This dessert not only looks dramatic but also offers a delightful burst of flavor with every bite.
Ingredients
- 1 ¾ cups all-purpose flour
- 1 ½ cups granulated sugar
- ¾ cup unsweetened cocoa powder
- 1 ½ teaspoons baking powder
- 1 ½ teaspoons baking soda
- 1 teaspoon salt
- 2 large eggs
- 1 cup whole milk
- ½ cup vegetable oil
- 2 teaspoons vanilla extract
- 1 cup boiling water
- 1 cup fresh raspberries
- 1 cup raspberry jam
- 2 cups heavy cream
- 1 cup powdered sugar
- 1 teaspoon vanilla extract (for frosting)
Instructions
- Preheat your oven to 350°F (175°C). Grease and flour two 9-inch round cake pans.
- In a large bowl, mix flour, sugar, cocoa powder, baking powder, baking soda, and salt. Add eggs, milk, oil, and vanilla. Beat on medium speed for 2 minutes. Stir in boiling water until well combined.
- Pour the batter evenly into the prepared pans. Bake for 30-35 minutes or until a toothpick comes out clean. Let them cool in the pans for 10 minutes before transferring to wire racks.
- Once cooled, whip the heavy cream with powdered sugar and vanilla until stiff peaks form.
- Layer the cakes with raspberry jam and whipped cream in between. Frost the top and sides with the remaining whipped cream.
- For the raspberry glaze, heat the raspberry jam in a saucepan until it becomes liquid. Pour it over the top of the cake, allowing it to drip down the sides.
- Decorate with fresh raspberries and any spooky decorations you like!
Cooking Tips: Use a good quality cocoa powder for a richer flavor. If you want a lighter cake, substitute half the oil with applesauce. You can also use frozen raspberries if fresh ones aren’t available.
Want to showcase your beautiful cake on a dramatic black cake stand. Check this out.
Wicked Witch’S Cauldron Cake With Edible Decorations
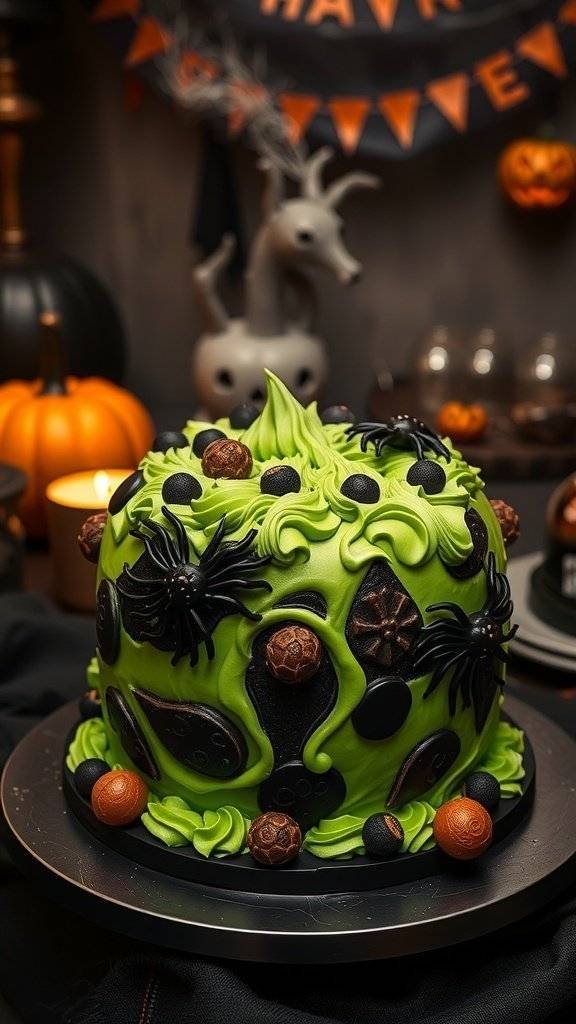
This Wicked Witch’s Cauldron Cake is a showstopper for any Halloween gathering. Picture a dark, bubbling cauldron, dripping with vibrant green frosting that looks like a witch’s brew. The cake is topped with a whimsical witch’s hat, adding a fun twist to your spooky dessert table. Edible decorations, like little spiders and pumpkins, make it even more festive and fun.
The cake not only looks amazing but tastes delicious too. It’s a perfect blend of chocolate and vanilla flavors, making it a crowd favorite. You can easily customize the decorations to match your Halloween theme, whether you want it to be cute or creepy.
Here’s how to make this delightful treat:
Ingredients
- 2 cups all-purpose flour
- 1 1/2 cups granulated sugar
- 3/4 cup unsweetened cocoa powder
- 1 1/2 teaspoons baking powder
- 1 1/2 teaspoons baking soda
- 1 teaspoon salt
- 2 large eggs
- 1 cup whole milk
- 1/2 cup vegetable oil
- 2 teaspoons vanilla extract
- 1 cup boiling water
- 3 cups green buttercream frosting
- 1 witch’s hat cake topper (store-bought or homemade)
- Edible decorations (spiders, pumpkins, etc.)
Instructions
- Preheat your oven to 350°F (175°C). Grease and flour a round cake pan.
- In a large bowl, mix the flour, sugar, cocoa powder, baking powder, baking soda, and salt.
- Add the eggs, milk, oil, and vanilla to the dry ingredients. Mix until smooth.
- Carefully stir in the boiling water. The batter will be thin.
- Pour the batter into the prepared cake pan and bake for 30-35 minutes, or until a toothpick comes out clean.
- Let the cake cool completely before frosting.
- Once cooled, frost the top and sides with green buttercream. Use a spatula to create a dripping effect.
- Place the witch’s hat on top and decorate with edible spiders and pumpkins.
Cooking Tips: If you want a richer flavor, swap half the all-purpose flour for cake flour. For a fun twist, add some orange food coloring to the frosting for a marbled effect. You can also use store-bought frosting if you’re short on time.
Enjoy this Wicked Witch’s Cauldron Cake at your Halloween party, and watch your guests be amazed!
Gory Red Velvet Layer Cake With Ghostly Frosting
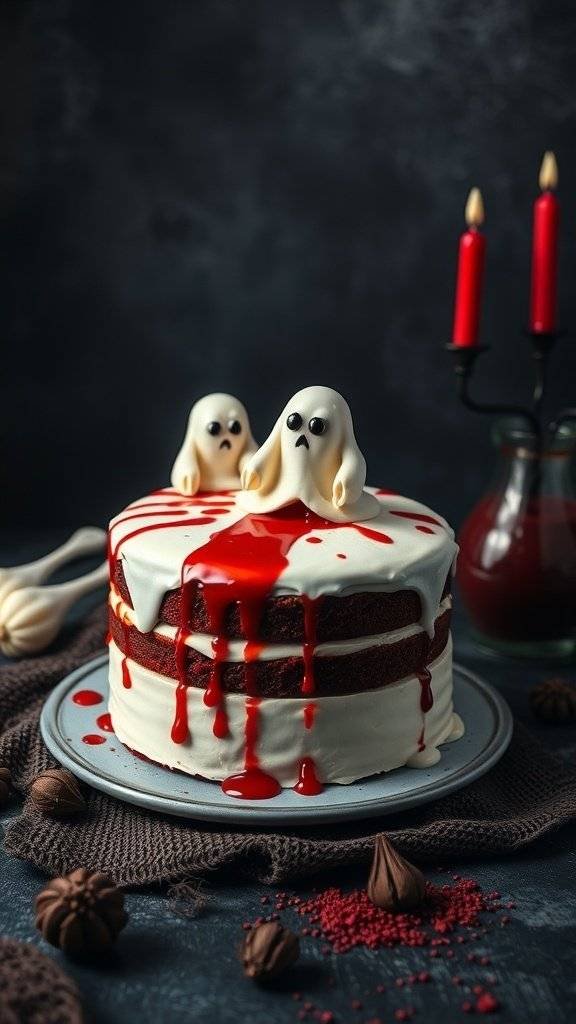
This Gory Red Velvet Layer Cake is the perfect centerpiece for your Halloween treats. With its deep red layers and ghostly white frosting, it’s both spooky and delicious. The cake is drizzled with a vibrant red sauce that looks like blood, making it a hit at any Halloween gathering.
The cake features two or three layers of rich red velvet, which is soft and moist. The frosting is a smooth cream cheese blend, giving it a sweet contrast to the cake’s slight cocoa flavor. Topping it off are adorable ghost decorations made from fondant, adding a playful touch to the eerie theme.
To make this cake, you’ll need some basic ingredients, but don’t worry about being too precise. If you’re out of something, there are easy substitutions. For instance, if you don’t have buttermilk, you can mix regular milk with a bit of vinegar or lemon juice to create a similar effect.
Here’s how to whip up this spooky delight:
Ingredients
- 2 1/2 cups all-purpose flour
- 1 1/2 cups granulated sugar
- 1 teaspoon baking soda
- 1 teaspoon salt
- 1 teaspoon cocoa powder
- 1 1/2 cups vegetable oil
- 1 cup buttermilk
- 2 large eggs
- 2 tablespoons red food coloring
- 1 teaspoon vanilla extract
- 1 teaspoon white vinegar
- 8 oz cream cheese, softened
- 1/2 cup unsalted butter, softened
- 4 cups powdered sugar
- 1 teaspoon vanilla extract (for frosting)
- Red sauce (for decoration)
- Fondant (for ghost decorations)
Instructions
- Preheat your oven to 350°F (175°C). Grease and flour your cake pans.
- In a large bowl, mix flour, sugar, baking soda, salt, and cocoa powder.
- In another bowl, combine oil, buttermilk, eggs, food coloring, vanilla, and vinegar. Mix well.
- Gradually add the wet ingredients to the dry ingredients, stirring until just combined.
- Divide the batter evenly between the prepared pans and bake for 25-30 minutes. Check with a toothpick for doneness.
- Let the cakes cool in the pans for 10 minutes, then transfer to wire racks to cool completely.
- For the frosting, beat cream cheese and butter until smooth. Gradually add powdered sugar and vanilla, mixing until fluffy.
- Once the cakes are cool, spread frosting between the layers and around the sides. Drizzle red sauce on top and decorate with fondant ghosts.
Cooking Tips: If you want a richer flavor, you can add a bit of espresso powder to the batter. For a dairy-free version, substitute the buttermilk with almond or coconut milk mixed with vinegar.
Enjoy your spooky creation and watch your guests be wowed by this gory yet delightful treat!
You may also like:
– 23 Easy Dinner Recipes Inspired by Qarth – GOT
– 19 Breakfast Recipes Inspired by the Gatsby Roaring 1920s
– 21 Children’s Birthday Cakes Inspired by Gotham City
If you enjoyed this blog you can visit us or check out our other blogs and learn a bit about us.
Disclaimer: This blog post is inspired by fictional universes and characters created by their respective rights holders. All related content and imagery remain the property of their respective rights holder. This fan-inspired content is for entertainment and commentary purposes only and is not affiliated with or endorsed by HBO, Disney, Warner Bros., Lionsgate, or any other rights holders. To explore the official source material, please visit:
HBO