

Vintage ice cream cakes bring a nostalgic twist to dessert, combining fluffy cake layers with creamy ice cream for a delightful treat. Perfect for celebrations or casual get-togethers, these cakes can be customized with your favorite flavors and nostalgic toppings. For a successful bake, consider using a cake mix for ease or substituting yogurt for eggs to keep it light and airy. Don’t forget to let your ice cream soften a bit for easier spreading, and feel free to mix in various goodies like nuts, fruits, or chocolate chips for added texture!
Delightfully Classic Vanilla Ice Cream Cake
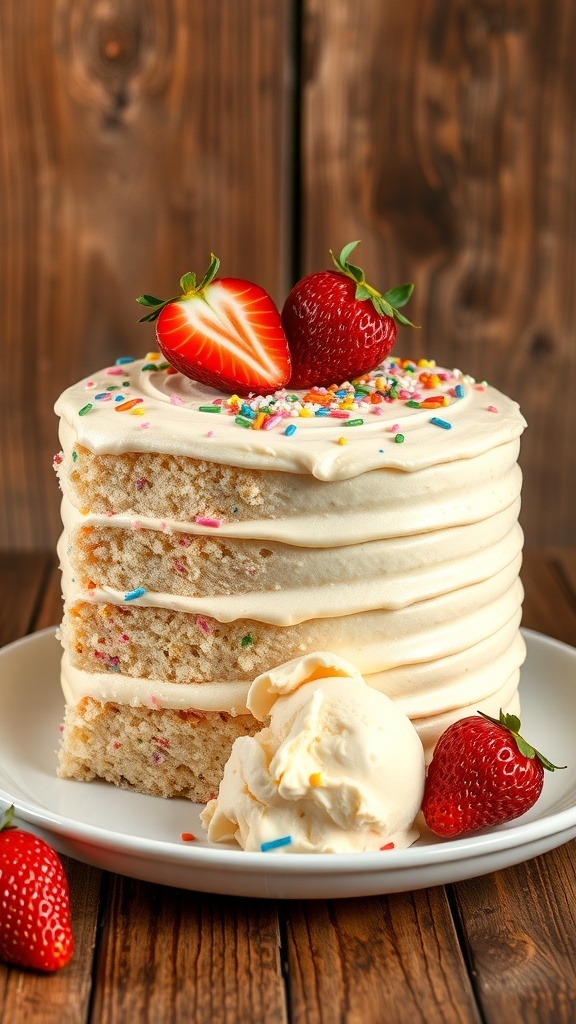
Vintage ice cream cakes bring back sweet memories of celebrations and family gatherings. This classic vanilla ice cream cake is a delightful treat that combines fluffy cake layers with creamy ice cream. The soft, moist cake pairs perfectly with the rich vanilla ice cream, making it a favorite for all ages.
The cake is often adorned with colorful sprinkles and fresh strawberries, adding a fun touch to its appearance. The layers are smooth and inviting, making it hard to resist a slice. This cake is not just a dessert; it’s a centerpiece that brings joy to any occasion.
Making this cake at home is easier than you might think. You can customize it with your favorite flavors or toppings. If you prefer a different flavor, feel free to swap out the vanilla ice cream for chocolate or strawberry. You can also use gluten-free flour if you have dietary restrictions.
Ingredients
- 1 box of vanilla cake mix
- 3 large eggs
- 1 cup water
- 1/2 cup vegetable oil
- 1 quart vanilla ice cream, softened
- 1 cup heavy whipping cream
- 1/4 cup powdered sugar
- 1 teaspoon vanilla extract
- Sprinkles and fresh strawberries for decoration
Instructions
- Preheat your oven to 350°F (175°C). Grease and flour two 9-inch round cake pans.
- In a large bowl, combine the cake mix, eggs, water, and vegetable oil. Mix until smooth.
- Divide the batter evenly between the prepared pans. Bake for 25-30 minutes or until a toothpick comes out clean.
- Let the cakes cool in the pans for 10 minutes, then transfer to wire racks to cool completely.
- Once cooled, place one cake layer on a serving plate. Spread a layer of softened vanilla ice cream on top.
- Place the second cake layer on top of the ice cream. Freeze for at least 2 hours to set.
- While the cake is freezing, whip the heavy cream with powdered sugar and vanilla extract until soft peaks form.
- Remove the cake from the freezer and frost the top and sides with the whipped cream. Decorate with sprinkles and fresh strawberries.
- Slice and serve. Enjoy your vintage ice cream cake!
Cooking Tips: For a richer flavor, you can add a splash of almond extract to the cake batter. If you want to make it a bit healthier, consider using Greek yogurt instead of some of the ice cream.
Ingredient Substitutions: If you don’t have cake mix, you can make a homemade vanilla cake from scratch. Use coconut cream instead of heavy cream for a dairy-free option.
Decadent Chocolate Fudge Ice Cream Cake
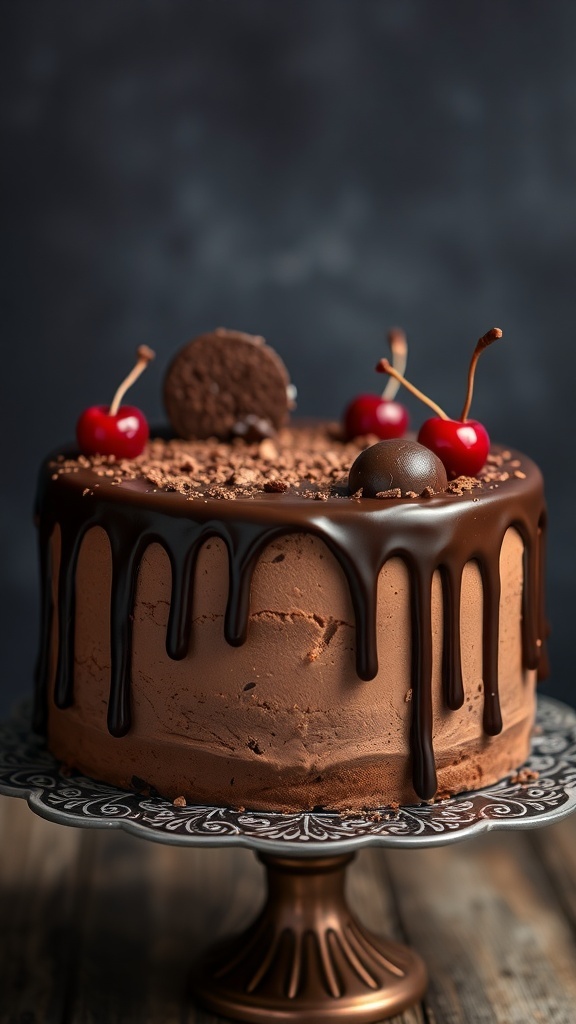
Picture this: a rich chocolate fudge ice cream cake that’s not just a treat but a celebration on a plate. This vintage ice cream cake brings back memories of summer parties and family gatherings. The smooth chocolate layers, drizzled with glossy fudge, create a mouthwatering sight that’s hard to resist.
The cake is topped with cherries and chocolate cookies, adding a fun and playful touch. Each slice reveals creamy ice cream nestled between layers of moist chocolate cake, making it a perfect dessert for any occasion.
Making this cake at home is easier than you might think. You can customize it with your favorite flavors or toppings. If you want to switch things up, consider using vanilla or strawberry ice cream instead of chocolate. You can also swap out the cherries for fresh berries or nuts for added texture.
Ingredients
- 1 box chocolate cake mix
- 1/2 cup vegetable oil
- 3 large eggs
- 1 cup water
- 1 quart chocolate ice cream, softened
- 1 cup heavy cream
- 1/2 cup powdered sugar
- 1/2 cup chocolate fudge sauce
- Chocolate cookies and cherries for topping
Instructions
- Preheat your oven to 350°F (175°C). Grease and flour two 9-inch round cake pans.
- In a large bowl, mix the chocolate cake mix, vegetable oil, eggs, and water until smooth. Divide the batter evenly between the prepared pans.
- Bake for 25-30 minutes or until a toothpick comes out clean. Let the cakes cool completely in the pans.
- Once cooled, remove the cakes from the pans. Place one layer on a serving plate and spread the softened chocolate ice cream on top.
- Place the second cake layer on top of the ice cream. Freeze for at least 2 hours to set the ice cream.
- While the cake is freezing, whip the heavy cream with powdered sugar until soft peaks form. Spread the whipped cream over the top and sides of the cake.
- Drizzle chocolate fudge sauce over the top and decorate with chocolate cookies and cherries.
- Slice and serve this vintage ice cream cake straight from the freezer for a delightful treat!
Cooking Tip: If you want a richer flavor, add a splash of coffee to the cake batter. For a lighter option, use whipped topping instead of heavy cream.
Ingredient Substitution: If you’re out of chocolate cake mix, you can use a homemade chocolate cake recipe or even a gluten-free mix for a different twist.
Refreshing Strawberry Shortcake Ice Cream Dessert
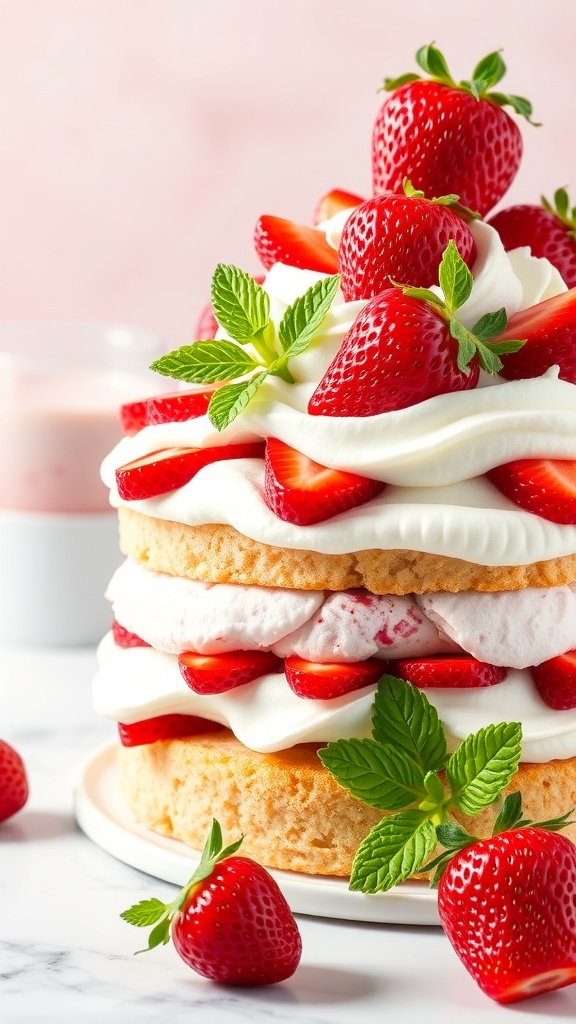
Strawberry shortcake is a classic dessert that brings a smile to anyone’s face. This version takes it up a notch by adding ice cream, making it a perfect treat for warm days. The layers of fluffy cake, sweet strawberries, and creamy ice cream create a delightful combination.
The image showcases a beautiful strawberry shortcake ice cream dessert, topped with fresh strawberries and mint leaves. The layers are inviting, and the vibrant colors make it hard to resist. This dessert is not just a feast for the eyes; it’s a nostalgic nod to vintage ice cream cakes that many of us grew up loving.
To make your own refreshing strawberry shortcake ice cream dessert, here’s a simple recipe that will impress your friends and family.
Ingredients
- 1 pound fresh strawberries, hulled and sliced
- 1/4 cup granulated sugar
- 1 pound vanilla ice cream, softened
- 1 pound sponge cake or pound cake, sliced
- 1 cup heavy whipping cream
- 1/4 cup powdered sugar
- 1 teaspoon vanilla extract
- Fresh mint leaves for garnish
Instructions
- Prepare the Strawberries: In a bowl, mix the sliced strawberries with granulated sugar. Let them sit for about 30 minutes to release their juices.
- Make the Whipped Cream: In a mixing bowl, whip the heavy cream with powdered sugar and vanilla extract until soft peaks form.
- Layer the Dessert: In a serving dish, place a layer of sponge cake at the bottom. Spread a layer of softened vanilla ice cream over the cake, followed by a layer of the sugared strawberries.
- Add More Layers: Repeat the layering process until you run out of ingredients, finishing with whipped cream on top.
- Garnish: Top with fresh strawberries and mint leaves for a beautiful presentation.
- Chill: Place the dessert in the freezer for at least 2 hours before serving to allow it to set.
Cooking Tips: If you want to switch things up, try using chocolate or strawberry ice cream instead of vanilla. You can also add a drizzle of chocolate sauce or a sprinkle of crushed nuts for extra texture.
Enjoy this refreshing strawberry shortcake ice cream dessert at your next gathering or simply treat yourself on a sunny day!
Nutty Crunch Almond Joy Ice Cream Cake
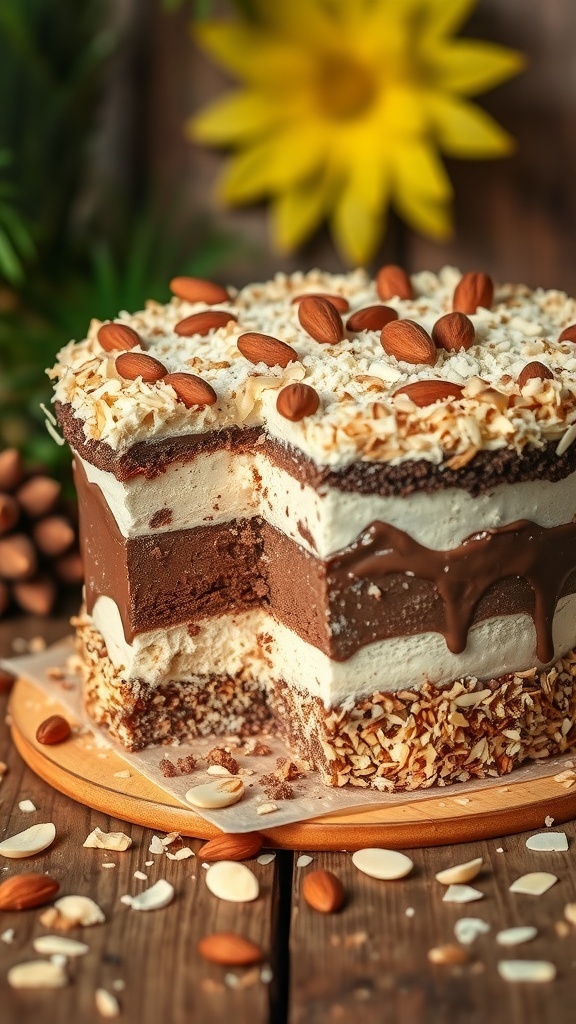
This Nutty Crunch Almond Joy Ice Cream Cake is a delightful treat that brings back memories of vintage ice cream cakes. The layers of chocolate and vanilla ice cream are perfectly complemented by crunchy almonds and a rich chocolate drizzle. The presentation is just as inviting as the taste, with a beautiful blend of textures and flavors.
The cake features a base of crunchy almond pieces, layered with creamy ice cream. Topped with whipped cream and more almonds, it’s a feast for the eyes and the taste buds. This cake is perfect for celebrations or just a sweet treat on a warm day.
For those who love a bit of nostalgia, this cake captures the essence of vintage ice cream cakes, making it a must-try. Whether you’re serving it at a party or enjoying a slice at home, it’s sure to impress.
Ingredients
- 2 cups chocolate ice cream
- 2 cups vanilla ice cream
- 1 cup crushed almonds
- 1/2 cup chocolate syrup
- 1 cup whipped cream
- 1/4 cup sliced almonds for garnish
Instructions
- Prepare the Base: Start by crushing the almonds and spreading them evenly on the bottom of a springform pan.
- Add Ice Cream Layers: Spoon the chocolate ice cream over the almond base, smoothing it out. Freeze for about 30 minutes until firm.
- Layer Vanilla Ice Cream: Next, add the vanilla ice cream on top of the chocolate layer. Smooth it out and freeze again for another 30 minutes.
- Top with Whipped Cream: Once the ice cream layers are firm, spread whipped cream over the top. Drizzle with chocolate syrup and sprinkle with sliced almonds.
- Final Freeze: Place the cake back in the freezer for at least 2 hours before serving to ensure it holds its shape.
- Serve: When ready to serve, remove from the springform pan and slice. Enjoy your delicious Nutty Crunch Almond Joy Ice Cream Cake!
Cooking Tips: If you want to switch things up, try using different flavors of ice cream or nuts. You can also substitute the whipped cream with a dairy-free alternative for a lighter version.
Ingredient Substitutions: If you don’t have almonds, any nut or even granola can work as a base. For a chocolatey twist, consider using chocolate ice cream with a fudge topping instead of syrup.
Zesty Lemon Meringue Ice Cream Cake
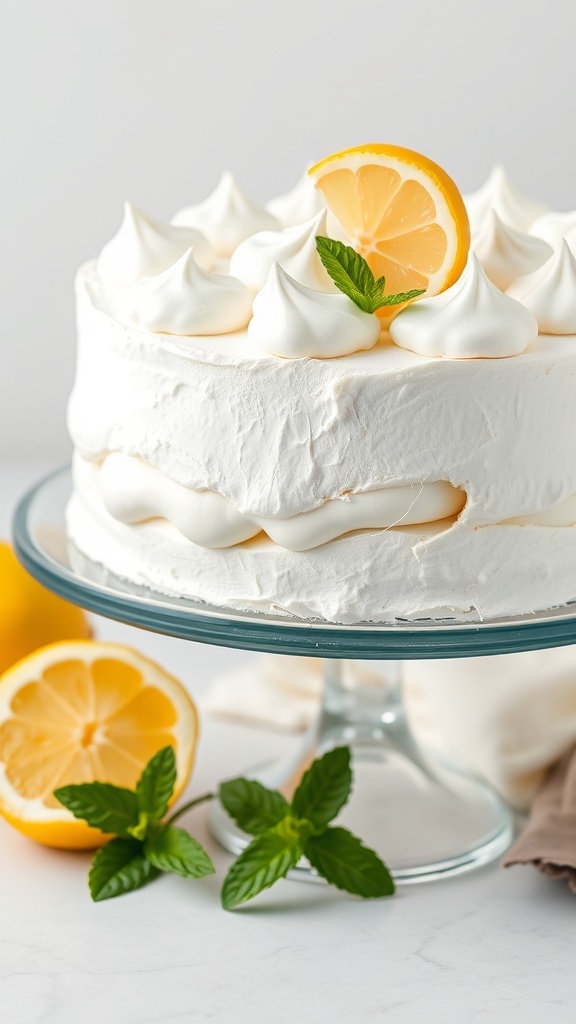
Nothing says summer like a refreshing slice of Zesty Lemon Meringue Ice Cream Cake. This delightful dessert combines the tangy flavor of lemon with the creaminess of ice cream, topped off with fluffy meringue. It’s a vintage ice cream cake that brings back memories of sunny days and family gatherings.
The cake features layers of lemon-flavored ice cream, making it a perfect treat for warm weather. The meringue topping adds a sweet contrast, creating a delightful balance of flavors. Garnished with fresh lemon slices and mint leaves, it’s as beautiful as it is delicious.
Whether you’re celebrating a special occasion or just treating yourself, this cake is sure to impress. It’s easy to make and can be prepared ahead of time, allowing you to enjoy the moment without any stress.
Ingredients
- 2 cups lemon ice cream, softened
- 1 cup whipped cream
- 3 large egg whites
- 1/4 teaspoon cream of tartar
- 1/2 cup granulated sugar
- 1 teaspoon vanilla extract
- 1 tablespoon lemon juice
- Fresh lemon slices and mint leaves for garnish
Instructions
- Prepare the Cake Base: In a springform pan, spread the softened lemon ice cream evenly. Freeze for about 2 hours until firm.
- Make the Meringue: In a clean bowl, beat the egg whites and cream of tartar until soft peaks form. Gradually add the sugar, continuing to beat until stiff peaks form. Stir in the vanilla extract and lemon juice.
- Assemble the Cake: Once the ice cream is firm, spread the meringue over the top. Use a spatula to create peaks for a decorative look.
- Brown the Meringue: Place the cake under a broiler for 1-2 minutes until the meringue is lightly browned. Watch closely to prevent burning.
- Chill and Serve: Let the cake cool for a few minutes before refrigerating for at least 30 minutes. Garnish with fresh lemon slices and mint leaves before serving.
Cooking Tips: If you prefer a less sweet meringue, reduce the sugar slightly. You can also substitute the lemon ice cream with lime or orange for a different twist. For a dairy-free option, use coconut whipped cream.
Gourmet Coffee Ice Cream Layer Cake
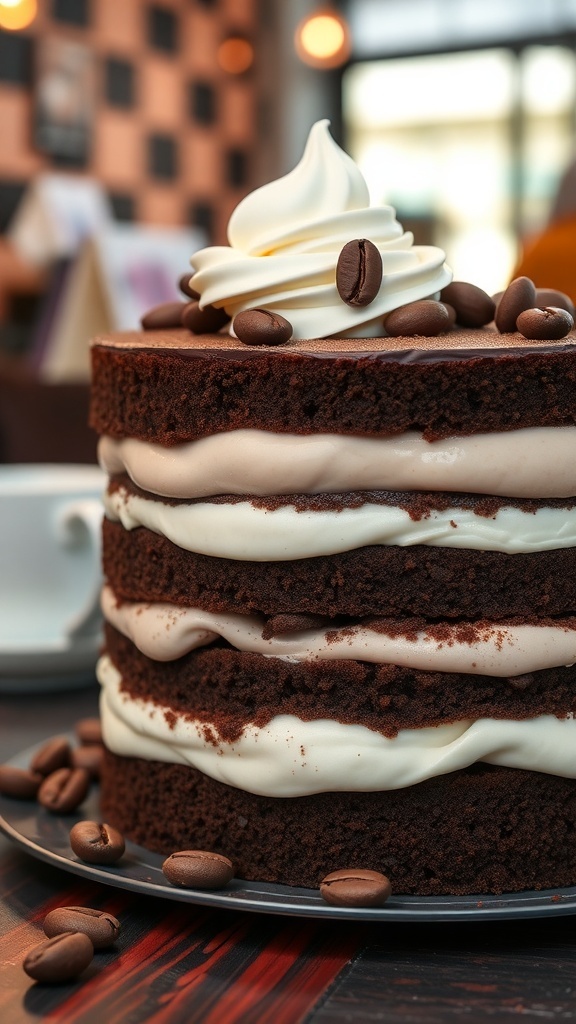
Imagine a cake that combines the rich flavors of coffee with the creamy goodness of ice cream. This gourmet coffee ice cream layer cake is a delightful treat that brings together vintage ice cream cakes with a modern twist. The layers of moist chocolate cake are filled with luscious coffee ice cream, making it perfect for any occasion.
The cake is topped with a swirl of whipped cream and garnished with coffee beans, adding a touch of elegance. Each slice offers a perfect balance of sweetness and coffee flavor, making it a hit among coffee lovers and dessert enthusiasts alike.
To make this cake, you’ll need some simple ingredients. Here’s how to whip it up!
Ingredients
- 2 cups all-purpose flour
- 1 3/4 cups granulated sugar
- 3/4 cup unsweetened cocoa powder
- 1 1/2 teaspoons baking powder
- 1 1/2 teaspoons baking soda
- 1 teaspoon salt
- 2 large eggs
- 1 cup milk
- 1/2 cup vegetable oil
- 2 teaspoons vanilla extract
- 1 cup boiling water
- 4 cups coffee ice cream, softened
- 1 cup heavy cream
- 2 tablespoons powdered sugar
- 1/2 cup coffee beans, for garnish
Instructions
- Preheat the oven to 350°F (175°C). Grease and flour two 9-inch round cake pans.
- In a large bowl, mix flour, sugar, cocoa powder, baking powder, baking soda, and salt. Add eggs, milk, oil, and vanilla. Beat on medium speed for 2 minutes. Stir in boiling water until well combined.
- Pour the batter evenly into the prepared pans. Bake for 30-35 minutes or until a toothpick comes out clean. Let the cakes cool in the pans for 10 minutes, then transfer to wire racks to cool completely.
- Once cooled, slice each cake in half horizontally to create four layers. Place one layer on a serving plate and spread a layer of coffee ice cream on top. Repeat with the remaining layers.
- In a separate bowl, whip the heavy cream with powdered sugar until stiff peaks form. Spread the whipped cream over the top layer of the cake. Decorate with coffee beans.
Cooking tips: If you prefer a less sweet cake, reduce the sugar in the batter. You can also substitute the coffee ice cream with vanilla or chocolate for a different flavor. Enjoy your gourmet coffee ice cream layer cake!
Classic Neapolitan Ice Cream Cake
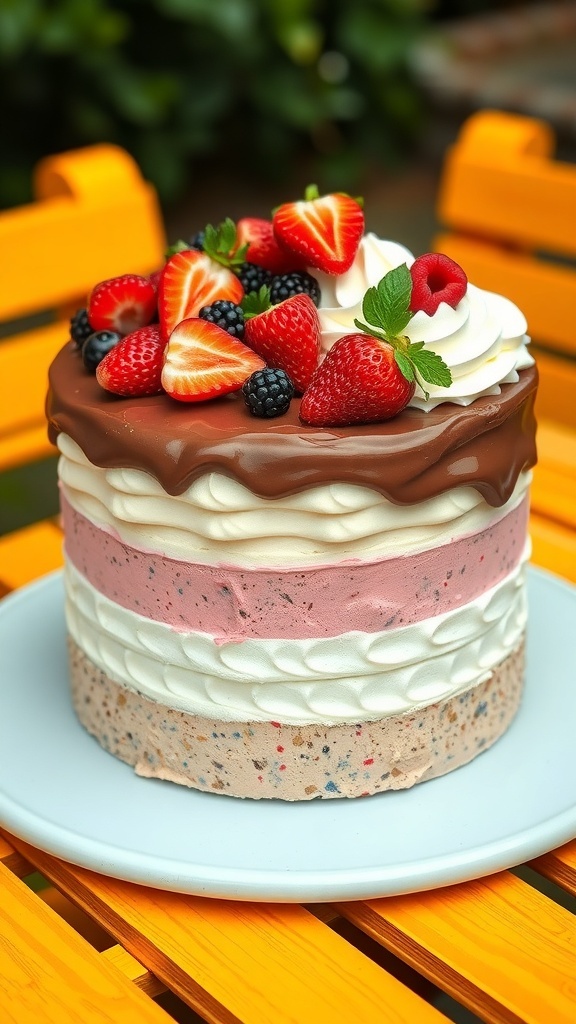
Neapolitan ice cream cake is a delightful treat that brings back memories of summer days and family gatherings. This cake features three classic flavors: chocolate, vanilla, and strawberry. Each layer is distinct yet harmonizes beautifully, making it a favorite for many.
The cake is often topped with whipped cream and fresh fruits, adding a pop of color and freshness. The combination of flavors and textures makes each bite a joy. It’s perfect for birthdays, picnics, or just a sweet indulgence on a warm day.
Making your own Neapolitan ice cream cake is easier than you might think. You can customize it with your favorite toppings or even switch up the flavors. Let’s get into the recipe!
Ingredients
- 1 quart chocolate ice cream
- 1 quart vanilla ice cream
- 1 quart strawberry ice cream
- 1 cup heavy whipping cream
- 1/4 cup powdered sugar
- 1/2 cup chocolate syrup
- Fresh strawberries, blueberries, and raspberries for topping
Instructions
- Prepare the Cake Layers: In a springform pan, layer the chocolate ice cream at the bottom. Spread it evenly and freeze for about 30 minutes.
- Add Vanilla Layer: Next, add the vanilla ice cream on top of the chocolate layer. Smooth it out and freeze for another 30 minutes.
- Add Strawberry Layer: Finally, layer the strawberry ice cream on top. Freeze for at least 2 hours or until firm.
- Make the Whipped Cream: In a bowl, whip the heavy cream and powdered sugar until soft peaks form.
- Assemble the Cake: Remove the cake from the springform pan. Spread the whipped cream over the top and sides of the cake. Drizzle chocolate syrup on top.
- Decorate: Top with fresh berries for a colorful finish. Slice and serve!
Cooking Tips: If you want to save time, store-bought ice cream works great. Let the ice cream soften slightly before spreading for easier layering. You can also use different flavors like mint or coffee for a unique twist.
Ingredient Substitutions: If you’re dairy-free, try coconut or almond milk ice cream. For a healthier option, use Greek yogurt instead of whipped cream.
Sweet Mint Chocolate Chip Ice Cream Cake
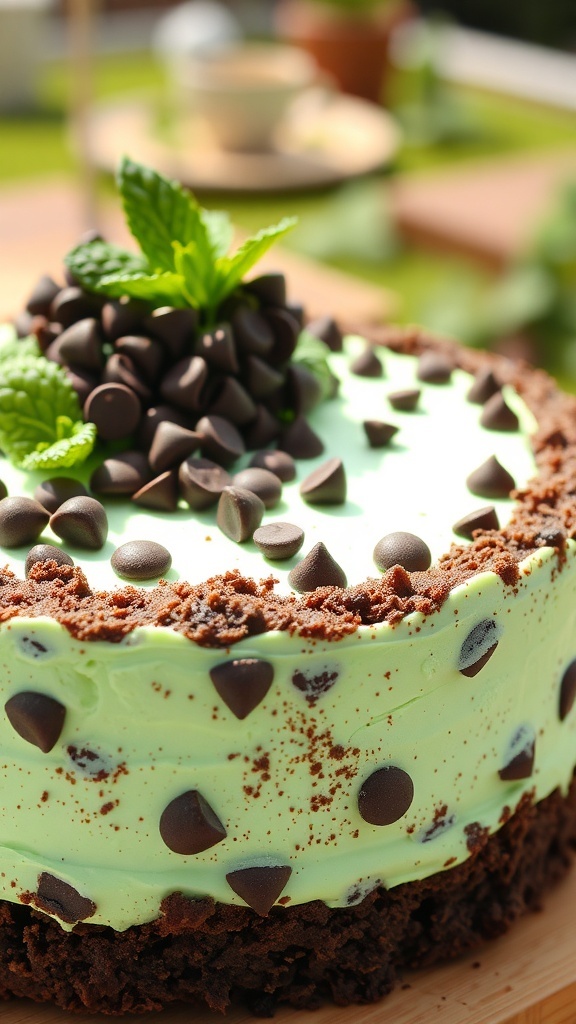
Mint chocolate chip ice cream cake is a delightful treat that brings back memories of summer days and family gatherings. This vintage ice cream cake features a rich chocolate base, creamy mint ice cream, and a sprinkle of chocolate chips on top. The vibrant green color of the mint ice cream adds a fun touch, making it perfect for celebrations.
The cake is layered with a crunchy chocolate crust, which provides a satisfying contrast to the smooth ice cream. Topped with fresh mint leaves and more chocolate chips, it’s not just tasty but also visually appealing. This cake is sure to impress your guests and satisfy your sweet tooth.
When making this cake, you can easily customize it. If you prefer a different flavor, swap the mint ice cream for vanilla or cookies and cream. You can also use gluten-free chocolate cookies for the crust if you have dietary restrictions.
Ingredients
- 1 package chocolate sandwich cookies (about 15-20 cookies)
- 1/4 cup unsalted butter, melted
- 1 quart mint chocolate chip ice cream, softened
- 1 cup whipped cream
- 1/2 cup mini chocolate chips
- Fresh mint leaves for garnish
Instructions
- Prepare the Crust: Preheat your oven to 350°F (175°C). Crush the chocolate sandwich cookies in a food processor until fine. Mix with melted butter until combined.
- Form the Base: Press the cookie mixture into the bottom of a springform pan to create a crust. Bake for 10 minutes, then let it cool completely.
- Add Ice Cream: Once the crust is cool, spread the softened mint chocolate chip ice cream evenly over the crust. Smooth the top with a spatula.
- Freeze: Cover the cake with plastic wrap and freeze for at least 4 hours or until firm.
- Top with Whipped Cream: Once frozen, remove the cake from the springform pan. Spread whipped cream on top and sprinkle with mini chocolate chips. Garnish with fresh mint leaves.
- Serve: Slice and enjoy your delicious mint chocolate chip ice cream cake!
Cooking Tips: If you want a richer flavor, consider adding a layer of chocolate fudge between the ice cream and whipped cream. For a lighter version, use low-fat ice cream and whipped topping.
Ingredient Substitutions: You can replace mint chocolate chip ice cream with any flavor you like. For a nutty twist, add crushed nuts to the crust mixture.
Rich Cookies And Cream Ice Cream Cake
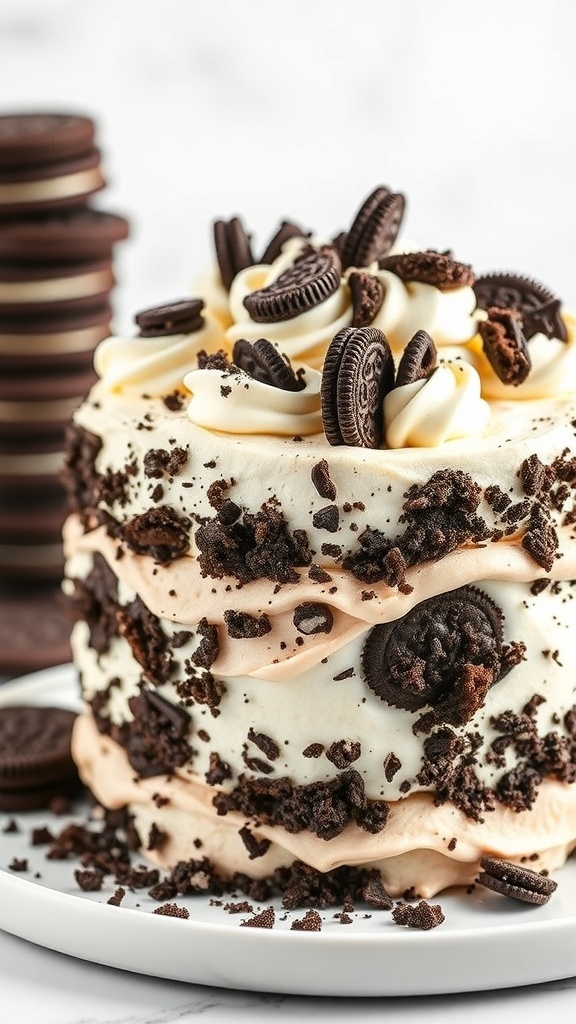
Vintage ice cream cakes bring a sense of nostalgia and joy. The rich cookies and cream ice cream cake is a delightful treat that combines creamy ice cream with crunchy cookie bits. This cake is perfect for celebrations or just a sweet indulgence on a warm day.
The cake features layers of cookies and cream ice cream, sandwiched between soft cake layers. Topped with whipped cream and more cookie crumbles, it’s a feast for the eyes and the taste buds. Each slice reveals a beautiful blend of textures and flavors that will take you back to simpler times.
To make this cake, you’ll need some simple ingredients. You can easily substitute some items based on what you have at home. For example, if you don’t have cookies, any chocolate wafer can work. If you prefer a lighter cake, consider using a sponge cake instead of a denser chocolate cake.
Ingredients
- 1 box chocolate cake mix
- 3 cups cookies and cream ice cream, softened
- 1 cup heavy whipping cream
- 1/4 cup powdered sugar
- 1 teaspoon vanilla extract
- 1 cup crushed Oreo cookies
- Extra Oreo cookies for decoration
Instructions
- Prepare the Cake: Bake the chocolate cake according to the package instructions. Allow it to cool completely.
- Layer the Ice Cream: Once the cake is cool, slice it in half horizontally. Spread a layer of softened cookies and cream ice cream on the bottom half, then place the top half back on.
- Make the Whipped Cream: In a bowl, beat the heavy whipping cream, powdered sugar, and vanilla extract until soft peaks form.
- Frost the Cake: Spread the whipped cream over the top and sides of the cake. Sprinkle crushed Oreo cookies on top for decoration.
- Chill: Place the cake in the freezer for at least 2 hours to set before serving.
Cooking Tips: Make sure the ice cream is softened for easy spreading. You can also use a different flavor of ice cream if you prefer. For a fun twist, add chocolate syrup between the layers.
Enjoy this vintage ice cream cake at your next gathering or just as a special treat for yourself!
Exotic Mango Coconut Ice Cream Cake
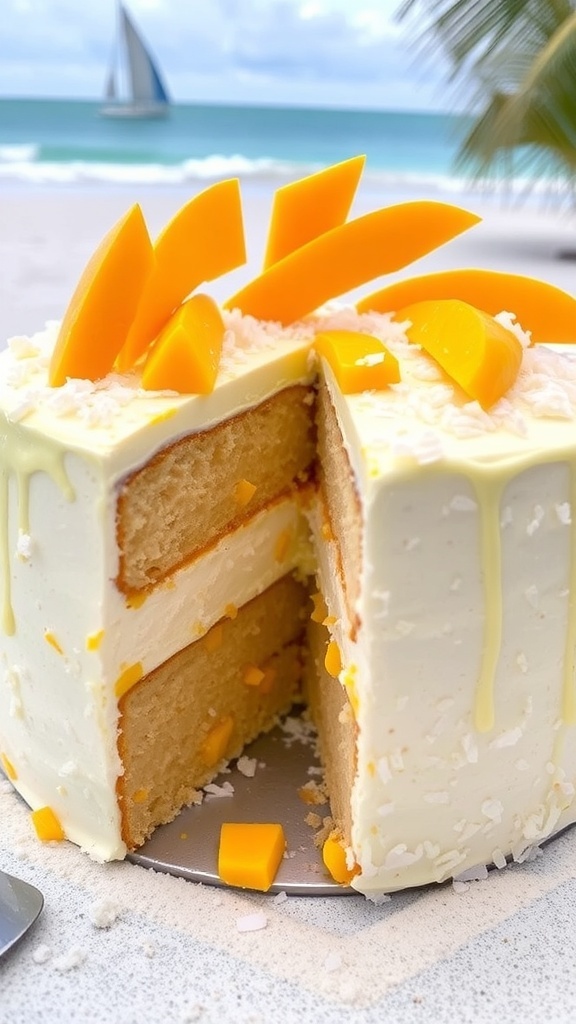
Picture a sunny day with a refreshing treat that brings a tropical vibe right to your table. The Exotic Mango Coconut Ice Cream Cake is a delightful blend of creamy coconut and sweet mango, perfect for any occasion. This vintage ice cream cake is not only visually stunning but also a treat for your taste buds.
The cake features layers of smooth mango ice cream, complemented by a rich coconut frosting. Topped with fresh mango slices and a sprinkle of shredded coconut, it’s a feast for the eyes and the palate. The combination of flavors makes it a standout dessert that everyone will love.
Making this cake is simpler than you might think. You can use store-bought ice cream or make your own if you’re feeling adventurous. Either way, the result is sure to impress. Let’s get into the ingredients and steps to create this tropical delight!
Ingredients
- 2 cups mango ice cream
- 2 cups coconut ice cream
- 1 cup heavy whipping cream
- 1/2 cup powdered sugar
- 1 teaspoon vanilla extract
- 1 cup fresh mango slices
- 1/2 cup shredded coconut
Instructions
- Prepare the Base: In a round cake pan, spread a layer of mango ice cream evenly. Freeze for about 30 minutes until firm.
- Add Coconut Layer: Spread a layer of coconut ice cream over the mango layer. Freeze again for another 30 minutes.
- Make the Frosting: In a bowl, whip the heavy cream with powdered sugar and vanilla extract until soft peaks form.
- Frost the Cake: Remove the cake from the freezer and frost the top and sides with the whipped cream mixture.
- Decorate: Top with fresh mango slices and sprinkle shredded coconut over the cake.
- Serve: Let the cake sit at room temperature for about 10 minutes before slicing and serving.
Cooking Tips: If you want a lighter version, you can use light ice cream or yogurt instead. For a different flavor, try adding lime zest to the frosting for a citrus kick. Enjoy this vintage ice cream cake at your next gathering!
Decadent Peanut Butter Cup Ice Cream Cake
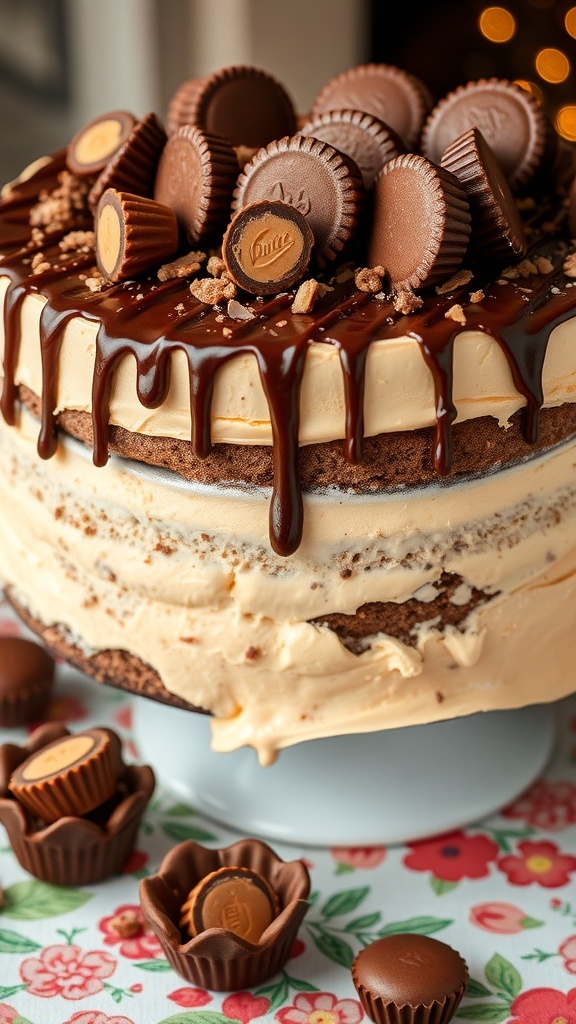
Picture a vintage ice cream cake that brings back sweet memories. This Peanut Butter Cup Ice Cream Cake is a delightful treat for any occasion. The layers of rich chocolate cake and creamy peanut butter ice cream create a perfect balance of flavors. Topped with chocolate drizzle and mini peanut butter cups, it’s a feast for both the eyes and the taste buds.
The cake features a smooth, creamy texture that melts in your mouth. Each bite combines the sweetness of ice cream with the rich taste of chocolate. It’s a nostalgic dessert that reminds us of simpler times, making it a favorite for gatherings and celebrations.
Ready to make your own? Here’s how!
Ingredients
- 1 box chocolate cake mix
- 3 cups peanut butter ice cream, softened
- 1 cup heavy cream
- 1/2 cup powdered sugar
- 1/2 cup chocolate syrup
- 1 cup mini peanut butter cups, chopped
- 1 teaspoon vanilla extract
Instructions
- Bake the Cake: Prepare the chocolate cake mix according to the package instructions. Once baked, let it cool completely.
- Layer the Ice Cream: Once the cake is cool, slice it in half horizontally. Spread half of the softened peanut butter ice cream on the bottom layer. Place the top layer back on.
- Whip the Cream: In a bowl, whip the heavy cream with powdered sugar and vanilla until soft peaks form. Spread this whipped cream over the top of the cake.
- Add Toppings: Drizzle chocolate syrup over the whipped cream and sprinkle chopped mini peanut butter cups on top.
- Freeze: Place the cake in the freezer for at least 4 hours to set before serving.
Cooking Tips: If you want a lighter version, use reduced-fat ice cream and whipped topping. You can also substitute the chocolate cake with a vanilla or gluten-free cake mix for a different flavor.
Enjoy your vintage ice cream cake with family and friends!
Luscious Raspberry Swirl Ice Cream Cake
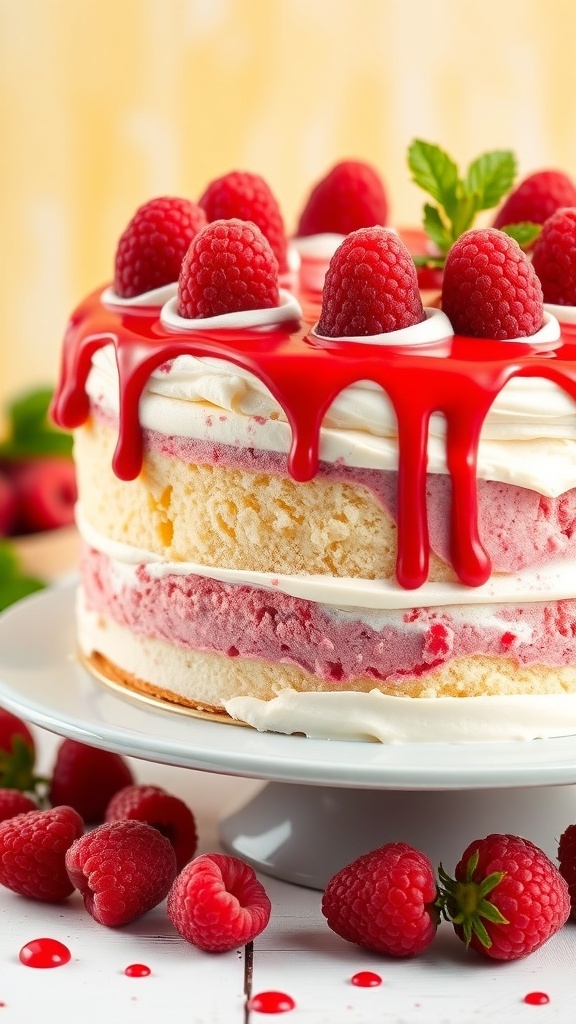
Picture a delightful vintage ice cream cake that brings back sweet memories. The Luscious Raspberry Swirl Ice Cream Cake is a perfect blend of creamy ice cream and fluffy cake, topped with vibrant raspberries. The layers of vanilla and raspberry ice cream create a beautiful swirl that’s not only pleasing to the eye but also a treat for the taste buds.
This cake is perfect for any celebration or just a sunny afternoon. The fresh raspberries on top add a burst of color and a hint of tartness that balances the sweetness of the ice cream. It’s a classic dessert that never goes out of style!
To make this cake, you’ll need some simple ingredients that you might already have at home. You can also switch things up by using different flavors of ice cream or fruits. Let’s get started!
Ingredients
- 1 box of vanilla cake mix
- 3 cups raspberry ice cream, softened
- 3 cups vanilla ice cream, softened
- 1 cup heavy whipping cream
- 1/4 cup powdered sugar
- 1 teaspoon vanilla extract
- Fresh raspberries for topping
- Raspberry sauce for drizzling (optional)
Instructions
- Prepare the Cake: Bake the vanilla cake according to the package instructions. Let it cool completely.
- Layer the Ice Cream: Once the cake is cool, slice it in half horizontally. Place one layer on a serving plate and spread the softened raspberry ice cream evenly on top. Add the second layer of cake on top of the raspberry ice cream.
- Add Vanilla Ice Cream: Spread the softened vanilla ice cream over the second layer of cake. Smooth it out and cover it completely.
- Make the Whipped Cream: In a mixing bowl, whip the heavy cream with powdered sugar and vanilla extract until soft peaks form. Spread this whipped cream over the vanilla ice cream layer.
- Freeze: Cover the cake with plastic wrap and freeze for at least 4 hours or until firm.
- Serve: Before serving, top with fresh raspberries and drizzle with raspberry sauce if desired. Slice and enjoy!
Cooking Tips: If you want a lighter version, you can use low-fat ice cream. For a fun twist, try adding crushed cookies between the layers. Enjoy this vintage ice cream cake at your next gathering!
Elegant Red Velvet Ice Cream Cake

Red velvet ice cream cake is a stunning treat that brings a vintage twist to any celebration. The rich, red layers of cake paired with creamy ice cream create a delightful contrast. Topped with swirls of frosting and a sprinkle of cake crumbs, it’s as pleasing to the eye as it is to the palate.
This cake is perfect for birthdays, anniversaries, or just a sweet indulgence. The combination of flavors and textures makes it a favorite among dessert lovers. Plus, it’s a fun way to enjoy the classic red velvet cake in a new form!
When making this cake, you can use store-bought ice cream or whip up your own. If you want to switch things up, try using different flavors like cream cheese or vanilla. You can also adjust the sweetness by using less sugar in the cake or ice cream.
Ingredients
- 2 ½ cups all-purpose flour
- 1 ½ cups granulated sugar
- 1 teaspoon baking soda
- 1 teaspoon salt
- 1 teaspoon cocoa powder
- 1 ½ cups vegetable oil
- 1 cup buttermilk, room temperature
- 2 large eggs
- 2 tablespoons red food coloring
- 1 teaspoon vanilla extract
- 1 teaspoon white vinegar
- 4 cups vanilla ice cream, softened
- 1 cup cream cheese frosting
Instructions
- Preheat your oven to 350°F (175°C). Grease and flour two 9-inch round cake pans.
- In a large bowl, mix flour, sugar, baking soda, salt, and cocoa powder. In another bowl, whisk together oil, buttermilk, eggs, food coloring, vanilla, and vinegar.
- Combine the wet and dry ingredients until just mixed. Divide the batter evenly between the prepared pans.
- Bake for 25-30 minutes or until a toothpick comes out clean. Let the cakes cool in the pans for 10 minutes, then transfer to wire racks to cool completely.
- Once cooled, slice each cake in half horizontally to create four layers. Place one layer on a serving plate and spread a layer of softened ice cream on top. Repeat with remaining layers, finishing with the last cake layer on top.
- Frost the top and sides of the cake with cream cheese frosting. Decorate with cake crumbs and any additional toppings you like.
- Freeze the cake for at least 2 hours before serving. Slice and enjoy your vintage ice cream cake!
Cooking Tips: If you want a lighter cake, consider using egg whites instead of whole eggs. For a richer flavor, add a teaspoon of almond extract to the batter.
Ingredient Substitutions: You can replace buttermilk with regular milk mixed with a tablespoon of vinegar or lemon juice. If you prefer a dairy-free option, use almond milk and a dairy-free ice cream.
Charming S’Mores Ice Cream Cake
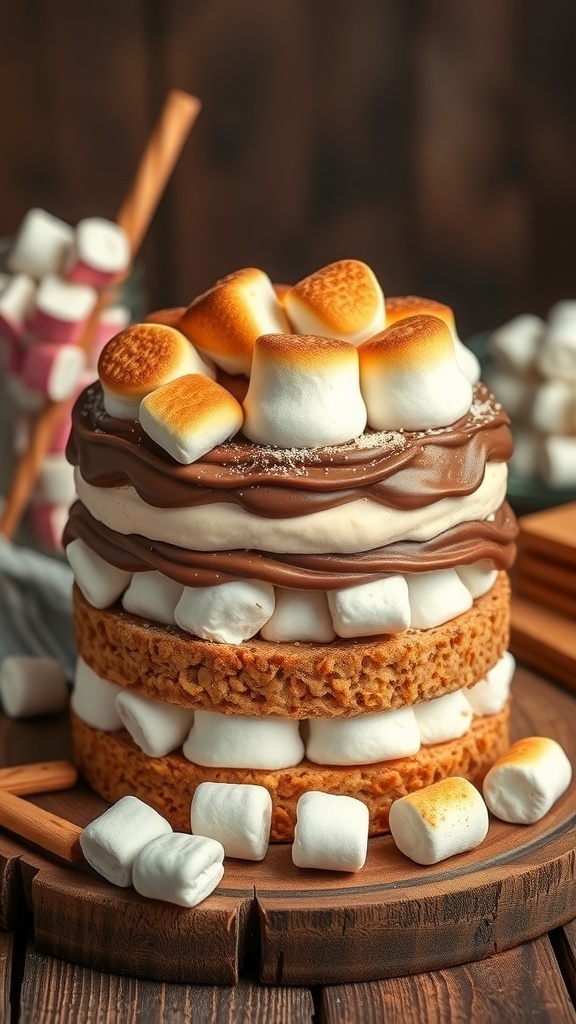
This S’mores Ice Cream Cake is a delightful twist on a classic treat. Imagine layers of creamy ice cream, fluffy whipped topping, and rich chocolate, all topped with toasted marshmallows. It’s a perfect dessert for gatherings or just a cozy night in.
The cake features a graham cracker base that gives it that authentic s’mores flavor. Each layer is generously filled with ice cream, making it a cool and refreshing choice. The toasted marshmallows on top add a fun and nostalgic touch, reminding us of campfire nights.
To make this cake, you’ll need some simple ingredients. Gather graham crackers, your favorite ice cream flavors, whipped cream, chocolate syrup, and marshmallows. You can even mix and match ice cream flavors for a unique twist!
Ingredients
- 2 cups graham cracker crumbs
- 1/2 cup unsalted butter, melted
- 4 cups ice cream (any flavor)
- 2 cups whipped cream
- 1 cup chocolate syrup
- 2 cups mini marshmallows
Instructions
- Prepare the Base: In a bowl, mix graham cracker crumbs with melted butter until combined. Press the mixture into the bottom of a springform pan to form the base.
- Add Ice Cream: Let your ice cream soften slightly, then spread a layer over the graham cracker base. Repeat with additional layers of ice cream, alternating flavors if desired.
- Top with Whipped Cream: Once all layers are added, spread whipped cream over the top of the ice cream. Drizzle chocolate syrup on top for extra flavor.
- Toast the Marshmallows: Sprinkle mini marshmallows over the whipped cream. Use a kitchen torch to toast them lightly, or place under a broiler for a few seconds (watch closely!).
- Freeze: Cover the cake and freeze for at least 4 hours or until firm. When ready to serve, remove from the pan and slice.
Cooking Tip: If you want a richer flavor, try adding a layer of crushed chocolate cookies between the ice cream layers. For a lighter version, use low-fat ice cream and whipped topping. Enjoy this vintage ice cream cake with friends and family!
Classic Birthday Cake Ice Cream Delight
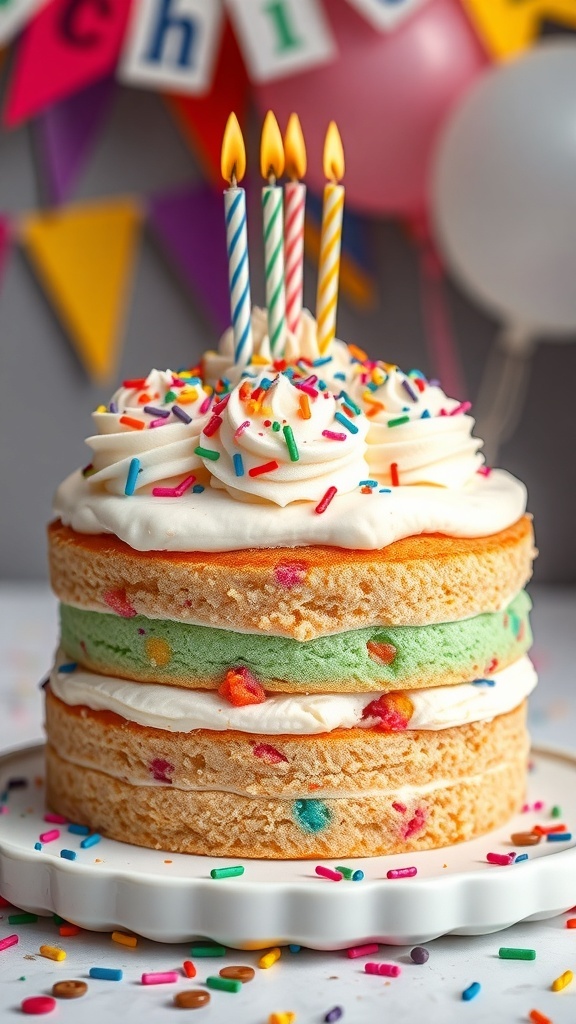
Vintage ice cream cakes bring a wave of nostalgia, especially when it comes to birthday celebrations. Picture a tall, layered cake with colorful sprinkles and creamy frosting, topped with cheerful candles. This delightful treat combines the joy of cake and ice cream, making it a perfect centerpiece for any birthday party.
The layers of cake are often made with a light sponge, alternating with rich ice cream. This combination creates a fun texture and flavor that everyone loves. The vibrant colors and festive decorations add to the excitement, inviting everyone to dig in.
Making your own vintage ice cream cake is easier than you might think. You can customize it with your favorite flavors and colors. Plus, it’s a great way to get creative in the kitchen!
Ingredients
- 1 box of vanilla cake mix
- 3 cups of your favorite ice cream (softened)
- 1 cup heavy whipping cream
- 1/2 cup powdered sugar
- 1 teaspoon vanilla extract
- Sprinkles for decoration
- Candles for topping
Instructions
- Prepare the Cake: Bake the vanilla cake according to the package instructions. Allow it to cool completely.
- Layer the Ice Cream: Once the cake is cool, slice it into two layers. Place one layer on a serving plate and spread a layer of softened ice cream on top. Add the second layer of cake on top of the ice cream.
- Frost the Cake: In a bowl, whip the heavy cream with powdered sugar and vanilla extract until soft peaks form. Frost the top and sides of the cake with this whipped cream.
- Add Decorations: Sprinkle colorful sprinkles on top and around the sides. Place candles on top for that birthday touch.
- Freeze: Place the cake in the freezer for at least 2 hours to set before serving.
Cooking Tips: If you want to switch things up, try using chocolate or strawberry cake mix. You can also mix different ice cream flavors for a fun twist!
Ingredient Substitutions: If you don’t have heavy cream, you can use store-bought whipped topping. For a dairy-free option, use coconut whipped cream and dairy-free ice cream.
Sumptuous Tiramisu Ice Cream Cake
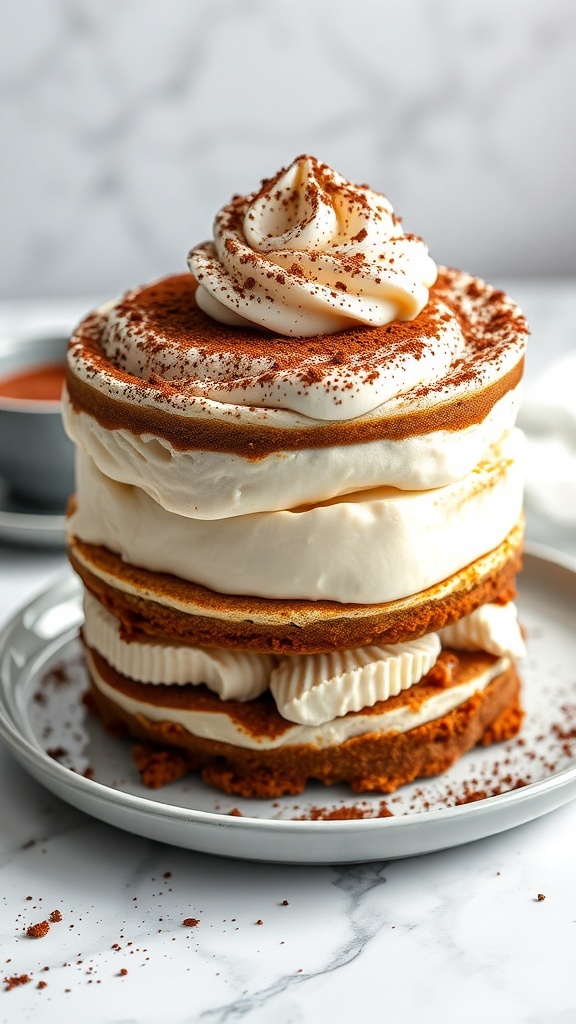
Vintage ice cream cakes bring a delightful twist to traditional desserts, and the Tiramisu Ice Cream Cake is no exception. This cake combines layers of coffee-flavored ice cream with creamy mascarpone, creating a rich and satisfying treat. The beautiful layers and dusting of cocoa powder make it not just tasty but visually appealing too.
Imagine slicing into this cake, revealing the soft, creamy layers that melt in your mouth. The coffee flavor is balanced perfectly with the sweetness of the ice cream, making it a perfect dessert for any occasion. Whether it’s a birthday party or a casual get-together, this cake is sure to impress.
Making this cake at home is easier than you think! You can customize it with your favorite flavors or even add a layer of chocolate or fruit for an extra twist. Let’s get started on this delicious recipe!
Ingredients
- 2 cups coffee ice cream
- 2 cups vanilla ice cream
- 1 cup mascarpone cheese
- 1 cup heavy cream
- 1/2 cup powdered sugar
- 1 teaspoon vanilla extract
- 1 cup brewed coffee, cooled
- Cocoa powder for dusting
- Ladyfinger cookies (optional)
Instructions
- Prepare the Base: In a springform pan, layer half of the coffee ice cream at the bottom. Smooth it out evenly and freeze for about 30 minutes.
- Add Vanilla Layer: Spread the vanilla ice cream over the coffee layer. Freeze again for another 30 minutes.
- Make the Cream Mixture: In a bowl, whip the heavy cream, mascarpone cheese, powdered sugar, and vanilla extract until soft peaks form.
- Layer the Cream: Spread the whipped cream mixture over the vanilla ice cream layer. If using, add a layer of ladyfinger cookies soaked in coffee on top.
- Final Freeze: Freeze the cake for at least 4 hours or overnight for best results.
- Serve: Before serving, dust the top with cocoa powder. Slice and enjoy your homemade Tiramisu Ice Cream Cake!
Cooking Tips: If you want a stronger coffee flavor, use espresso instead of brewed coffee. You can also substitute the mascarpone with cream cheese for a different taste. For a lighter version, use low-fat ice cream.
Festive Pumpkin Spice Ice Cream Cake
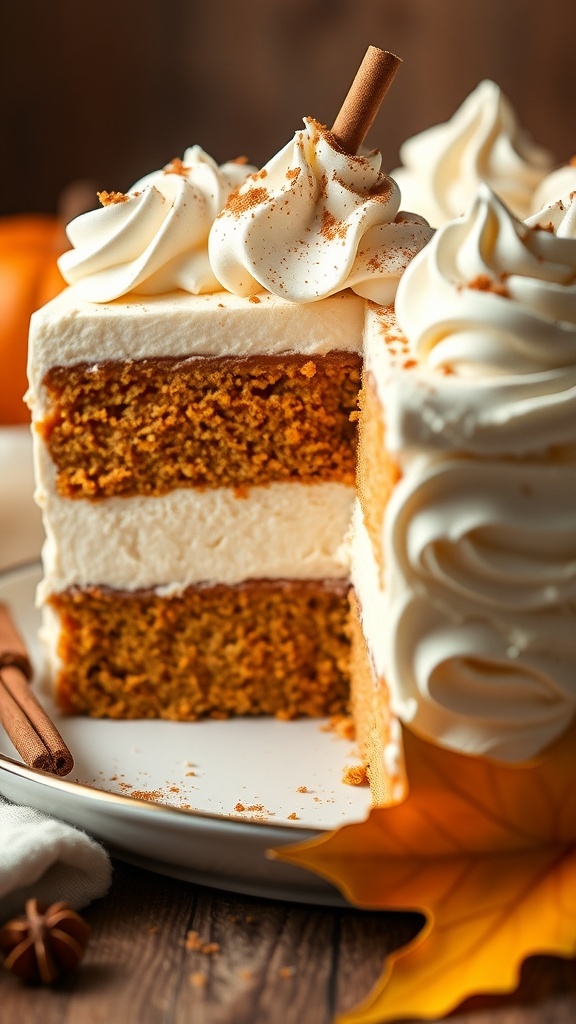
Fall is the perfect time to enjoy a slice of pumpkin spice ice cream cake. This delightful dessert combines the warm flavors of pumpkin and spices with the cool, creamy texture of ice cream. The layers of cake and ice cream create a beautiful presentation that’s sure to impress at any gathering.
Imagine a moist pumpkin cake, perfectly spiced with cinnamon and nutmeg, layered with rich vanilla ice cream. Topped with fluffy whipped cream and a sprinkle of cinnamon, this cake is not just a treat for the taste buds but also a feast for the eyes. It’s a vintage ice cream cake that brings back memories of cozy autumn evenings.
Whether you’re celebrating a special occasion or just treating yourself, this cake is a must-try. It’s simple to make and can be prepared ahead of time, making it a great choice for busy hosts.
Ingredients
- 2 cups pumpkin puree
- 1 1/2 cups all-purpose flour
- 1 cup granulated sugar
- 1/2 cup brown sugar, packed
- 1 teaspoon baking soda
- 1 teaspoon baking powder
- 1 teaspoon ground cinnamon
- 1/2 teaspoon ground nutmeg
- 1/4 teaspoon ground ginger
- 1/2 teaspoon salt
- 1/2 cup vegetable oil
- 4 large eggs
- 1 pint vanilla ice cream
- 1 cup heavy whipping cream
- 2 tablespoons powdered sugar
- Cinnamon sticks for garnish
Instructions
- Preheat your oven to 350°F (175°C). Grease and flour two 9-inch round cake pans.
- In a large bowl, mix together pumpkin puree, granulated sugar, brown sugar, and vegetable oil until smooth. Add eggs one at a time, mixing well after each addition.
- In another bowl, whisk together flour, baking soda, baking powder, cinnamon, nutmeg, ginger, and salt. Gradually add the dry ingredients to the pumpkin mixture, stirring until just combined.
- Divide the batter evenly between the prepared pans. Bake for 25-30 minutes, or until a toothpick inserted in the center comes out clean. Let the cakes cool in the pans for 10 minutes, then transfer to wire racks to cool completely.
- Once the cakes are cool, place one layer on a serving plate. Spread a layer of vanilla ice cream on top. Place the second cake layer on top of the ice cream layer.
- In a mixing bowl, whip the heavy cream with powdered sugar until stiff peaks form. Spread the whipped cream over the top and sides of the cake.
- Garnish with cinnamon sticks and a sprinkle of cinnamon. Freeze the cake for at least 2 hours before serving to allow the ice cream to set.
Cooking Tips: If you want to make this cake even easier, you can use store-bought pumpkin cake mix. For a lighter version, consider using Greek yogurt instead of heavy cream for the frosting.
Ingredient Substitutions: If you don’t have pumpkin puree, you can use mashed bananas or applesauce for a different flavor. Feel free to swap vanilla ice cream for any other flavor you love!
Satisfying Blueberry Cheesecake Ice Cream Cake
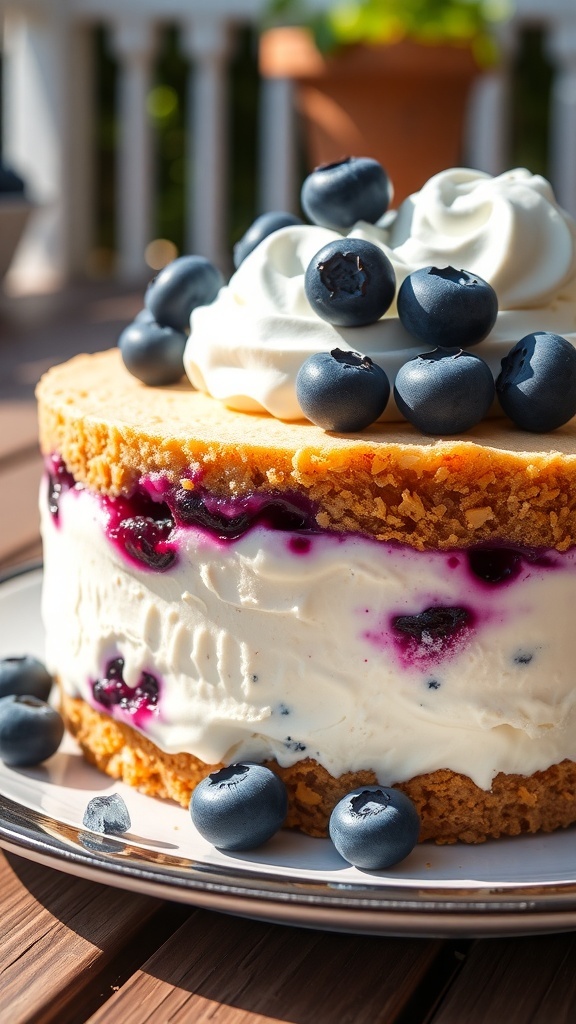
Vintage ice cream cakes bring a delightful nostalgia, and the blueberry cheesecake ice cream cake is a perfect example. This cake features layers of creamy cheesecake ice cream, a sweet blueberry swirl, and a crunchy graham cracker crust. It’s a treat that’s as pleasing to the eye as it is to the taste buds.
The cake is beautifully topped with fresh blueberries and whipped cream, making it a stunning centerpiece for any gathering. The combination of flavors is refreshing and satisfying, perfect for warm days or any celebration. Each slice reveals a delightful mix of textures and tastes that will have everyone coming back for more.
Ingredients
- 1 ½ cups graham cracker crumbs
- ½ cup unsalted butter, melted
- 1 quart cheesecake ice cream, softened
- 1 cup blueberry pie filling
- 1 cup heavy whipping cream
- 2 tablespoons powdered sugar
- Fresh blueberries for topping
Instructions
- Prepare the Crust: In a bowl, mix graham cracker crumbs and melted butter. Press the mixture into the bottom of a springform pan to form the crust. Freeze for about 30 minutes.
- Add Ice Cream: Spread the softened cheesecake ice cream over the crust. Smooth it out evenly and return to the freezer for another hour.
- Layer Blueberries: Once the ice cream is firm, spoon the blueberry pie filling over the cheesecake layer. Swirl it gently with a knife for a marbled effect.
- Make Whipped Cream: In a mixing bowl, whip the heavy cream and powdered sugar until soft peaks form. Spread the whipped cream over the blueberry layer.
- Freeze Again: Cover the cake and freeze for at least 4 hours or until firm. Before serving, let it sit at room temperature for a few minutes for easier slicing.
- Serve: Top with fresh blueberries and enjoy!
Cooking Tips: If you prefer a different flavor, try using strawberry or raspberry ice cream instead. You can also use homemade blueberry sauce for a fresher taste. For a gluten-free option, substitute graham crackers with gluten-free cookies.
You may also like:
– 43 Easy And Quick Cocktails From The 1960’s
– 27 Must-Try Tequila Cocktails Inspired by Gotham City
– 25 Cocktails Inspired by Gotham City Nightlife
If you enjoyed this blog you can visit us or check out our other blogs and learn a bit about us.
Disclaimer: This blog post is inspired by fictional universes and characters created by their respective rights holders. All related content and imagery remain the property of their respective rights holder. This fan-inspired content is for entertainment and commentary purposes only and is not affiliated with or endorsed by HBO, Disney, Warner Bros., Lionsgate, or any other rights holders. To explore the official source material, please visit:
HBO