

Tiny Treats That Pack a Mad Men Punch brings you stylish mini desserts that are sure to charm your guests at any gathering. These petite delights not only pack a flavor punch, but they’re also easy to whip up with simple ingredients. Use our cooking tips for perfect results, and don’t hesitate to swap out ingredients according to your preferences or pantry stock. Let’s get those taste buds tingling with some fun and fancy mini creations!
Delight In The Sweet Layers Of Miniature Tiramisu
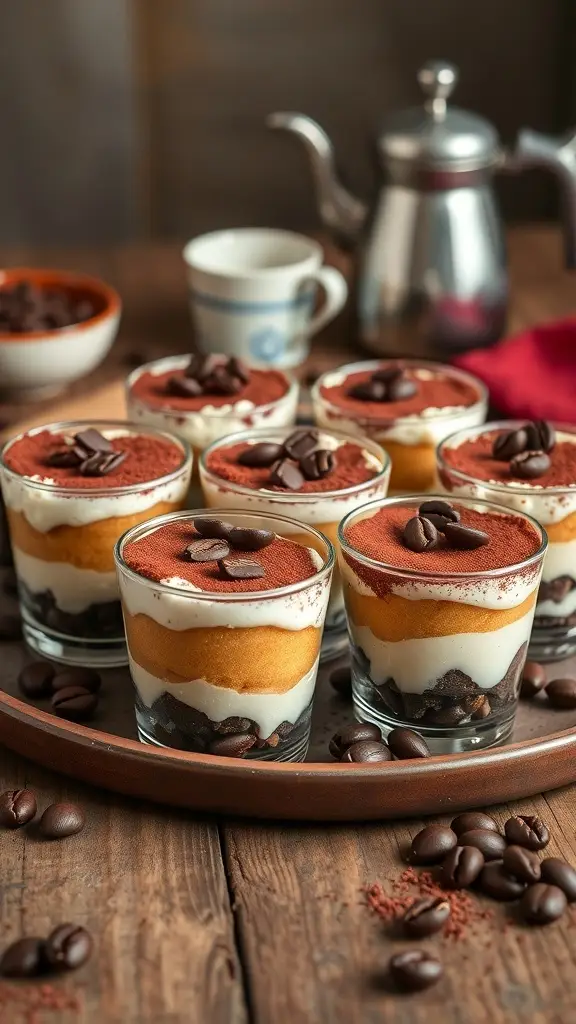
Miniature tiramisu is a delightful twist on the classic Italian dessert. These tiny treats are layered with rich flavors that bring a smile to anyone’s face. Each little cup is filled with coffee-soaked ladyfingers, creamy mascarpone, and a dusting of cocoa powder. They are perfect for sharing or enjoying all by yourself!
The beauty of these mini tiramisu cups lies in their presentation. Served in clear glasses, you can see the beautiful layers of cream, coffee, and chocolate. They look fancy but are surprisingly easy to make. Plus, they pack a punch of flavor that will remind you of the Mad Men era, where style and taste were everything.
To make these tiny treats, you’ll need some basic ingredients. You can easily substitute ingredients based on what you have at home. For example, if you don’t have mascarpone, cream cheese works well too. And if you want to skip the coffee, you can use milk or a flavored syrup instead. Let’s get into the recipe!
Indulge In The Creamy Goodness Of Mini Cheesecakes
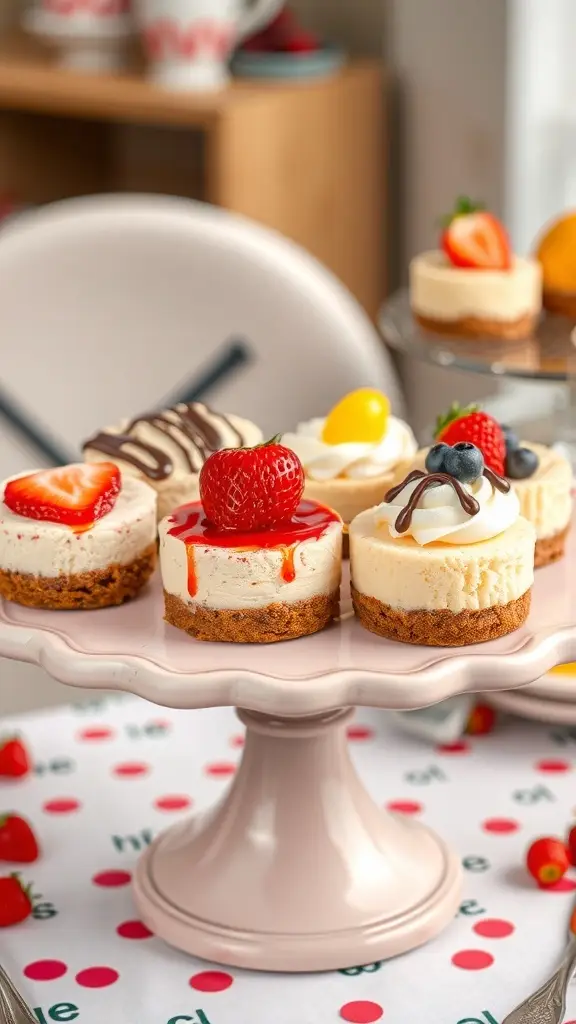
Mini cheesecakes are the perfect tiny treats that bring a burst of flavor in every bite. These little delights are not just cute; they pack a serious punch of creamy goodness. Each cheesecake is topped with colorful fruits and drizzles, making them visually appealing and irresistible.
Imagine a plate filled with these charming desserts, each one a different flavor. From classic strawberry to zesty lemon, there’s something for everyone. They’re great for parties, gatherings, or just a sweet treat at home. Plus, they’re easy to make, so you can whip them up anytime you’re craving something sweet.
Ready to make your own mini cheesecakes? Here’s a simple recipe to get you started!
Ingredients
- 1 cup graham cracker crumbs
- 1/4 cup granulated sugar
- 1/2 cup unsalted butter, melted
- 16 oz cream cheese, softened
- 1 cup powdered sugar
- 1 teaspoon vanilla extract
- 2 large eggs
- 1 cup sour cream
- Fresh fruits for topping (strawberries, blueberries, etc.)
- Chocolate syrup or fruit sauce for drizzling
Instructions
- Preheat your oven to 325°F (160°C). Line a muffin tin with cupcake liners.
- In a bowl, mix graham cracker crumbs, sugar, and melted butter until combined. Press this mixture into the bottom of each cupcake liner to form the crust.
- In another bowl, beat the cream cheese until smooth. Gradually add powdered sugar and vanilla, mixing well.
- Add eggs one at a time, mixing just until combined. Finally, stir in the sour cream until smooth.
- Pour the cheesecake mixture over the crusts in the muffin tin, filling each about 3/4 full.
- Bake for 18-20 minutes or until the centers are set. Let them cool completely before refrigerating for at least 2 hours.
- Once chilled, top with fresh fruits and drizzle with chocolate or fruit sauce before serving.
Cooking Tips: If you want a gluten-free option, use gluten-free graham crackers. You can also substitute the sour cream with Greek yogurt for a lighter version. Enjoy your mini cheesecakes!
Experience The Crunchy Bliss Of Bite-Sized Baklava
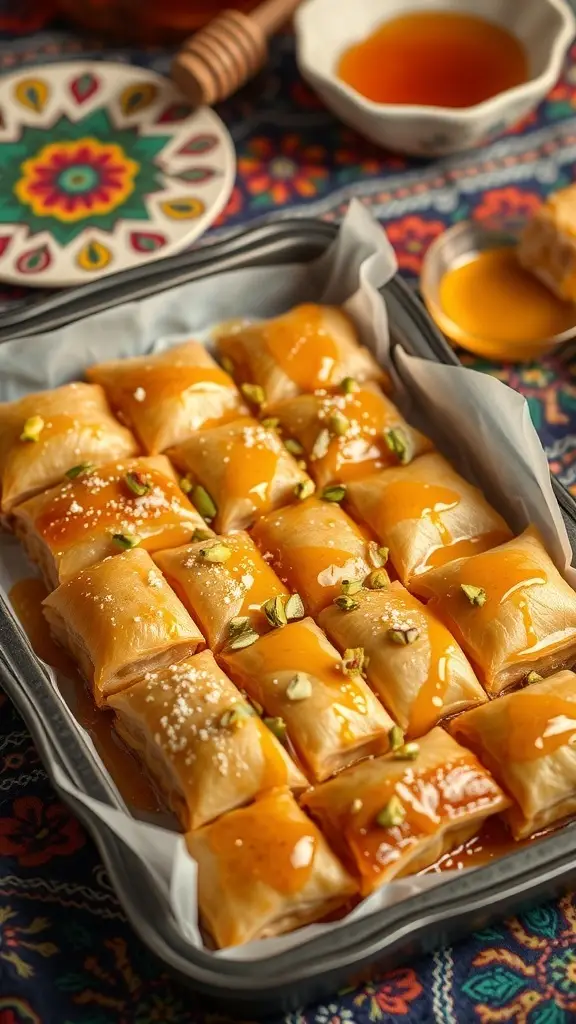
Tiny treats like baklava are a delightful way to satisfy your sweet tooth. These bite-sized pieces are layered with flaky pastry and filled with a mix of nuts, all drizzled with a sweet syrup. The crunch of the phyllo dough combined with the rich filling creates a blissful experience with every bite.
Imagine serving these mini desserts at your next gathering. They not only look stunning but also bring a taste of tradition to the table. The golden color and glossy syrup make them irresistible. Plus, they’re easy to pick up and enjoy, making them perfect for parties.
When making baklava, you can customize the nut filling to your liking. Walnuts, pistachios, or almonds all work beautifully. If you’re feeling adventurous, try adding a hint of cinnamon or cardamom for extra flavor.
Here’s a simple recipe to create your own batch of these tiny treats:
Ingredients
- 1 package of phyllo dough (16 oz)
- 2 cups mixed nuts (walnuts, pistachios, or almonds)
- 1 cup unsalted butter, melted
- 1 cup granulated sugar
- 1 cup water
- 1/2 cup honey
- 1 teaspoon vanilla extract
- 1 teaspoon ground cinnamon (optional)
Instructions
- Preheat your oven to 350°F (175°C).
- In a food processor, pulse the nuts until finely chopped. Mix in cinnamon if using.
- Unroll the phyllo dough and cover it with a damp cloth to prevent drying out. Brush a baking dish with melted butter.
- Layer 8 sheets of phyllo, brushing each with butter before adding the next. Spread a thin layer of the nut mixture over the phyllo.
- Repeat the layering process, alternating with the nut mixture, until all the nuts are used. Finish with 8 more layers of phyllo, brushing each with butter.
- Cut the baklava into diamond shapes with a sharp knife.
- Bake for about 45 minutes or until golden brown.
- While the baklava is baking, combine sugar, water, honey, and vanilla in a saucepan. Bring to a boil, then reduce heat and simmer for 10 minutes.
- Once the baklava is done, pour the syrup over it while it’s still hot. Allow it to cool completely before serving.
Cooking Tips: If you want a lighter version, use less butter or substitute with coconut oil. You can also experiment with different sweeteners like maple syrup for a unique twist.
Enjoy these tiny treats and watch them disappear in no time!
Savor The Flavors Of Miniature Fruit Tarts
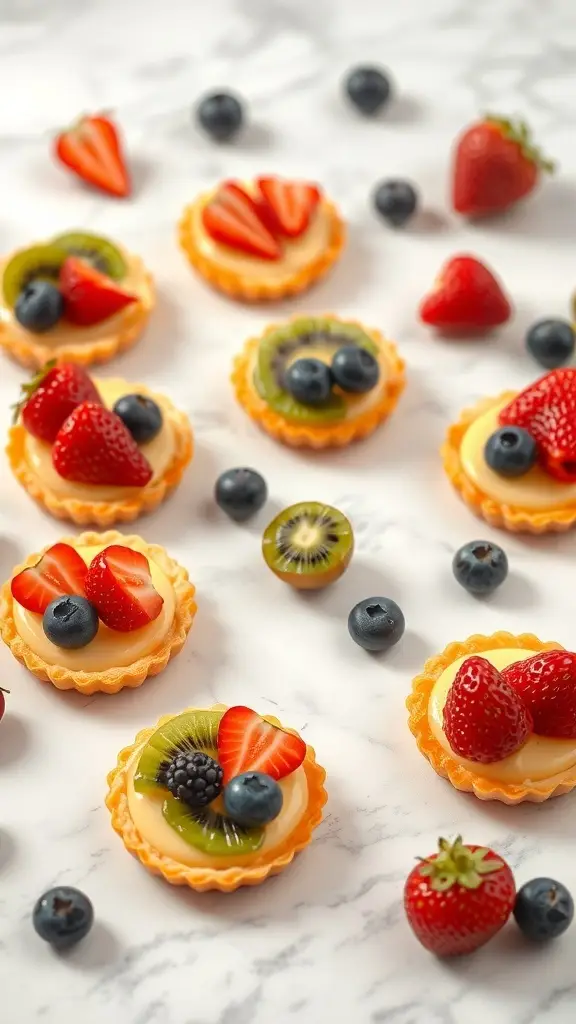
Miniature fruit tarts are the perfect tiny treats to impress your guests. These little delights are not just cute; they burst with flavor. Each tart features a crisp shell filled with creamy custard and topped with fresh, vibrant fruits. The combination of textures and tastes makes them irresistible.
Imagine a sunny gathering where these tarts steal the show. Their colorful toppings, like strawberries, blueberries, and kiwi, add a pop of color to any table. Plus, they are easy to grab and enjoy, making them a hit at parties.
Making these tarts at home is simpler than you might think. You can customize them with your favorite fruits or even use a store-bought crust to save time. Let’s get into the recipe so you can whip up these delightful treats!
Ingredients
- 1 package of pre-made tart shells
- 1 cup heavy cream
- 1/2 cup powdered sugar
- 1 teaspoon vanilla extract
- 1 cup mixed fresh fruits (strawberries, blueberries, kiwi, etc.)
- 1/4 cup fruit glaze (optional)
Instructions
- Prepare the Cream: In a mixing bowl, whip the heavy cream with powdered sugar and vanilla until soft peaks form.
- Fill the Tarts: Spoon or pipe the whipped cream into each tart shell, filling them generously.
- Top with Fruit: Arrange your chosen fruits on top of the cream in a decorative manner.
- Add Glaze: If using, brush a light layer of fruit glaze over the fruits to give them a shiny finish.
- Chill and Serve: Refrigerate the tarts for at least 30 minutes before serving to let the flavors meld.
Cooking Tips: If you want to make your own tart shells, a simple shortcrust pastry works well. You can also substitute the heavy cream with Greek yogurt for a lighter option. Feel free to mix and match fruits based on the season or your preference!
Relish The Richness Of Chocolate Lava Cakes
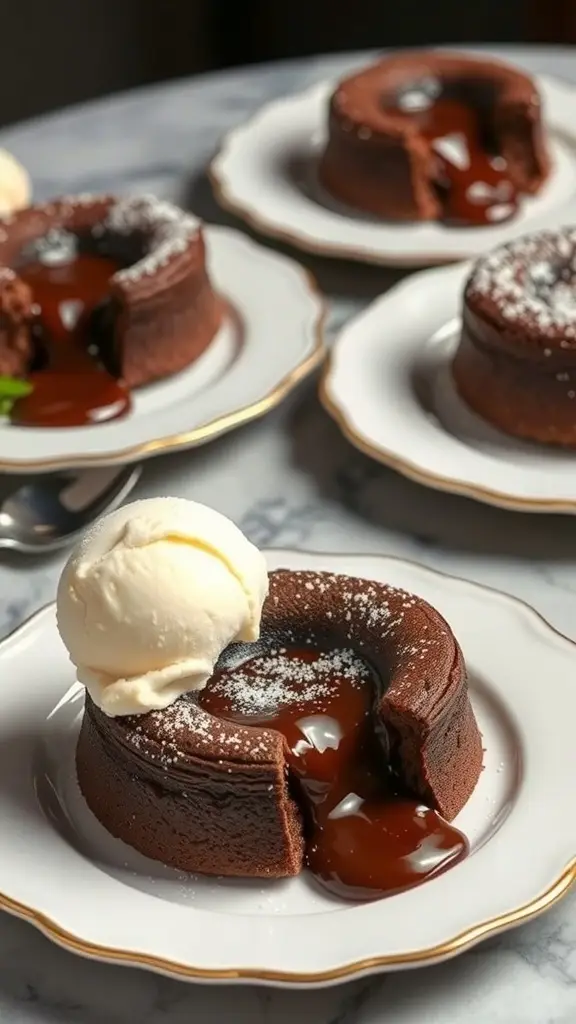
Chocolate lava cakes are the perfect tiny treats that bring a touch of elegance to any dessert table. These little wonders are not just visually appealing; they offer a delightful surprise with their molten center. Imagine cutting into a warm cake and watching rich chocolate flow out. It’s a moment that makes every bite worth it!
Making these cakes is easier than you might think. With just a few ingredients, you can whip up a batch that will impress your friends and family. Serve them warm with a scoop of vanilla ice cream on the side, and you’ve got a dessert that feels fancy without the fuss.
For those looking to switch things up, consider using dark chocolate for a richer flavor or adding a hint of espresso to enhance the chocolate taste. You can even substitute the butter with coconut oil for a dairy-free version. The possibilities are endless!
Ingredients
- 1/2 cup unsalted butter
- 1 cup semi-sweet chocolate chips
- 2 large eggs
- 2 large egg yolks
- 1/4 cup granulated sugar
- 2 tablespoons all-purpose flour
- 1/4 teaspoon salt
- Powdered sugar for dusting
- Vanilla ice cream for serving
Instructions
- Preheat your oven to 425°F (220°C). Grease four ramekins with butter and dust with flour.
- In a microwave-safe bowl, melt the butter and chocolate chips together in 30-second intervals, stirring until smooth.
- In another bowl, whisk together the eggs, egg yolks, and sugar until thick and pale. Stir in the melted chocolate mixture.
- Gently fold in the flour and salt until just combined.
- Pour the batter evenly into the prepared ramekins. Place them on a baking sheet.
- Bake for 12-14 minutes until the edges are firm but the center is soft. Let them cool for 1 minute.
- Carefully invert each ramekin onto a plate. Dust with powdered sugar and serve with a scoop of vanilla ice cream.
Cooking Tip: Make sure not to overbake the cakes; the center should remain gooey for that perfect lava effect. If you want to prepare them in advance, you can refrigerate the filled ramekins and bake them just before serving.
Ingredient Substitution: If you don’t have chocolate chips, you can chop up a chocolate bar instead. For a gluten-free option, use almond flour instead of all-purpose flour.
Enjoy The Whimsy Of Mini Cupcakes

Mini cupcakes bring a playful twist to any gathering. Their vibrant colors and charming sizes make them irresistible. Each tiny treat is a burst of flavor, perfect for satisfying a sweet tooth without overindulging.
These delightful cupcakes are often topped with swirls of frosting, making them look as good as they taste. The combination of pastel hues and sprinkles adds a festive touch, making them ideal for parties or casual get-togethers.
Whether you’re celebrating a birthday or just want a fun dessert, mini cupcakes are a hit. They’re easy to grab and enjoy, making them a favorite among guests of all ages.
Ingredients
- 1 1/2 cups all-purpose flour
- 1 cup granulated sugar
- 1/2 cup unsalted butter, softened
- 2 large eggs
- 1/2 cup milk
- 2 teaspoons baking powder
- 1 teaspoon vanilla extract
- 1/4 teaspoon salt
- Food coloring (optional)
- Sprinkles for decoration
Instructions
- Preheat the oven to 350°F (175°C) and line a mini cupcake pan with liners.
- In a bowl, cream together the softened butter and sugar until light and fluffy.
- Add the eggs one at a time, mixing well after each addition. Stir in the vanilla extract.
- In another bowl, whisk together the flour, baking powder, and salt.
- Gradually add the dry ingredients to the butter mixture, alternating with the milk. Mix until just combined.
- If desired, divide the batter and add food coloring to create different colors.
- Fill each cupcake liner about two-thirds full with batter.
- Bake for 12-15 minutes or until a toothpick inserted in the center comes out clean.
- Let the cupcakes cool completely before frosting.
- Top with your favorite frosting and sprinkle with decorations.
Cooking Tips: If you want to make these cupcakes even more special, consider adding chocolate chips or fruit to the batter. For a healthier option, you can substitute half of the butter with applesauce.
Ingredient Substitutions: You can use almond milk instead of regular milk for a dairy-free version. Coconut oil can replace butter for a different flavor profile.
Delight In The Nutty Goodness Of Mini Pecan Pies
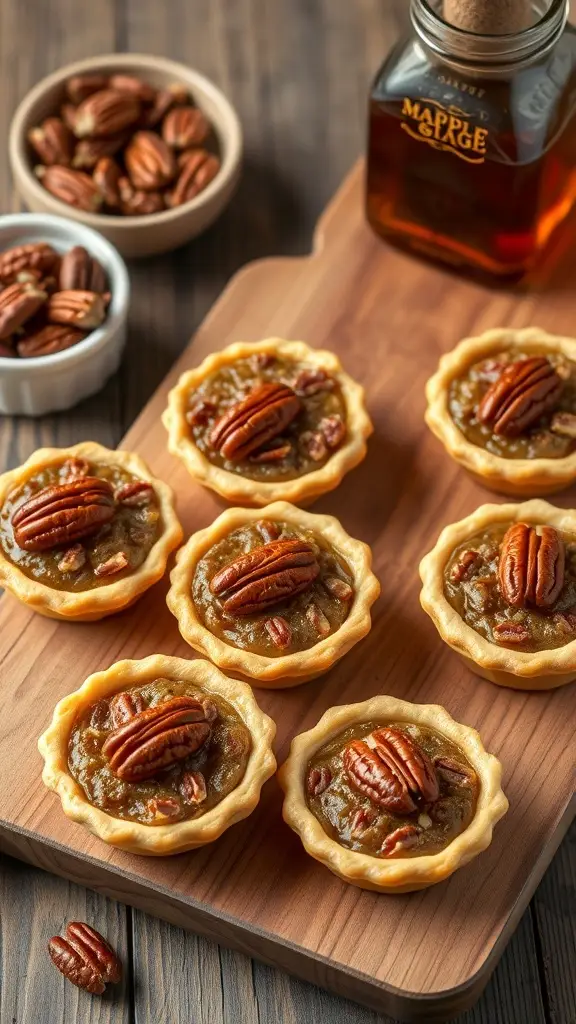
Mini pecan pies are the perfect tiny treats that bring a delightful crunch and sweetness to any gathering. These little gems are filled with a rich, gooey filling that highlights the nutty flavor of pecans. Each bite is a burst of flavor, making them a favorite for dessert lovers.
The image showcases these charming mini pies, each nestled in a flaky crust and topped with a whole pecan. The warm tones of the wooden board and the rich caramel color of the filling create an inviting scene that makes you want to reach out and grab one. The jar of maple syrup in the background hints at the delicious sweetness that complements the pecans perfectly.
Whether you’re hosting a party or just treating yourself, these mini pecan pies are sure to impress. They’re easy to make and even easier to enjoy!
Ingredients
- 1 cup pecans, chopped
- 1/2 cup maple syrup
- 1/2 cup brown sugar
- 1/4 cup unsalted butter, melted
- 2 large eggs
- 1 teaspoon vanilla extract
- 1/4 teaspoon salt
- 1 package of mini pie crusts (store-bought or homemade)
- Whole pecans for topping
Instructions
- Preheat your oven to 350°F (175°C).
- In a bowl, mix together the chopped pecans, maple syrup, brown sugar, melted butter, eggs, vanilla extract, and salt until well combined.
- Place the mini pie crusts on a baking sheet. Fill each crust with the pecan mixture, leaving a little space at the top.
- Top each pie with a whole pecan for decoration.
- Bake for 20-25 minutes, or until the filling is set and the crust is golden brown.
- Let them cool for a few minutes before serving. Enjoy your tiny treats!
Cooking Tips: If you prefer a less sweet pie, reduce the amount of brown sugar. You can also substitute honey for maple syrup for a different flavor. For a gluten-free option, use gluten-free pie crusts.
Taste The Tradition With Mini Apple Crisps
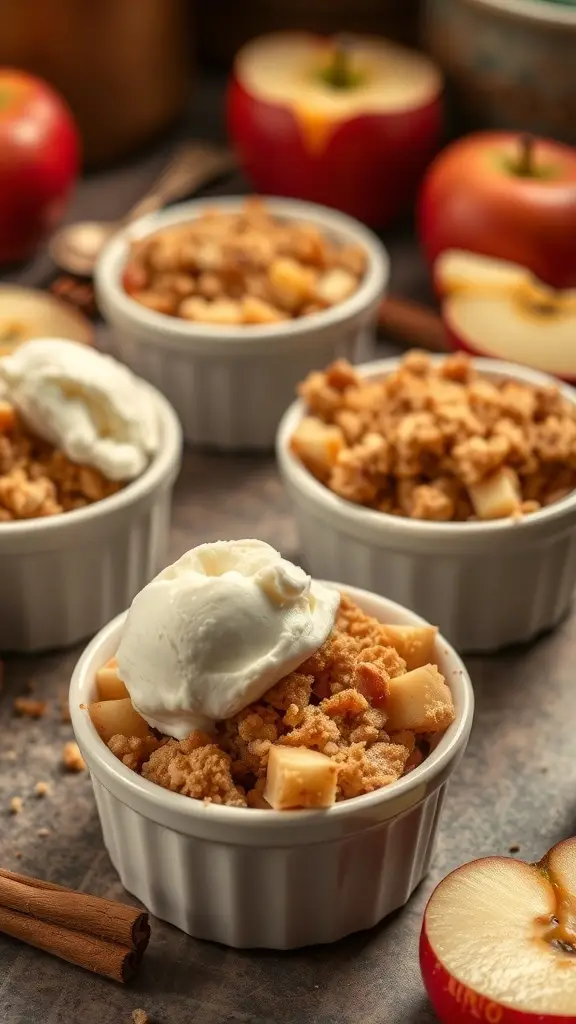
Mini apple crisps are the perfect tiny treats that bring a taste of tradition to your table. These delightful desserts are not only easy to make but also pack a punch of flavor that will remind you of cozy autumn days. Each little ramekin is filled with tender apples, a crunchy topping, and a scoop of ice cream on top, making them irresistible.
The beauty of mini apple crisps lies in their simplicity. You can use fresh apples, which add a natural sweetness and tartness. The crispy topping made from oats, flour, and butter gives that satisfying crunch. Plus, they are portioned perfectly for sharing or indulging solo!
Whether you’re hosting a gathering or just treating yourself, these mini apple crisps are sure to impress. They bring warmth and nostalgia, making them a delightful addition to any dessert spread.
Ingredients
- 4 medium apples, peeled and diced
- 1/2 cup granulated sugar
- 1 teaspoon ground cinnamon
- 1 tablespoon lemon juice
- 1/2 cup rolled oats
- 1/2 cup all-purpose flour
- 1/4 cup brown sugar, packed
- 1/4 cup unsalted butter, melted
- 1/4 teaspoon salt
- Vanilla ice cream for serving
Instructions
- Preheat your oven to 350°F (175°C).
- In a bowl, mix the diced apples, granulated sugar, cinnamon, and lemon juice. Divide this mixture into small ramekins.
- In another bowl, combine oats, flour, brown sugar, melted butter, and salt. Mix until crumbly.
- Sprinkle the oat mixture evenly over the apples in each ramekin.
- Bake for 25-30 minutes until the topping is golden and the apples are bubbly.
- Let them cool slightly, then serve warm with a scoop of vanilla ice cream on top.
Cooking Tips: If you prefer a healthier option, you can substitute brown sugar with honey or maple syrup. For a nutty flavor, add chopped pecans or walnuts to the topping. Feel free to mix different apple varieties for a more complex flavor!
Discover The Delight Of Mini Chocolate Mousse
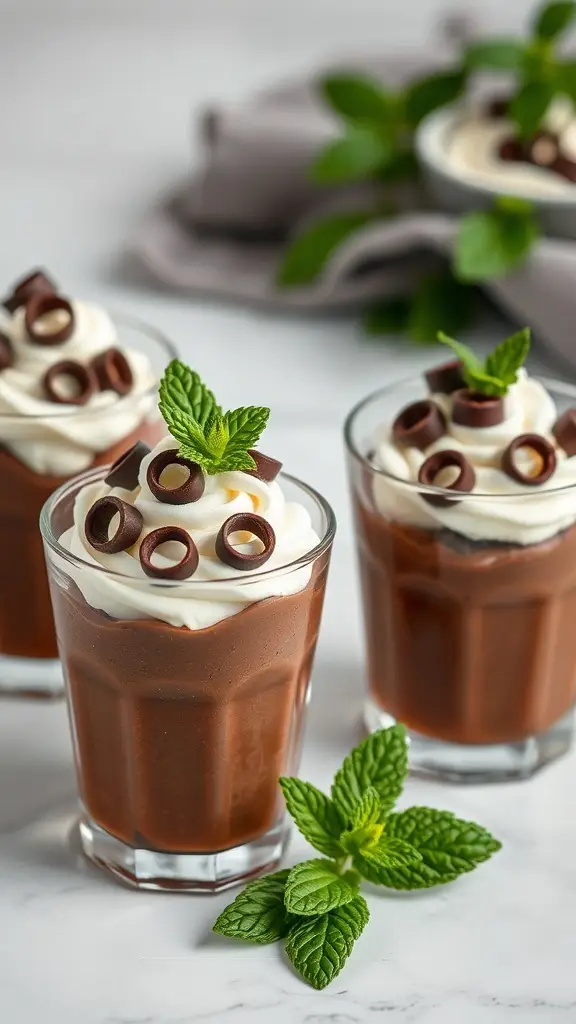
Mini chocolate mousse is a delightful tiny treat that brings a touch of elegance to any gathering. These little cups of chocolate goodness are rich, creamy, and perfect for satisfying your sweet tooth without overwhelming you. Topped with fluffy whipped cream and chocolate curls, they not only taste amazing but look stunning too.
Making mini chocolate mousse is surprisingly simple. You can whip up a batch in no time, making them ideal for parties or just a cozy night in. The combination of chocolate and cream creates a smooth texture that melts in your mouth. Plus, they are portioned perfectly, so you can enjoy a sweet bite without feeling guilty.
For those who love to experiment in the kitchen, feel free to switch things up! You can use dark chocolate for a richer flavor or even add a splash of coffee for a mocha twist. If you want a lighter version, consider using Greek yogurt instead of heavy cream.
Ingredients
- 1 cup heavy cream
- 1/2 cup semi-sweet chocolate chips
- 2 tablespoons granulated sugar
- 1 teaspoon vanilla extract
- Chocolate curls for garnish
- Fresh mint leaves for garnish
Instructions
- In a small saucepan, heat half of the heavy cream over low heat until it begins to steam. Remove from heat and add the chocolate chips. Stir until melted and smooth.
- In a mixing bowl, whip the remaining heavy cream, sugar, and vanilla extract until soft peaks form.
- Gently fold the melted chocolate mixture into the whipped cream until fully combined.
- Transfer the mousse into small cups or glasses and refrigerate for at least 2 hours to set.
- Before serving, top with additional whipped cream, chocolate curls, and a mint leaf for a fresh touch.
Cooking Tips: For a lighter mousse, use whipped coconut cream instead of heavy cream. If you want to make it dairy-free, opt for dairy-free chocolate and coconut cream.
Ingredient Substitutions: You can replace semi-sweet chocolate with milk chocolate or dark chocolate, depending on your preference. For a sugar-free version, consider using a sugar substitute.
Satisfy Your Cravings With Mini Brownie Bites
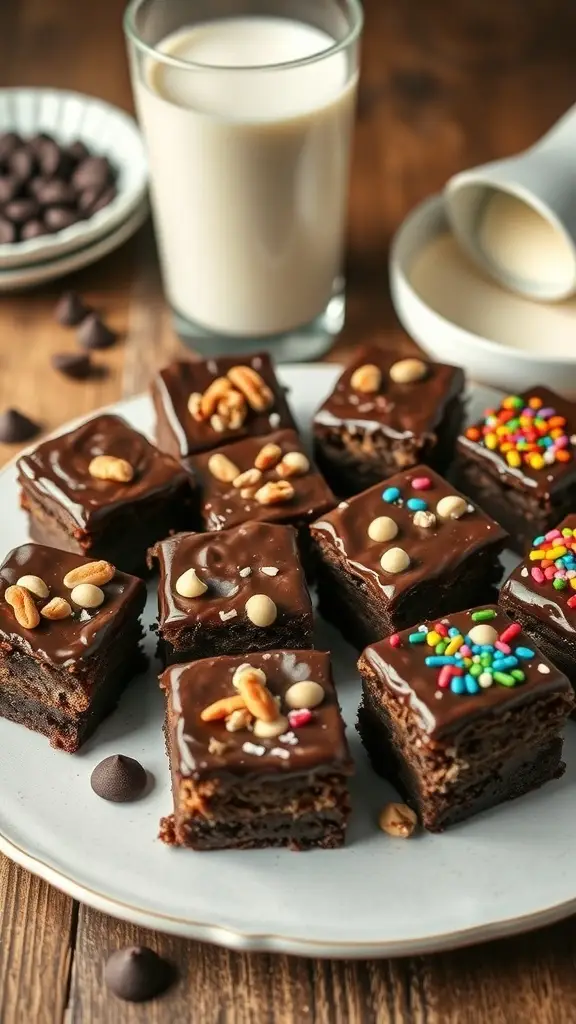
Mini brownie bites are the perfect tiny treats that bring a big punch of flavor. These little squares are rich, fudgy, and topped with delightful decorations. Whether you’re hosting a gathering or just need a sweet pick-me-up, these brownies are sure to hit the spot.
The image showcases a tempting platter of mini brownie bites, each adorned with colorful toppings like sprinkles and nuts. They are beautifully arranged, making them irresistible. Pair them with a glass of milk for that classic combo that never fails to satisfy.
Making these brownie bites is simple and fun. You can customize the toppings to fit any occasion. From nuts to sprinkles, the options are endless!
Ingredients
- 1/2 cup unsalted butter
- 1 cup granulated sugar
- 2 large eggs
- 1 teaspoon vanilla extract
- 1/3 cup unsweetened cocoa powder
- 1/2 cup all-purpose flour
- 1/4 teaspoon salt
- 1/4 teaspoon baking powder
- Chocolate chips or nuts for topping
- Sprinkles for decoration
Instructions
- Preheat your oven to 350°F (175°C) and grease a mini muffin pan.
- In a saucepan, melt the butter over low heat. Remove from heat and stir in sugar, eggs, and vanilla.
- Add cocoa, flour, salt, and baking powder. Mix until well combined.
- Pour the batter into the mini muffin pan, filling each cup about 2/3 full.
- Bake for 15-18 minutes, or until a toothpick comes out clean.
- Let them cool before removing from the pan. Once cooled, top with chocolate chips or nuts and sprinkles as desired.
Cooking Tips: For a richer flavor, try adding a tablespoon of espresso powder to the batter. If you prefer a gluten-free option, substitute all-purpose flour with almond flour.
Enjoy these mini brownie bites at your next gathering or as a sweet treat for yourself!
Bite Into The Flavorful Fun Of Mini Cannoli
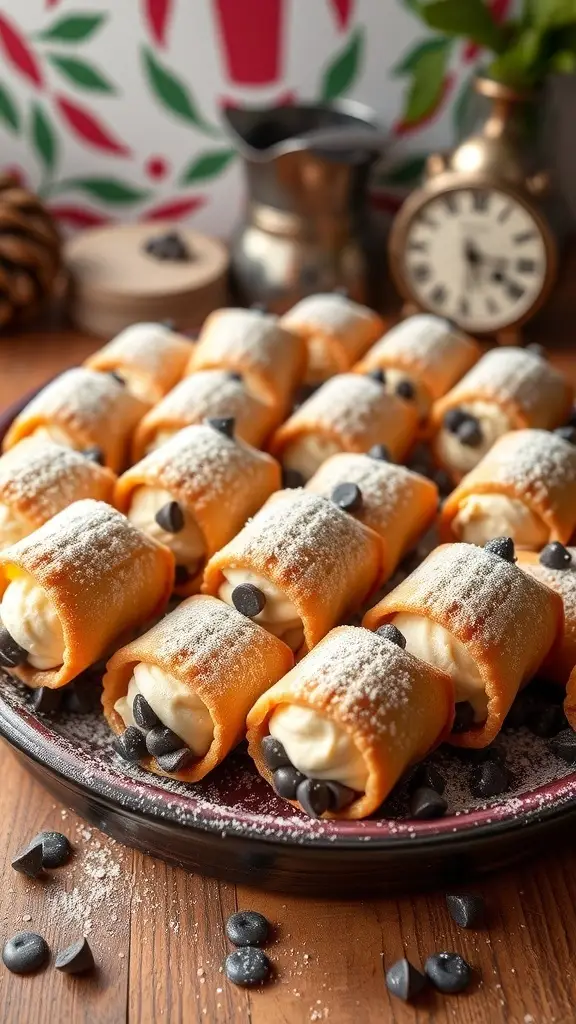
Mini cannoli are the perfect tiny treats to satisfy your sweet tooth without going overboard. These little delights are filled with a creamy ricotta mixture and topped with chocolate chips, making them a hit at any gathering. Their crispy shells and rich filling create a delightful contrast that everyone loves.
Picture a platter filled with these charming desserts, dusted with powdered sugar and surrounded by chocolate chips. They’re not just visually appealing; they also pack a punch of flavor. Each bite offers a creamy, sweet experience that’s hard to resist.
Making mini cannoli at home is easier than you might think. You can customize the filling to suit your taste, whether you prefer classic ricotta or want to add a twist with flavors like orange zest or almond extract. Plus, they’re a fun project to tackle with friends or family!
Ingredients
- 1 cup ricotta cheese
- 1/2 cup powdered sugar
- 1/2 teaspoon vanilla extract
- 1/4 cup mini chocolate chips
- 12 mini cannoli shells
- Powdered sugar for dusting
- Chocolate chips for garnish
Instructions
- Prepare the Filling: In a bowl, mix the ricotta cheese, powdered sugar, and vanilla extract until smooth. Stir in the mini chocolate chips.
- Fill the Shells: Using a piping bag or a small spoon, fill each mini cannoli shell with the ricotta mixture. Make sure to fill them generously.
- Garnish: Dust the filled cannoli with powdered sugar and add a few chocolate chips on top for decoration.
- Serve: Arrange the mini cannoli on a platter and enjoy immediately or refrigerate until ready to serve.
Cooking Tips: If you want a lighter filling, consider using mascarpone cheese instead of ricotta. You can also add a splash of espresso for a coffee flavor. For a twist, try adding crushed pistachios or dried fruit into the filling!
Ingredient Substitutions: If you don’t have ricotta, cottage cheese can work in a pinch. For a dairy-free option, use a plant-based cream cheese alternative. Feel free to swap out the chocolate chips for your favorite nuts or dried fruits!
Enjoy The Creamy Texture Of No-Bake Mini Cheesecakes
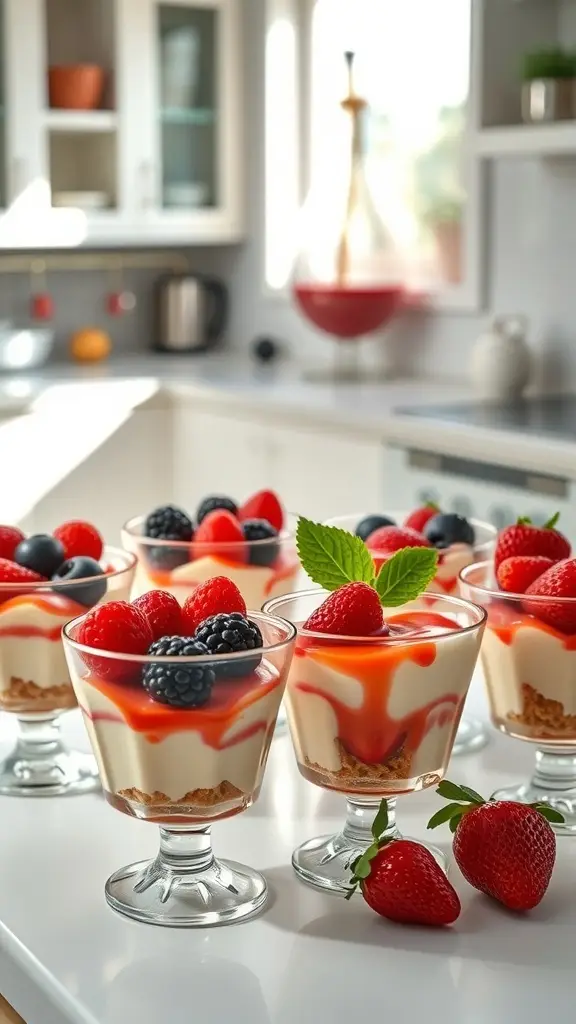
No-bake mini cheesecakes are the perfect tiny treats for any occasion. They bring a creamy texture that melts in your mouth, making them a delightful dessert. These little cups of joy are not only easy to make but also look stunning on any table. Topped with fresh berries and a drizzle of sauce, they are sure to impress your guests.
Each mini cheesecake features a buttery graham cracker crust, a smooth cream cheese filling, and a vibrant topping. The combination of flavors and textures creates a satisfying dessert that everyone will love. Plus, you can customize the toppings to suit your taste. Whether you prefer strawberries, blueberries, or a mix of both, these tiny treats will always shine.
Making these cheesecakes is simple. Just mix your ingredients, layer them in cups, and let them chill. They’re perfect for parties, picnics, or just a sweet treat at home. Let’s get into the recipe!
Ingredients
- 1 cup graham cracker crumbs
- 1/4 cup unsalted butter, melted
- 2 cups cream cheese, softened
- 1/2 cup powdered sugar
- 1 teaspoon vanilla extract
- 1 cup heavy whipping cream
- Fresh berries (strawberries, blueberries, blackberries)
- Berry sauce (optional)
Instructions
- Prepare the Crust: In a bowl, mix graham cracker crumbs and melted butter until combined. Press the mixture into the bottom of small cups or glasses.
- Make the Filling: In another bowl, beat the cream cheese until smooth. Gradually add powdered sugar and vanilla extract, mixing until well combined.
- Whip the Cream: In a separate bowl, whip the heavy cream until soft peaks form. Gently fold the whipped cream into the cream cheese mixture until smooth.
- Layer the Cups: Spoon the cream cheese filling over the crust in each cup. Smooth the top and refrigerate for at least 4 hours or until set.
- Add Toppings: Before serving, top each cheesecake with fresh berries and a drizzle of berry sauce if desired.
Cooking Tips: For a gluten-free version, use gluten-free graham crackers. If you want a lighter version, you can substitute the cream cheese with Greek yogurt. Enjoy these tiny treats!
Savor The Layers Of Mini Trifles

Mini trifles are the perfect tiny treats for any occasion. These delightful desserts are not just visually appealing but also packed with flavor. Each layer brings something unique to the table, making every bite a delightful surprise. You can see the vibrant colors of fresh strawberries and raspberries peeking through the creamy layers, inviting you to dig in.
Building a mini trifle is simple and fun. Start with a base of sponge cake or ladyfingers, then add layers of whipped cream and fruit. The combination of textures and flavors makes these trifles a hit at parties or family gatherings. Plus, they’re easy to customize based on your favorite ingredients!
For a classic mini trifle, you can use strawberries, blueberries, and a rich vanilla pudding. If you want to mix things up, try adding chocolate mousse or a layer of crushed cookies. The possibilities are endless!
Ingredients
- 1 cup sponge cake or ladyfingers, crumbled
- 1 cup whipped cream
- 1 cup mixed berries (strawberries, blueberries, raspberries)
- 1 cup vanilla pudding
- Maraschino cherries for topping
Instructions
- Prepare the Base: Start by crumbling the sponge cake or ladyfingers into small pieces. Divide them among your serving jars.
- Add the Pudding: Spoon a layer of vanilla pudding over the cake crumbles in each jar.
- Layer the Berries: Add a layer of mixed berries on top of the pudding. Feel free to mix and match your favorite fruits!
- Top with Whipped Cream: Add a generous layer of whipped cream over the berries.
- Finish with a Cherry: Place a maraschino cherry on top for that classic touch.
- Chill and Serve: Let the trifles chill in the fridge for about an hour before serving to let the flavors meld.
Cooking Tips: If you want a lighter version, use Greek yogurt instead of whipped cream. For a gluten-free option, substitute the sponge cake with gluten-free cookies.
Ingredient Substitutions: You can swap out the berries for any seasonal fruit, like peaches or mangoes. If you prefer chocolate, use chocolate pudding instead of vanilla for a rich twist!
Dive Into The Fun Of Mini S’Mores

Mini s’mores are tiny treats that bring a big smile. Picture this: golden graham crackers, gooey marshmallows, and rich chocolate all coming together in a bite-sized delight. These little wonders are perfect for gatherings or just a cozy night in. They capture the essence of campfire fun without needing a fire pit!
Making mini s’mores is super easy. You can roast marshmallows over a candle or even in the microwave. Just layer your ingredients and you’re set! These treats are not only tasty but also fun to assemble, making them a hit with kids and adults alike.
Want to switch things up? Try using different types of chocolate or even flavored marshmallows. You can also use cookies instead of graham crackers for a unique twist. The possibilities are endless!
Ingredients
- 1 package of graham crackers
- 1 bag of marshmallows
- 1 bar of chocolate (milk, dark, or your favorite)
- Optional: flavored marshmallows or different types of chocolate
Instructions
- Break the graham crackers into squares. You’ll need two squares for each s’more.
- Toast the marshmallows over a flame, candle, or in the microwave until they are golden and gooey.
- Place a piece of chocolate on one graham cracker square.
- Add the toasted marshmallow on top of the chocolate.
- Top with another graham cracker square and gently press down.
- Enjoy your mini s’mores warm or let them cool for a bit!
Cooking tips: If you want a crispy edge on your marshmallows, try toasting them longer. For a fun flavor, consider adding a sprinkle of sea salt on top before closing your s’more. You can also substitute the chocolate with Nutella or peanut butter for a different taste!
Delight In The Simplicity Of Mini Chocolate Chip Cookies
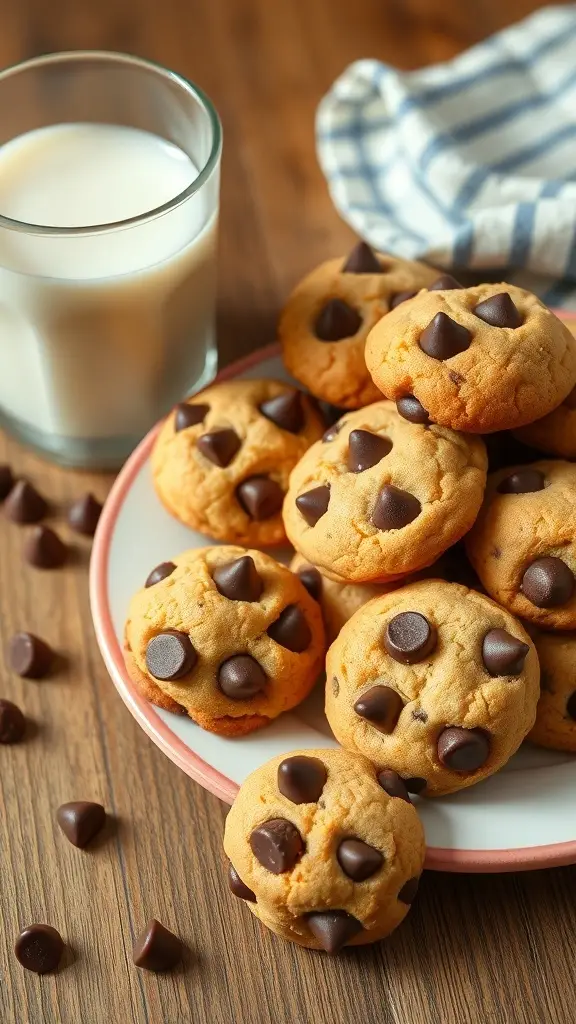
Mini chocolate chip cookies are the perfect tiny treats that bring joy in every bite. These little delights are soft, chewy, and packed with chocolate goodness. They’re great for sharing or simply enjoying with a glass of milk. The beauty of these cookies lies in their simplicity. You can whip them up in no time, making them a go-to for any occasion.
Picture a plate filled with these golden-brown cookies, each topped with a sprinkle of chocolate chips. They’re not just cute; they’re delicious too! The combination of buttery dough and melty chocolate creates a flavor that’s hard to resist. Plus, their small size means you can enjoy a few without feeling guilty.
Making mini chocolate chip cookies is a breeze. You only need a handful of ingredients, and the steps are straightforward. Whether you’re baking for a party or just treating yourself, these cookies will surely impress.
Ingredients
- 1 cup all-purpose flour
- 1/2 teaspoon baking soda
- 1/4 teaspoon salt
- 1/4 cup unsalted butter, softened
- 1/4 cup granulated sugar
- 1/4 cup brown sugar, packed
- 1 teaspoon vanilla extract
- 1 large egg yolk
- 1/2 cup chocolate chips
Instructions
- Preheat your oven to 350°F (175°C) and line a baking sheet with parchment paper.
- In a small bowl, whisk together flour, baking soda, and salt. Set aside.
- In a mixing bowl, cream together the softened butter, granulated sugar, and brown sugar until smooth.
- Add the vanilla extract and egg yolk to the butter mixture, mixing well.
- Gradually stir in the dry ingredients until just combined. Fold in the chocolate chips.
- Using a teaspoon, scoop small amounts of dough onto the prepared baking sheet, spacing them about 2 inches apart.
- Bake for 8-10 minutes, or until the edges are lightly golden. Let them cool on the baking sheet for a few minutes before transferring to a wire rack.
Cooking tips: If you want a chewier cookie, try chilling the dough for about 30 minutes before baking. You can also substitute half of the all-purpose flour with whole wheat flour for a healthier option. If you’re out of eggs, a tablespoon of applesauce can work as a substitute.
Bask In The Flavor Of Mini Key Lime Pies
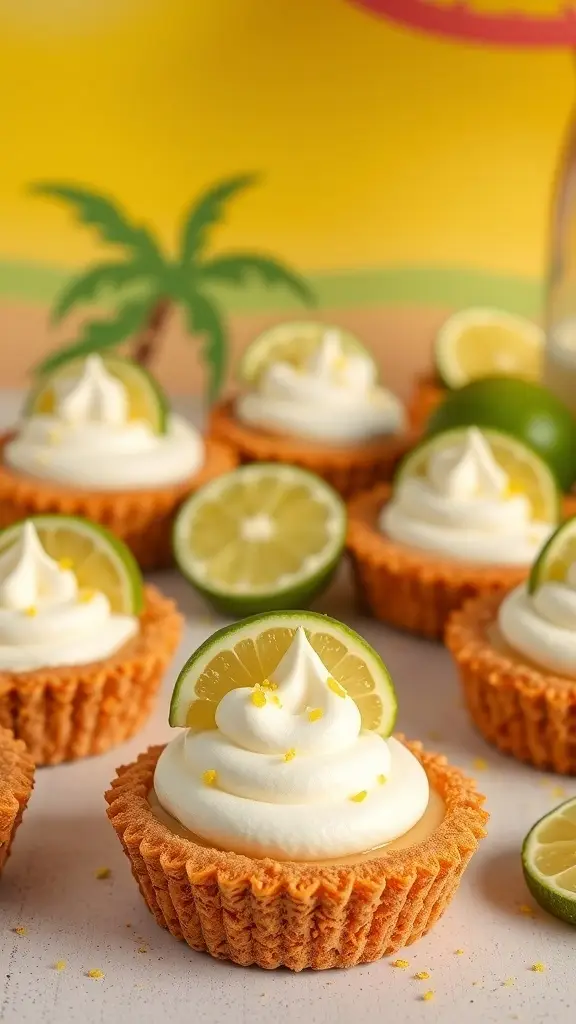
Mini key lime pies are the perfect tiny treats to brighten up any gathering. These little desserts pack a punch of zesty flavor, making them a delightful addition to your dessert table. With their creamy filling and crunchy crust, they are sure to impress your guests.
Each mini pie is topped with a swirl of whipped cream and a slice of lime, adding a pop of color and freshness. The bright yellow background in the image hints at the tropical vibe these treats bring. They’re not just cute; they’re bursting with flavor!
Making these mini key lime pies is easier than you might think. You can whip them up for a casual get-together or a fancy dinner party. They are a fun way to enjoy a classic dessert in a bite-sized form.
Ingredients
- 1 cup graham cracker crumbs
- 1/4 cup granulated sugar
- 1/2 cup unsalted butter, melted
- 1 can (14 oz) sweetened condensed milk
- 1/2 cup key lime juice
- 3 large egg yolks
- 1 cup heavy whipping cream
- 2 tablespoons powdered sugar
- Lime slices for garnish
Instructions
- Make the Crust: Preheat your oven to 350°F (175°C). In a bowl, mix graham cracker crumbs, sugar, and melted butter until combined. Press the mixture into the bottom and sides of mini tart pans. Bake for 8-10 minutes until golden. Let cool.
- Prepare the Filling: In another bowl, whisk together sweetened condensed milk, key lime juice, and egg yolks until smooth. Pour the mixture into the cooled crusts.
- Bake the Pies: Bake the mini pies for 15 minutes. Remove from the oven and let them cool completely before refrigerating for at least 2 hours.
- Make the Whipped Cream: In a mixing bowl, beat heavy whipping cream and powdered sugar until soft peaks form. Pipe or spread the whipped cream over the chilled pies.
- Garnish: Top each mini pie with a slice of lime for a fresh touch. Serve and enjoy!
Cooking Tips: If you want a sweeter crust, add more sugar to the graham cracker mixture. For a different flavor, try using lemon juice instead of key lime juice. You can also use store-bought crusts if you’re short on time.
Relish The Creamy Dream Of Mini Panna Cotta
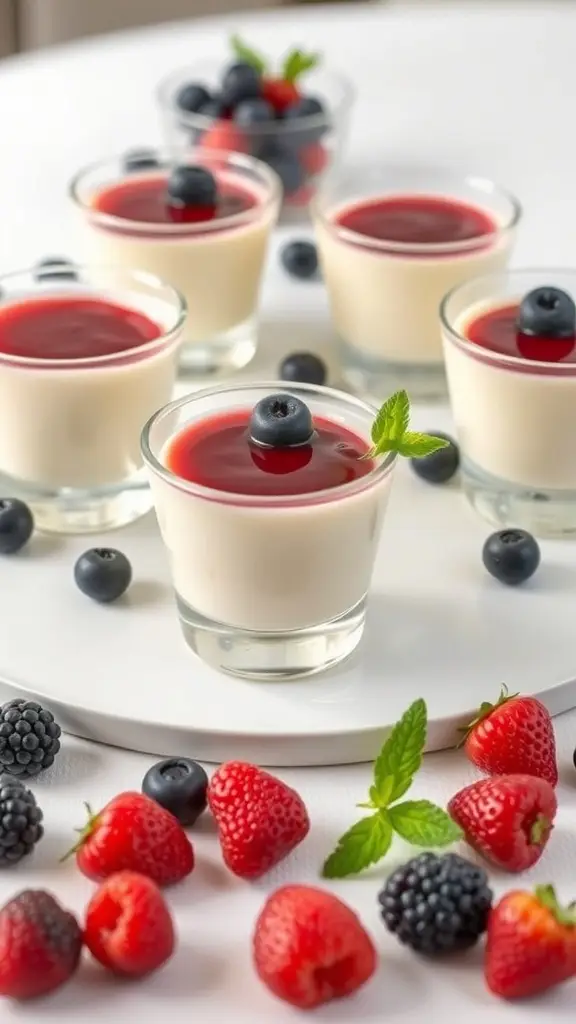
Mini panna cotta is a delightful tiny treat that brings a touch of elegance to any gathering. These creamy desserts are not only visually appealing but also incredibly easy to make. Each little cup is filled with a smooth, silky vanilla base, topped with a vibrant fruit coulis that adds a burst of flavor.
The image showcases these charming panna cotta cups, adorned with fresh berries and mint leaves. The contrast of the creamy white dessert against the colorful toppings makes them irresistible. Perfect for a Mad Men-themed soirée or any casual get-together, these tiny treats will surely impress your guests.
Ingredients
- 2 cups heavy cream
- 1/2 cup granulated sugar
- 1 teaspoon vanilla extract
- 2 1/2 teaspoons gelatin powder
- 3 tablespoons cold water
- 1 cup mixed berries (strawberries, blueberries, blackberries)
- 1/4 cup berry jam (for topping)
- Fresh mint leaves (for garnish)
Instructions
- Prepare the Gelatin: In a small bowl, sprinkle gelatin over cold water. Let it sit for about 5 minutes until it blooms.
- Heat the Cream: In a saucepan, combine heavy cream, sugar, and vanilla extract. Heat over medium heat until the sugar dissolves, but do not let it boil.
- Incorporate Gelatin: Remove the saucepan from heat and stir in the bloomed gelatin until fully dissolved.
- Pour into Cups: Divide the mixture into small cups or glasses. Refrigerate for at least 4 hours or until set.
- Prepare the Topping: In a small saucepan, heat the berry jam until it becomes liquid. Strain if necessary to remove seeds.
- Assemble: Once the panna cotta is set, spoon the warm berry jam over each cup. Top with fresh berries and a mint leaf for garnish.
Cooking Tips: For a lighter version, you can substitute half of the heavy cream with milk. If you prefer a different flavor, try infusing the cream with lemon zest or coffee before adding the gelatin. These mini panna cottas can be made a day in advance, making them a perfect make-ahead dessert!
Indulge In The Sweetness Of Mini Raspberry Tarts
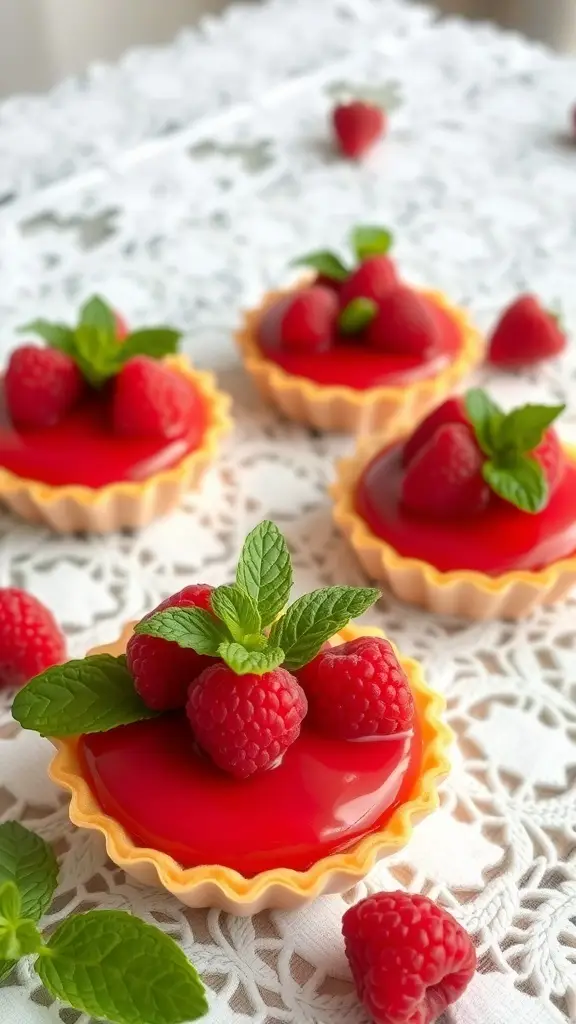
Mini raspberry tarts are the perfect tiny treats that bring a burst of flavor in each bite. These delightful desserts feature a crisp pastry shell filled with a smooth raspberry filling, topped with fresh raspberries and mint leaves. They look stunning on any dessert table and are sure to impress your guests.
The vibrant red of the raspberries against the golden crust creates a visual feast. Each tart is a little masterpiece, combining sweetness and tartness that dances on your palate. Perfect for any occasion, these mini tarts are not just a treat for the eyes but also a delight for the taste buds.
Making mini raspberry tarts is easier than you might think. With a few simple ingredients, you can whip up these charming desserts in no time. Plus, they can be made ahead of time, making them a great option for parties or gatherings.
Ingredients
- 1 cup all-purpose flour
- 1/4 cup powdered sugar
- 1/2 cup unsalted butter, softened
- 1 large egg yolk
- 1 cup fresh raspberries
- 1/2 cup granulated sugar
- 1 tablespoon cornstarch
- 1 tablespoon lemon juice
- 1/2 cup water
- Mint leaves for garnish
Instructions
- Make the Crust: In a bowl, mix flour and powdered sugar. Cut in butter until crumbly. Stir in egg yolk and form into a dough. Chill for 30 minutes.
- Preheat the Oven: Preheat your oven to 350°F (175°C).
- Shape the Tarts: Roll out the dough and cut into circles. Press into mini tart pans. Prick the bottoms with a fork.
- Bake the Shells: Bake for 15-20 minutes until golden. Let cool.
- Prepare the Filling: In a saucepan, combine raspberries, granulated sugar, cornstarch, lemon juice, and water. Cook over medium heat until thickened, about 5-7 minutes.
- Fill the Tarts: Spoon the raspberry mixture into the cooled tart shells. Let set for at least 30 minutes.
- Garnish: Top with fresh raspberries and mint leaves before serving.
Cooking Tips: If you want a sweeter filling, feel free to adjust the sugar to your taste. You can also substitute the raspberries with other berries like strawberries or blueberries for a different flavor. For a gluten-free option, use almond flour instead of all-purpose flour.
You may also like:
– 43 Easy And Quick Cocktails From The 1960’s
– 27 Must-Try Tequila Cocktails Inspired by Gotham City
– 25 Cocktails Inspired by Gotham City Nightlife
If you enjoyed this blog you can visit us or check out our other blogs and learn a bit about us.
Disclaimer: This blog post is inspired by fictional universes and characters created by their respective rights holders. All related content and imagery remain the property of their respective rights holder. This fan-inspired content is for entertainment and commentary purposes only and is not affiliated with or endorsed by HBO, Disney, Warner Bros., Lionsgate, or any other rights holders. To explore the official source material, please visit:
HBO