

Step back in time with these elegant lunch recipes to the Roaring 20s , a dazzling era known for its glamour and celebration.
With these 18 recipes, you can recreate the charm of a garden party inspired by this lively decade.
From classy canapés to refreshing cocktails, get ready to impress your guests with dishes that are sure to transport them to a time of jazz, flappers, and elegant gatherings.
Cucumber Mint Tea Sandwiches On Porcelain
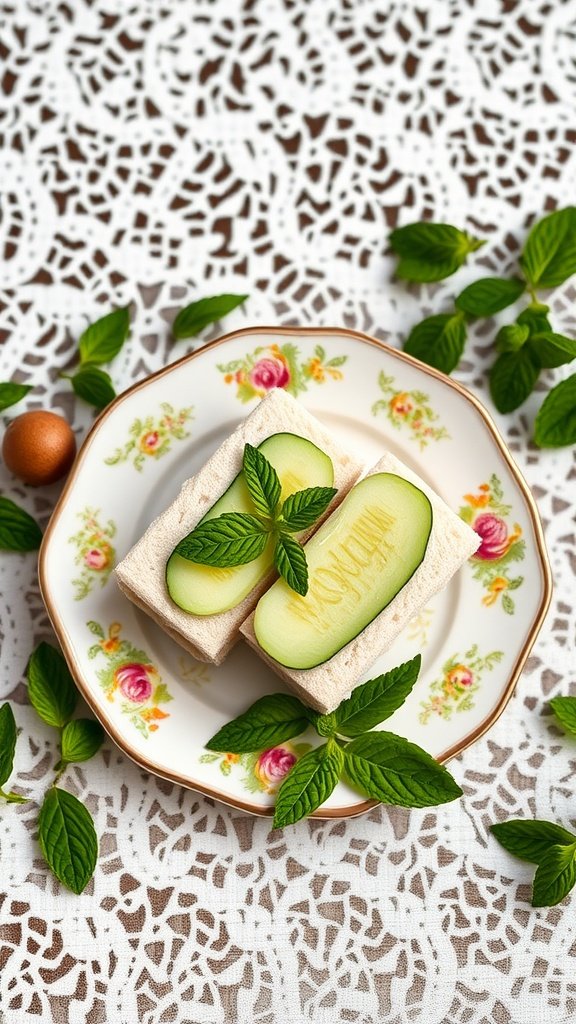
Cucumber mint tea sandwiches are a refreshing addition to any lunch garden party, especially when inspired by the elegant Roaring 20s. These bite-sized treats are light and crisp, featuring thinly sliced cucumbers layered with a creamy mint spread. They offer a delightful balance of flavors that’s perfect for warm weather gatherings.
Not only are these sandwiches simple to make, but they also bring a touch of sophistication to your table. With just a few ingredients and minimal prep time, you can impress your guests without breaking a sweat!
Ingredients
- 1 loaf of white bread
- 1 cup cream cheese, softened
- 2 tablespoons fresh mint leaves, finely chopped
- 1 tablespoon lemon juice
- 1/4 teaspoon salt
- 1 large cucumber, thinly sliced
Instructions
- Make the Mint Spread: In a bowl, combine the cream cheese, chopped mint, lemon juice, and salt. Mix until smooth and well blended.
- Prepare the Bread: Trim the crusts off the slices of bread. Spread a generous layer of the mint cream cheese on one side of each slice.
- Layer the Cucumber: Place a few cucumber slices on half of the bread slices, then top with another slice of bread, cream cheese side down.
- Cut and Serve: Slice the sandwiches into quarters or triangles. Arrange them on a platter and garnish with extra mint leaves.
Chilled Watermelon Gazpacho In Crystal Coupes
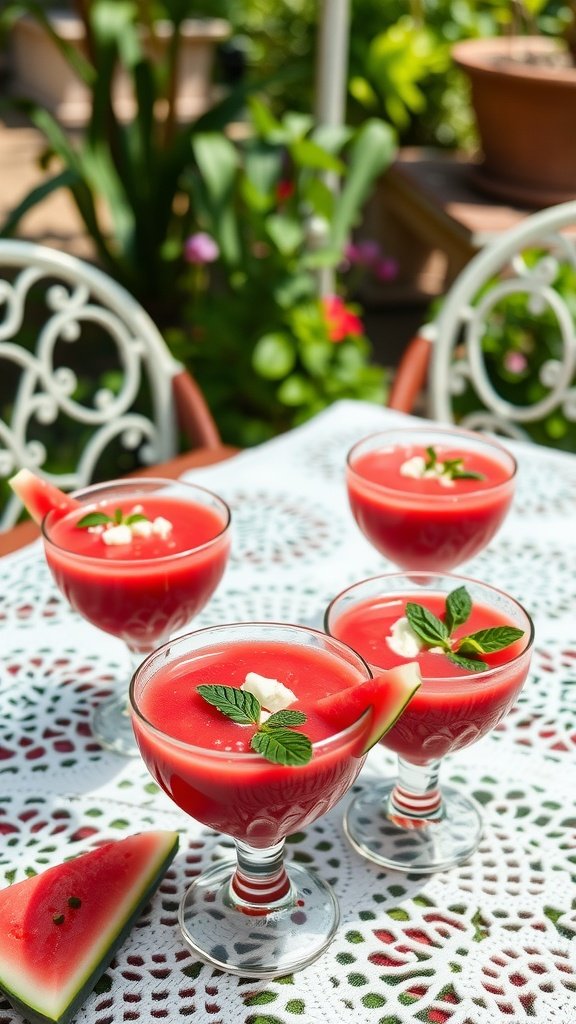
This chilled watermelon gazpacho is a refreshing twist on a classic favorite. It blends the natural sweetness of watermelon with savory elements for a delightful burst of flavor. Perfect for summer gatherings, this dish is not only delicious but also super easy to whip up, making it a great addition to any garden party.
The combination of fresh ingredients creates a smooth, vibrant soup that’s both light and satisfying. Served in elegant crystal coupes, it adds a touch of sophistication to your lunch table. Your guests will love the contrast of sweetness and spice, and you’ll love how quickly it comes together.
Ingredients
- 4 cups ripe watermelon, cubed
- 1 small cucumber, peeled and diced
- 1/2 red bell pepper, diced
- 1/4 cup red onion, finely chopped
- 2 tablespoons fresh lime juice
- 1 tablespoon olive oil
- Salt and pepper to taste
- Fresh mint leaves for garnish
Instructions
- Blend Ingredients: In a blender, combine the watermelon, cucumber, red bell pepper, red onion, lime juice, and olive oil. Blend until smooth.
- Season: Taste the mixture and season with salt and pepper according to your preference.
- Chill: Transfer the gazpacho to a bowl and refrigerate for at least 1 hour to allow the flavors to meld.
- Serve: Spoon the chilled gazpacho into crystal coupes and garnish with fresh mint leaves. Enjoy immediately!
Smoked Salmon Tartlets With Dill Cream

Smoked salmon tartlets with dill cream are a sophisticated yet easy-to-make appetizer that brings a touch of elegance to any lunch garden party. With a delightful balance of savory flavors and a creamy texture, these tartlets are sure to impress your guests.
The buttery tart shell holds a creamy filling, topped with luscious slices of smoked salmon and a dollop of dill cream. They are light, refreshing, and perfect for outdoor gatherings. Plus, they come together quickly, making them an excellent choice for both novice and seasoned cooks.
Ingredients
- 12 mini tart shells
- 8 ounces cream cheese, softened
- 1/4 cup sour cream
- 2 tablespoons fresh dill, chopped
- 1 tablespoon lemon juice
- 8 ounces smoked salmon, sliced
- Salt and pepper to taste
- Dill sprigs for garnish
Instructions
- Prepare the Dill Cream: In a bowl, mix the cream cheese, sour cream, chopped dill, lemon juice, salt, and pepper until smooth.
- Fill the Tart Shells: Spoon the dill cream into each tart shell, filling them up generously.
- Add the Salmon: Top each tartlet with slices of smoked salmon, arranging them attractively.
- Garnish: Place a small sprig of dill on top of each tartlet for a pop of color.
- Serve: Chill in the refrigerator for about 30 minutes before serving to let the flavors meld together.
Deviled Eggs With Paprika Dust & Chive Garnish

Deviled eggs are a classic appetizer that never goes out of style. With a creamy filling and a hint of spice, these little bites pack a flavorful punch. The combination of mayonnaise, mustard, and a sprinkle of paprika creates a delightful taste, making them perfect for any garden party inspired by the Roaring 20s.
Not only are they easy to prepare, but they also add a touch of elegance to your table. Garnishing with chives not only enhances the look but adds a fresh, mild onion flavor that complements the eggs beautifully.
Ingredients
- 6 large eggs
- 1/4 cup mayonnaise
- 1 teaspoon Dijon mustard
- 1/4 teaspoon salt
- 1/4 teaspoon black pepper
- 1 teaspoon paprika, plus more for garnish
- 1 tablespoon chopped fresh chives
Instructions
- Boil the Eggs: Place eggs in a pot and cover with water. Bring to a boil, then cover and remove from heat. Let sit for 12 minutes.
- Cool and Shell: Transfer eggs to an ice bath to cool. Once cooled, peel the eggs and slice them in half lengthwise.
- Make the Filling: Scoop out the yolks into a bowl. Mash the yolks with mayonnaise, Dijon mustard, salt, pepper, and paprika until smooth.
- Fill the Eggs: Spoon the yolk mixture back into the egg whites. For a fancy touch, use a piping bag to create swirls.
- Garnish: Sprinkle with additional paprika and top with chopped chives before serving.
Garden Pea And Mint Quiche
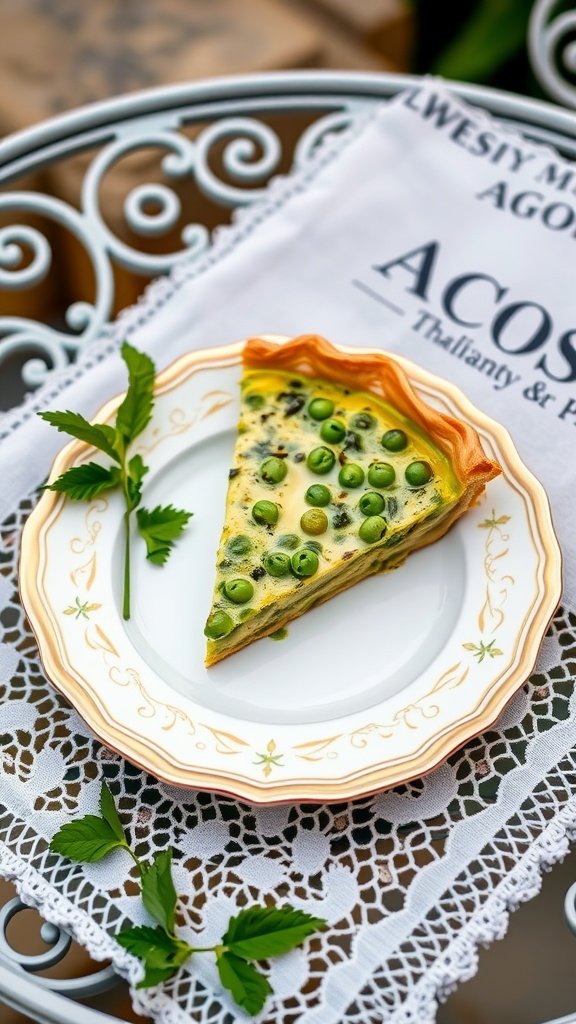
This Garden Pea and Mint Quiche brings a fresh and vibrant touch to any lunch garden party. With its creamy filling and the delightful combination of sweet peas and aromatic mint, it’s a dish that’s both easy to make and a joy to eat. Perfect for those sunny afternoons, this quiche offers a light, yet satisfying flavor that pairs beautifully with a crisp salad.
Making this quiche is straightforward, even for beginner cooks. The buttery crust holds a rich custard filled with tender peas and fresh mint, creating a lovely contrast in texture and taste. Serve it warm or at room temperature, and watch it disappear!
Ingredients
- 1 pre-made pie crust
- 1 cup fresh or frozen peas
- 1 cup heavy cream
- 3 large eggs
- 1/2 cup grated cheese (such as Gruyère or cheddar)
- 1/4 cup fresh mint leaves, chopped
- Salt and pepper to taste
Instructions
- Preheat your oven to 375°F (190°C).
- Place the pie crust in a tart pan and prick the bottom with a fork. Bake for 10 minutes until lightly golden.
- In a bowl, whisk together cream, eggs, salt, and pepper. Stir in the peas, chopped mint, and grated cheese.
- Pour the mixture into the pre-baked crust. Bake for 30-35 minutes until the filling is set and lightly browned.
- Let it cool slightly before slicing. Serve warm or at room temperature.
Prosciutto-Wrapped Asparagus Spears
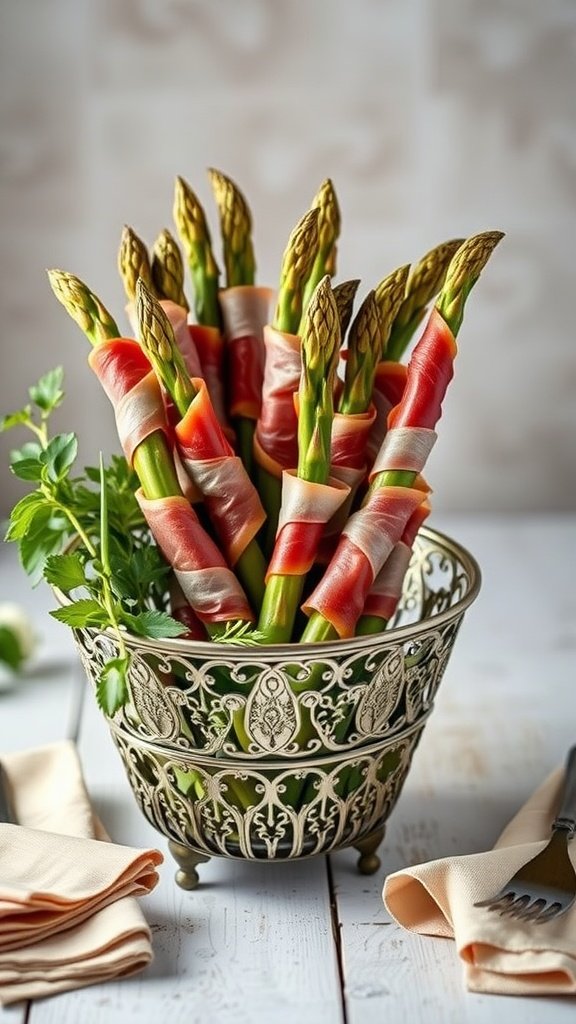
Prosciutto-wrapped asparagus spears are a classic appetizer that perfectly blends salty and savory flavors. They are simple to prepare and add an elegant touch to any garden party, making them a favorite for gatherings. The crisp asparagus pairs beautifully with the rich, cured prosciutto, providing a delightful crunch in every bite.
This dish is not only easy to make but also quick, allowing you to focus on other party preparations. With just a few ingredients, you can impress your guests with a delicious treat that’s both healthy and indulgent. Perfect for those warm afternoons, these spears are sure to be a hit!
Ingredients
- 1 bunch fresh asparagus
- 8 oz prosciutto, thinly sliced
- 2 tablespoons olive oil
- Salt and pepper to taste
- Fresh lemon zest (optional)
Instructions
- Preheat the oven to 400°F (200°C).
- Wash and trim the asparagus, removing the tough ends.
- Wrap each asparagus spear with a slice of prosciutto, leaving the tips exposed.
- Place the wrapped spears on a baking sheet lined with parchment paper.
- Drizzle with olive oil and sprinkle with salt and pepper. Add lemon zest if desired.
- Bake for 12-15 minutes until the asparagus is tender and the prosciutto is crispy.
- Serve warm and enjoy!
Lemon Butter Poached Shrimp Salad
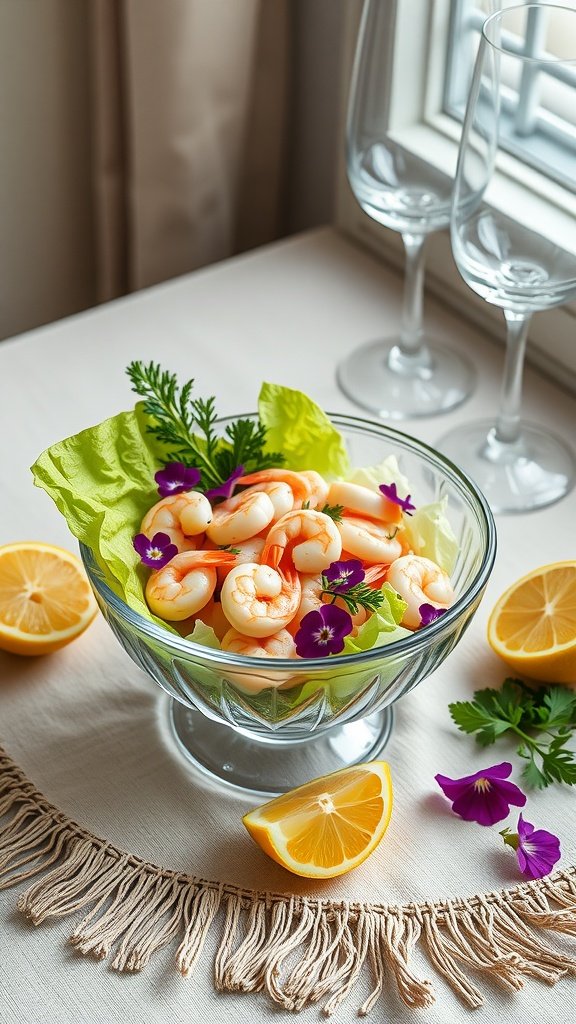
This Lemon Butter Poached Shrimp Salad is a delightful blend of fresh flavors that brings a touch of elegance to any lunch gathering. The tender shrimp are poached in a buttery lemon sauce that infuses them with zesty goodness. The result is a dish that’s light yet satisfying, perfect for a garden party inspired by the Roaring 20s.
Simple to prepare, this salad is not only a feast for the taste buds but also a visual delight. With colorful vegetables and an inviting presentation, it’s sure to impress your guests while keeping things casual and fun.
Ingredients
- 1 pound large shrimp, peeled and deveined
- 1/2 cup unsalted butter
- 1/4 cup fresh lemon juice
- 1 teaspoon lemon zest
- Salt and pepper to taste
- 4 cups mixed greens
- 1/2 cup cherry tomatoes, halved
- 1/4 cup thinly sliced cucumber
- Edible flowers for garnish (optional)
Instructions
- Poach the Shrimp: In a saucepan, melt the butter over medium heat. Add the lemon juice and zest. Once heated, gently add the shrimp, cooking until they turn pink and opaque (about 3-4 minutes). Season with salt and pepper.
- Prepare the Salad: In a large bowl, combine mixed greens, cherry tomatoes, and cucumber.
- Assemble: Top the salad with the poached shrimp. Drizzle with any remaining lemon butter sauce.
- Garnish: Add edible flowers for a beautiful touch, if desired.
- Serve: Enjoy immediately for a refreshing and elegant dish!
Mini Lobster Rolls With Chive Butter

Mini lobster rolls with chive butter are a delightful nod to the glamour of the Roaring 20s. These bite-sized treats combine tender lobster meat with a rich, buttery chive spread, all nestled in soft, toasted buns. They offer a perfect balance of savory flavors and creamy textures that will impress your guests and elevate any garden party.
This recipe is simple to follow, making it ideal for both seasoned cooks and newcomers alike. With just a few quality ingredients, you can create a sophisticated dish that tastes like a gourmet treat without the fuss. These mini rolls are not only delicious but also visually appealing, making them a fantastic addition to your lunch garden party menu.
Ingredients
- 1 pound cooked lobster meat, chopped
- 1/2 cup unsalted butter, softened
- 2 tablespoons fresh chives, finely chopped
- 1 tablespoon lemon juice
- Salt and pepper to taste
- 8 small hot dog buns or slider rolls
- 1 tablespoon olive oil
Instructions
- Prepare the Chive Butter: In a mixing bowl, combine softened butter, chopped chives, lemon juice, salt, and pepper. Mix until well blended and set aside.
- Mix the Lobster Filling: In another bowl, combine the chopped lobster with a few tablespoons of the chive butter. Adjust seasoning with salt and pepper to taste.
- Toast the Buns: Heat olive oil in a skillet over medium heat. Lightly toast the buns on both sides until golden brown.
- Assemble the Rolls: Spread a little more chive butter inside each toasted bun, then generously fill with the lobster mixture.
- Serve Immediately: Arrange on a platter and enjoy these elegant mini lobster rolls while they’re fresh!
Fig & Goat Cheese Crostini With Honey Drizzle

These Fig & Goat Cheese Crostini are a delightful blend of sweet and savory, perfect for your lunch garden party. The creamy goat cheese pairs beautifully with the natural sweetness of fresh figs, creating a flavor explosion in every bite. Topped off with a drizzle of honey, these crostini are not only tasty but also super simple to prepare, making them a great addition to any gathering.
With just a few ingredients, you can whip up these crostini in no time. They look elegant and are sure to impress your guests with their gourmet flair. Serve them on a beautiful platter for that extra touch of sophistication!
Ingredients
- 1 baguette, sliced into 1/2-inch pieces
- 8 oz goat cheese, softened
- 6-8 fresh figs, sliced
- 1/4 cup honey
- 1 tablespoon olive oil
- Fresh thyme leaves (optional, for garnish)
Instructions
- Preheat the oven to 400°F (200°C). Arrange the baguette slices on a baking sheet and brush lightly with olive oil.
- Bake for about 5-7 minutes, or until the bread is golden and crispy.
- Spread a generous layer of softened goat cheese on each crostini.
- Top each with a slice of fresh fig.
- Drizzle with honey and garnish with fresh thyme leaves if desired.
- Serve immediately and enjoy the delightful flavors!
Pear & Arugula Salad With Champagne Vinaigrette

This Pear & Arugula Salad with Champagne Vinaigrette is a refreshing dish that perfectly balances sweet and savory flavors. The juicy pears and peppery arugula create a delightful contrast, while the champagne vinaigrette adds a touch of elegance that’s perfect for your garden party.
Simple to prepare, this salad can be whipped up in no time, making it a fantastic choice for a light lunch or a side dish. Fresh ingredients and vibrant flavors will impress your guests and leave them wanting more!
Ingredients
- 4 cups fresh arugula
- 2 ripe pears, thinly sliced
- 1/4 cup toasted walnuts, chopped
- 1/2 cup crumbled goat cheese
- 1/4 cup champagne vinegar
- 1/2 cup olive oil
- 1 tablespoon honey
- Salt and pepper to taste
Instructions
- In a large bowl, combine the arugula, pear slices, walnuts, and goat cheese.
- In a small bowl, whisk together the champagne vinegar, olive oil, honey, salt, and pepper until well combined.
- Drizzle the vinaigrette over the salad and toss gently to coat.
- Serve immediately, and enjoy!
Roasted Beet Terrine With Herbed Goat Cheese

This roasted beet terrine with herbed goat cheese is a stunning and flavorful addition to any lunch garden party. Its vibrant colors and unique presentation make it a showstopper, while the combination of earthy beets and creamy goat cheese provides a delightful taste experience. Not only does it look impressive, but it’s also surprisingly simple to prepare, making it perfect for both novice and experienced cooks.
The terrine delivers a harmonious blend of flavors, with the sweetness of the beets balanced by the tanginess of the goat cheese, and a hint of fresh herbs to elevate the dish. Serve it chilled for a refreshing appetizer or a light main course at your next gathering. It pairs beautifully with crusty bread or a simple salad.
Ingredients
- 4 medium-sized beets
- 8 oz goat cheese, softened
- 1/2 cup heavy cream
- 2 tablespoons fresh chives, chopped
- 2 tablespoons fresh parsley, chopped
- 1 teaspoon lemon juice
- Salt and pepper to taste
- Olive oil for drizzling
Instructions
- Roast the Beets: Preheat the oven to 400°F (200°C). Wrap each beet in aluminum foil and place them on a baking sheet. Roast for about 45-60 minutes, or until tender. Let them cool, then peel and slice them into thin rounds.
- Prepare the Cheese Mixture: In a bowl, mix the softened goat cheese, heavy cream, chives, parsley, lemon juice, salt, and pepper until smooth and well combined.
- Assemble the Terrine: In a loaf pan lined with plastic wrap, layer the beet slices, followed by a layer of the cheese mixture. Repeat until all ingredients are used, finishing with a layer of beets on top. Cover with plastic wrap and refrigerate for at least 4 hours to set.
- Serve: Once set, carefully invert the terrine onto a serving platter. Drizzle with olive oil and garnish with additional herbs if desired. Slice and enjoy!
Coronation Chicken Finger Sandwiches

Coronation Chicken Finger Sandwiches bring a delightful twist to any lunch garden party, combining tender chicken with a creamy, flavorful dressing. This dish is easy to prepare and offers a taste that’s both savory and mildly spiced, making it a hit for guests of all ages.
With their elegant presentation and bite-sized portions, these sandwiches are perfect for mingling. Serve them alongside refreshing drinks, and you’ll have a charming addition to your 1920s-inspired gathering!
Ingredients
- 2 cups cooked chicken, shredded
- 1/2 cup mayonnaise
- 1 tablespoon curry powder
- 1 tablespoon mango chutney
- 1 teaspoon lemon juice
- Salt and pepper to taste
- 8 slices of white or whole grain bread
- Fresh lettuce leaves
- Sliced tomatoes (optional)
Instructions
- Prepare the Chicken Mixture: In a bowl, mix the shredded chicken with mayonnaise, curry powder, mango chutney, lemon juice, salt, and pepper until well combined.
- Assemble the Sandwiches: Lay out slices of bread and spread a generous layer of the chicken mixture onto half of the slices. If desired, add a slice of tomato and a lettuce leaf on top of the chicken mixture.
- Top and Cut: Place the remaining bread slices on top and press gently. Cut each sandwich into quarters or fingers for easy serving.
- Serve: Arrange the sandwiches on a platter and serve at room temperature for a delightful treat.
Tomato Galette With Herbes De Provence
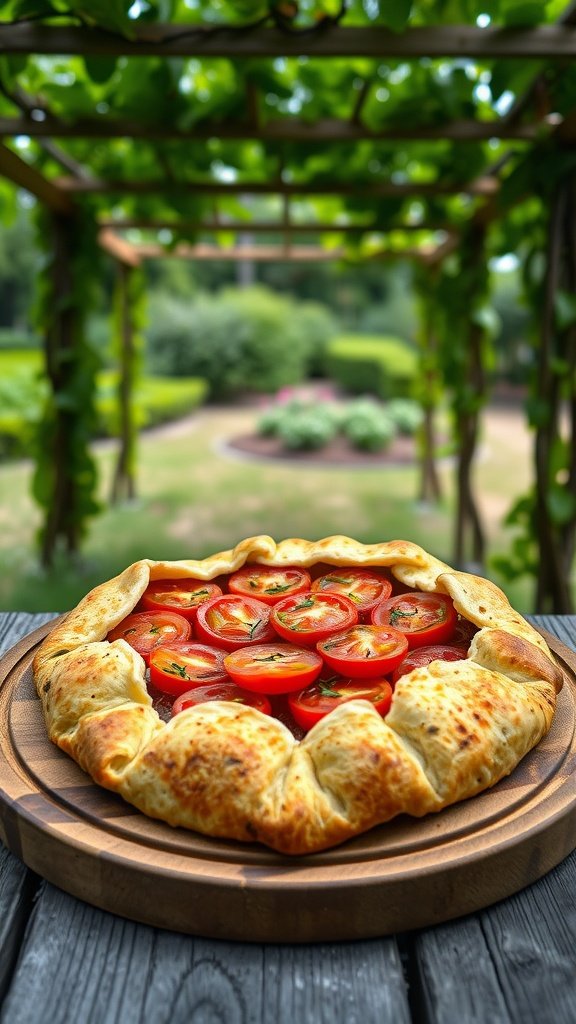
Tomato galette with herbes de Provence is a delightful dish that blends fresh flavors in a rustic presentation. This savory tart features juicy tomatoes nestled in a flaky pastry crust, complemented by the aromatic blend of herbes de Provence. It’s simple to make, making it perfect for a lunch garden party.
The combination of the buttery crust and the sweet, slightly tangy tomatoes creates a satisfying bite. Whether served warm or at room temperature, this galette is a fantastic centerpiece for any gathering, easy to slice and share among friends and family.
Ingredients
- 1 1/4 cups all-purpose flour
- 1/2 teaspoon salt
- 1/2 cup unsalted butter, cold and cubed
- 4-5 tablespoons ice water
- 2-3 large ripe tomatoes, sliced
- 1 teaspoon herbes de Provence
- 1 cup shredded cheese (such as Gruyère or mozzarella)
- 1 egg, beaten (for egg wash)
- Salt and pepper to taste
Instructions
- Make the Dough: In a bowl, combine flour and salt. Cut in the cold butter until the mixture resembles coarse crumbs. Stir in ice water, one tablespoon at a time, until the dough comes together. Form into a disk, wrap in plastic, and refrigerate for at least 30 minutes.
- Prepare the Filling: Preheat the oven to 400°F (200°C). Toss the sliced tomatoes with herbes de Provence, salt, and pepper. Drain any excess moisture.
- Roll Out the Dough: On a floured surface, roll out the chilled dough into a circle about 12 inches in diameter. Transfer to a baking sheet lined with parchment paper.
- Assemble the Galette: Sprinkle cheese in the center of the dough, leaving a 2-inch border. Arrange the tomatoes on top of the cheese. Fold the edges of the dough over the tomatoes, pleating as you go.
- Brush the Edges: Brush the folded edges with the beaten egg for a golden finish.
- Bake: Bake for 30-35 minutes, until the crust is golden and the tomatoes are tender. Let it cool slightly before slicing.
Citrus & Fennel Slaw In Cut Glass Bowls
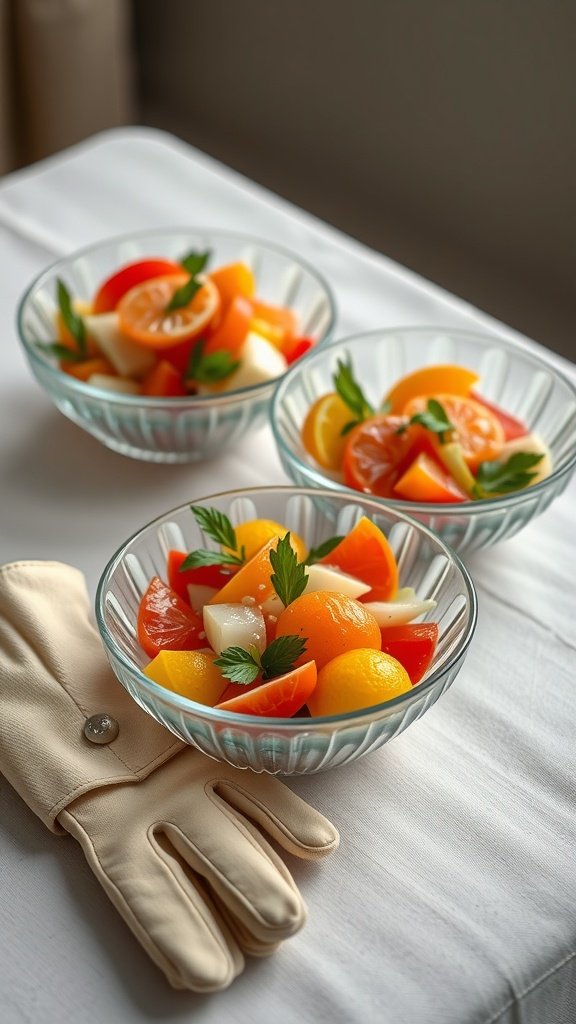
Citrus and fennel slaw is a refreshing addition to any lunch garden party. It combines the bright flavors of citrus fruits with the crunchy texture of fennel, creating a dish that’s both light and zesty. This slaw is not only simple to make but also adds a vibrant touch to your table.
The balance of sweet and tangy flavors, along with the slight anise note from the fennel, makes this dish a crowd-pleaser. Perfect for warm days, it’s a great side that complements a variety of main courses. Plus, serving it in elegant cut glass bowls brings a touch of sophistication.
Ingredients
- 1 small fennel bulb, thinly sliced
- 1 cup orange segments
- 1 cup grapefruit segments
- 1/4 cup fresh parsley, chopped
- 2 tablespoons olive oil
- 1 tablespoon apple cider vinegar
- Salt and pepper to taste
Instructions
- Prepare the Fennel: Thinly slice the fennel bulb using a mandolin or sharp knife.
- Segment the Citrus: Carefully peel and segment the oranges and grapefruit, removing any pith.
- Mix the Dressing: In a small bowl, whisk together the olive oil, apple cider vinegar, salt, and pepper.
- Toss the Slaw: In a large bowl, combine the sliced fennel, citrus segments, and chopped parsley. Drizzle the dressing over the slaw and toss gently to combine.
- Serve: Transfer the slaw to cut glass bowls and enjoy chilled or at room temperature.
Savory Cheese Scones With Chive Butter

These savory cheese scones are a delightful treat for any garden party. The buttery, flaky texture pairs perfectly with the sharpness of cheese, creating a balance that is rich yet light. Topped with chive butter, they offer a fresh, herbaceous kick that elevates their flavor profile.
Making these scones is straightforward, making them a great choice for both novice and experienced bakers. They come together quickly and can be served warm or at room temperature, making them perfect for a casual lunch or a more formal gathering.
Ingredients
- 2 cups all-purpose flour
- 1 tablespoon baking powder
- 1/2 teaspoon salt
- 1/4 cup cold unsalted butter, cubed
- 1 cup shredded sharp cheddar cheese
- 1/2 cup milk
- 1/4 cup chopped fresh chives
Instructions
- Preheat your oven to 400°F (200°C). Line a baking sheet with parchment paper.
- In a large bowl, whisk together the flour, baking powder, and salt. Add the cold butter and mix until the mixture resembles coarse crumbs.
- Fold in the cheddar cheese and chives. Gradually add the milk, mixing until just combined. Do not overmix.
- Turn the dough onto a floured surface and knead gently a few times. Pat it into a circle about 1-inch thick, then cut into wedges or rounds.
- Place the scones on the prepared baking sheet and bake for 15-20 minutes or until golden brown. Serve warm with chive butter.
Roasted Carrot & Thyme Soup In Espresso Cups

This roasted carrot and thyme soup is a delightful twist on traditional soups, perfect for any garden party inspired by the Roaring 20s. The natural sweetness of the carrots combined with the earthy notes of thyme creates a warm, comforting flavor that’s both sophisticated and easy to enjoy.
Served in charming espresso cups, this soup not only tastes great but also adds a stylish touch to your party table. Plus, it’s simple to make, so you can focus on enjoying your time with friends rather than being stuck in the kitchen.
Ingredients
- 1 lb carrots, peeled and chopped
- 1 medium onion, chopped
- 2 cloves garlic, minced
- 2 tablespoons olive oil
- 4 cups vegetable broth
- 1 teaspoon fresh thyme (or ½ teaspoon dried thyme)
- Salt and pepper, to taste
- 1 tablespoon lemon juice
Instructions
- Preheat your oven to 400°F (200°C). Toss the chopped carrots, onion, and garlic in olive oil, salt, and pepper on a baking sheet. Roast for about 25-30 minutes, until the carrots are tender and caramelized.
- Transfer the roasted vegetables to a pot and add the vegetable broth and thyme. Bring to a boil, then simmer for about 10 minutes.
- Blend the soup until smooth using an immersion blender or a regular blender. Stir in lemon juice to brighten the flavors.
- Serve warm in espresso cups, garnished with a sprig of thyme or a drizzle of olive oil for an elegant touch.
Peach And Burrata Salad With Basil Oil

This Peach and Burrata Salad is a refreshing dish that captures the essence of summer. The sweetness of ripe peaches pairs beautifully with the creamy texture of burrata cheese, creating a delightful balance of flavors. Drizzled with fragrant basil oil, this salad is both simple to make and visually stunning, making it the perfect addition to any garden party.
Enjoy this light and vibrant salad as a starter or a side, and impress your guests with its colorful presentation. It’s an elegant yet easy dish that showcases seasonal ingredients at their best.
Ingredients
- 2 ripe peaches, sliced
- 8 ounces burrata cheese
- 1/4 cup fresh basil leaves
- 1/4 cup extra virgin olive oil
- Salt and pepper, to taste
Instructions
- Prepare the Basil Oil: In a small bowl, combine olive oil and chopped basil. Let it sit for about 10 minutes to infuse the oil with the basil flavor.
- Arrange the Salad: On a serving plate, artfully arrange the peach slices and torn burrata cheese.
- Drizzle: Generously drizzle the basil oil over the peach and burrata arrangement.
- Season: Sprinkle with salt and pepper to taste.
- Serve: Enjoy immediately, or chill for a short while before serving for an extra refreshing experience.
Truffled Egg Salad On Brioche Rounds

Truffled egg salad on brioche rounds is a delightful twist on a classic dish. The creamy egg salad, infused with the rich flavor of truffle oil, is perfectly complemented by the light, buttery brioche. This recipe is simple enough for a casual lunch but elegant enough to impress your guests at a garden party.
Each bite is a burst of flavor, making it a standout option for your spread. The contrast of textures between the smooth egg salad and the soft brioche rounds creates a satisfying experience. Plus, it’s quick to prepare, allowing you to focus on enjoying your gathering.
Ingredients
- 6 large eggs
- 1/4 cup mayonnaise
- 1 teaspoon truffle oil (adjust to taste)
- 1 tablespoon Dijon mustard
- Salt and pepper to taste
- 1 tablespoon fresh chives, chopped
- 12 brioche rounds
Instructions
- Hard boil the eggs: Place eggs in a pot and cover with water. Bring to a boil, then reduce heat and simmer for 9-12 minutes. Transfer to cold water to cool.
- Prepare the egg salad: Peel and chop the cooled eggs in a bowl. Add mayonnaise, truffle oil, Dijon mustard, salt, pepper, and chives. Mix until well combined.
- Assemble: Cut brioche rounds in half if desired. Spoon the egg salad onto each brioche round generously.
- Serve: Arrange on a platter and enjoy these tasty bites at your garden party.
If you enjoyed this blog you can visit us or check out our other blogs and learn a bit about us.
Disclaimer: This blog post is inspired by fictional universes and characters created by their respective rights holders. All related content and imagery remain the property of their respective rights holder. This fan-inspired content is for entertainment and commentary purposes only and is not affiliated with or endorsed by HBO, Disney, Warner Bros., Lionsgate, or any other rights holders. To explore the official source material, please visit:
HBO