

Step back in time with these 19 vintage appetizers that capture the essence of the 1960s as seen in the iconic series Mad Men. Perfect for your next gathering or simply to enjoy a taste of nostalgia, these dishes bring a touch of retro flair to your table. From classic shrimp cocktails to stuffed celery, get ready to impress your guests with these timeless bites that are as stylish as they are delicious.
Shrimp Cocktail – Icy, Elegant, Towering, Tangy, 60s-Classic, Lavish

Shrimp cocktail is a timeless appetizer that captures the essence of sophistication and indulgence. The combination of icy, succulent shrimp and zesty cocktail sauce creates a refreshing bite that dances on the palate. This dish is easy to prepare, making it a perfect choice for entertaining or a casual get-together.
The shrimp are typically poached to keep them tender and flavorful, then served chilled on a bed of ice, adding a touch of elegance to any table. Paired with a tangy sauce, this classic dish brings a hint of retro glamour, reminiscent of the Mad Men era.
Ingredients
- 1 pound large shrimp, peeled and deveined
- 1 lemon, halved
- 1 teaspoon Old Bay seasoning
- Ice for serving
- 1 cup cocktail sauce
- Fresh parsley for garnish
Instructions
- Poach the Shrimp: In a large pot, bring water to a boil. Squeeze in the juice of one lemon half and add the Old Bay seasoning. Add the shrimp to the boiling water and cook until they turn pink, about 2-3 minutes. Remove and immediately transfer to an ice bath to stop the cooking process.
- Chill: Once cooled, drain the shrimp and chill in the refrigerator for about 30 minutes.
- Prepare for Serving: Arrange the shrimp on a serving platter or individual glasses filled with ice. Serve with cocktail sauce and garnish with fresh parsley and lemon wedges.
Deviled Eggs – Creamy, Peppery, Bite-Sized, Retro, Chic, Irresistible
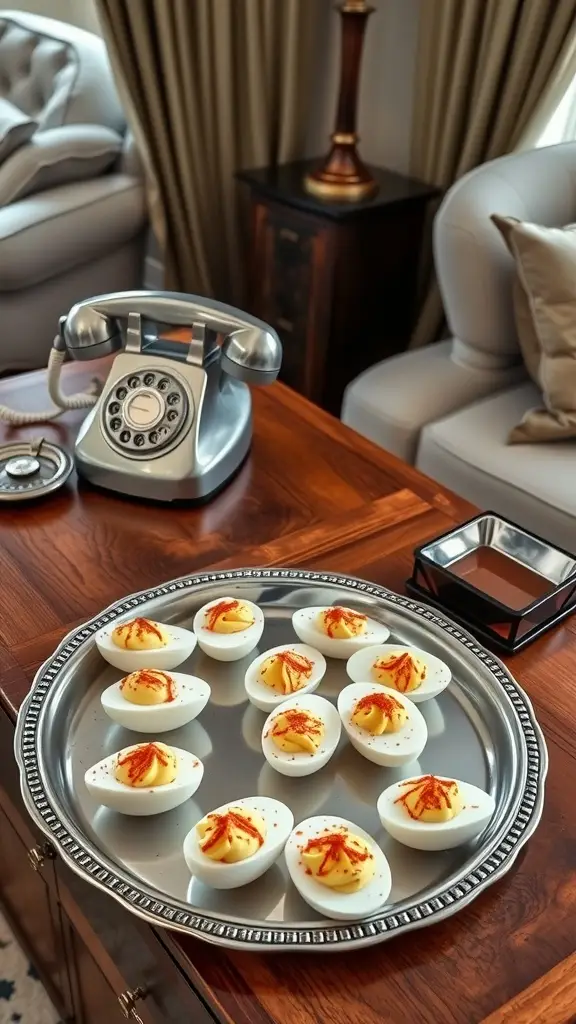
Deviled eggs are a classic appetizer that perfectly embodies the retro charm of the 1960s. These bite-sized delights feature a creamy, peppery filling that’s both satisfying and simple to make. With their elegant presentation and rich flavor, deviled eggs were a staple at gatherings, making them a chic choice for your next event.
The process of making deviled eggs is straightforward. Start with hard-boiled eggs, then mix the yolks with ingredients like mayonnaise, mustard, and spices for that creamy texture and zesty kick. A sprinkle of paprika on top adds a touch of color and flavor, making these appetizers as visually appealing as they are delicious.
Ingredients
- 6 large eggs
- 1/4 cup mayonnaise
- 1 teaspoon Dijon mustard
- 1 teaspoon white vinegar
- Salt and pepper, to taste
- Paprika, for garnish
Instructions
- Hard-Boil the Eggs: Place the eggs in a pot and cover with water. Bring to a boil, then cover and remove from heat. Let sit for 12 minutes, then transfer to an ice bath to cool.
- Prepare the Filling: Once cooled, peel the eggs and slice them in half lengthwise. Remove the yolks and place them in a bowl. Mash the yolks with mayonnaise, Dijon mustard, white vinegar, salt, and pepper until smooth.
- Fill the Eggs: Spoon or pipe the yolk mixture back into the egg whites. For a decorative touch, use a piping bag to create swirls.
- Garnish: Sprinkle with paprika for added flavor and color before serving.
Cheese Ball – Savory, Spreadable, Nut-Crusted, Kitschy, Golden, Indulgent
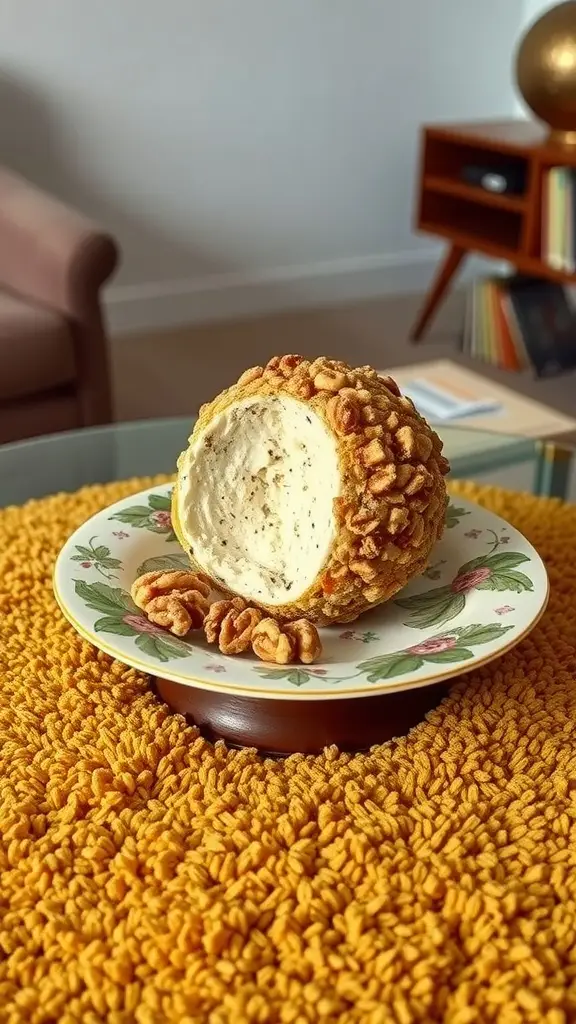
Cheese balls are a classic retro appetizer that brings a delightful mix of creamy, nutty, and savory flavors. They are easy to whip up and can be made ahead of time, making them a great addition to any gathering. The crunch of the nut coating adds a satisfying texture contrast to the smooth cheese filling, making each bite irresistible.
This indulgent treat is not only delicious but also a fun and nostalgic nod to the 1960s food scene. Perfect for spreading on crackers or veggies, a cheese ball is both kitschy and elegant, sure to impress your guests.
Ingredients
- 8 oz cream cheese, softened
- 1 cup shredded sharp cheddar cheese
- 1/4 cup chopped green onions
- 1/4 tsp garlic powder
- 1/4 tsp onion powder
- 1/2 cup chopped nuts (walnuts or pecans)
- 1 tbsp Worcestershire sauce
- 1/2 tsp salt
Instructions
- In a mixing bowl, combine softened cream cheese, shredded cheddar cheese, green onions, garlic powder, onion powder, Worcestershire sauce, and salt. Mix until well blended.
- Shape the mixture into a ball and wrap it in plastic wrap. Refrigerate for at least 2 hours to firm up.
- Once chilled, roll the cheese ball in the chopped nuts until fully coated.
- Place on a serving platter and serve with crackers and fresh vegetables for dipping.
Pigs In A Blanket – Flaky, Golden, Bite-Sized, Crowd-Pleasing, Buttery, Playful

Pigs in a blanket are a timeless favorite that perfectly capture the spirit of casual gatherings. With their flaky, buttery dough wrapping around juicy little sausages, these bite-sized delights are simple to make and always a crowd-pleaser. Their playful presentation and easy-to-eat nature make them an ideal appetizer for any party or get-together.
The combination of warm, golden pastry and savory sausage is a match made in heaven. They’re not only delicious but also versatile—you can pair them with a variety of dipping sauces to suit every taste. Ready to impress your guests? Let’s get into the recipe!
Ingredients
- 1 package of crescent roll dough
- 1 package of mini hot dogs or cocktail sausages
- 1 cup shredded cheese (optional)
- 1 egg (for egg wash)
- Mustard or ketchup (for dipping)
Instructions
- Preheat your oven to 375°F (190°C).
- Unroll the crescent roll dough and separate it into triangles.
- If using cheese, place a small amount on the wider end of each triangle.
- Place a mini hot dog on top of the cheese or the dough alone.
- Roll the dough around the hot dog, starting from the wide end. Pinch the edges to seal.
- Place the wrapped sausages on a baking sheet lined with parchment paper.
- In a small bowl, beat the egg and brush it over the tops for a golden finish.
- Bake for 12-15 minutes or until golden brown.
- Serve warm with mustard or ketchup for dipping.
If you’re loving the Mad Men 1960s-inspired vibe, check out our Cake Recipes for more timeless moments.
Canapés Trio – Tiny, Colorful, Delicate, Balanced, Chic, Photogenic

Canapés are the perfect bite-sized treats that bring a touch of elegance to any gathering. These tiny, colorful snacks are not only pleasing to the eye but also a delight to the palate. Combining a variety of flavors and textures, they are simple to make and can be tailored to suit any occasion. Whether you’re hosting a classy cocktail party or just looking to impress at a casual get-together, canapés are a chic choice that everyone will enjoy.
This trio of canapés features a harmonious blend of ingredients for a balanced taste experience. Each bite is crafted to be photogenic, ensuring they look as good as they taste. You can mix and match ingredients like smoked salmon, creamy cheese, and fresh herbs to create a delicious array that will have your guests coming back for more.
Ingredients
- 1 French baguette, sliced into thin rounds
- 4 oz cream cheese, softened
- 4 oz smoked salmon
- 1/4 cup capers
- 1/4 cup diced cucumber
- Fresh dill for garnish
- Zest of 1 lemon
Instructions
- Preheat your oven to 350°F (175°C). Arrange the baguette slices on a baking sheet and toast them for about 5-7 minutes until lightly golden.
- Once toasted, let the bread cool slightly. Spread a generous layer of cream cheese on each slice.
- Top half of the canapés with smoked salmon, a few capers, and a sprinkle of dill. For the other half, add diced cucumber and a sprinkle of lemon zest for a fresh twist.
- Arrange your canapés on a serving platter and serve immediately, or refrigerate until ready to serve.
Stuffed Celery – Crunchy, Creamy, Nostalgic, Refreshing, Simple, Snappy
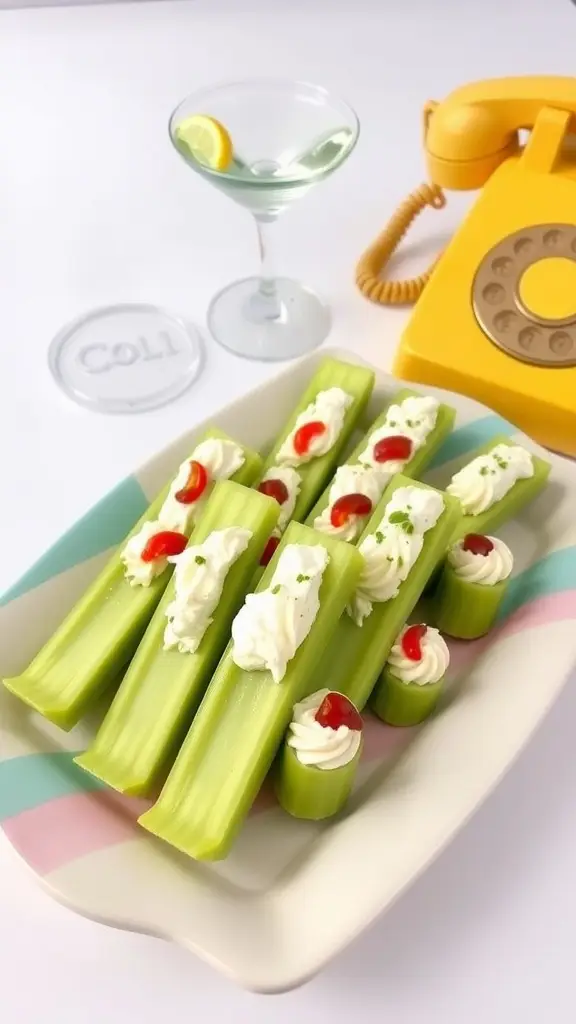
Stuffed celery is a delightful appetizer that takes you back to the charming gatherings of the 1960s. The crunch of the fresh celery pairs perfectly with a creamy filling, making it a refreshing bite. This recipe is not only easy to prepare but also brings a nostalgic touch to any event, evoking the retro vibes of classic cocktail parties.
With just a handful of ingredients, you can whip up this snappy snack in no time. It’s perfect for those looking to impress guests with minimal effort while providing a satisfying crunch and creamy texture that everyone will love.
Ingredients
- 1 bunch of celery
- 8 oz cream cheese, softened
- 1/4 cup mayonnaise
- 1 tablespoon Worcestershire sauce
- Salt and pepper to taste
- Red bell pepper or pimentos, chopped (for garnish)
Instructions
- Prepare the Celery: Wash the celery stalks and cut them into 3-4 inch pieces. Pat them dry with a paper towel.
- Make the Filling: In a bowl, mix together the softened cream cheese, mayonnaise, Worcestershire sauce, salt, and pepper until smooth and creamy.
- Stuff the Celery: Using a knife or a spatula, fill each celery piece with the cream cheese mixture, making sure to pack it in well.
- Add Garnish: Top each stuffed celery piece with a sprinkle of chopped red bell pepper or pimentos for a pop of color and flavor.
- Serve: Arrange the stuffed celery on a platter and serve immediately or refrigerate until ready to serve.
Cocktail Meatballs – Saucy, Sweet, Tangy, Sticky, Smoky, Retro-Glam
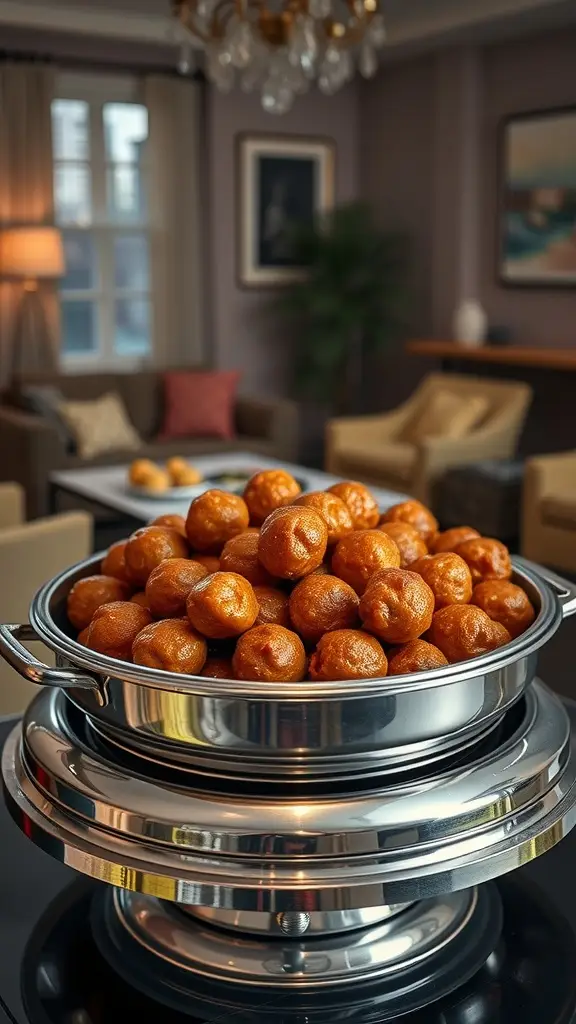
Cocktail meatballs are a classic party favorite that capture the essence of the 1960s cocktail culture. These little bites are savory and sweet, making them a delightful treat for any gathering. With a perfect balance of tangy barbecue sauce and a hint of smokiness, they’re sure to impress your guests.
This recipe is simple to make, requiring only a few ingredients and minimal prep time. Whether you’re hosting a cocktail party or just enjoying a cozy night in, these meatballs bring a nostalgic touch to the table.
Ingredients
- 1 pound ground beef
- 1/2 cup breadcrumbs
- 1/4 cup grated Parmesan cheese
- 1/4 cup minced onion
- 1 egg
- 1 teaspoon garlic powder
- 1 teaspoon salt
- 1/2 teaspoon black pepper
- 1 cup barbecue sauce
- 1/4 cup honey
- 1 tablespoon Worcestershire sauce
Instructions
- Preheat the oven to 375°F (190°C). In a large bowl, combine the ground beef, breadcrumbs, Parmesan cheese, onion, egg, garlic powder, salt, and pepper. Mix until well combined.
- Shape the mixture into small meatballs, about 1 inch in diameter, and place them on a baking sheet lined with parchment paper.
- Bake the meatballs for 20-25 minutes or until cooked through and browned.
- While the meatballs bake, in a saucepan over medium heat, combine the barbecue sauce, honey, and Worcestershire sauce. Stir until heated through.
- Once the meatballs are done, toss them in the sauce until well coated. Serve warm and enjoy the delicious, retro flavors!
Mini Quiches – Fluffy, Buttery, Golden, Petite, Charming, Rich

Mini quiches are the perfect appetizer for any gathering, combining a light, fluffy texture with a rich, buttery flavor. These charming little bites are not only visually appealing but also packed with endless possibilities for fillings, making them both fun and simple to prepare. Whether you’re hosting a cocktail party or just want a tasty snack, mini quiches are sure to impress your guests.
The magic of mini quiches lies in their versatility. You can easily switch up the fillings to suit your taste or dietary needs, making them a great option for everyone. Plus, they bake up golden and delightful, creating an irresistible aroma as they cook. Ready to whip up your own batch? Here’s a straightforward recipe to get you started!
Ingredients
- 1 pie crust (store-bought or homemade)
- 4 large eggs
- 1 cup milk
- 1 cup shredded cheese (cheddar, Swiss, or your choice)
- 1 cup diced vegetables (spinach, bell peppers, mushrooms, or your favorites)
- 1/2 cup cooked and crumbled bacon or sausage (optional)
- Salt and pepper to taste
Instructions
- Preheat your oven to 375°F (190°C). Roll out the pie crust and cut it into small circles to fit into a mini muffin tin.
- In a mixing bowl, whisk together the eggs, milk, salt, and pepper until well combined.
- Place a small amount of cheese, diced vegetables, and meat (if using) into each pie crust circle.
- Carefully pour the egg mixture over the fillings until just full.
- Bake in the preheated oven for 20-25 minutes or until the egg is set and the tops are golden brown.
- Allow to cool slightly before removing from the tin. Serve warm or at room temperature.
Jell-O Ham Salad Bites – Pink, Odd, Daring, Tangy, Gelatinous, Vintage
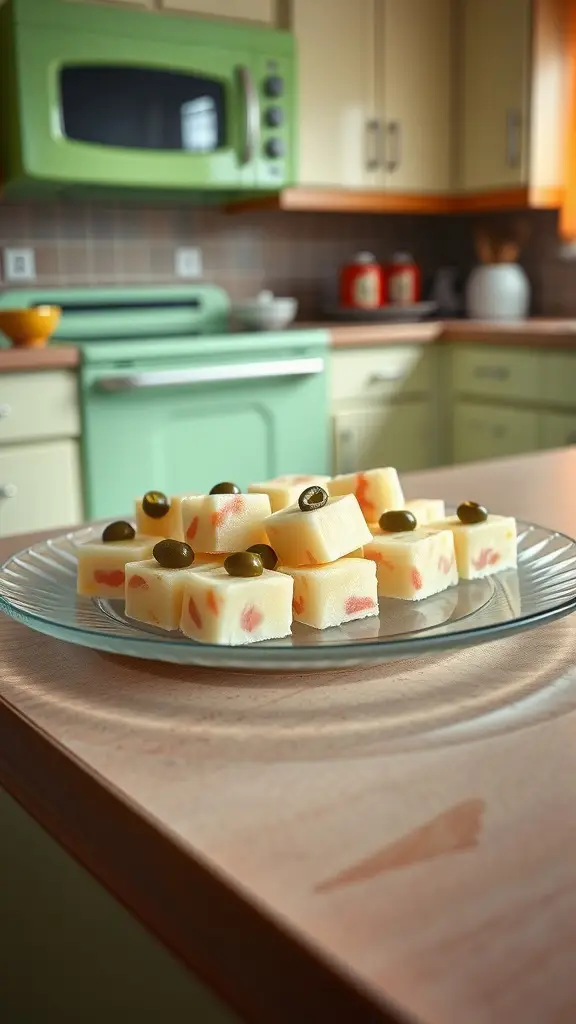
Jell-O Ham Salad Bites are a throwback to a time when quirky appetizers reigned supreme. This playful dish combines the familiar flavor of ham with the unexpected texture of gelatin, creating a unique bite that’s both tangy and a bit sweet. They’re simple to make and sure to spark conversations at any gathering with their vintage charm.
The bright pink color adds a fun pop to your appetizer spread, while the addition of olives offers a delightful contrast. These Jell-O bites are perfect for those looking to embrace a little nostalgia while serving something daring and whimsical.
Ingredients
- 1 cup diced ham
- 1 cup diced celery
- 1/2 cup diced onion
- 1 cup cottage cheese
- 1 packet (3 oz) flavored gelatin (like Raspberry or Strawberry)
- 1 cup boiling water
- 1/4 cup chopped olives (for garnish)
- Salt and pepper to taste
Instructions
- In a mixing bowl, combine the diced ham, celery, onion, and cottage cheese.
- Dissolve the gelatin in boiling water, stirring until completely dissolved.
- Pour the gelatin mixture into the ham mixture and stir well to combine. Season with salt and pepper.
- Pour the mixture into a mold or a square dish and refrigerate until firm, about 4 hours or overnight.
- Once set, cut into bite-sized squares and garnish with olives on top before serving. Enjoy your retro treat!
Bacon-Wrapped Chicken Livers – Smoky, Salty, Decadent, Sharp, Sizzling, Bold

Bacon-wrapped chicken livers are a classic appetizer that brings a burst of flavor to any gathering. These bites are smoky and salty, perfectly balancing the rich taste of chicken livers with the crispy goodness of bacon. The dish is simple to prepare and sure to impress your guests with its bold taste and sizzling aroma.
The preparation involves wrapping tender chicken livers in strips of bacon, securing them with toothpicks, and baking until they are crispy and golden. The combination of flavors creates a delightful experience that’s both savory and satisfying. Here’s how to make this delicious appetizer at home!
Ingredients
- 1 pound chicken livers, cleaned
- 8-10 strips of bacon
- 1 tablespoon olive oil
- 1 teaspoon garlic powder
- 1 teaspoon onion powder
- Salt and pepper to taste
- Toothpicks for securing
Instructions
- Preheat the oven to 400°F (200°C).
- In a bowl, toss the cleaned chicken livers with olive oil, garlic powder, onion powder, salt, and pepper until well coated.
- Cut each bacon strip in half. Wrap each chicken liver with a piece of bacon and secure it with a toothpick.
- Place the wrapped livers on a baking sheet lined with parchment paper.
- Bake for 20-25 minutes or until the bacon is crispy and the chicken livers are cooked through.
- Serve warm and enjoy!
Ritz Cracker Stacks – Crunchy, Creamy, Zesty, Cheesy, Charming, Kitsch
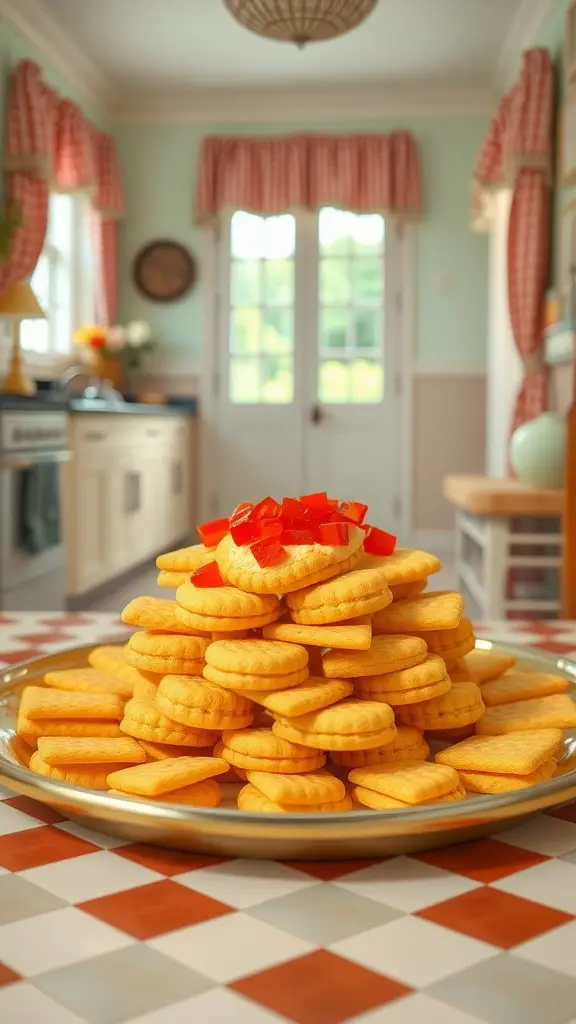
Ritz Cracker Stacks are the perfect blend of crunch and creaminess, making them a hit at any gathering. These delightful bites combine the buttery flavor of Ritz crackers with a zesty filling that’s sure to please your palate. They’re simple to whip up, requiring just a few ingredients, and they pack a nostalgic punch reminiscent of the 1960s cocktail parties.
The beauty of this recipe lies in its versatility. You can customize the filling with different cheeses or a hint of spice, depending on your taste. These charming stacks not only look appealing on a platter, but they also deliver a delightful crunch with every bite. Perfect for entertaining or just a fun snack at home!
Ingredients
- 1 box Ritz crackers
- 1 cup cream cheese, softened
- 1/4 cup mayonnaise
- 1 teaspoon Dijon mustard
- 1 teaspoon garlic powder
- 1 tablespoon chopped fresh herbs (like chives or dill)
- 1/2 cup shredded cheese (like cheddar or mozzarella)
- 1/4 cup chopped pickles or pimentos for garnish
Instructions
- In a mixing bowl, combine the softened cream cheese, mayonnaise, Dijon mustard, garlic powder, and herbs. Mix until well blended.
- Fold in the shredded cheese and adjust seasoning if needed.
- Spread a generous amount of the mixture onto one Ritz cracker and top with another cracker, creating a stack. Repeat until all ingredients are used.
- Top each stack with a small dollop of pickles or pimentos for an extra pop of color and flavor.
- Chill the stacks in the refrigerator for at least 30 minutes before serving to allow the flavors to meld.
Caviar Toast Points – Sharp, Crisp, Briny, Indulgent, Luxe, Impressive
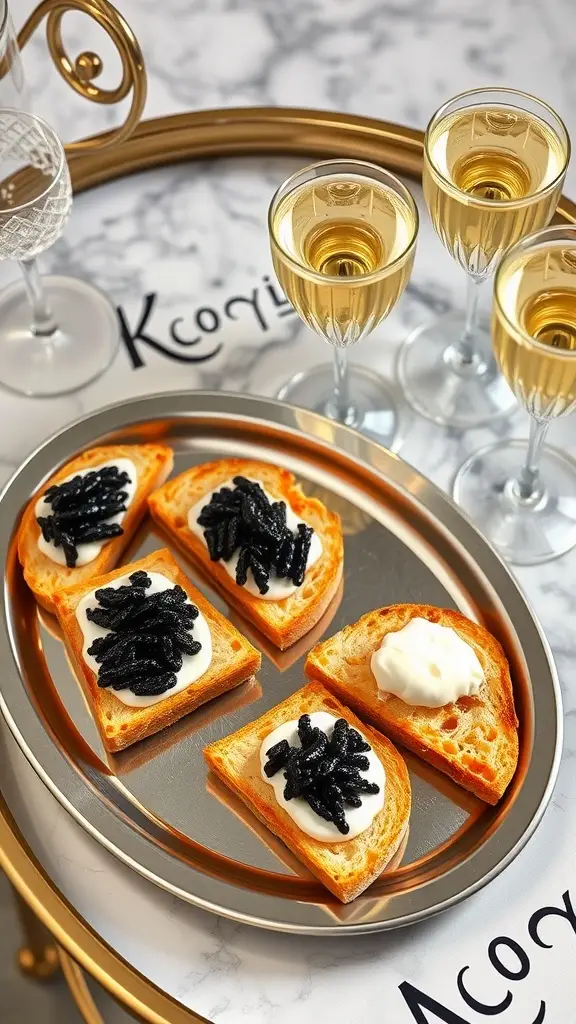
Caviar toast points are a classic appetizer that perfectly capture the essence of 1960s elegance. With a sharp and briny flavor, each bite delivers an indulgent experience that feels both luxurious and impressive. This recipe is simple enough for anyone to whip up, making it a fantastic choice for gatherings or special occasions.
The combination of crisp toast and rich caviar creates a delightful contrast, while a dollop of creamy topping adds a luscious texture. It’s a dish that’s sure to impress your guests, evoking memories of sophisticated cocktail parties from a bygone era.
Ingredients
- 1 baguette, sliced into ½-inch pieces
- 1/2 cup unsalted butter, softened
- 1/2 cup crème fraîche or sour cream
- 4 ounces high-quality caviar
- Fresh chives, chopped (for garnish)
- Salt and pepper, to taste
Instructions
- Preheat your oven to 375°F (190°C). Arrange the baguette slices on a baking sheet.
- Spread a thin layer of softened butter on each slice. Bake for about 10 minutes or until golden and crisp.
- Allow the toast points to cool slightly. Top each piece with a dollop of crème fraîche or sour cream.
- Carefully spoon caviar on top of the cream. Season with a pinch of salt and pepper if desired.
- Garnish with chopped chives before serving. Enjoy your elegant caviar toast points!
Olives & Pickles Tray – Briny, Punchy, Colorful, Tart, Casual, Classic

Olives and pickles are the perfect combination of flavors for a casual gathering. This appetizer brings together a delightful mix of briny, punchy, and tart tastes, making it an irresistible choice. Plus, it’s incredibly simple to prepare, allowing you to focus on enjoying your time with friends and family.
Creating this tray is all about variety and presentation. Choose a colorful assortment of olives, pickles, and garnishes to make it visually appealing. Serve it with toothpicks or small forks for easy snacking, and watch as your guests dive right in!
Ingredients
- 2 cups assorted olives (green, black, kalamata, stuffed)
- 2 cups assorted pickles (dill, bread and butter, gherkins)
- 1/2 cup pickled red onions
- 1/2 cup cherry tomatoes
- Fresh herbs (dill, parsley, or thyme) for garnish
- Olive oil for drizzling
- Salt and pepper to taste
Instructions
- Prepare the Ingredients: Rinse the olives and pickles under cold water to remove excess brine. Pat dry with a paper towel.
- Assemble the Tray: In a large serving dish or platter, arrange the olives, pickles, and cherry tomatoes in sections for a colorful display.
- Garnish: Scatter fresh herbs over the top for a pop of color and flavor. Drizzle a little olive oil over the dish, and sprinkle with salt and pepper to taste.
- Serve: Provide toothpicks or small forks for easy access, and enjoy your vibrant olive and pickle tray!
If you’re a fan of Mad Men, check out our blog – 26 Stylish Office Decor Ideas Inspired by the Mad Men 1960s
Prosciutto-Wrapped Melon – Sweet, Salty, Breezy, Juicy, Unexpected, Fresh

Prosciutto-wrapped melon is the perfect bite-sized appetizer that embodies a delightful mix of sweet and savory. The juicy melon pairs beautifully with the salty prosciutto, creating a fresh and breezy flavor profile that feels light yet satisfying. Simple to make, this dish is great for gatherings or an elegant touch to a casual meal.
Not only does it look inviting on a platter, but it also surprises your taste buds with every bite. This appetizer is all about contrasting flavors and textures, making it an unexpected hit that everyone will love.
Ingredients
- 1 ripe cantaloupe or honeydew melon
- 8 oz prosciutto, thinly sliced
- Fresh mint leaves (optional, for garnish)
- Toothpicks or small skewers
Instructions
- Prepare the Melon: Cut the melon in half, remove the seeds, and slice it into bite-sized wedges or balls.
- Wrap with Prosciutto: Take a slice of prosciutto and wrap it around each melon piece, securing it with a toothpick if needed.
- Garnish: Optionally, add a mint leaf over the top for an extra touch of freshness.
- Chill and Serve: Place the wrapped melon in the refrigerator for about 30 minutes to chill before serving. Enjoy!
Crab Rangoon – Crispy, Creamy, Golden, Zesty, Surprising, Delightful

Crab Rangoon is a delightful appetizer that perfectly captures the essence of the 1960s cocktail hour. These crispy, golden parcels are filled with a creamy mixture of crab meat, cream cheese, and a hint of green onion. The delightful crunch combined with the zesty filling makes each bite a surprise, making them a hit at parties or casual get-togethers.
This recipe is simple enough for anyone to make, requiring just a handful of ingredients and minimal prep time. Whether you’re hosting a vintage-themed gathering or just craving something savory and satisfying, Crab Rangoon will surely impress your guests.
Ingredients
- 8 ounces cream cheese, softened
- 6 ounces crab meat, drained and flaked
- 2 green onions, finely chopped
- 1 teaspoon garlic powder
- 1 teaspoon Worcestershire sauce
- 20 wonton wrappers
- Vegetable oil for frying
- Sweet and sour sauce for dipping
Instructions
- Prepare the Filling: In a bowl, mix the softened cream cheese, crab meat, green onions, garlic powder, and Worcestershire sauce until well combined.
- Assemble the Wontons: Place a teaspoon of the filling in the center of each wonton wrapper. Moisten the edges with water, fold the wrapper over to create a triangle, and press to seal.
- Heat the Oil: In a deep skillet or frying pan, heat about 2 inches of vegetable oil over medium heat until hot.
- Fry the Rangoon: Carefully add the wontons to the hot oil in batches, frying until golden brown, about 2-3 minutes per side. Remove with a slotted spoon and drain on paper towels.
- Serve: Arrange the Crab Rangoon on a serving platter and serve hot with sweet and sour sauce for dipping.
Pineapple Cheese Skewers – Juicy, Funky, Colorful, Tart, Sweet-Savory, Fun
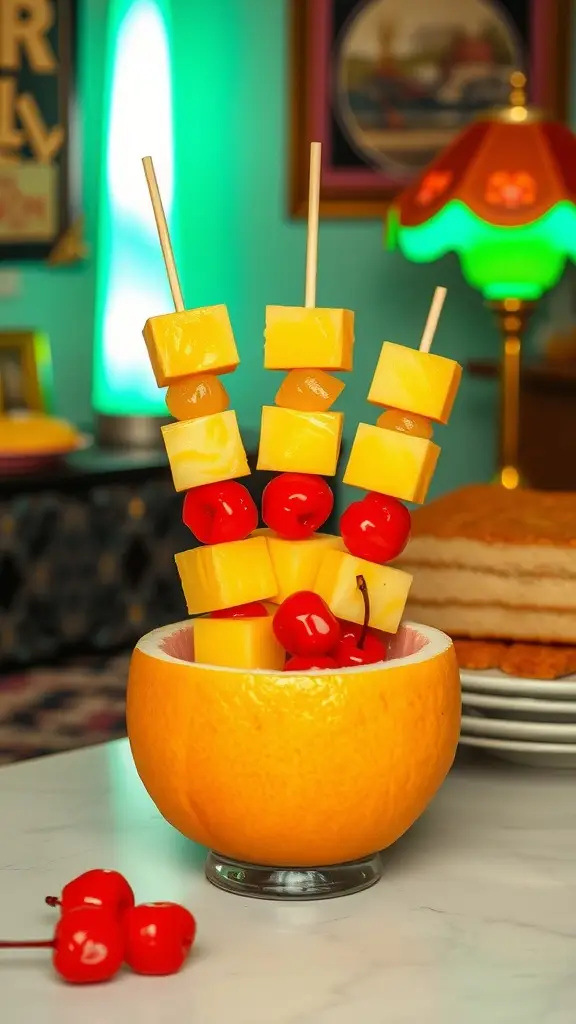
Pineapple cheese skewers are the perfect blend of sweet and savory, making them a hit at any gathering. These vibrant little bites bring together the juicy tartness of pineapple and the creamy richness of cheese, all on a fun stick. They’re not only easy to make, but they also brighten up a table with their colorful presentation.
Whether you’re throwing a party or just looking for a tasty snack, these skewers are simple and quick to prepare. Everyone will love the juicy bursts of pineapple paired with the salty cheese, and they make for a playful appetizer that’s sure to grab attention!
Ingredients
- 1 fresh pineapple, peeled and cut into chunks
- 8 ounces sharp cheddar cheese, cut into cubes
- 1 jar of maraschino cherries
- Wooden skewers, 6 inches long
- Optional: fresh mint leaves for garnish
Instructions
- Prepare the Ingredients: Start by cutting the pineapple into bite-sized chunks and the cheddar cheese into cubes. Drain the maraschino cherries and set aside.
- Assemble the Skewers: Take a wooden skewer and thread on a piece of pineapple, followed by a cube of cheese, and then a cherry. Repeat this pattern until the skewer is filled, leaving some space at the bottom for easy handling.
- Garnish: If desired, top your skewers with a sprig of fresh mint for an extra touch of color and flavor.
- Serve: Arrange the skewers on a platter and enjoy! They can be made ahead of time and served cold or at room temperature.
Chicken Drumettes – Saucy, Sticky, Smoky, Rich, Hearty, Handheld

Chicken drumettes are a classic party favorite that pack a flavorful punch. These tender pieces of chicken are coated in a sticky, smoky sauce that leaves you wanting more. They’re perfect for gatherings, easy to hold, and are sure to impress your guests with their rich taste.
This recipe is simple to whip up, making it a great choice for both seasoned cooks and beginners alike. With just a few ingredients and a bit of time, you can create a dish that tastes like it came from a gourmet restaurant!
Ingredients
- 2 pounds chicken drumettes
- 1 cup barbecue sauce
- 1 tablespoon smoked paprika
- 1 tablespoon garlic powder
- 1 teaspoon onion powder
- 1 teaspoon salt
- 1/2 teaspoon black pepper
- 2 tablespoons olive oil
Instructions
- Preheat the oven to 400°F (200°C).
- In a large bowl, combine the barbecue sauce, smoked paprika, garlic powder, onion powder, salt, and black pepper.
- Add the chicken drumettes and olive oil to the bowl. Toss until the chicken is well coated in the sauce.
- Arrange the drumettes on a baking sheet lined with parchment paper.
- Bake for 30-35 minutes, turning halfway through, until the chicken is cooked through and has a nice glaze.
- Serve hot with extra barbecue sauce for dipping.
Asparagus Roll-Ups – Crunchy, Creamy, Vintage, Clean, Elegant, Green
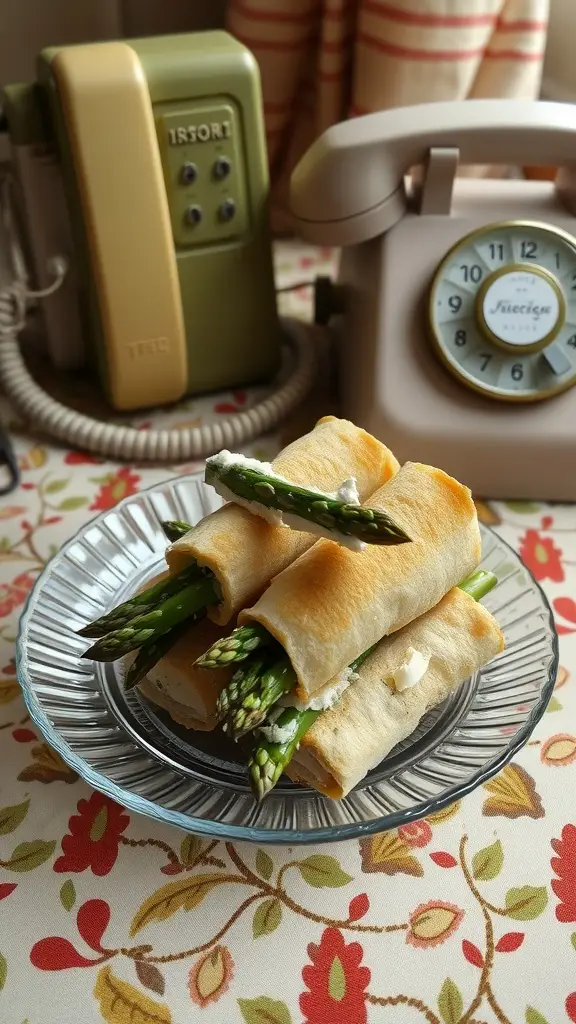
Asparagus Roll-Ups are a delightful appetizer that perfectly captures the essence of vintage elegance. With tender asparagus wrapped in a creamy filling, these bites offer a satisfying crunch and a fresh taste that feels both sophisticated and easy to make. They’re perfect for any gathering, from casual get-togethers to more formal occasions.
Creating these roll-ups is a breeze, making them an ideal choice for hosts who want to impress without spending hours in the kitchen. Just a few ingredients and a little time are all you need to whip up this timeless treat.
Ingredients
- 1 bunch of fresh asparagus, trimmed
- 8 ounces cream cheese, softened
- 1 tablespoon fresh lemon juice
- 1/4 teaspoon garlic powder
- 1/4 teaspoon salt
- 1/4 teaspoon black pepper
- 1 package of crescent roll dough
Instructions
- Preheat your oven to 375°F (190°C).
- In a bowl, mix the softened cream cheese, lemon juice, garlic powder, salt, and pepper until smooth.
- Open the crescent roll dough and separate it into triangles. Roll each triangle out slightly to make it larger.
- Spread a thin layer of the cream cheese mixture on each triangle.
- Place a piece of asparagus on the wider end of the triangle and roll it up snugly.
- Place the roll-ups on a baking sheet lined with parchment paper. Bake for 12-15 minutes or until golden brown.
- Allow to cool slightly before serving. Enjoy your crunchy, creamy Asparagus Roll-Ups!
Cold Cuts Platter – Hearty, Meaty, Layered, Salty, Colorful, Bold

A cold cuts platter is a classic choice for any gathering, bringing together a variety of meats and accompaniments that are sure to please. The combination of savory, salty flavors from assorted cured meats creates a delightful experience. It’s not only visually appealing but also simple to assemble, making it a go-to option for parties or casual get-togethers.
This platter invites creativity, allowing you to choose your favorite meats and pair them with colorful sides like pickles, olives, or fresh fruits. It’s a perfect balance of flavors and textures, with hearty slices of salami, prosciutto, and more, layered for an impressive display that’s easy to enjoy.
Ingredients
- 1 pound of assorted deli meats (salami, prosciutto, ham, turkey)
- 1/2 pound of sliced cheese (cheddar, Swiss, provolone)
- 1 cup of pickles (dill and sweet)
- 1 cup of mixed olives
- 1 cup of cherry tomatoes
- Fresh herbs for garnish (parsley or basil)
- Crackers or bread for serving
- Lemon wedges for garnish
Instructions
- Prepare the Board: Choose a large platter or cutting board to assemble your cold cuts. Lay down your sliced meats first, arranging them in a circular or layered fashion for an attractive display.
- Add Cheese: Place the cheese slices next to the meats, fanning them out or stacking them for visual appeal.
- Include Accompaniments: Scatter the pickles, olives, and cherry tomatoes around the meats and cheeses. This adds color and variety to your platter.
- Garnish: Finish with fresh herbs and lemon wedges to add a touch of freshness and brightness.
- Serve: Provide crackers or bread on the side for guests to enjoy with the meats and cheeses. Enjoy your beautifully arranged cold cuts platter with friends!
You may also like:
– 23 Cake Recipes Inspired by Gotham City You’ll Love
– 29 Soup Recipes Inspired by the Gatsby Roaring 20s
– 30 Desserts Inspired by Star Wars to Satisfy Your Cravings
If you enjoyed this blog you can visit us or check out our other blogs and learn a bit about us.
Disclaimer: This blog post is inspired by fictional universes and characters created by their respective rights holders. All related content and imagery remain the property of their respective rights holder. This fan-inspired content is for entertainment and commentary purposes only and is not affiliated with or endorsed by HBO, Disney, Warner Bros., Lionsgate, or any other rights holders. To explore the official source material, please visit:
HBO