

Back in the 1920s, ice cream molding was a delightful culinary art that added flair to any dessert table. This charming practice involved shaping creamy, frozen treats into stunning designs and figures, making them a visual treat as much as a tasty one. With modern cooking methods, it’s time to revisit this nostalgic craft, and we’ll share some handy cooking tips and ingredient substitutions to make it easy for you to recreate these delightful molds at home. Get ready to impress your friends and family with these fun and classic vintage ice cream molds!
Reviving Vintage Flavors: The Classic Vanilla Mold
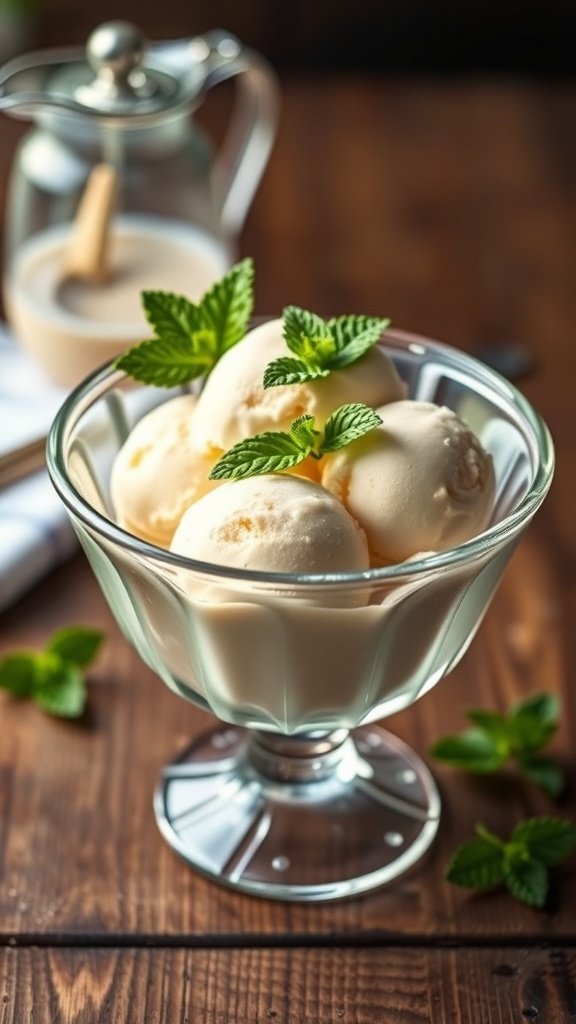
The image captures a delightful bowl of classic vanilla ice cream, beautifully molded and garnished with fresh mint leaves. This nostalgic treat takes us back to the 1920s, when ice cream molded dishes were all the rage. The smooth, creamy texture of the ice cream is inviting, and the simple presentation highlights the elegance of vintage desserts.
In the 1920s, ice cream was not just a dessert; it was an experience. Families would gather around the table to enjoy molded ice cream creations, often served in fancy glassware. The classic vanilla flavor remains a favorite, offering a timeless taste that pairs well with various toppings and sauces.
To recreate this vintage delight at home, you can easily make your own vanilla ice cream. Using simple ingredients, you can bring back the charm of the past while enjoying a delicious treat. Here’s how to make your own classic vanilla ice cream:
Ingredients
- 2 cups heavy cream
- 1 cup whole milk
- 3/4 cup granulated sugar
- 1 tablespoon pure vanilla extract
- 1/4 teaspoon salt
Instructions
- Mix Ingredients: In a large bowl, whisk together the heavy cream, whole milk, sugar, vanilla extract, and salt until the sugar is dissolved.
- Chill Mixture: Cover the bowl and refrigerate the mixture for at least 2 hours, or overnight for best results.
- Churn Ice Cream: Pour the chilled mixture into an ice cream maker and churn according to the manufacturer’s instructions until it reaches a soft-serve consistency.
- Freeze: Transfer the ice cream to a lidded container and freeze for at least 4 hours until firm.
- Serve: Scoop the ice cream into bowls, garnish with mint leaves, and enjoy!
Cooking tips: If you don’t have an ice cream maker, you can pour the mixture into a shallow dish and freeze it. Stir every 30 minutes for the first 2 hours to create a creamy texture.
Ingredient substitutions: For a lighter version, you can use half-and-half instead of heavy cream. For a dairy-free option, try coconut milk or almond milk.
A Sweet Twist: Strawberry Cream Dream
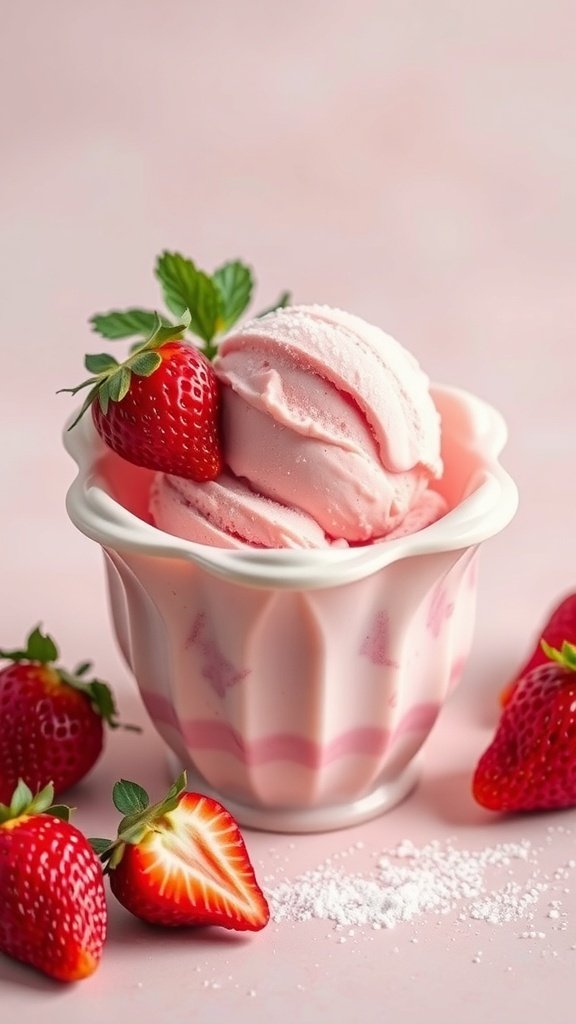
Strawberry cream dream is a delightful treat that captures the essence of summer. The image showcases a charming bowl filled with creamy pink ice cream, topped with fresh strawberries. This dessert not only looks appealing but also brings back memories of simpler times when ice cream moulded dishes were a staple at gatherings.
Making strawberry cream dream at home is a fun way to recreate that nostalgic vibe. The combination of fresh strawberries and creamy goodness makes it a hit for all ages. Plus, you can customize it to your liking!
Ingredients
- 2 cups fresh strawberries, hulled and sliced
- 1 cup heavy cream
- 1 cup whole milk
- 3/4 cup granulated sugar
- 1 teaspoon vanilla extract
- 1 tablespoon lemon juice
- 1/4 teaspoon salt
Instructions
- Prepare the Strawberries: In a bowl, mash half of the strawberries with a fork. Leave the other half sliced for later.
- Mix the Base: In a separate bowl, whisk together the heavy cream, whole milk, sugar, vanilla extract, lemon juice, and salt until well combined.
- Combine: Fold the mashed strawberries into the cream mixture. Then, gently stir in the sliced strawberries.
- Chill: Cover the mixture and refrigerate for at least 2 hours to let the flavors meld.
- Churn: Pour the chilled mixture into an ice cream maker and churn according to the manufacturer’s instructions until it reaches a soft-serve consistency.
- Freeze: Transfer the ice cream to a container and freeze for at least 4 hours or until firm.
- Serve: Scoop into bowls and garnish with fresh strawberries. Enjoy your homemade strawberry cream dream!
Cooking tips: If you want a richer flavor, consider adding a splash of strawberry liqueur to the mixture before churning. For a dairy-free version, substitute coconut cream for heavy cream and almond milk for whole milk. Enjoy experimenting!
Decadent Indulgence: Chocolate Delight Mold

The 1920s brought a wave of creativity in the culinary world, especially with desserts. One standout was the art of ice cream molding, where flavors and shapes combined to create stunning dishes. The image captures a chocolate delight mold, showcasing the smooth, rich chocolate ready to be transformed into a delightful treat.
This mold isn’t just for show; it represents a time when desserts were crafted with care and flair. The glossy finish of the chocolate hints at the indulgent experience awaiting those lucky enough to enjoy it. Ice cream molded dishes were a way to impress guests, turning simple gatherings into memorable events.
To recreate this experience at home, you can make your own chocolate delight using the following recipe. It’s perfect for parties or just a sweet treat for yourself!
Ingredients
- 2 cups heavy cream
- 1 cup whole milk
- 3/4 cup granulated sugar
- 1 cup semi-sweet chocolate chips
- 1 teaspoon vanilla extract
- 1/4 teaspoon salt
Instructions
- Heat the Cream: In a saucepan, heat the heavy cream and whole milk over medium heat until it just begins to simmer.
- Melt the Chocolate: Remove from heat and stir in the chocolate chips until melted and smooth.
- Add Sugar and Flavor: Mix in the sugar, vanilla extract, and salt until fully combined.
- Chill the Mixture: Allow the mixture to cool to room temperature, then refrigerate for at least 2 hours.
- Pour into Mold: Once chilled, pour the mixture into your chocolate mold, filling it to the top.
- Freeze: Cover and freeze for at least 4 hours, or until solid.
- Serve: To release, gently warm the outside of the mold with your hands or run under warm water for a few seconds. Enjoy your chocolate delight!
Cooking Tips: For a richer flavor, use dark chocolate instead of semi-sweet. If you’re looking for a lighter version, you can substitute half of the heavy cream with Greek yogurt. Enjoy experimenting!
Citrus Burst: Refreshing Lemon Ice Mold
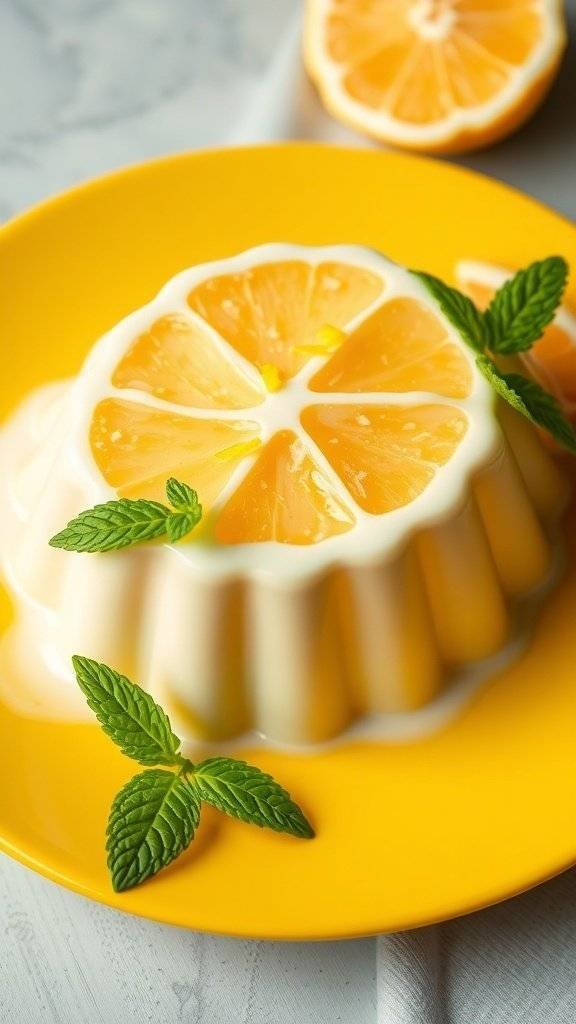
The 1920s brought a delightful trend in dessert making, and lemon ice molds were a shining star. This charming dish showcases the vibrant yellow of fresh lemons, making it a feast for the eyes and the palate. The smooth texture and refreshing flavor of lemon ice are perfect for warm days, evoking a sense of nostalgia for simpler times.
Imagine serving this lovely lemon ice mold at a summer gathering. The bright color and elegant presentation will surely impress your guests. Garnished with fresh mint leaves, it adds a touch of sophistication to any table setting. This dessert not only looks good but also offers a burst of citrusy goodness that’s hard to resist.
Making this lemon ice mold is quite simple. You can enjoy it as a standalone treat or pair it with a scoop of vanilla ice cream for a delightful contrast. It’s a great way to introduce the lost art of ice cream moulded dishes back into modern kitchens.
Ingredients
- 2 cups fresh lemon juice
- 1 cup granulated sugar
- 2 cups water
- 1 tablespoon lemon zest
- 1 tablespoon gelatin (optional, for a firmer texture)
- Fresh mint leaves for garnish
Instructions
- Prepare the Mixture: In a saucepan, combine water and sugar. Heat over medium until the sugar dissolves. Remove from heat and let it cool.
- Add Lemon: Stir in the fresh lemon juice and lemon zest. If using gelatin, dissolve it in a small amount of warm water and add it to the mixture.
- Chill: Pour the mixture into a mold and place it in the freezer. Let it freeze for at least 4-6 hours or until solid.
- Serve: To unmold, dip the mold briefly in warm water. Invert onto a plate and garnish with fresh mint leaves. Cut into slices and enjoy!
Cooking Tips: If you prefer a sweeter ice, adjust the sugar to taste. For a more intense lemon flavor, add extra zest. You can also substitute lime juice for a different twist.
Enjoy this refreshing lemon ice mold as a delightful treat that pays homage to the classic desserts of the 1920s!
Nutty Bliss: Pistachio Ice Cream Sensation
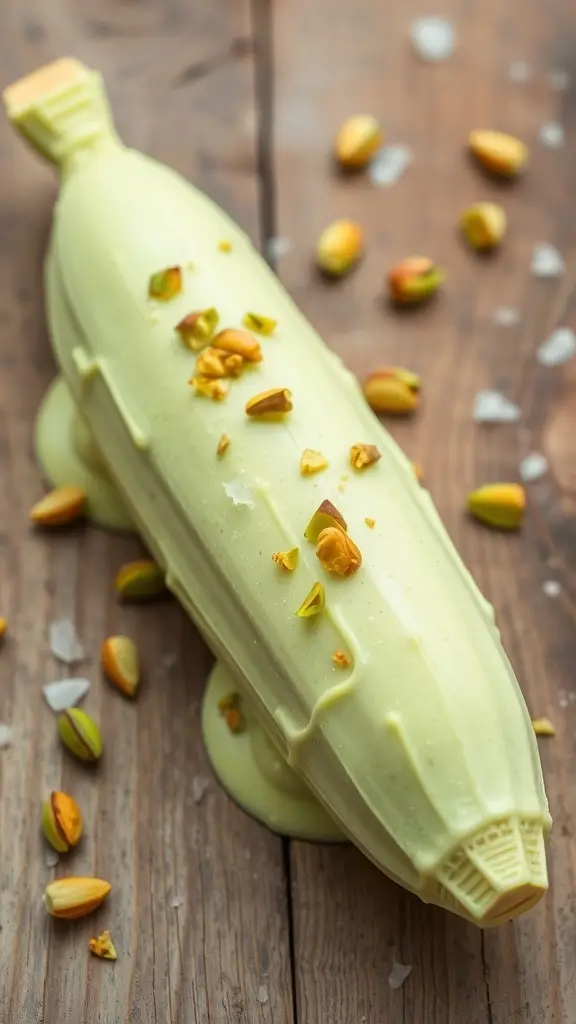
Pistachio ice cream is a delightful treat that takes us back to the 1920s when ice cream moulded dishes were all the rage. The vibrant green color and nutty flavor make it a standout dessert. In the image, you can see a creamy scoop of pistachio ice cream, topped with crunchy pistachio pieces. This combination not only looks appealing but also offers a satisfying texture.
Making pistachio ice cream at home is easier than you might think. You can enjoy the rich, nutty flavor without any artificial additives. Plus, it’s a fun way to impress your friends and family with a classic dessert!
Ingredients
- 2 cups heavy cream
- 1 cup whole milk
- 3/4 cup granulated sugar
- 1 cup pistachios, shelled and unsalted
- 1 teaspoon vanilla extract
- 1/4 teaspoon salt
- 1/2 cup crushed pistachios for topping
Instructions
- Blend the Pistachios: In a blender, combine the shelled pistachios with the milk and blend until smooth. This will create a rich pistachio base.
- Mix the Cream: In a large bowl, whisk together the heavy cream, sugar, vanilla extract, and salt until the sugar dissolves.
- Combine: Stir the pistachio mixture into the cream mixture until well combined.
- Chill: Cover the mixture and refrigerate for at least 2 hours, or overnight for best results.
- Churn: Pour the chilled mixture into an ice cream maker and churn according to the manufacturer’s instructions until it reaches a soft-serve consistency.
- Freeze: Transfer the ice cream to a container, sprinkle crushed pistachios on top, and freeze for at least 4 hours until firm.
- Serve: Scoop into bowls and enjoy your homemade pistachio ice cream!
Cooking Tips: If you want a smoother texture, strain the pistachio mixture before combining it with the cream. For a dairy-free version, substitute coconut milk for heavy cream and whole milk.
Ingredient Substitutions: You can use almond milk instead of whole milk for a different flavor. If you’re allergic to nuts, consider using sunflower seeds to create a similar taste.
Tropical Escape: Coconut Cream Paradise
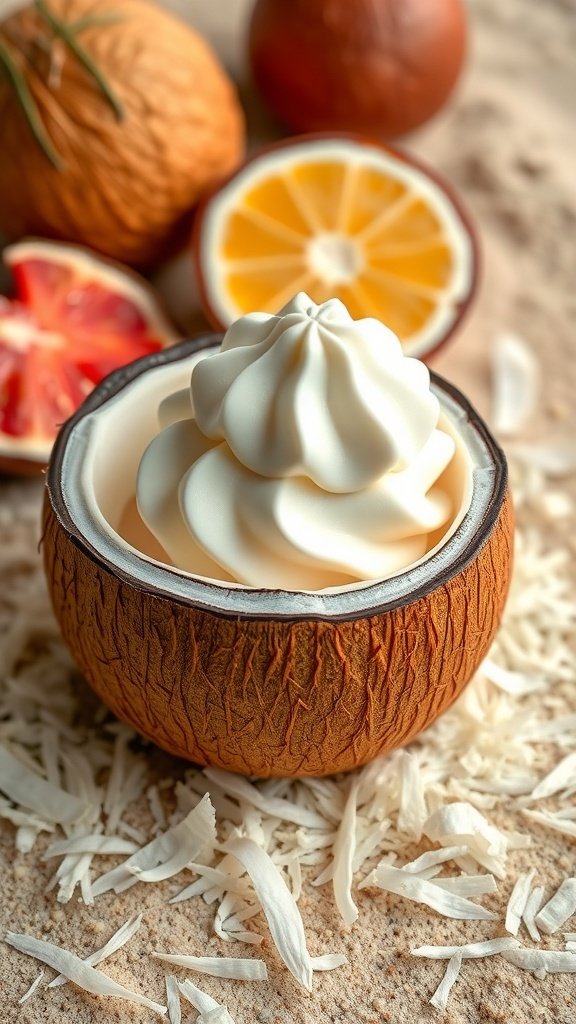
Coconut cream desserts have a special place in the hearts of many, especially when they evoke the charm of the 1920s. The image captures a delightful ice cream molded dish, showcasing creamy goodness nestled in a coconut shell. This presentation not only highlights the beauty of the dessert but also reflects the playful spirit of that era.
In the 1920s, ice cream molded dishes were a popular treat. They were often served at parties and gatherings, bringing a touch of elegance to any occasion. The coconut shell adds a tropical flair, making it perfect for summer celebrations or a cozy night in.
To recreate this Coconut Cream Paradise at home, you’ll need some simple ingredients. This recipe is easy to follow and will impress your friends and family.
Ingredients
- 1 cup coconut milk
- 1 cup heavy cream
- 1/2 cup granulated sugar
- 1 teaspoon vanilla extract
- 1/4 cup shredded coconut
- 1 tablespoon gelatin (or agar-agar for a vegetarian option)
- 1/4 cup cold water
- Whipped cream for topping
Instructions
- Prepare the Gelatin: In a small bowl, sprinkle gelatin over cold water and let it sit for about 5 minutes until it blooms.
- Heat the Mixture: In a saucepan, combine coconut milk, heavy cream, sugar, and vanilla extract. Heat over medium heat until the sugar dissolves, but do not boil.
- Combine Gelatin: Remove the saucepan from heat and stir in the bloomed gelatin until fully dissolved.
- Add Coconut: Mix in the shredded coconut, then pour the mixture into coconut shells or molds.
- Chill: Refrigerate for at least 4 hours or until set.
- Serve: Once set, top with whipped cream and extra shredded coconut for garnish.
Cooking tips: If you prefer a sweeter dessert, feel free to adjust the sugar to your taste. For a richer flavor, use full-fat coconut milk. You can also substitute heavy cream with a non-dairy alternative if desired.
Enjoy this delightful treat and bring a taste of the tropics to your table!
Berry Bliss: Mixed Berry Ice Cream Mold

Mixed berry ice cream is a delightful treat that captures the essence of summer. This ice cream, with its vibrant colors and fresh flavors, is a nod to the 1920s art of ice cream molding. The image showcases a beautiful bowl filled with creamy, pink-hued ice cream, dotted with blueberries and raspberries. It’s garnished with a sprig of mint, adding a touch of freshness.
Creating ice cream moulded dishes like this one is a fun way to impress your friends and family. The combination of strawberries, blueberries, and raspberries not only looks stunning but also offers a burst of flavor. You can easily make this at home with just a few ingredients.
For those looking to recreate this berry bliss, here’s a simple recipe. You can swap out berries based on what you have on hand. For example, blackberries or even peaches can work just as well!
Ingredients
- 2 cups mixed berries (strawberries, blueberries, raspberries)
- 1 cup heavy cream
- 1 cup sweetened condensed milk
- 1 teaspoon vanilla extract
- 1 tablespoon lemon juice
- Mint leaves for garnish
Instructions
- Prepare the Berries: Wash and chop the strawberries. In a bowl, mix all the berries with lemon juice and set aside.
- Make the Ice Cream Base: In a separate bowl, whip the heavy cream until soft peaks form. Gently fold in the sweetened condensed milk and vanilla extract until combined.
- Add the Berries: Carefully fold the mixed berries into the ice cream base, ensuring they are evenly distributed.
- Mold the Ice Cream: Pour the mixture into an ice cream mold or a loaf pan. Cover with plastic wrap and freeze for at least 4-6 hours, or until solid.
- Serve: Once frozen, remove from the mold and scoop into bowls. Garnish with mint leaves and extra berries if desired.
Cooking Tips: If you prefer a sweeter ice cream, feel free to add more sweetened condensed milk. For a lighter version, you can substitute half of the heavy cream with Greek yogurt. Enjoy this refreshing dessert on a warm day!
Classic Elegance: Coffee Ice Cream Indulgence
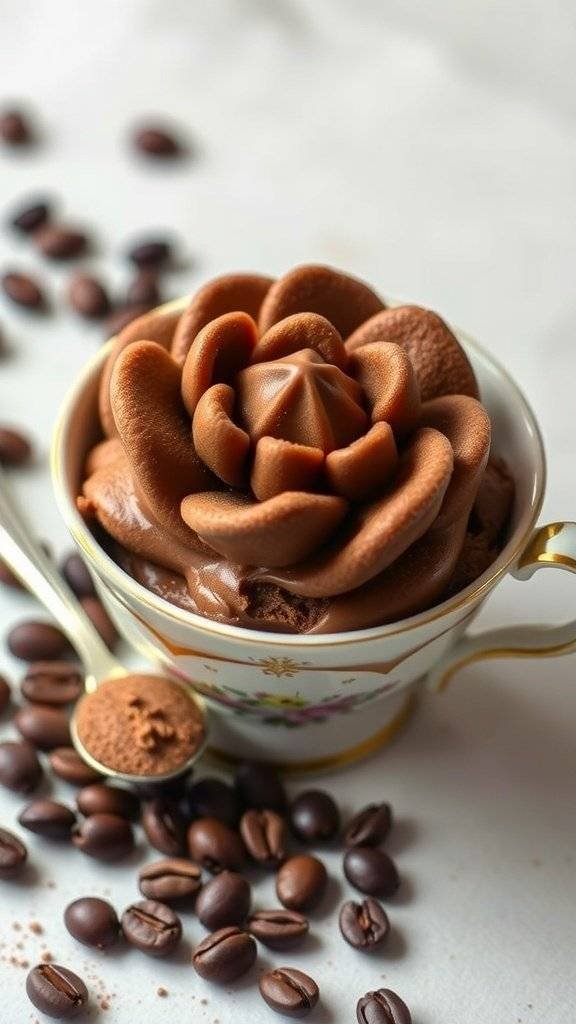
The image captures a delightful serving of coffee ice cream, elegantly presented in a vintage cup. The rich, creamy scoops are topped with a drizzle of syrup, making it a tempting treat. Surrounding the cup are scattered coffee beans and old newspaper clippings, adding a nostalgic touch that reflects the charm of the 1920s.
This era was known for its sophisticated desserts, and ice cream moulded dishes were a popular way to serve frozen delights. Coffee ice cream, in particular, was a favorite, combining the bold flavor of coffee with the smoothness of ice cream. It’s a classic indulgence that brings a sense of nostalgia and comfort.
Making your own coffee ice cream at home is easier than you might think. You can enjoy the process of creating a dessert that not only tastes amazing but also looks stunning when served. Let’s dive into a simple recipe that will bring the elegance of the 1920s right to your kitchen.
Ingredients
- 2 cups heavy cream
- 1 cup whole milk
- 3/4 cup granulated sugar
- 1 tablespoon instant coffee granules
- 1 teaspoon vanilla extract
- 1/2 cup chocolate syrup (optional, for drizzling)
Instructions
- Combine the Ingredients: In a mixing bowl, whisk together the heavy cream, whole milk, sugar, instant coffee granules, and vanilla extract until the sugar is dissolved.
- Chill the Mixture: Cover the bowl and refrigerate the mixture for at least 2 hours. This step helps enhance the flavors.
- Churn the Ice Cream: Pour the chilled mixture into an ice cream maker and churn according to the manufacturer’s instructions until it reaches a soft-serve consistency.
- Freeze: Transfer the ice cream to an airtight container and freeze for at least 4 hours or until firm.
- Serve: Scoop the ice cream into elegant cups, drizzle with chocolate syrup if desired, and enjoy!
Cooking Tips: For a richer flavor, consider using freshly brewed coffee instead of instant coffee. You can also experiment with adding a pinch of salt to enhance the sweetness. If you don’t have an ice cream maker, pour the mixture into a shallow dish and stir every 30 minutes until it’s frozen.
Ingredient Substitutions: If you prefer a lighter version, you can use half-and-half instead of heavy cream. For a dairy-free option, almond or coconut milk can be used, though the texture may vary slightly.
Exotic Flavor: Honey Lavender Ice Cream
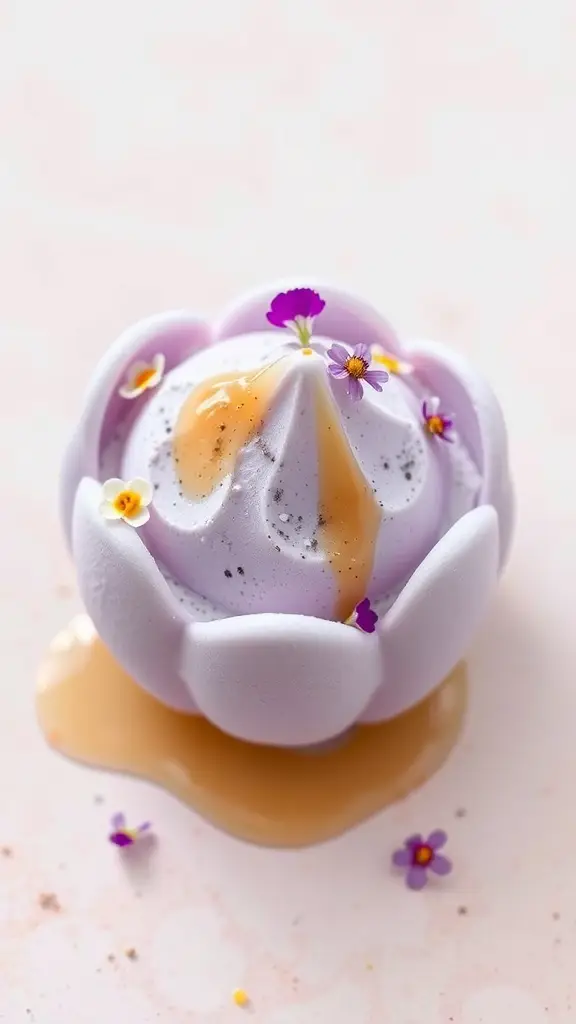
Honey lavender ice cream is a delightful treat that brings a unique twist to traditional flavors. The soft purple hue of the ice cream, combined with the delicate floral notes of lavender, creates an inviting visual. This ice cream is often served in charming, moulded dishes that add a touch of nostalgia, reminiscent of the 1920s ice cream parlors.
The sweetness of honey complements the subtle earthiness of lavender, making each bite a refreshing experience. It’s perfect for warm days or as a special dessert for gatherings. The presentation, with honey drizzled on top and garnished with edible flowers, makes it a feast for the eyes as well.
To make your own honey lavender ice cream, you’ll need simple ingredients that you might already have at home. This recipe is easy to follow and will surely impress your friends and family.
Ingredients
- 2 cups heavy cream
- 1 cup whole milk
- 3/4 cup honey
- 2 tablespoons dried culinary lavender
- 1 teaspoon vanilla extract
- 1/4 teaspoon salt
- 1 tablespoon lemon juice (optional, for brightness)
Instructions
- Infuse the Cream: In a saucepan, combine the heavy cream, whole milk, and dried lavender. Heat over medium until it just starts to simmer. Remove from heat and let it steep for about 30 minutes.
- Strain the Mixture: After steeping, strain the mixture through a fine mesh sieve to remove the lavender. Return the liquid to the saucepan.
- Add Sweetness: Stir in the honey, vanilla extract, salt, and lemon juice (if using). Heat gently until the honey is fully dissolved.
- Chill: Allow the mixture to cool to room temperature, then refrigerate for at least 4 hours, or overnight for best results.
- Churn: Pour the chilled mixture into an ice cream maker and churn according to the manufacturer’s instructions until it reaches a soft-serve consistency.
- Freeze: Transfer the ice cream to a moulded dish or an airtight container and freeze for at least 4 hours to firm up.
- Serve: Scoop the ice cream into bowls, drizzle with extra honey, and garnish with edible flowers if desired.
Cooking Tips: If you can’t find culinary lavender, you can use dried chamomile or mint for a different flavor. For a creamier texture, consider adding a tablespoon of vodka to the mixture before churning. This helps prevent ice crystals from forming.
Enjoy this unique flavor that captures the essence of a bygone era!
Seasonal Treat: Pumpkin Spice Ice Cream Mold
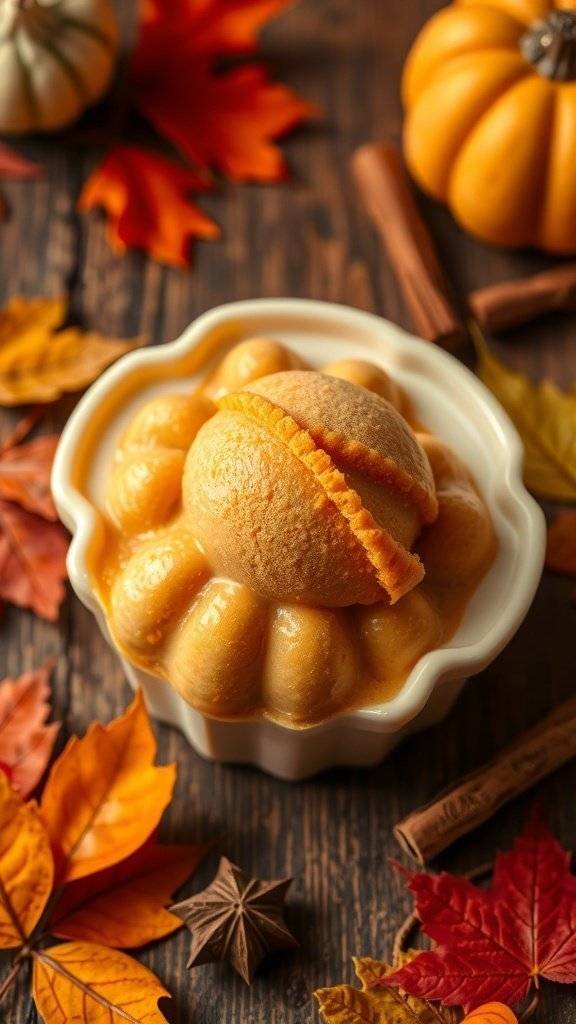
Picture a cozy autumn day, leaves crunching underfoot, and the scent of pumpkin spice wafting through the air. This delightful image captures a charming ice cream mold shaped like a pumpkin, perfect for the season. The warm colors of orange and brown evoke the spirit of fall, making it an ideal treat for gatherings or quiet evenings at home.
Ice cream molded dishes like this one bring a touch of nostalgia. They remind us of simpler times when desserts were not just about taste but also about presentation. This pumpkin-shaped mold is not only fun but also a great way to serve a seasonal favorite: pumpkin spice ice cream.
Making your own pumpkin spice ice cream is easier than you think. You can enjoy the creamy texture and rich flavors without the need for an ice cream machine. Let’s get into the ingredients and steps to create this delightful seasonal treat!
Ingredients
- 2 cups heavy cream
- 1 cup sweetened condensed milk
- 1 cup pumpkin puree
- 1 teaspoon vanilla extract
- 1 teaspoon pumpkin pie spice
- 1/2 teaspoon ground cinnamon
- 1/4 teaspoon salt
Instructions
- Mix Ingredients: In a large bowl, combine heavy cream, sweetened condensed milk, pumpkin puree, vanilla extract, pumpkin pie spice, ground cinnamon, and salt. Whisk until smooth.
- Pour into Mold: Carefully pour the mixture into the pumpkin-shaped ice cream mold. Tap it gently on the counter to remove any air bubbles.
- Freeze: Cover the mold with a lid or plastic wrap. Freeze for at least 6 hours or until solid.
- Serve: To release the ice cream, run warm water over the outside of the mold for a few seconds. Invert the mold onto a serving plate and gently lift it off.
- Enjoy: Slice and serve your pumpkin spice ice cream. It’s perfect for a fall dessert!
Cooking Tips: If you want a lighter version, you can substitute half of the heavy cream with whole milk. For a dairy-free option, use coconut cream and a dairy-free condensed milk alternative. Enjoy this seasonal treat with friends and family, and savor the flavors of fall!
Decadent Layers: Neapolitan Ice Cream Mold
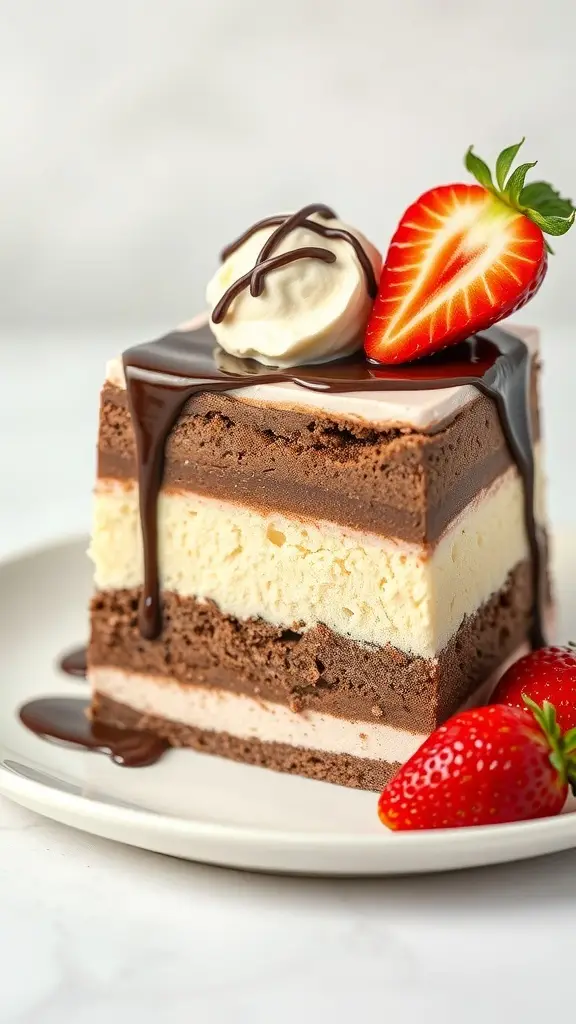
Neapolitan ice cream is a classic treat, and its layered look makes it a standout dessert. The image shows a beautifully molded slice of Neapolitan ice cream, showcasing three distinct flavors: chocolate, vanilla, and strawberry. Each layer is perfectly defined, creating a visual feast that invites you to dig in.
This style of ice cream, often served in a rectangular mold, is not just about taste; it’s about presentation. The combination of flavors and colors makes it a favorite for parties and gatherings. Ice cream moulded dishes like this one bring a touch of nostalgia, reminding us of simpler times when desserts were crafted with care.
To recreate this delightful dessert at home, you’ll need a few basic ingredients and some patience. The result will be a stunning centerpiece for any occasion!
Ingredients
- 2 cups chocolate ice cream
- 2 cups vanilla ice cream
- 2 cups strawberry ice cream
- 1/2 cup chocolate syrup
- Whipped cream for topping
- Fresh strawberries for garnish
Instructions
- Prepare the Mold: Start by lining a loaf pan with plastic wrap, leaving some overhang for easy removal later.
- Layer the Ice Cream: Spoon the chocolate ice cream into the bottom of the mold, smoothing it out evenly. Freeze for about 30 minutes until firm.
- Add Vanilla: Next, add the vanilla ice cream on top of the chocolate layer. Smooth it out and freeze for another 30 minutes.
- Finish with Strawberry: Finally, add the strawberry ice cream layer. Smooth the top and cover with plastic wrap. Freeze for at least 4 hours, or overnight for best results.
- Serve: To serve, remove the ice cream from the mold using the plastic wrap. Slice into pieces and drizzle with chocolate syrup. Top with whipped cream and a fresh strawberry.
Cooking Tips: If you want to mix things up, try using different flavors of ice cream or adding layers of fruit in between. You can also substitute the chocolate syrup with caramel or fruit sauces for a different twist.
Ingredient Substitutions: If you’re dairy-free, look for non-dairy ice cream options. You can also use homemade ice cream if you prefer to make it from scratch.
Fruity Delight: Raspberry Sorbet Mold
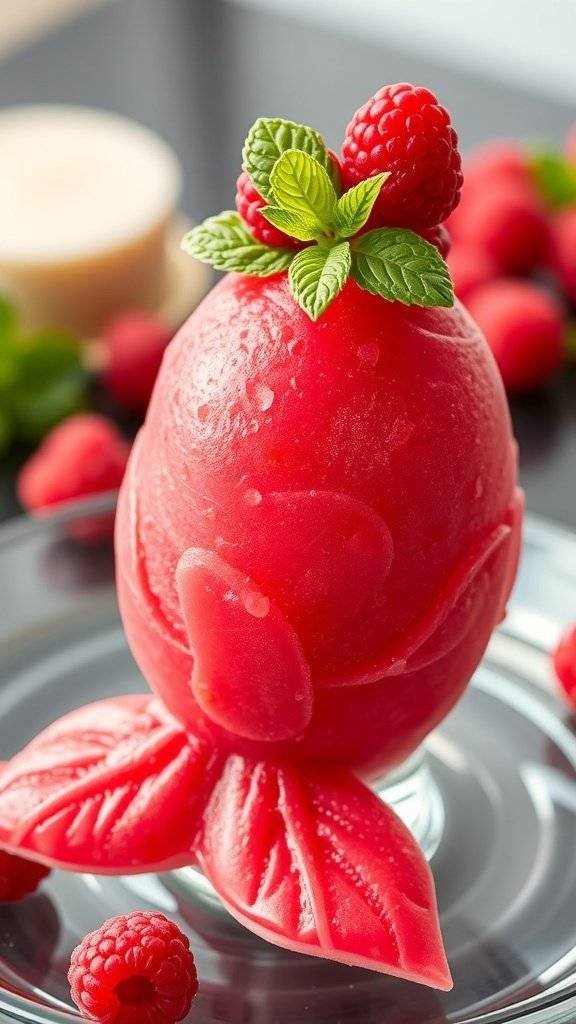
Raspberry sorbet is a classic treat that brings a burst of fruity flavor to any occasion. This delightful dessert captures the essence of summer with its vibrant color and refreshing taste. The image shows a beautifully molded raspberry sorbet, topped with a scoop and garnished with fresh mint leaves. It’s a perfect way to showcase the lost art of ice cream molded dishes from the 1920s.
Making raspberry sorbet is quite simple. You can enjoy it as a light dessert or serve it as a palate cleanser between courses. The smooth texture and fruity flavor make it a crowd-pleaser. Plus, it’s dairy-free, making it suitable for various dietary preferences.
To make this sorbet, you’ll need fresh raspberries, sugar, lemon juice, and water. The key is to use ripe raspberries for the best flavor. If you don’t have fresh raspberries, frozen ones work just as well. You can also adjust the sweetness by adding more or less sugar based on your taste.
Here’s a complete recipe to create your own raspberry sorbet:
Classic Comfort: Butterscotch Ice Cream Mold
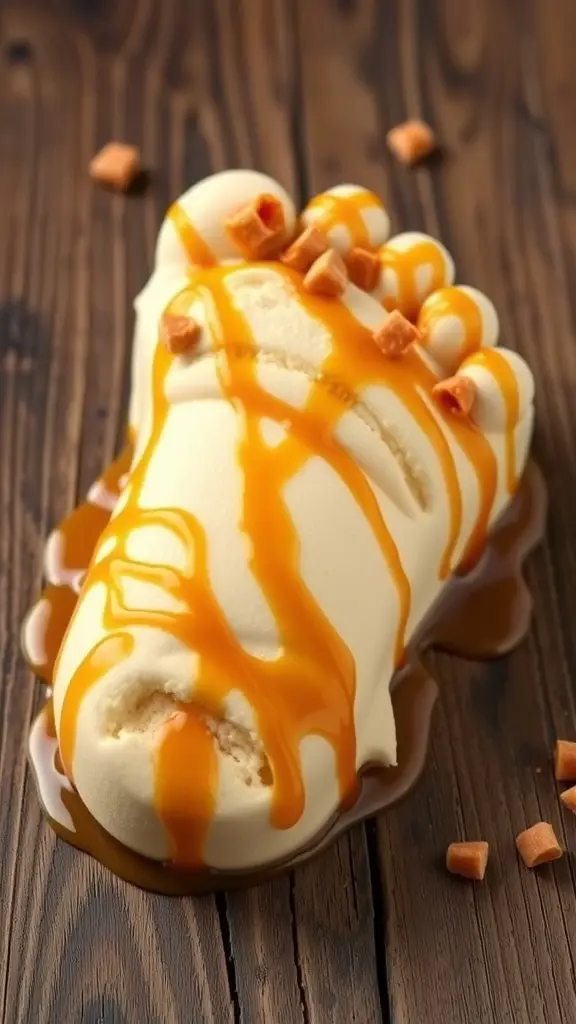
Butterscotch ice cream is a timeless treat that takes us back to simpler days. The creamy texture and rich flavor make it a favorite for many. In the 1920s, ice cream moulded dishes were all the rage, and this butterscotch version fits right in with that nostalgic vibe.
The image showcases a delightful bowl of butterscotch ice cream, drizzled with caramel and topped with crunchy bits. This presentation not only looks appealing but also invites you to dig in. The combination of flavors and textures is sure to please anyone’s palate.
Making this ice cream at home is easier than you think! You can customize it to your liking, whether you want it extra sweet or with a hint of salt. Plus, it’s a fun way to bring a bit of vintage charm to your dessert table.
Ingredients
- 2 cups heavy cream
- 1 cup whole milk
- 3/4 cup brown sugar
- 1/4 cup granulated sugar
- 1 teaspoon vanilla extract
- 1/2 teaspoon salt
- 1/4 cup butterscotch chips
- Caramel sauce for drizzling
Instructions
- Mix the Cream: In a large bowl, whisk together the heavy cream, whole milk, brown sugar, granulated sugar, vanilla extract, and salt until well combined.
- Heat the Mixture: Pour the mixture into a saucepan and heat over medium heat. Stir until the sugars dissolve, but do not let it boil.
- Add Butterscotch Chips: Remove from heat and stir in the butterscotch chips until melted and smooth.
- Chill the Mixture: Let the mixture cool to room temperature, then refrigerate for at least 2 hours or until completely chilled.
- Churn: Pour the chilled mixture into an ice cream maker and churn according to the manufacturer’s instructions.
- Freeze: Transfer the churned ice cream to a container and freeze for at least 4 hours, or until firm.
- Serve: Scoop the ice cream into bowls, drizzle with caramel sauce, and enjoy!
Cooking Tips: If you want a lighter version, you can substitute half of the heavy cream with Greek yogurt. For a nutty twist, add chopped pecans or walnuts into the mix before freezing.
Ingredient Substitutions: If you don’t have butterscotch chips, you can use toffee bits or even chocolate chips for a different flavor profile.
Exquisite Flavor: Matcha Green Tea Ice Cream
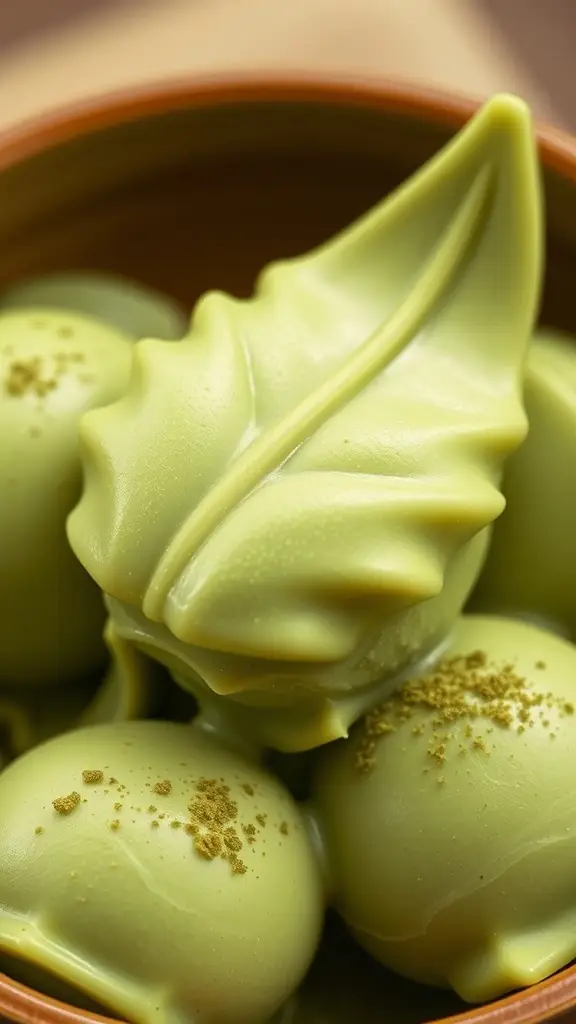
Matcha green tea ice cream is a delightful treat that embodies the elegance of the 1920s ice cream molding trend. The vibrant green color and smooth texture make it visually appealing, while the unique flavor offers a refreshing twist on traditional ice cream.
The image showcases perfectly molded scoops of matcha ice cream, resting in a charming bowl. The rich green hue hints at the quality of matcha used, promising a taste that is both earthy and sweet. This ice cream not only looks good but also brings a sense of nostalgia, reminiscent of the intricate ice cream moulded dishes popular in the past.
Making matcha green tea ice cream at home is easier than you might think. With just a few simple ingredients, you can recreate this exquisite flavor and impress your friends and family.
Ingredients
- 2 cups heavy cream
- 1 cup whole milk
- 3/4 cup granulated sugar
- 1/4 cup matcha green tea powder
- 1 teaspoon vanilla extract
- Pinch of salt
Instructions
- Mix Ingredients: In a medium bowl, whisk together the heavy cream, whole milk, sugar, matcha powder, vanilla extract, and salt until smooth and well combined.
- Chill Mixture: Cover the bowl and refrigerate the mixture for at least 2 hours, or overnight for best results.
- Churn Ice Cream: Pour the chilled mixture into an ice cream maker and churn according to the manufacturer’s instructions until it reaches a soft-serve consistency.
- Mold the Ice Cream: Transfer the ice cream into ice cream moulded dishes or a container. Smooth the top with a spatula.
- Freeze: Cover and freeze for at least 4 hours, or until firm.
- Serve: Scoop the ice cream into bowls and enjoy!
Cooking Tips: If you don’t have an ice cream maker, you can pour the mixture into a shallow dish and freeze it. Stir every 30 minutes until it reaches the desired consistency.
Ingredient Substitutions: For a lighter version, you can use half-and-half instead of heavy cream. If you prefer a dairy-free option, try coconut milk and a dairy-free cream substitute.
Nutty And Sweet: Almond Joy Ice Cream
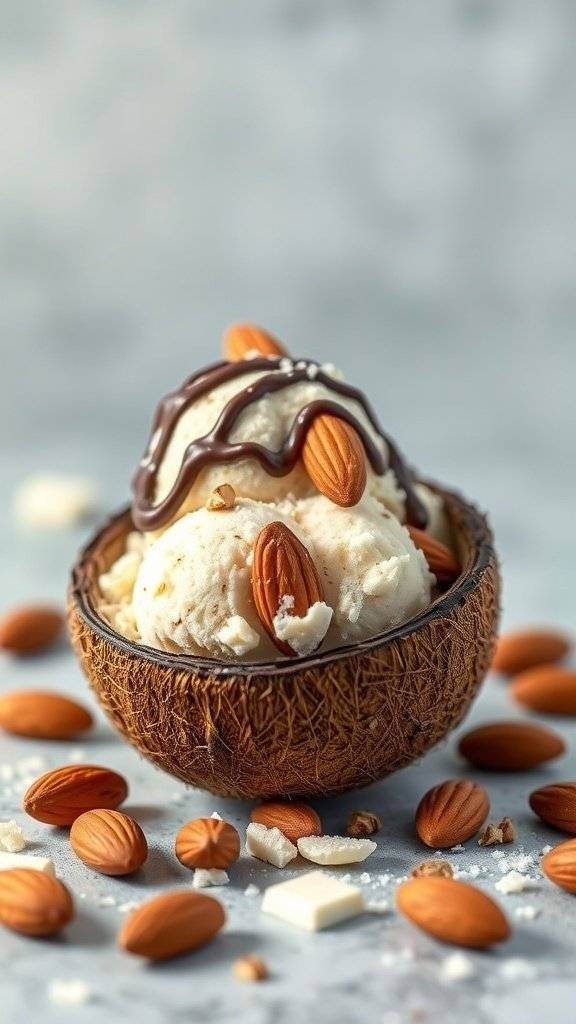
Picture a delightful scoop of ice cream nestled in a charming coconut shell, topped with crunchy almonds and a drizzle of rich chocolate. This image captures the essence of Almond Joy Ice Cream, a treat that brings together the nutty flavor of almonds and the sweetness of chocolate, reminiscent of the classic candy bar.
In the 1920s, ice cream moulded dishes were all the rage, showcasing creativity and flair. This Almond Joy Ice Cream pays homage to that era, combining nostalgia with modern flavors. The coconut shell not only serves as a unique serving dish but also adds a tropical twist to the experience.
To make this delicious ice cream at home, gather your ingredients and follow the simple steps below. You can easily customize the recipe by using different nuts or chocolate types based on your preference.
Ingredients
- 2 cups heavy cream
- 1 cup whole milk
- 3/4 cup granulated sugar
- 1 teaspoon vanilla extract
- 1/2 cup shredded coconut
- 1/2 cup chopped almonds
- 1/2 cup chocolate chips
Instructions
- Mix the Base: In a bowl, whisk together the heavy cream, whole milk, sugar, and vanilla extract until the sugar dissolves.
- Add the Goodies: Stir in the shredded coconut, chopped almonds, and chocolate chips. Mix well.
- Chill: Cover the mixture and refrigerate for at least 2 hours, or overnight for the best flavor.
- Churn: Pour the chilled mixture into an ice cream maker and churn according to the manufacturer’s instructions until it reaches a soft-serve consistency.
- Freeze: Transfer the ice cream to a container and freeze for at least 4 hours until firm.
- Serve: Scoop the ice cream into coconut shells or bowls, and top with extra almonds and a drizzle of chocolate if desired.
Cooking Tips: If you don’t have an ice cream maker, you can freeze the mixture in a shallow dish and stir it every 30 minutes until it reaches the desired consistency.
Ingredient Substitutions: For a lighter version, you can use half-and-half instead of heavy cream. You can also swap out almonds for walnuts or pecans for a different nutty flavor.
Choco-Mint Bliss: Mint Chocolate Chip Ice Cream Mold
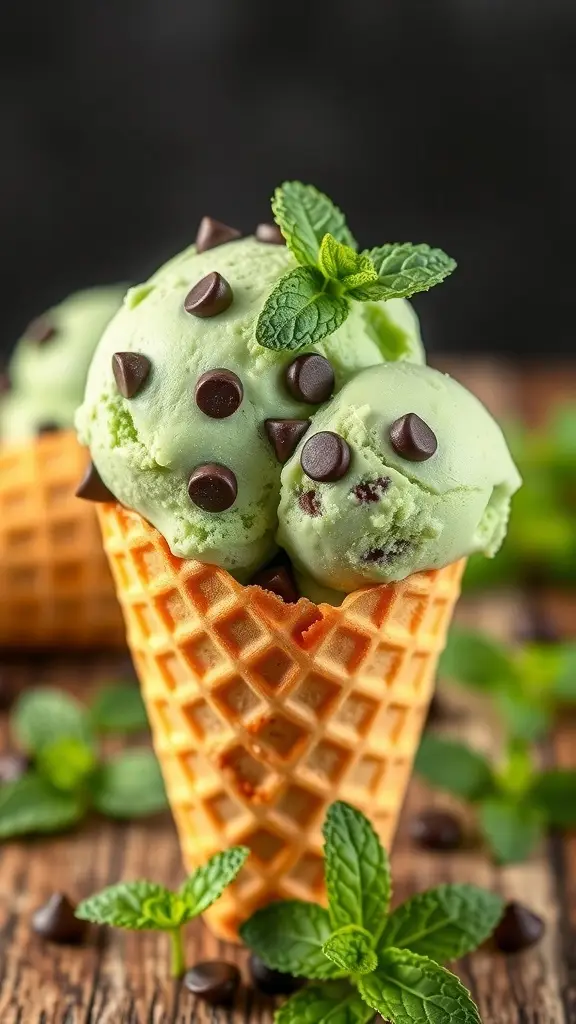
Mint chocolate chip ice cream is a classic treat that brings a refreshing twist to the dessert table. The vibrant green color and the rich chocolate chips make it visually appealing and delicious. This ice cream is often molded into fun shapes, adding a playful element to any gathering.
In the 1920s, ice cream moulded dishes were all the rage. They were not just about taste but also about presentation. Imagine serving a beautifully molded mint chocolate chip ice cream at a summer party, with its cool mint flavor and crunchy chocolate bits. It’s a nostalgic nod to a time when desserts were crafted with care and creativity.
To make your own mint chocolate chip ice cream, you’ll need a few simple ingredients. It’s a fun project that can be enjoyed by the whole family. Plus, you can customize it to your liking!
Ingredients
- 2 cups heavy cream
- 1 cup whole milk
- 3/4 cup granulated sugar
- 1 teaspoon pure peppermint extract
- 1/2 cup mini chocolate chips
- Green food coloring (optional)
Instructions
- Mix the Base: In a large bowl, whisk together the heavy cream, whole milk, sugar, and peppermint extract until the sugar dissolves.
- Add Color: If you want a vibrant green color, add a few drops of green food coloring and mix until you reach your desired shade.
- Chill the Mixture: Cover the bowl and refrigerate the mixture for at least 2 hours or until it’s completely chilled.
- Churn: Pour the chilled mixture into an ice cream maker and churn according to the manufacturer’s instructions. This usually takes about 20-25 minutes.
- Add Chocolate Chips: Once the ice cream is nearly done, fold in the mini chocolate chips.
- Mold the Ice Cream: Transfer the ice cream to a mold or a container. If using a mold, pack it tightly. Cover and freeze for at least 4 hours or until firm.
- Serve: When ready to serve, let the ice cream sit at room temperature for a few minutes before unmolding. Enjoy your homemade mint chocolate chip ice cream!
Cooking Tips: If you don’t have an ice cream maker, you can pour the mixture into a shallow dish and stir every 30 minutes until it reaches the desired consistency. For a richer flavor, consider using dark chocolate chips instead of mini ones.
Ingredient Substitutions: You can substitute the heavy cream with coconut cream for a dairy-free version. If you prefer a less sweet ice cream, reduce the sugar to 1/2 cup.
Delightful Surprise: Birthday Cake Ice Cream Mold
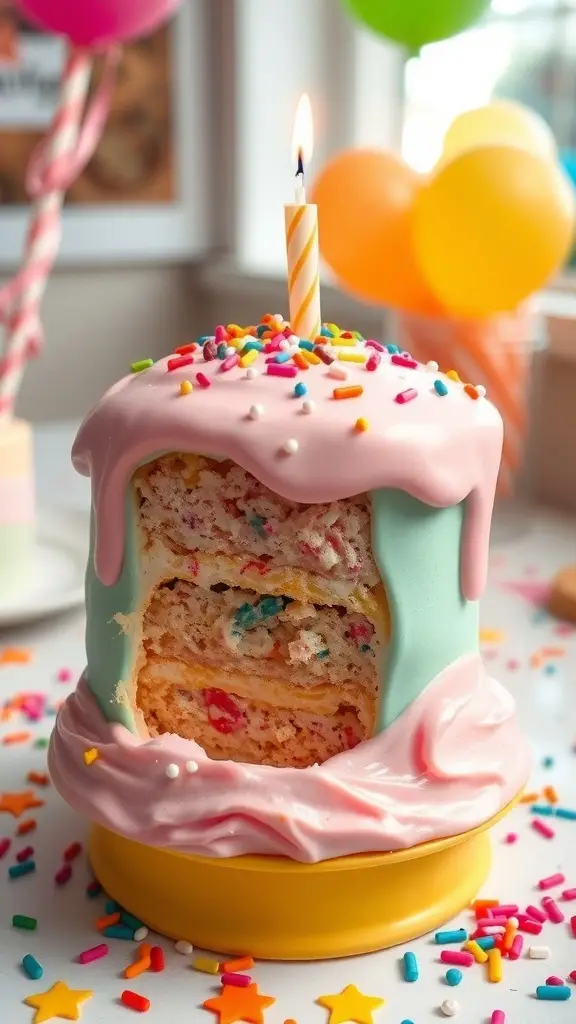
Picture a fun birthday celebration with a twist! This delightful birthday cake ice cream mold brings back the charm of the 1920s. It combines the joy of cake and ice cream into one delightful treat. The vibrant colors and festive sprinkles make it a perfect centerpiece for any party.
The mold itself resembles a classic laundry basket, adding a playful touch to the dessert. Topped with whipped cream and candles, it’s not just a dessert; it’s a showstopper. This nostalgic treat is a reminder of simpler times when ice cream molded dishes were a popular way to celebrate special occasions.
To recreate this fun dessert at home, gather the ingredients and follow the simple steps below. You can customize it with your favorite cake flavors and ice cream varieties!
Ingredients
- 1 box of cake mix (your favorite flavor)
- 3 cups of ice cream (vanilla or your choice)
- 1 cup of whipped cream
- Sprinkles for decoration
- 2 birthday candles
Instructions
- Prepare the Cake: Bake the cake according to the package instructions. Let it cool completely before removing it from the pan.
- Layer the Ice Cream: Once the cake is cool, slice it into layers. In a mold, alternate layers of cake and ice cream, starting with cake at the bottom.
- Freeze: Cover the mold with plastic wrap and freeze for at least 4 hours or until firm.
- Serve: Once frozen, carefully remove the dessert from the mold. Top with whipped cream, sprinkles, and place the candles on top.
- Enjoy: Slice and serve this fun birthday treat to your guests!
Cooking Tips: If you want to make this dessert gluten-free, use a gluten-free cake mix. You can also swap out the ice cream for a dairy-free alternative if needed. Get creative with the flavors—chocolate cake with mint ice cream is a delicious combo!
Refreshing Treat: Watermelon Sorbet Mold
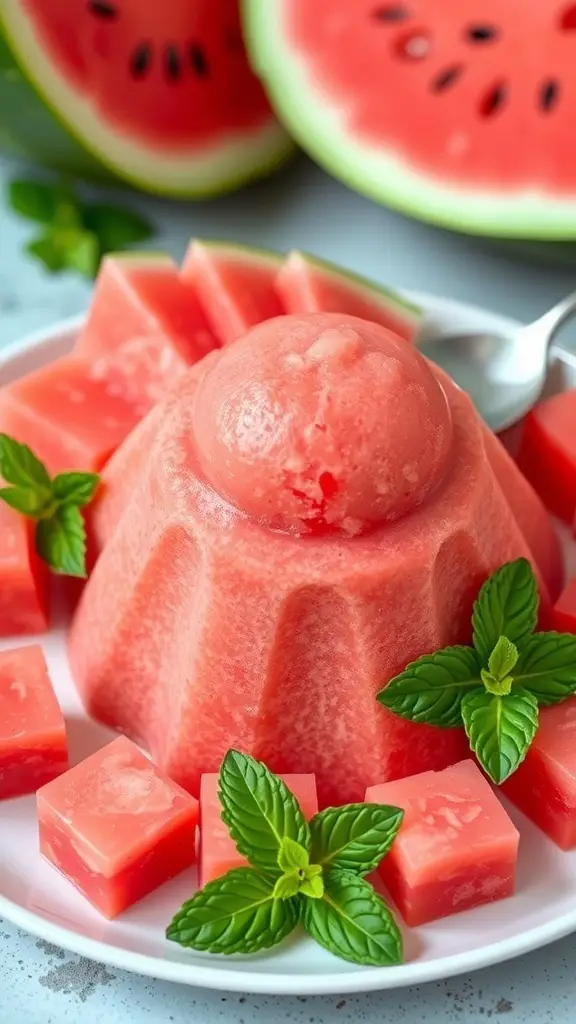
Watermelon sorbet is a delightful treat that captures the essence of summer. This refreshing dessert is not only visually appealing but also incredibly easy to make. The vibrant pink color and icy texture make it perfect for hot days. Imagine serving this beautiful molded sorbet at your next gathering; it’s sure to impress!
In the 1920s, ice cream molded dishes were all the rage, and this watermelon sorbet fits right into that nostalgic trend. The charming shape adds a playful touch, making it a centerpiece on any dessert table. Plus, it’s a great way to enjoy the natural sweetness of watermelon without any added sugars.
To make this sorbet, you’ll need just a few simple ingredients. Fresh watermelon is the star of the show, but you can also add a splash of lime juice for a zesty kick. The process is straightforward, and you can easily customize it to suit your taste. If you want to make it a bit creamier, consider adding a splash of coconut milk.
Here’s how to create your own watermelon sorbet mold:
You may also like:
– 43 Easy And Quick Cocktails From The 1960’s
– 27 Must-Try Tequila Cocktails Inspired by Gotham City
– 25 Cocktails Inspired by Gotham City Nightlife
If you enjoyed this blog you can visit us or check out our other blogs and learn a bit about us.
Disclaimer: This blog post is inspired by fictional universes and characters created by their respective rights holders. All related content and imagery remain the property of their respective rights holder. This fan-inspired content is for entertainment and commentary purposes only and is not affiliated with or endorsed by HBO, Disney, Warner Bros., Lionsgate, or any other rights holders. To explore the official source material, please visit:
HBO