
1960’s inspired charcuterie boards blend classic elements with creative flair, showcasing mouthwatering selections that reflect the colorful spirit of the decade. From vibrant cheeses to iconic meats, these boards are not just meals; they’re a feast for the eyes that invite everyone to come together and celebrate good food and good times.
Classic Charcuterie Board: A Timeless Taste Of The ’60s
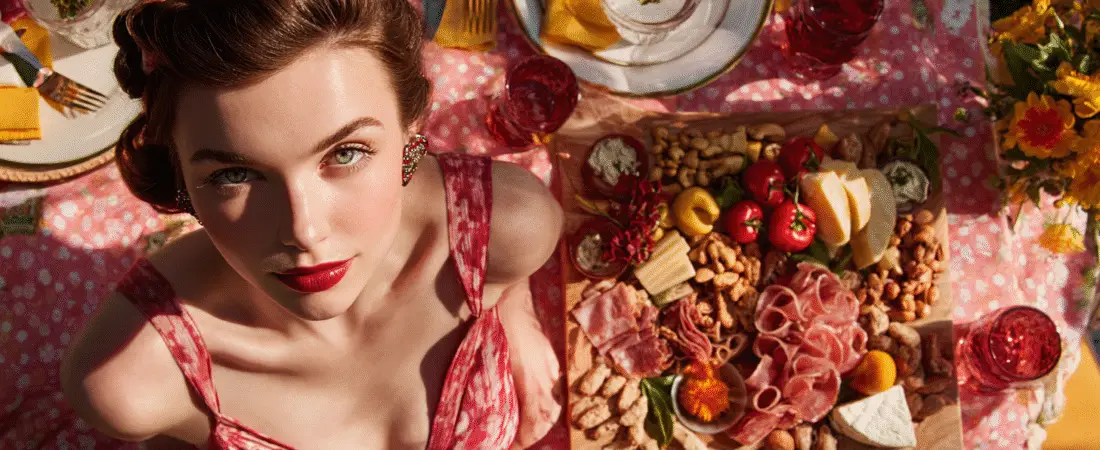
Charcuterie boards have a special place in the culinary world, especially when we look back at the 1960s. This era was all about gatherings, and what better way to celebrate than with a beautifully arranged board? The image captures a classic charcuterie board filled with a delightful mix of meats, cheeses, fruits, and nuts, showcasing the vibrant colors and textures that were popular in that decade.
The board features an array of cured meats like salami and prosciutto, paired with a selection of cheeses that range from creamy to sharp. Fresh fruits, such as grapes and cherry tomatoes, add a pop of color and sweetness. Nuts and olives provide a crunchy contrast, making each bite exciting. The inclusion of honey and mustard dips brings a touch of sophistication, perfect for any gathering.
This classic charcuterie board is not just about taste; it’s a visual feast that reflects the social spirit of the ’60s. Friends and family would gather around, sharing stories and laughter, all while enjoying the delicious offerings laid out before them. It’s a timeless tradition that continues to inspire modern charcuterie boards today.
Ingredients
- 1 cup sliced salami
- 1 cup sliced prosciutto
- 1 cup assorted cheeses (cheddar, brie, blue cheese)
- 1 cup mixed nuts (almonds, walnuts, pecans)
- 1 cup fresh grapes
- 1 cup cherry tomatoes
- 1/2 cup olives
- 1/4 cup honey
- 1/4 cup mustard
- 1 cup sliced fruits (peaches, apples)
Instructions
- Arrange the sliced meats on one side of a large serving platter.
- Place the assorted cheeses next to the meats, ensuring a variety of textures and flavors.
- Fill in the gaps with mixed nuts, fresh grapes, and cherry tomatoes.
- Add olives and sliced fruits for extra color and taste.
- In small bowls, serve honey and mustard for dipping.
- Invite friends and family to gather around and enjoy!
Retro Veggie Platter: A Colorful Twist On Classic Dishes
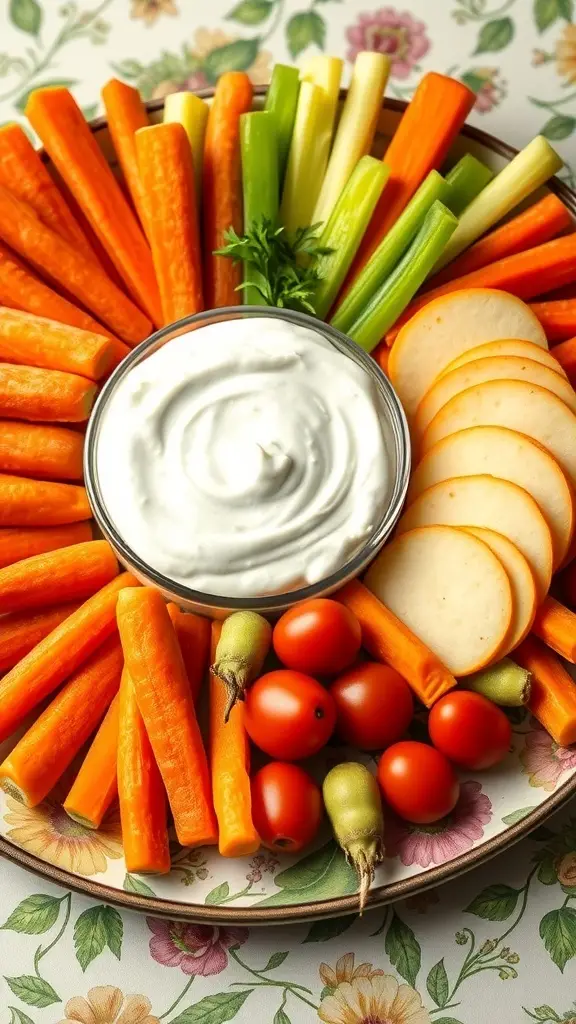
Retro veggie platters are making a comeback, and they bring a delightful pop of color to any gathering. This vibrant spread features fresh carrots, celery, and cherry tomatoes, all arranged beautifully around a creamy dip. The classic presentation is reminiscent of the 1960s, where simplicity and freshness were key.
The bright orange of the carrots contrasts nicely with the green celery and the rich red of the tomatoes. Adding a creamy dip in the center not only enhances the flavor but also invites guests to dig in. This platter is not just a feast for the eyes; it’s a healthy option that complements any charcuterie board.
Creating your own veggie platter is easy and fun. You can mix and match your favorite vegetables and dips. It’s a great way to encourage everyone to enjoy their greens while reminiscing about the past. Plus, it’s a fantastic conversation starter at parties!
Ingredients
- 2 cups baby carrots
- 2 cups celery sticks
- 1 cup cherry tomatoes
- 1 cup sliced cucumbers
- 1 cup ranch dressing or your favorite dip
- Fresh parsley for garnish
Instructions
- Prepare the Vegetables: Wash and cut the celery into sticks and slice the cucumbers. Arrange the baby carrots, celery sticks, cherry tomatoes, and cucumber slices on a large platter.
- Make the Dip: If using ranch dressing, simply pour it into a small bowl. If you prefer a homemade dip, mix sour cream with herbs and spices to taste.
- Assemble: Place the bowl of dip in the center of the platter. Garnish with fresh parsley around the dip for a pop of color.
- Serve: Enjoy your colorful veggie platter at your next gathering, and watch it disappear!
Gourmet Cheese Selection: The Cream Of The Crop
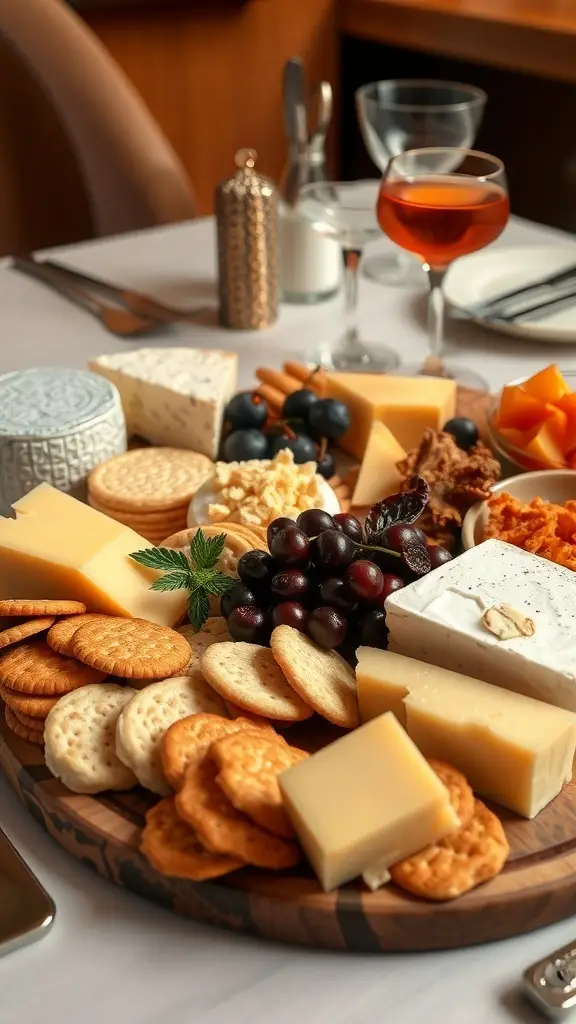
When it comes to charcuterie boards, cheese is the star of the show. The image captures a beautiful spread featuring a variety of gourmet cheeses, each with its own unique flavor and texture. From creamy brie to sharp cheddar, the selection is sure to impress any cheese lover.
The arrangement is visually appealing, with cheeses paired alongside crackers, fruits, and nuts. This not only enhances the taste but also adds a pop of color to the board. The use of fresh herbs, like mint, brings a refreshing touch, making the presentation even more inviting.
Choosing the right cheeses is essential. A well-rounded selection typically includes a soft cheese, a hard cheese, a blue cheese, and a flavored cheese. This variety allows guests to explore different tastes and textures, making the experience enjoyable.
Now, let’s create a simple yet delicious cheese board that captures the essence of gourmet selections.
Ingredients
- 1 wheel of brie cheese
- 1 block of aged cheddar
- 1 wedge of blue cheese
- 1 log of goat cheese
- 1 cup assorted crackers
- 1 cup grapes
- 1/2 cup dried apricots
- Fresh mint leaves for garnish
Instructions
- Prepare the Board: Start with a large wooden board or platter. Arrange the cheeses, leaving space between each for crackers and fruits.
- Add Crackers: Place the assorted crackers around the cheeses. Mix different shapes and sizes for visual interest.
- Incorporate Fruits: Scatter grapes and dried apricots around the board. These add sweetness and balance the savory flavors of the cheese.
- Garnish: Finish with fresh mint leaves for a pop of color and a hint of freshness.
- Serve: Pair with your favorite wine or beverage and enjoy the delightful flavors!
Savory Meat Delights: Charcuterie Reimagined

Charcuterie boards have taken a delightful turn, especially when inspired by the 1960s. This image showcases a vibrant spread of meats, pickles, and sauces, all artfully arranged on a wooden board. The variety of textures and colors makes it visually appealing and inviting.
In this reimagined take, classic meats like salami and prosciutto take center stage. They are complemented by crunchy pickles and tangy mustard, creating a balance of flavors. The warm tones of the wooden board and the background elements evoke a cozy, retro vibe that transports you back in time.
Creating your own charcuterie board can be a fun and creative process. You can mix and match different meats, cheeses, and accompaniments to suit your taste. The key is to focus on variety and presentation, making it a feast for the eyes as well as the palate.
Ingredients
- 8 ounces salami, sliced
- 8 ounces prosciutto, sliced
- 8 ounces pepperoni, sliced
- 1 cup pickles (dill or bread and butter)
- 1/2 cup mustard (yellow or Dijon)
- 1/2 cup honey
- 1/2 cup olives (green or black)
- 1 cup assorted crackers
- Fresh herbs for garnish (optional)
Instructions
- Prepare the Board: Start with a large wooden board or platter. Arrange the sliced meats in groups, creating a visually appealing layout.
- Add Accompaniments: Place small bowls of mustard and honey on the board. Scatter pickles and olives around the meats for added color and flavor.
- Include Crackers: Fill in gaps with assorted crackers, ensuring there’s something for everyone.
- Garnish: Finish with fresh herbs for a touch of color and freshness.
- Serve: Enjoy with friends and family, encouraging everyone to mix and match flavors!
Artisanal Bread & Crackers: A Toast To The Past
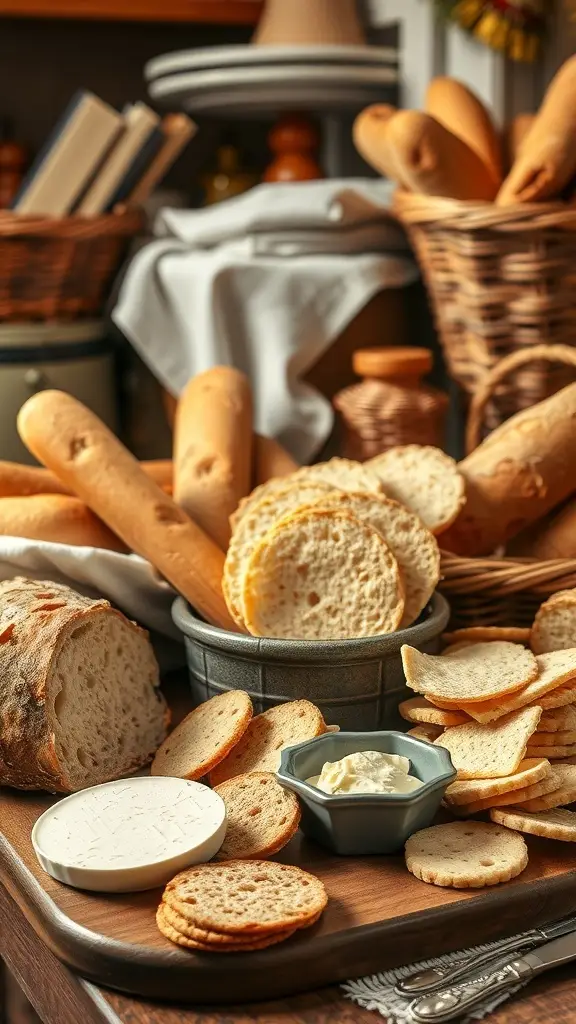
When you think of charcuterie boards, the first thing that comes to mind is often the delightful assortment of meats and cheeses. However, the foundation of any great board starts with artisanal bread and crackers. The image captures a beautiful spread of various breads and crackers, each with its own unique texture and flavor. From crusty loaves to delicate crackers, these elements bring a nostalgic touch to your charcuterie experience.
The rustic charm of the breads, with their golden crusts and soft interiors, invites you to take a bite. The crackers, neatly arranged, offer a satisfying crunch that pairs perfectly with creamy cheeses. This combination not only enhances the visual appeal of your board but also adds layers of flavor that transport you back to simpler times.
Incorporating these artisanal elements into your charcuterie boards is a nod to the past, celebrating the craftsmanship of traditional baking. Whether you’re hosting a gathering or enjoying a quiet evening at home, these breads and crackers elevate the experience, making each bite a toast to the past.
Ingredients
- 2 cups all-purpose flour
- 1 teaspoon salt
- 1 teaspoon sugar
- 1 teaspoon active dry yeast
- 3/4 cup warm water
- 1 tablespoon olive oil
- 1/2 cup grated Parmesan cheese (optional)
Instructions
- Mix the Dough: In a bowl, combine warm water, sugar, and yeast. Let it sit for about 5 minutes until foamy. Add flour, salt, and olive oil. Mix until a dough forms.
- Knead the Dough: Turn the dough onto a floured surface and knead for about 5 minutes until smooth. Place in a greased bowl, cover, and let rise for 1 hour.
- Shape and Bake: Preheat your oven to 400°F (200°C). Shape the dough into rolls or flatbreads. If using, sprinkle Parmesan cheese on top. Bake for 15-20 minutes until golden brown.
- Cool and Serve: Let the bread cool slightly before slicing. Serve alongside your favorite cheeses and meats on a charcuterie board.
Fruits Of The Season: A Sweet Touch To Savory Boards
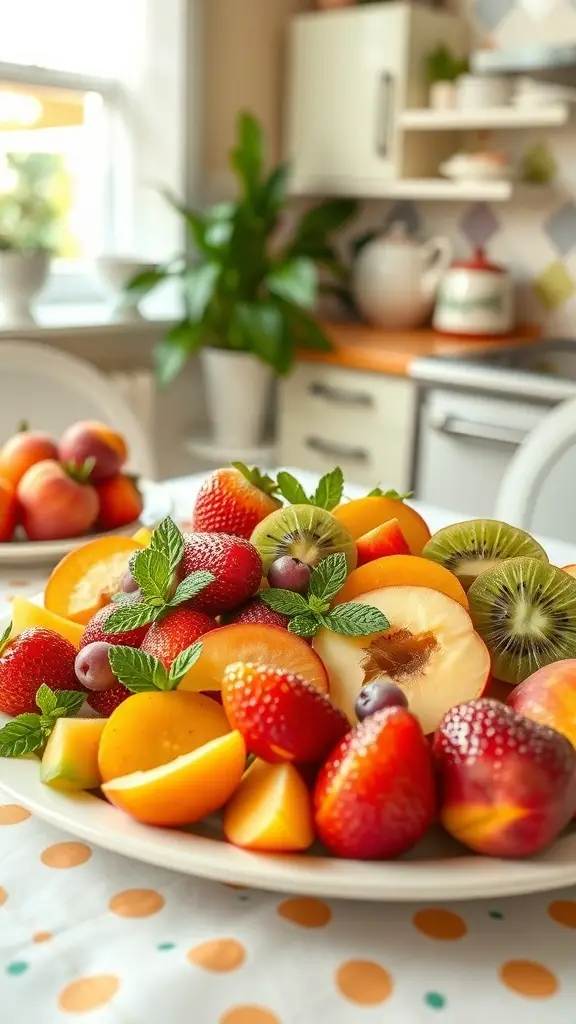
Fruits bring a delightful sweetness to charcuterie boards, balancing the savory elements beautifully. Imagine a vibrant platter filled with strawberries, kiwis, peaches, and grapes, all nestled together. The colors pop against the backdrop of a cozy kitchen, making it an inviting centerpiece for any gathering.
Seasonal fruits not only taste great but also add a fresh touch. Strawberries, with their bright red hue, are perfect for summer, while peaches and kiwis offer a juicy bite that complements cheeses and meats. A sprinkle of fresh mint leaves adds a hint of freshness and a lovely aroma.
When arranging your charcuterie board, think about variety. Mix textures and flavors to create a feast for the eyes and palate. Pair the fruits with nuts and cheeses for a well-rounded experience. The sweetness of the fruits will enhance the savory notes of the meats and cheeses, making every bite a pleasure.
Ingredients
- 2 cups strawberries, hulled
- 2 ripe peaches, sliced
- 2 kiwis, peeled and sliced
- 1 cup grapes, halved
- Fresh mint leaves for garnish
- Assorted cheeses (cheddar, brie, goat cheese)
- Assorted cured meats (salami, prosciutto)
- Mixed nuts (almonds, walnuts)
Instructions
- Prepare the Fruits: Wash and slice the strawberries, peaches, and kiwis. Halve the grapes.
- Arrange the Board: On a large platter, start by placing the cheeses and cured meats in different sections.
- Add the Fruits: Fill in the gaps with the prepared fruits, creating a colorful display.
- Garnish: Sprinkle fresh mint leaves over the fruits for a pop of color and flavor.
- Serve: Enjoy your charcuterie board with friends and family, pairing the fruits with the savory elements for a delightful experience.
Dips And Spreads: Adding Flavor And Fun
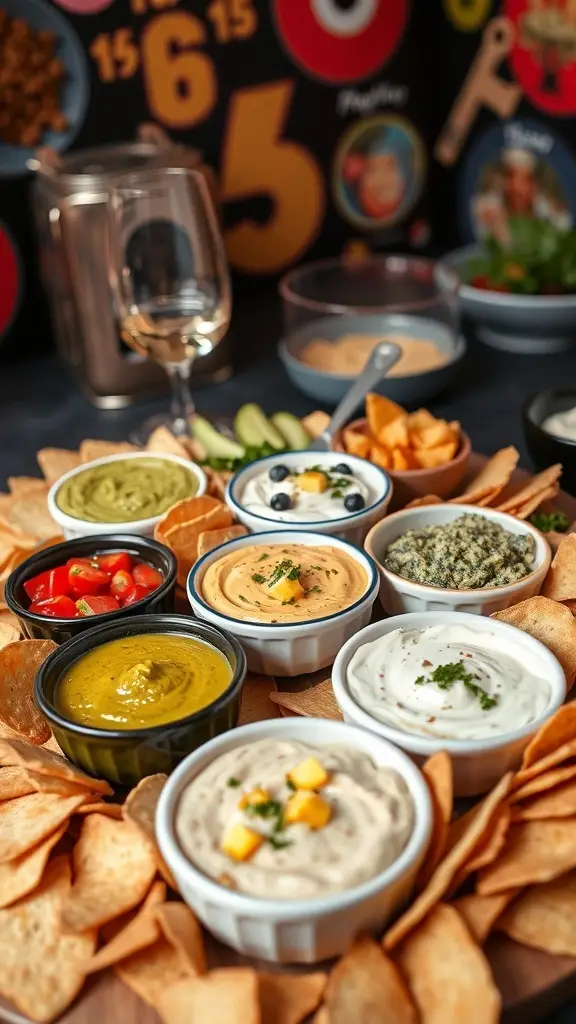
Dips and spreads are the life of any charcuterie board. They bring color, texture, and a burst of flavor that can elevate your snacking experience. Imagine a beautiful spread filled with vibrant dips, each one inviting you to dive in. Whether you’re hosting a party or just enjoying a cozy night in, these additions make everything more exciting.
In the image, you can see a delightful array of dips, each in its own little bowl. From creamy white dips to zesty green ones, there’s something for everyone. Pairing these with crispy chips or fresh veggies adds a fun crunch. The variety keeps things interesting and encourages everyone to try something new.
Creating your own dips is simple and rewarding. You can mix and match flavors to suit your taste. For a classic option, consider a creamy ranch or a spicy salsa. Want something unique? Try a mango chutney or a roasted red pepper dip. The possibilities are endless!
Ingredients
- 1 cup Greek yogurt
- 1/4 cup mayonnaise
- 1 tablespoon lemon juice
- 1 teaspoon garlic powder
- 1 teaspoon onion powder
- 1/2 teaspoon salt
- 1/2 teaspoon black pepper
- 1 tablespoon fresh herbs (like dill or parsley)
- 1 cup chopped veggies (like bell peppers, cucumbers, or carrots)
- Chips or crackers for serving
Instructions
- In a medium bowl, combine Greek yogurt, mayonnaise, lemon juice, garlic powder, onion powder, salt, and black pepper. Mix until smooth.
- Fold in the fresh herbs and chopped veggies. Adjust seasoning to taste.
- Chill in the refrigerator for at least 30 minutes to let the flavors meld.
- Serve with chips or crackers on the side for dipping.
Nuts And Seeds: Crunchy Additions For Texture
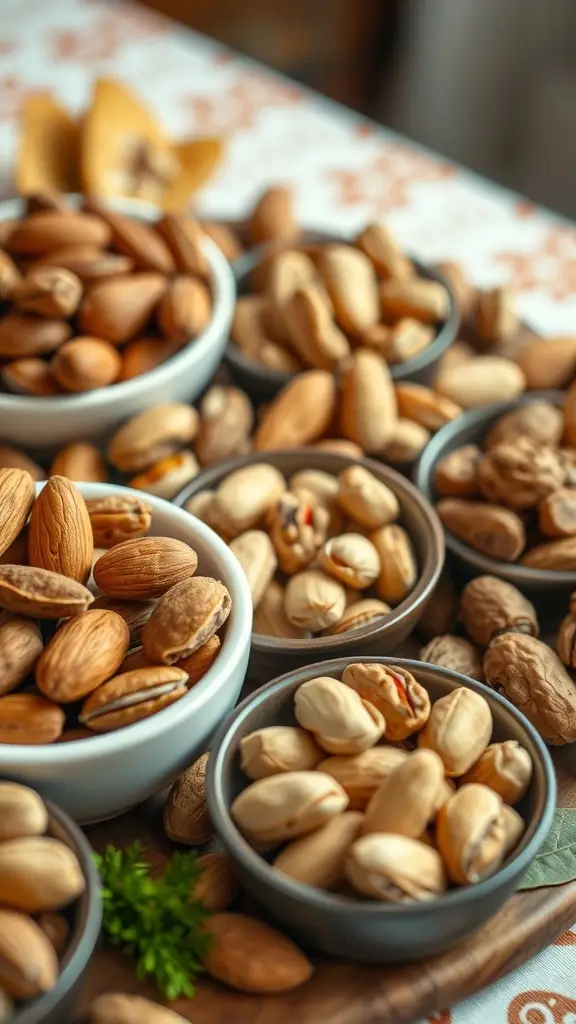
Nuts and seeds are fantastic for adding crunch to your charcuterie boards. They bring a delightful texture that contrasts beautifully with softer cheeses and meats. Imagine a spread featuring creamy brie paired with crunchy almonds or a savory salami alongside roasted pumpkin seeds. These combinations not only taste great but also look appealing.
In the image, you can see a variety of nuts displayed in charming bowls. Each bowl holds a different type, showcasing the diversity of flavors and textures. This variety invites guests to mix and match, creating their own perfect bites. Nuts like walnuts, pecans, and pistachios can add richness, while seeds like sunflower and sesame provide a lighter crunch.
When assembling your charcuterie board, consider the colors and shapes of the nuts and seeds. They can serve as a visual anchor, drawing the eye and enhancing the overall presentation. Plus, they’re packed with nutrients, making them a healthy addition to your spread.
Ingredients
- 1 cup mixed nuts (almonds, walnuts, pecans)
- 1/2 cup pumpkin seeds
- 1/2 cup sunflower seeds
- 1 tablespoon olive oil
- 1 teaspoon sea salt
- 1 teaspoon smoked paprika
- 1/2 teaspoon garlic powder
Instructions
- Preheat your oven to 350°F (175°C).
- In a mixing bowl, combine the mixed nuts, pumpkin seeds, and sunflower seeds.
- Drizzle olive oil over the mixture, then sprinkle with sea salt, smoked paprika, and garlic powder. Toss until everything is evenly coated.
- Spread the mixture on a baking sheet in a single layer.
- Bake for 10-15 minutes, stirring halfway through, until golden and fragrant.
- Remove from the oven and let cool before serving on your charcuterie board.
Classic Pickles: A Tangy Touch To Your Board
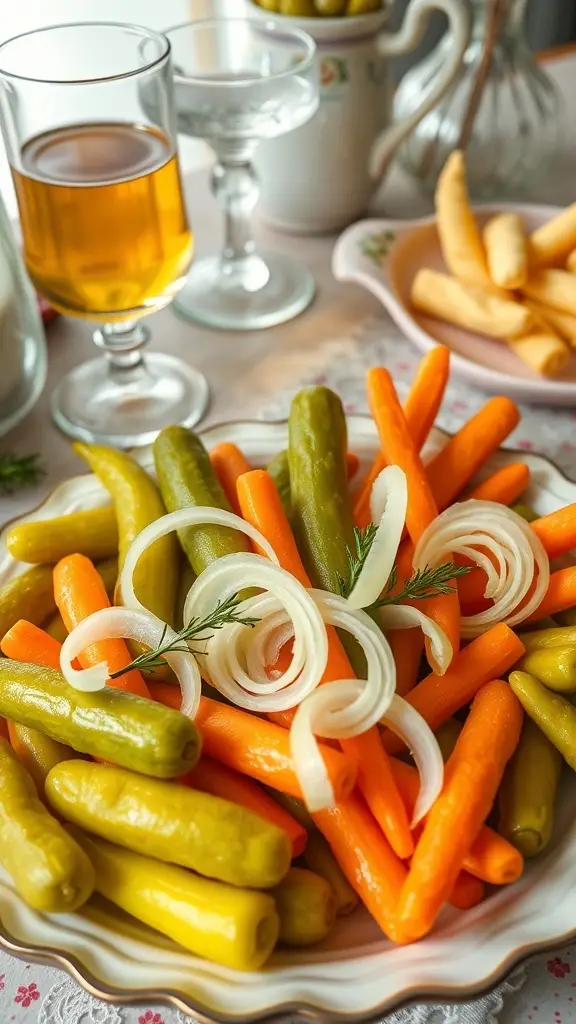
Classic pickles bring a delightful crunch and tang to any charcuterie board. Their vibrant colors and unique flavors make them a visual treat and a palate cleanser. You’ll often find a mix of green pickles, bright orange carrots, and yellow peppers, all beautifully arranged to catch the eye.
These pickles not only add a pop of color but also complement the rich flavors of meats and cheeses. The sharpness of the pickles contrasts nicely with creamy cheeses and savory meats, making every bite exciting. Plus, they’re super easy to prepare or find at your local market!
To make your own pickles, you can choose from cucumbers, carrots, or even radishes. The process is simple and rewarding. Let’s dive into a quick recipe for homemade pickles that will elevate your charcuterie board.
Ingredients
- 4 cups cucumbers, sliced
- 1 cup carrots, cut into sticks
- 1 cup yellow bell peppers, sliced
- 2 cups water
- 1 cup white vinegar
- 1/4 cup sugar
- 2 tablespoons salt
- 2 cloves garlic, smashed
- 1 tablespoon dill seeds
Instructions
- Prepare the Vegetables: Wash and slice the cucumbers, carrots, and bell peppers. Place them in a large jar or container.
- Make the Brine: In a saucepan, combine water, vinegar, sugar, salt, garlic, and dill seeds. Bring to a boil, stirring until the sugar and salt dissolve.
- Pour the Brine: Once the brine is boiling, carefully pour it over the vegetables in the jar. Ensure all veggies are submerged.
- Cool and Refrigerate: Let the jar cool to room temperature. Once cool, seal it and refrigerate for at least 24 hours before serving.
- Serve: Enjoy your homemade pickles on a charcuterie board or as a snack!
Sweet Treats: Dessert Boards For The ’60s Host
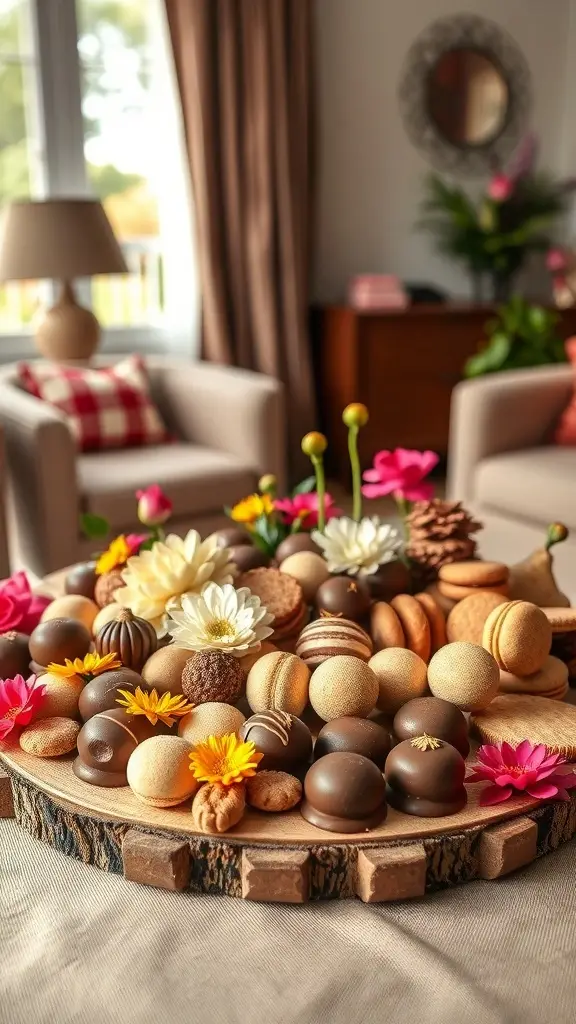
Picture this: a charming dessert board filled with an array of sweet delights, perfect for a ’60s gathering. The image showcases a beautifully arranged platter, featuring an assortment of cookies, chocolates, and decorative flowers. This board captures the essence of the era, combining vibrant colors and playful designs.
The dessert board is not just about the sweets; it’s a visual treat that invites guests to indulge. Each piece is thoughtfully placed, creating a feast for the eyes. The use of natural elements, like the wooden platter and fresh flowers, adds a rustic touch that complements the cozy atmosphere of a ’60s living room.
Creating your own dessert board is a fun way to bring a piece of the ’60s into your home. You can mix and match different types of sweets, from classic chocolate truffles to colorful macarons. Don’t forget to add some edible flowers for that extra flair!
Ingredients
- 1 cup chocolate truffles
- 1 cup assorted cookies (like butter, chocolate chip, and macaroons)
- 1 cup macarons (various flavors)
- 1/2 cup edible flowers (like pansies or violets)
- 1/2 cup nuts (like almonds or pecans)
- 1 wooden platter or board
Instructions
- Start by selecting a large wooden platter or board as your base.
- Arrange the chocolate truffles in one section of the board, grouping them by type for visual appeal.
- Next, add the assorted cookies, creating a colorful display.
- Place the macarons in another section, showcasing their vibrant colors.
- Sprinkle the nuts around the sweets for added texture and crunch.
- Finally, tuck in the edible flowers to fill in any gaps and enhance the overall look.
- Serve immediately and watch your guests enjoy this delightful sweet treat board!
Tropical Inspiration: A Hawaiian Luau Twist
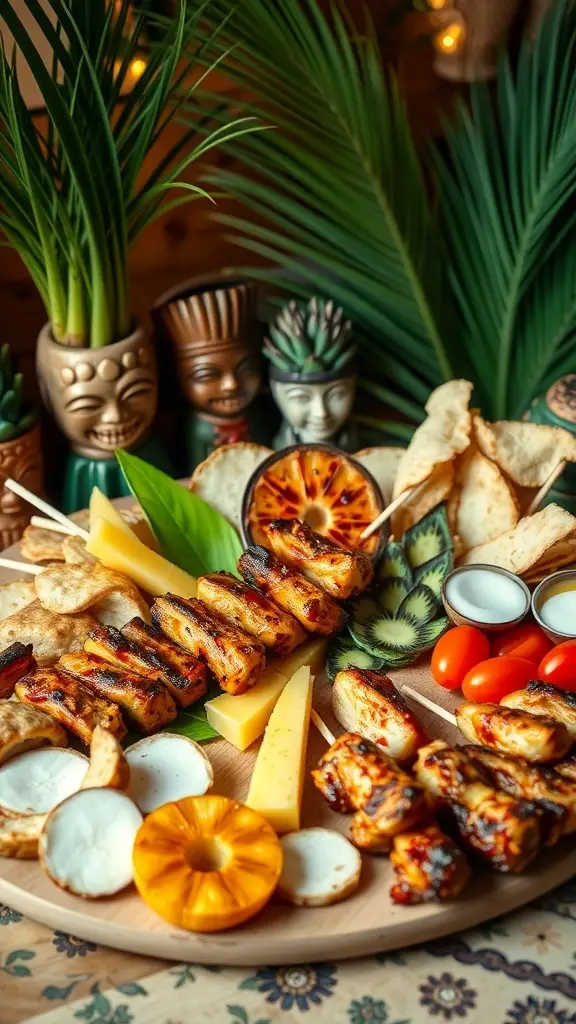
Imagine a vibrant charcuterie board that transports you straight to a Hawaiian luau. This board is bursting with tropical flavors and colors, making it a perfect centerpiece for any gathering. The mix of grilled meats, fresh fruits, and crunchy snacks creates a delightful experience for your taste buds.
The skewers of grilled chicken and pineapple are a highlight, offering a sweet and savory combination that is hard to resist. Surrounding them are slices of creamy cheese and crispy chips, adding texture and variety. Bright cherry tomatoes and fresh coconut slices bring a pop of color, making the board visually appealing.
Decorative elements like palm leaves and tiki mugs enhance the tropical vibe, inviting everyone to dig in. This charcuterie board is not just food; it’s a celebration of flavors and fun!
Ingredients
- 1 lb chicken breast, cut into cubes
- 1 cup pineapple chunks
- 1/2 cup teriyaki sauce
- 1 cup shredded cheese (cheddar or Monterey Jack)
- 1 cup tortilla chips
- 1 cup cherry tomatoes
- 1 cup coconut slices
- Fresh palm leaves for decoration
Instructions
- Marinate the Chicken: In a bowl, combine chicken cubes and teriyaki sauce. Let it marinate for at least 30 minutes.
- Prepare Skewers: Thread marinated chicken and pineapple chunks onto skewers.
- Grill: Preheat the grill to medium heat. Grill the skewers for about 10-15 minutes, turning occasionally, until the chicken is cooked through.
- Assemble the Board: On a large platter, arrange the grilled skewers, cheese, tortilla chips, cherry tomatoes, and coconut slices.
- Garnish: Add fresh palm leaves around the board for a tropical touch.
Mediterranean Flair: A Rustic Escape
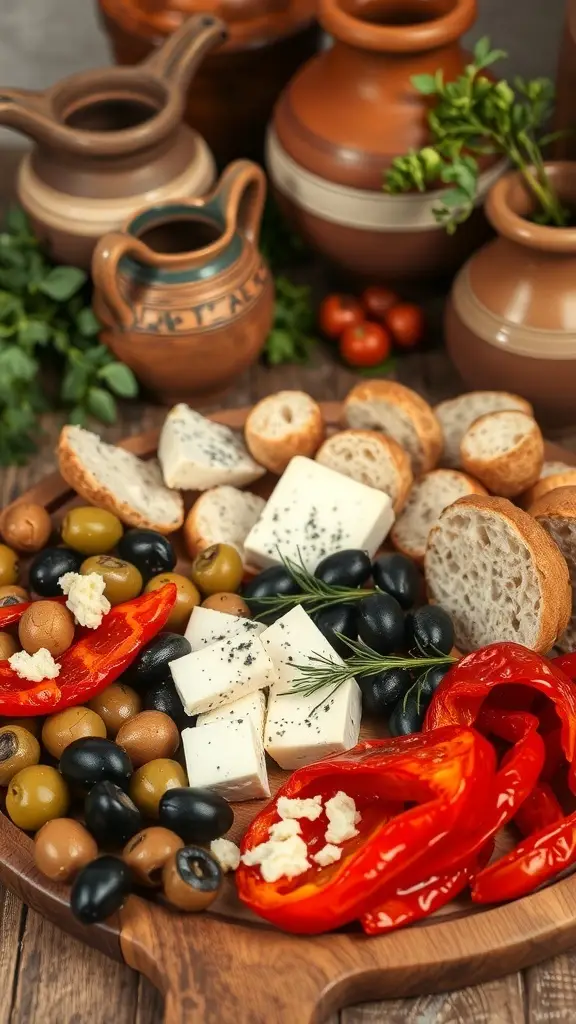
Picture a charcuterie board that transports you straight to the Mediterranean coast. This spread features vibrant colors and fresh ingredients, making it a feast for the eyes and the palate. The rustic wooden board is adorned with creamy cheeses, plump olives, and roasted red peppers, all inviting you to take a bite.
The combination of flavors is delightful. The salty olives pair perfectly with the rich cheese, while the sweet roasted peppers add a touch of brightness. Fresh herbs, like rosemary, sprinkle a hint of earthiness, enhancing the overall experience. This board is not just food; it’s a celebration of Mediterranean culture.
To recreate this Mediterranean flair at home, gather your favorite ingredients. Think of it as a canvas where you can mix and match to your heart’s content. Serve it at your next gathering, and watch your guests marvel at the beauty and taste of this rustic escape.
Ingredients
- 1 cup assorted olives (green and black)
- 8 oz feta cheese, cubed
- 1 cup roasted red peppers, sliced
- 1 cup cherry tomatoes
- 1 cup sliced baguette or pita bread
- Fresh rosemary sprigs for garnish
- Olive oil for drizzling
Instructions
- Prepare the Board: Start by arranging the olives, feta cheese, and roasted red peppers on a large wooden board.
- Add Fresh Elements: Scatter cherry tomatoes around the board for color and freshness.
- Include Bread: Place the sliced baguette or pita bread in a corner of the board for dipping and pairing.
- Garnish: Add fresh rosemary sprigs for a pop of green and a hint of aroma.
- Finish: Drizzle a little olive oil over the cheese and olives for added flavor.
Elegant Wine Pairings: Perfect Matches For Every Palate
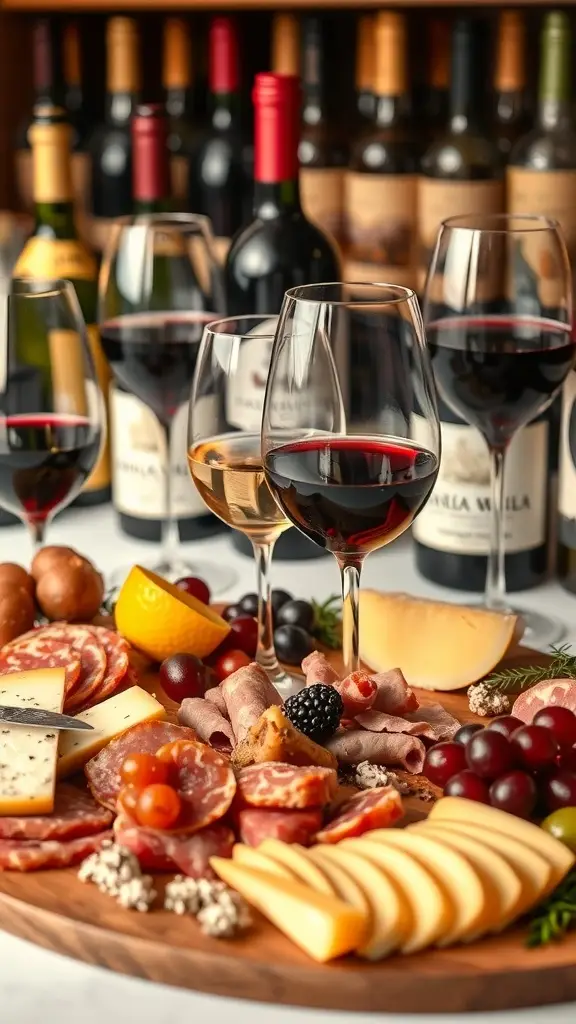
Wine and charcuterie boards are a match made in culinary heaven. The image showcases a beautifully arranged charcuterie board filled with an array of meats, cheeses, and fresh fruits. Each element is thoughtfully placed to create a feast for the eyes and the palate. The rich colors of the cured meats and cheeses contrast beautifully with the vibrant fruits, making it not just a snack but a visual delight.
When it comes to pairing wine with your charcuterie board, think about the flavors you want to highlight. A bold red wine, like a Cabernet Sauvignon, pairs wonderfully with rich meats and aged cheeses. On the other hand, a crisp white wine, such as Sauvignon Blanc, complements lighter fare like fresh fruits and soft cheeses. The key is to balance the flavors and enhance the overall experience.
Don’t forget to include some fun garnishes like olives or nuts to add texture and flavor. These small additions can elevate your board and make it even more enjoyable. Whether you’re hosting a gathering or enjoying a quiet night in, a well-paired charcuterie board can turn any occasion into a special event.
Ingredients
- 1 cup assorted cured meats (salami, prosciutto, chorizo)
- 1 cup assorted cheeses (cheddar, brie, gouda)
- 1 cup fresh fruits (grapes, berries, sliced apples)
- 1/2 cup olives or pickles
- 1/4 cup nuts (almonds, walnuts)
- 1 baguette or crackers
- Your choice of red or white wine
Instructions
- Arrange the cured meats on one side of a large wooden board.
- Place the cheeses next to the meats, cutting some into slices for easy serving.
- Add fresh fruits in small clusters around the board.
- Fill in gaps with olives, pickles, and nuts for added texture.
- Serve with slices of baguette or a variety of crackers.
- Pour your chosen wine into glasses and enjoy with your beautifully curated charcuterie board.
Cheese Ball Creations: Fun Shapes And Flavors
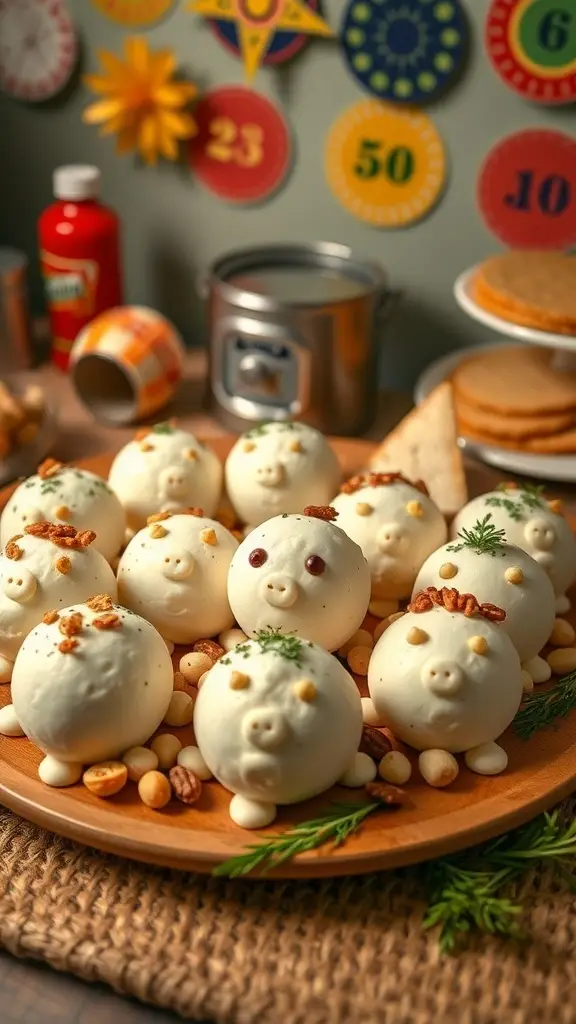
Cheese balls are a playful and tasty addition to any charcuterie board. They can be shaped into fun forms, making them a hit at gatherings. Picture a platter filled with cheese balls shaped like festive ornaments or playful animals, all adorned with colorful toppings. These delightful creations not only taste great but also add a whimsical touch to your spread.
Using a variety of cheeses, herbs, and spices, you can create unique flavors that cater to different palates. Think of classic combinations like cheddar and chives or something more adventurous like blue cheese with cranberries. The possibilities are endless!
To make your cheese ball creations, gather your ingredients and let your imagination run wild. You can roll them in nuts, herbs, or even edible flowers for that extra flair. Serve them alongside crackers, fruits, and meats for a complete charcuterie experience.
Ingredients
- 8 oz cream cheese, softened
- 1 cup shredded cheddar cheese
- 1/2 cup grated Parmesan cheese
- 1/4 cup chopped fresh herbs (like parsley and chives)
- 1/4 cup chopped nuts (like pecans or almonds)
- 1 tsp garlic powder
- 1 tsp onion powder
- Salt and pepper to taste
Instructions
- In a mixing bowl, combine the softened cream cheese, cheddar cheese, and Parmesan cheese. Mix until well blended.
- Add in the chopped herbs, garlic powder, onion powder, salt, and pepper. Stir until everything is evenly incorporated.
- Shape the mixture into balls or other fun shapes. Roll them in chopped nuts or herbs for added texture and flavor.
- Chill the cheese balls in the refrigerator for at least 30 minutes before serving. This helps them hold their shape.
- Arrange on a platter with crackers, fruits, and meats. Enjoy your creative cheese ball creations!
Bright And Bold: A Colorful Charcuterie Experience
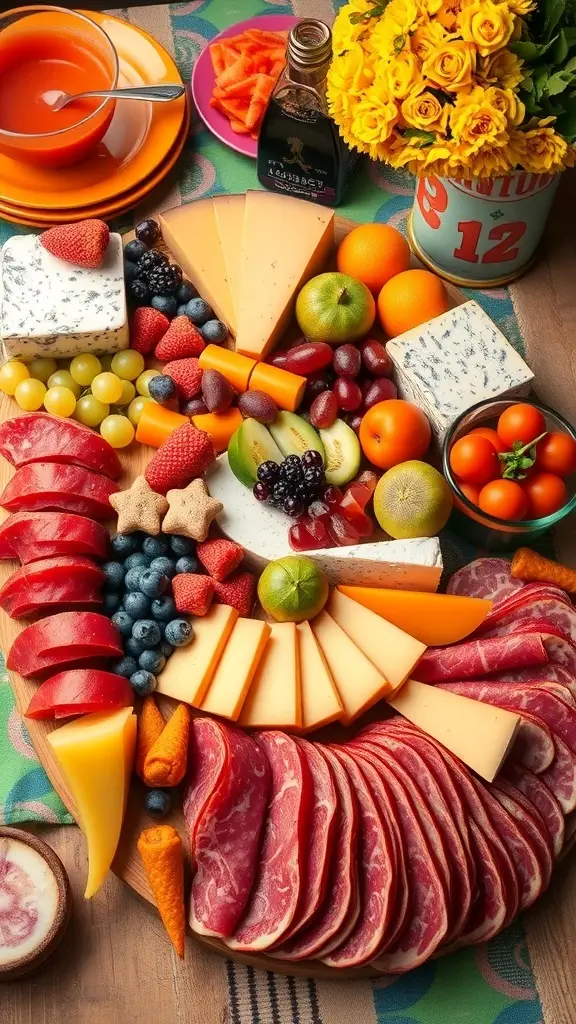
Charcuterie boards are a feast for the eyes and the palate. The vibrant colors of fresh fruits, assorted cheeses, and cured meats create a stunning visual display. This image captures the essence of a 1960s-inspired charcuterie board, showcasing a mix of bright oranges, deep reds, and lush greens. The arrangement is playful yet sophisticated, inviting everyone to dig in.
The board features a variety of textures and flavors. Creamy cheeses sit alongside crunchy vegetables, while sweet fruits add a refreshing contrast. The inclusion of colorful garnishes, like edible flowers, enhances the overall aesthetic. This is not just food; it’s art on a platter.
To recreate this colorful charcuterie experience at home, gather an array of ingredients that catch your eye. Think about balance—combine savory meats with sweet fruits and creamy cheeses. The goal is to create a board that looks as good as it tastes.
Ingredients
- 1 cup assorted cheeses (cheddar, blue cheese, gouda)
- 1 cup cured meats (salami, prosciutto, chorizo)
- 1 cup fresh fruits (strawberries, grapes, orange slices)
- 1 cup assorted vegetables (carrots, bell peppers, cucumbers)
- 1/2 cup nuts (almonds, walnuts)
- 1/4 cup olives
- 1/4 cup honey or jam
- Fresh herbs for garnish (like rosemary or basil)
Instructions
- Prepare the Board: Start with a large wooden board or platter. Arrange the cheeses in different sections, allowing space for meats and other ingredients.
- Add the Meats: Layer the cured meats around the cheeses. Fold or roll them for a more appealing look.
- Incorporate Fruits and Vegetables: Fill in the gaps with fresh fruits and colorful vegetables. This will add brightness and variety.
- Include Nuts and Olives: Scatter nuts and olives around the board for added texture and flavor.
- Finish with Garnishes: Drizzle honey or jam over the cheeses and add fresh herbs for a pop of color.
Savory And Sweet: The Perfect Balance On Your Board
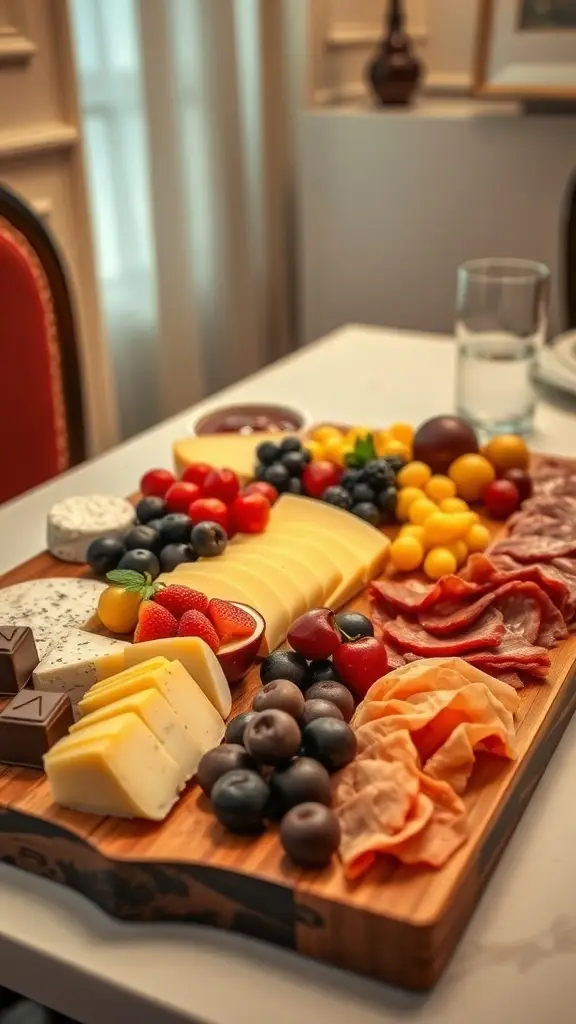
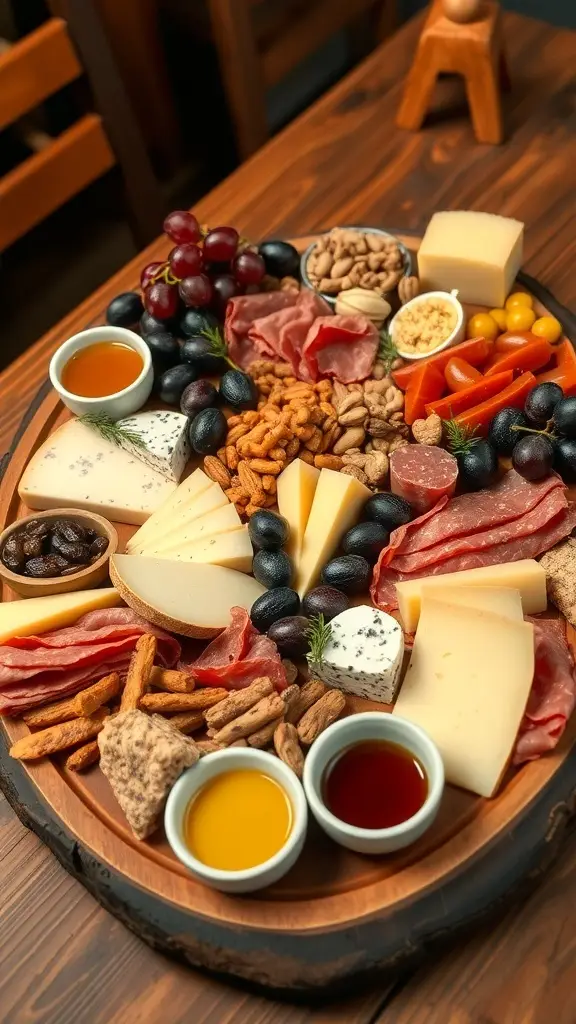
Creating a charcuterie board is all about balance. The image showcases a delightful spread featuring a variety of cheeses, meats, nuts, and fruits. Each element plays a role in achieving that perfect harmony between savory and sweet. The cheeses range from creamy to sharp, while the meats add a rich, salty flavor. Fresh fruits like grapes and tomatoes provide a refreshing contrast, making every bite exciting.
The visual appeal of the board is just as important as the taste. The colors and textures of the ingredients invite guests to dig in. A well-curated charcuterie board not only satisfies the palate but also serves as a centerpiece for gatherings. It’s a feast for the eyes and the taste buds!
Ingredients
- 3 varieties of cheese (e.g., cheddar, brie, blue cheese)
- 2 types of cured meats (e.g., salami, prosciutto)
- 1 cup mixed nuts (e.g., almonds, walnuts)
- 1 cup fresh fruits (e.g., grapes, cherry tomatoes)
- 1/2 cup olives
- 1/2 cup crackers or breadsticks
- Honey or fig jam for sweetness
Instructions
- Prepare the Board: Start with a large wooden or marble board. Arrange the cheeses in different sections, slicing some for easy access.
- Add the Meats: Roll or fold the cured meats and place them near the cheeses.
- Fill in with Nuts: Scatter the mixed nuts around the board for added crunch.
- Incorporate Fresh Fruits: Place the grapes and cherry tomatoes in clusters for a pop of color.
- Include Olives and Crackers: Add bowls of olives and a selection of crackers or breadsticks to complete the spread.
- Finish with Sweetness: Drizzle honey or place a small dish of fig jam on the board for a sweet touch.
Interactive Elements: Engaging Guests With Diy Boards
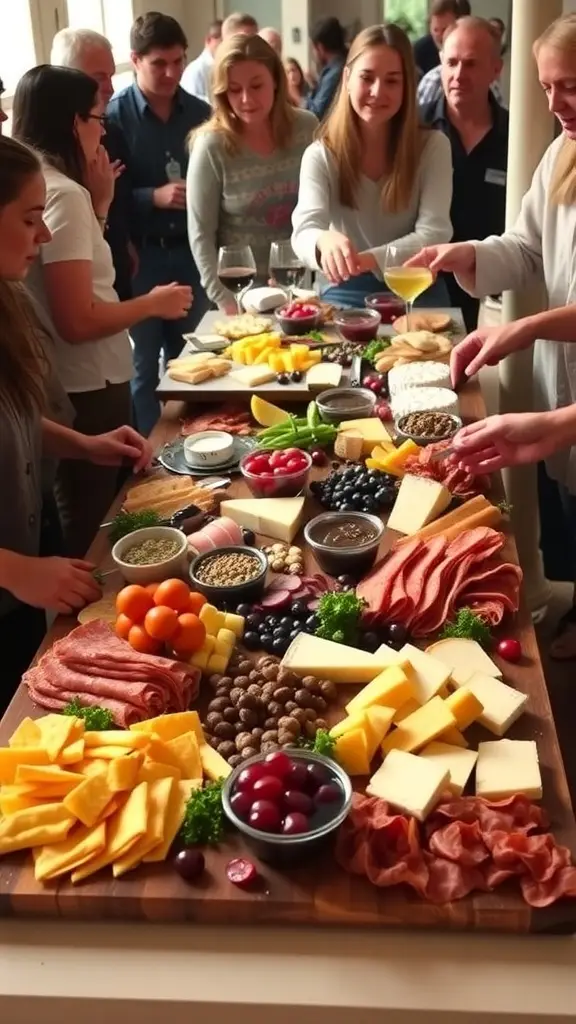
Creating a charcuterie board is not just about the food; it’s an experience! The image showcases a lively gathering where friends and family come together to enjoy a beautifully arranged spread. Each person is engaged, picking and choosing their favorite bites, which adds a fun, interactive element to the meal.
DIY boards allow guests to personalize their plates. You can set up a variety of cheeses, meats, fruits, and nuts, letting everyone mix and match according to their tastes. This not only sparks conversation but also encourages creativity as guests build their own unique combinations.
To make your charcuterie board even more inviting, consider adding some themed elements. For a 1960s vibe, you might include retro snacks or vintage-inspired serving dishes. The visual appeal of the board, with its colorful ingredients and artistic arrangement, can turn a simple gathering into a memorable event.
Ingredients
- 1 cup assorted cheeses (cheddar, brie, gouda)
- 1 cup cured meats (salami, prosciutto, chorizo)
- 1 cup fresh fruits (grapes, berries, sliced apples)
- 1/2 cup nuts (almonds, walnuts)
- 1/2 cup olives (green and black)
- 1/4 cup honey or jam
- 1 baguette or crackers
Instructions
- Prepare the Ingredients: Slice the cheeses and cured meats into bite-sized pieces. Wash and dry the fruits.
- Arrange the Board: Start with the cheeses, placing them in different sections of the board. Add the cured meats next, folding or rolling them for visual appeal.
- Add the Fruits and Nuts: Fill in the gaps with fresh fruits and nuts. This adds color and texture to the board.
- Include Dips: Place small bowls of honey or jam on the board for a sweet touch.
- Serve with Bread: Slice the baguette or arrange crackers around the board for easy access.
Seasonal Inspiration: Celebrate Each Season With Unique Flavors
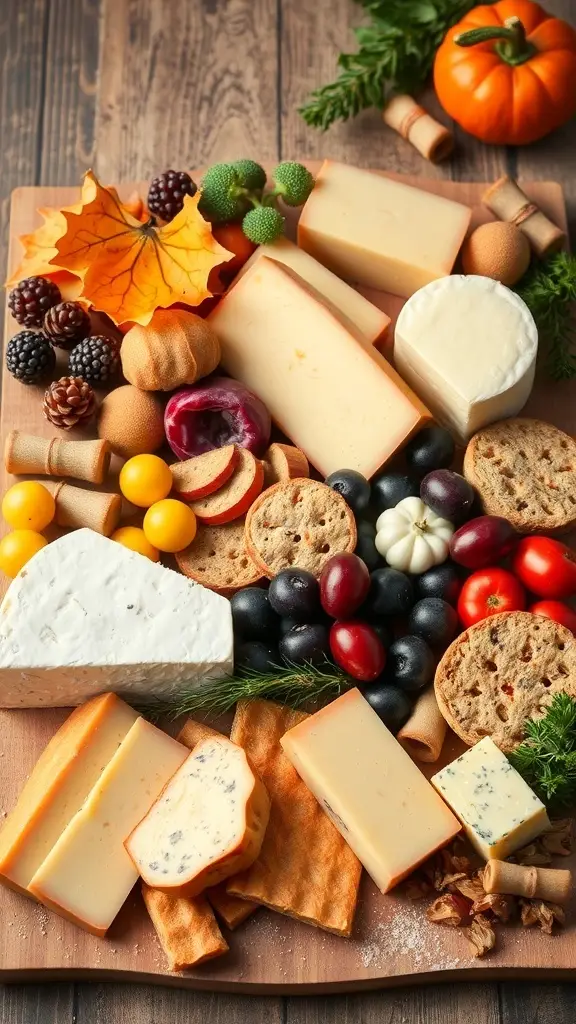
Charcuterie boards are a wonderful way to celebrate the changing seasons. Each season brings its own unique flavors, and a well-curated board can reflect that beautifully. Imagine a fall-inspired board filled with rich cheeses, seasonal fruits, and decorative elements like pumpkins and colorful leaves. The image captures this essence perfectly, showcasing a variety of cheeses, fruits, and autumnal decorations that create a warm, inviting display.
In spring, consider lighter options like fresh vegetables, herbs, and tangy cheeses. Summer can be all about vibrant colors with juicy fruits and refreshing dips. Winter might inspire a cozy board with hearty cheeses and spiced nuts. Each season offers a chance to get creative and experiment with different tastes and textures.
Ingredients
- 3 types of cheese (e.g., aged cheddar, brie, blue cheese)
- 1 cup assorted seasonal fruits (e.g., grapes, apples, figs)
- 1 cup nuts (e.g., walnuts, almonds)
- 1 cup crackers or breadsticks
- Fresh herbs for garnish (e.g., rosemary, thyme)
- Seasonal decorations (e.g., small pumpkins, leaves)
Instructions
- Select a large wooden board or platter as your base.
- Arrange the cheeses in different sections, allowing space for other items.
- Fill in gaps with seasonal fruits, nuts, and crackers.
- Garnish with fresh herbs and seasonal decorations to enhance the visual appeal.
- Serve with small cheese knives and toothpicks for easy enjoyment.
You may also like:
– 43 Easy And Quick Cocktails From The 1960’s
– 27 Must-Try Tequila Cocktails Inspired by Gotham City
– 25 Cocktails Inspired by Gotham City Nightlife
If you enjoyed this blog you can visit us or check out our other blogs and learn a bit about us.
Disclaimer: This blog post is inspired by fictional universes and characters created by their respective rights holders. All related content and imagery remain the property of their respective rights holder. This fan-inspired content is for entertainment and commentary purposes only and is not affiliated with or endorsed by HBO, Disney, Warner Bros., Lionsgate, or any other rights holders. To explore the official source material, please visit:
HBO